Template:Networking rutos manual storage memory expansion: Difference between revisions
(Created page with "{{Template:Networking_rutos_manual_fw_disclosure | fw_version = {{{series}}}_R_00.02.04.1 | series = {{{series}}} }} ==Summary== The <b>Storage Memory Expansion</b> func...") |
Gytispieze (talk | contribs) No edit summary |
||
| (5 intermediate revisions by 3 users not shown) | |||
| Line 1: | Line 1: | ||
{{Template: | {{Template: Networking_device_manual_fw_disclosure | ||
| | | series = {{{series}}} | ||
| series | | name = {{{name}}} | ||
| fw_version ={{Template: Networking_device_manual_latest_fw | |||
| series = {{{series}}} | |||
| name = {{{name}}} | |||
}} | |||
}} | }} | ||
| Line 39: | Line 43: | ||
<li>your <b>USB device's memory will be wiped</b> and formatted to ext2 format;</li> | <li>your <b>USB device's memory will be wiped</b> and formatted to ext2 format;</li> | ||
<li>your device's <b>current configuration will be backed up</b> and restored to this point if the USB drive is removed or memory expansion is disabled;</li> | <li>your device's <b>current configuration will be backed up</b> and restored to this point if the USB drive is removed or memory expansion is disabled;</li> | ||
<li>the entire procedure <b> | <li>the entire procedure <b>may take a very long time</b> and includes a reboot at the end; exact time will vary depending on the size of the MSD (larger size will take longer; for example, using a 128 GB drive will take about 2 hours to fully set up, while a 16 GB will only take about 5 minutes).</li> | ||
</ul>Click 'Continue' to proceed.<br>[[File:Networking_rutos_manual_storage_memory_expansion_enable_2.png|border|class=tlt-border]] | </ul>Click 'Continue' to proceed.<br>[[File:Networking_rutos_manual_storage_memory_expansion_enable_2.png|border|class=tlt-border]] | ||
</li> | </li> | ||
<li>If all is in order you should see a 'Formatting MSD...' message on the screen. This indicates that the MSD is being formatted and integrated with the system. This procedure can take | <li>If all is in order you should see a 'Formatting MSD...' message on the screen. This indicates that the MSD is being formatted and integrated with the system. This procedure can take a long time and ends with a reboot of the device.<br>[[File:Networking_rutos_manual_storage_memory_expansion_enable_3.png]]</li> | ||
<li>Your device's flash memory will be expanded once the reboot has finished. In order to check, log in to the WebUI and look to the 'System' widget in the 'Overview' page. Hover your mouse cursor over the 'FLASH' memory indicator; you should see an increase to the device's flash memory.<br>[[File:Networking_rutos_manual_storage_memory_expansion_enable_4.png|border|class=tlt-border]]</li> | <li>Your device's flash memory will be expanded once the reboot has finished. In order to check, log in to the WebUI and look to the 'System' widget in the 'Overview' page. Hover your mouse cursor over the 'FLASH' memory indicator; you should see an increase to the device's flash memory.<br>[[File:Networking_rutos_manual_storage_memory_expansion_enable_4.png|border|class=tlt-border]]</li> | ||
</ol> | </ol> | ||
| Line 60: | Line 64: | ||
</ul>Click 'Continue' to proceed.<br>[[File:Networking_rutos_manual_storage_memory_expansion_disable_2.png|border|class=tlt-border]] | </ul>Click 'Continue' to proceed.<br>[[File:Networking_rutos_manual_storage_memory_expansion_disable_2.png|border|class=tlt-border]] | ||
</li> | </li> | ||
<li>If all is in order you should see a 'Formatting MSD...' message on the screen. This indicates that the MSD is being formatted and | <li>If all is in order you should see a 'Formatting MSD...' message on the screen. This indicates that the MSD is being formatted and detached from the system. This procedure can take up to a couple of minutes and ends with a reboot of the device.<br>[[File:Networking_rutos_manual_storage_memory_expansion_disable_3.png]]</li> | ||
<li>Your device's flash memory will be | <li>Your device's flash memory will be restored to normal once the reboot has finished. In order to check, log in to the WebUI and look to the 'System' widget in the 'Overview' page. Hover your mouse cursor over the 'FLASH' memory indicator; you should see your device's flash memory return to its regular size.<br>[[File:Networking_rutos_manual_storage_memory_expansion_disable_4.png|border|class=tlt-border]]</li> | ||
</ol> | </ol> | ||
[[Category:{{{name}}} Services section]] | [[Category:{{{name}}} Services section]] | ||
Latest revision as of 11:40, 24 October 2023
The information in this page is updated in accordance with firmware version .
Summary
The Storage Memory Expansion function provides the possibility to expand the device's flash memory with a USB mass storage device.
This manual page provides an overview of the Storage Memory Expansion window in {{{name}}} devices.
If you're having trouble finding this page or some of the parameters described here on your device's WebUI, you should turn on "Advanced WebUI" mode. You can do that by clicking the "Advanced" button, located at the top of the WebUI.
Memory Expansion
You can expand the flash memory of this device with a USB Mass Storage Device (MSD) and use the extra memory to install additional software packages. This section provides instruction on how to do just that. However, there are a few prerequisites and warnings to take note of before using memory expansion.
To be eligible for memory expansion, the USB MSD must meet the following restrictions.
- The MSD must be the last one (chronologically) inserted.
- If you are using a USB hub, the target MSD must be the last one attached to the hub.
- No important data on the MSD as it will be wiped during expansion setup!
When expansion is enabled, do not detach the USB device as this will delete the data stored on it. Changes made to the device configuration while expansion was enabled will disappear after it is disabled.
Enabling memory expansion
To successfully expand the flash memory of your device follow the steps described below.
- Attach a USB Mass Storage Device (MSD) to the USB connector on the device and go to the Services → Storage Memory Expansion page.
- Set the 'Enable storage expansion' slider to 'on' and click 'Save & Apply'.

- You will see a pop-up asking for confirmation. Take note that if you continue from this point on:
- your USB device's memory will be wiped and formatted to ext2 format;
- your device's current configuration will be backed up and restored to this point if the USB drive is removed or memory expansion is disabled;
- the entire procedure may take a very long time and includes a reboot at the end; exact time will vary depending on the size of the MSD (larger size will take longer; for example, using a 128 GB drive will take about 2 hours to fully set up, while a 16 GB will only take about 5 minutes).

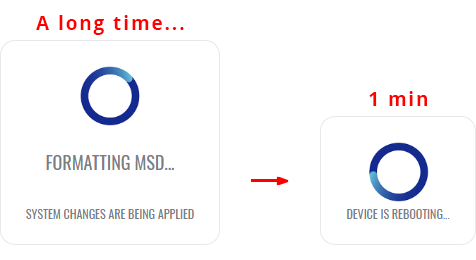
- If all is in order you should see a 'Formatting MSD...' message on the screen. This indicates that the MSD is being formatted and integrated with the system. This procedure can take a long time and ends with a reboot of the device.

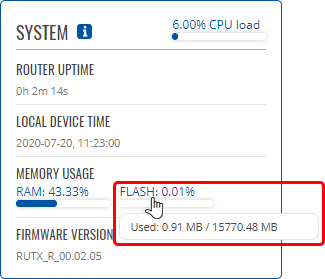
- Your device's flash memory will be expanded once the reboot has finished. In order to check, log in to the WebUI and look to the 'System' widget in the 'Overview' page. Hover your mouse cursor over the 'FLASH' memory indicator; you should see an increase to the device's flash memory.

Disabling memory expansion
To successfully disable memory expansion follow the steps described below.
- Go to the Services → Storage Memory Expansion page.
- Set the 'Enable storage expansion' slider to 'off' and click 'Save & Apply'.

- You will see a pop-up asking for confirmation. Take note that if you continue from this point on:
- your USB device's memory will be wiped and formatted to NTFS format;
- your device's configuration will be restored to the point it was before memory expansion;
- the entire procedure will take up to 2 minutes including a reboot.

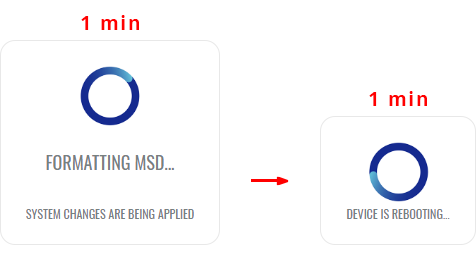
- If all is in order you should see a 'Formatting MSD...' message on the screen. This indicates that the MSD is being formatted and detached from the system. This procedure can take up to a couple of minutes and ends with a reboot of the device.

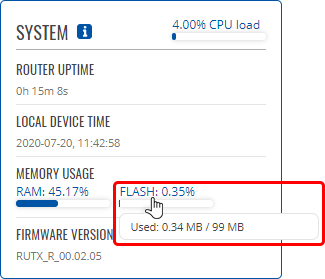
- Your device's flash memory will be restored to normal once the reboot has finished. In order to check, log in to the WebUI and look to the 'System' widget in the 'Overview' page. Hover your mouse cursor over the 'FLASH' memory indicator; you should see your device's flash memory return to its regular size.

[[Category:{{{name}}} Services section]]

