The device with eSIM ordering code includes a preinstalled '''10 MB Bootstrap eSIM profile''' with limited connectivity sufficient for downloading your provider’s eSIM profile and not for general Internet use.
ℹ️ To learn about Bootstrap, read the [[https://wiki.teltonika-networks.com/view/Bootstrap_guide_for_eSIM|eSIM Bootstrap guide]]. For advanced eSIM setup, see the [[https://wiki.teltonika-networks.com/view/RUT241_eSIM|RUT241 eSIM configuration page]]. For RMS-specific steps, follow [[How_to_configure_eSIM_profiles_in_RMS%3F|How to configure eSIM profiles in RMS]].
== Device operations with eSIM Bootstrap ==
* On first start, the device runs normally — eSIM Bootstrap profile is inactive. Device automatically switches to eSIM Bootstrap profile after 1 hour.
* To start immediately, set default SIM to eSIM, and that will set eSIM Bootstrap profile as the primary SIM.
* When eSIM Bootstrap profile is active, mobile service becomes available. Download your full eSIM profile within 15 minutes; afterwards, Bootstrap profile will disable itself to conserve data.
* After the new eSIM profile is downloaded, the temporary Bootstrap eSIM profile, and all related configurations are removed, and the new eSIM becomes the primary SIM.
'''Note:''' ''The Bootstrap profile is valid for 1 year from the device’s manufacturing date; after it expires, activate the eSIM via the default procedure using Internet connection from other sources.''
=Bootstrap - eSIM Setup Guide=
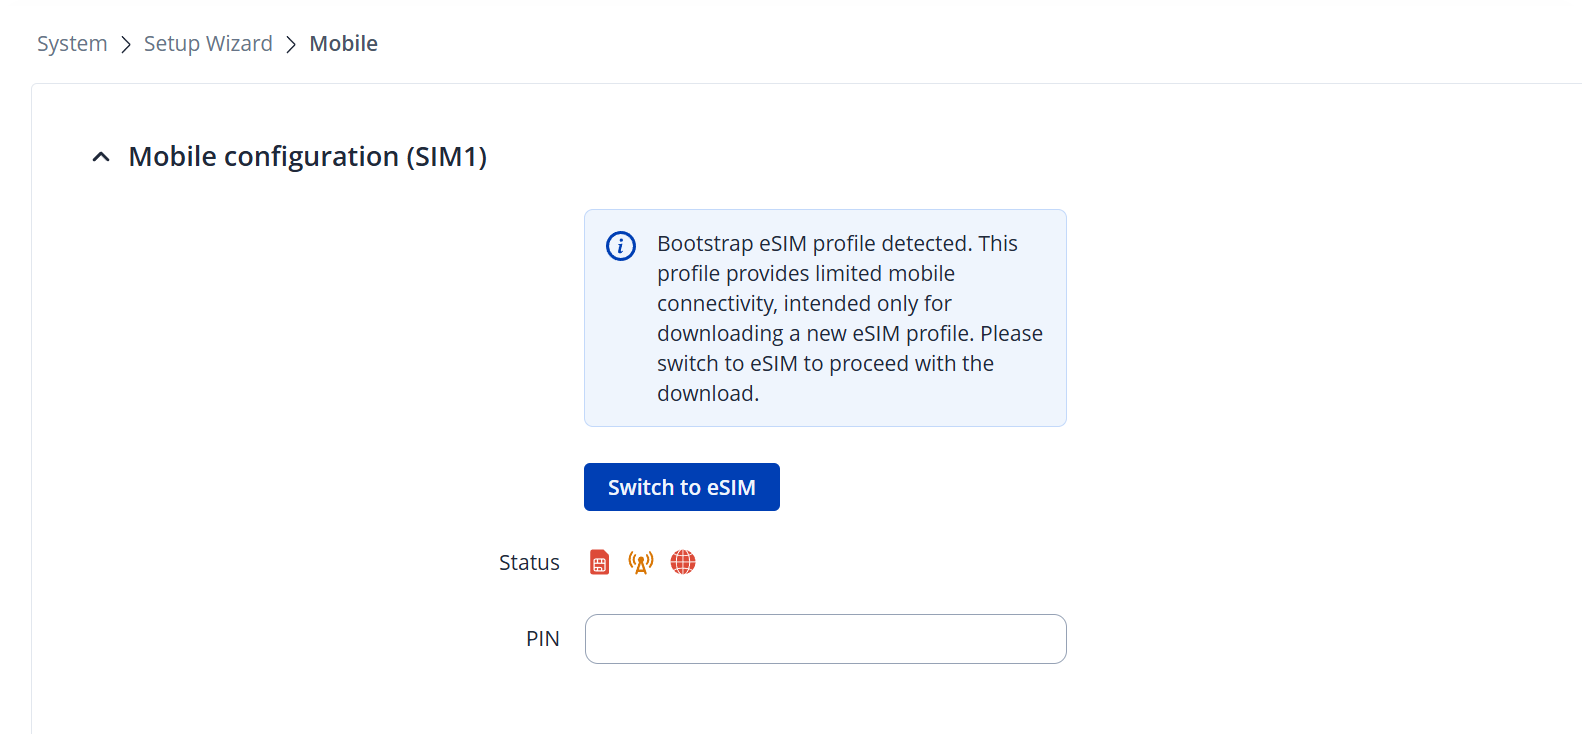
After logging into device WebUI for the first time, you will be greeted by a Setup Wizard. On the third step of Mobile, you will get a notification about bootstrap eSIM profile being detected.
If you skipped the Setup Wizard, you navigate to '''1. System → 2. Setup Wizard → 3. Mobile'''.
== Setup Wizard ==
<br>
'''Step 1''' - Click '''Switch to eSIM''' button – to set default SIM to eSIM and to start the process <br>
'''Step 2''' - You will receive a confirmation message to switch to eSIM. The default SIM will be switched to an eSIM, and the SIM switch rules used for the Bootstrap profile will be disabled.
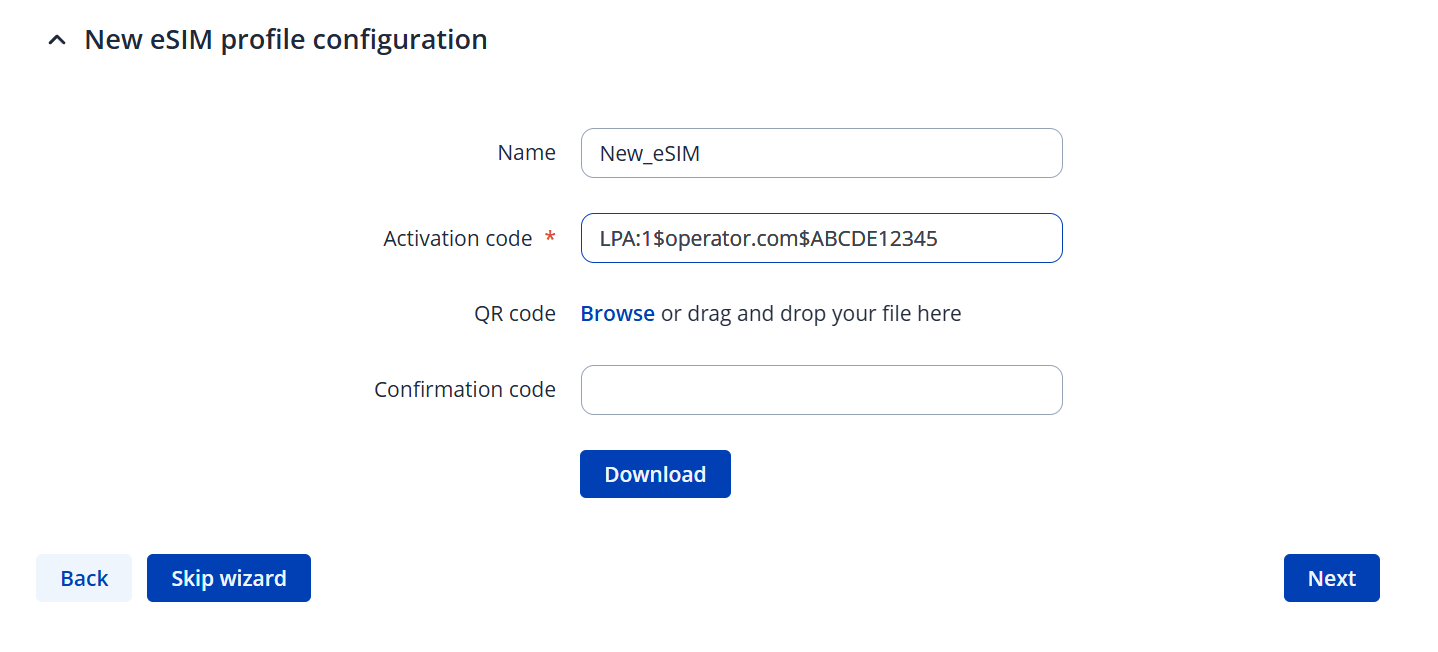
* Enter the '''Activation code''' – provided by the eSIM provider <br>
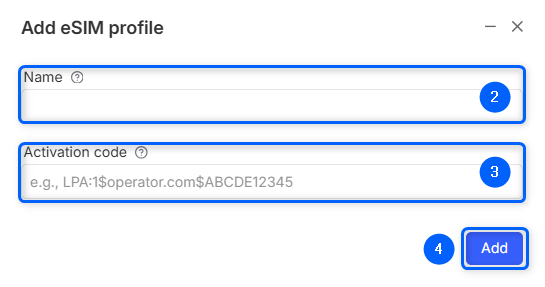
'''Step 4''' - Once '''Download''' button is active press it to start the process <br>
ℹ️ Profile download may take a while, depending on the connection quality. Make sure that all the Mobile antennas are attached to your device at this point.
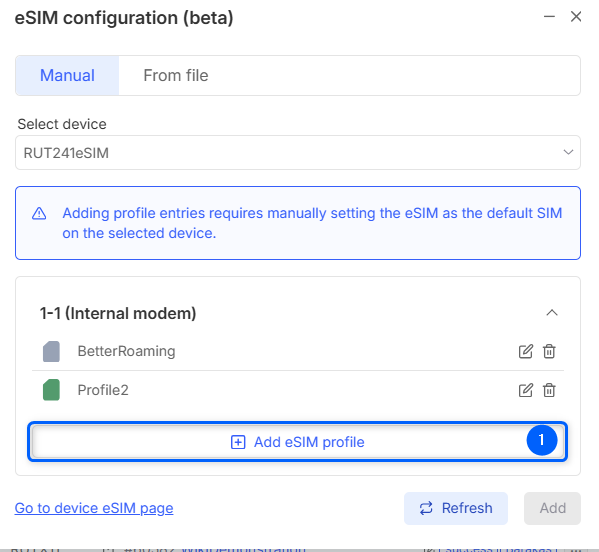
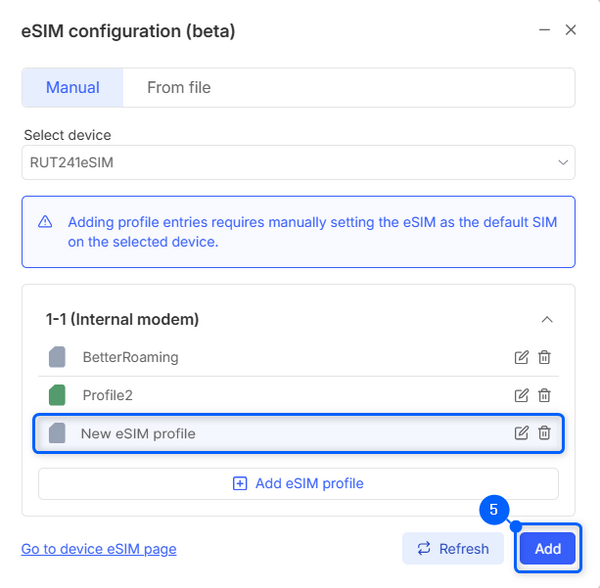
## New profile will show up in the list. Click '''Add''' to send this configuration to your device. <br><br><div style="padding-bottom:20px;">[[File:New-esim-profile-bootstrap-v1.png|border|600px]]</div>
## Action status window will pop-up. You will see if it was successful, alternatively you will see an error if it failed.
Latest revision as of 08:19, 14 October 2025
Information
The device with eSIM ordering code includes a preinstalled 10 MB Bootstrap eSIM profile with limited connectivity sufficient for downloading your provider’s eSIM profile and not for general Internet use.
On first start, the device runs normally — eSIM Bootstrap profile is inactive. Device automatically switches to eSIM Bootstrap profile after 1 hour.
To start immediately, set default SIM to eSIM, and that will set eSIM Bootstrap profile as the primary SIM.
When eSIM Bootstrap profile is active, mobile service becomes available. Download your full eSIM profile within 15 minutes; afterwards, Bootstrap profile will disable itself to conserve data.
After the new eSIM profile is downloaded, the temporary Bootstrap eSIM profile, and all related configurations are removed, and the new eSIM becomes the primary SIM.
The bootstrap profile only allows specific traffic such as RMS, DNS, and DHCP, while blocking everything else. Also, if no physical SIM card is detected within the first hour, the router automatically switches to the bootstrap profile to establish connectivity until a network operator profile is downloaded. Once the new profile is active, the system returns to its usual operation.
Note:The Bootstrap profile is valid for 1 year from the device’s manufacturing date; after it expires, activate the eSIM via the default procedure using Internet connection from other sources.
Bootstrap - eSIM Setup Guide
After logging into device WebUI for the first time, you will be greeted by a Setup Wizard. On the third step of Mobile, you will get a notification about bootstrap eSIM profile being detected.
If you skipped the Setup Wizard, you navigate to 1. System → 2. Setup Wizard → 3. Mobile.
Setup Wizard
Step 1 - Click Switch to eSIM button – to set default SIM to eSIM and to start the process
Step 2 - You will receive a confirmation message to switch to eSIM. The default SIM will be switched to an eSIM, and the SIM switch rules used for the Bootstrap profile will be disabled.
Step 3
Enter the desired eSIM Name (optional)
Enter the Activation code – provided by the eSIM provider
Step 4 - Once Download button is active press it to start the process
ℹ️ Profile download may take a while, depending on the connection quality. Make sure that all the Mobile antennas are attached to your device at this point.
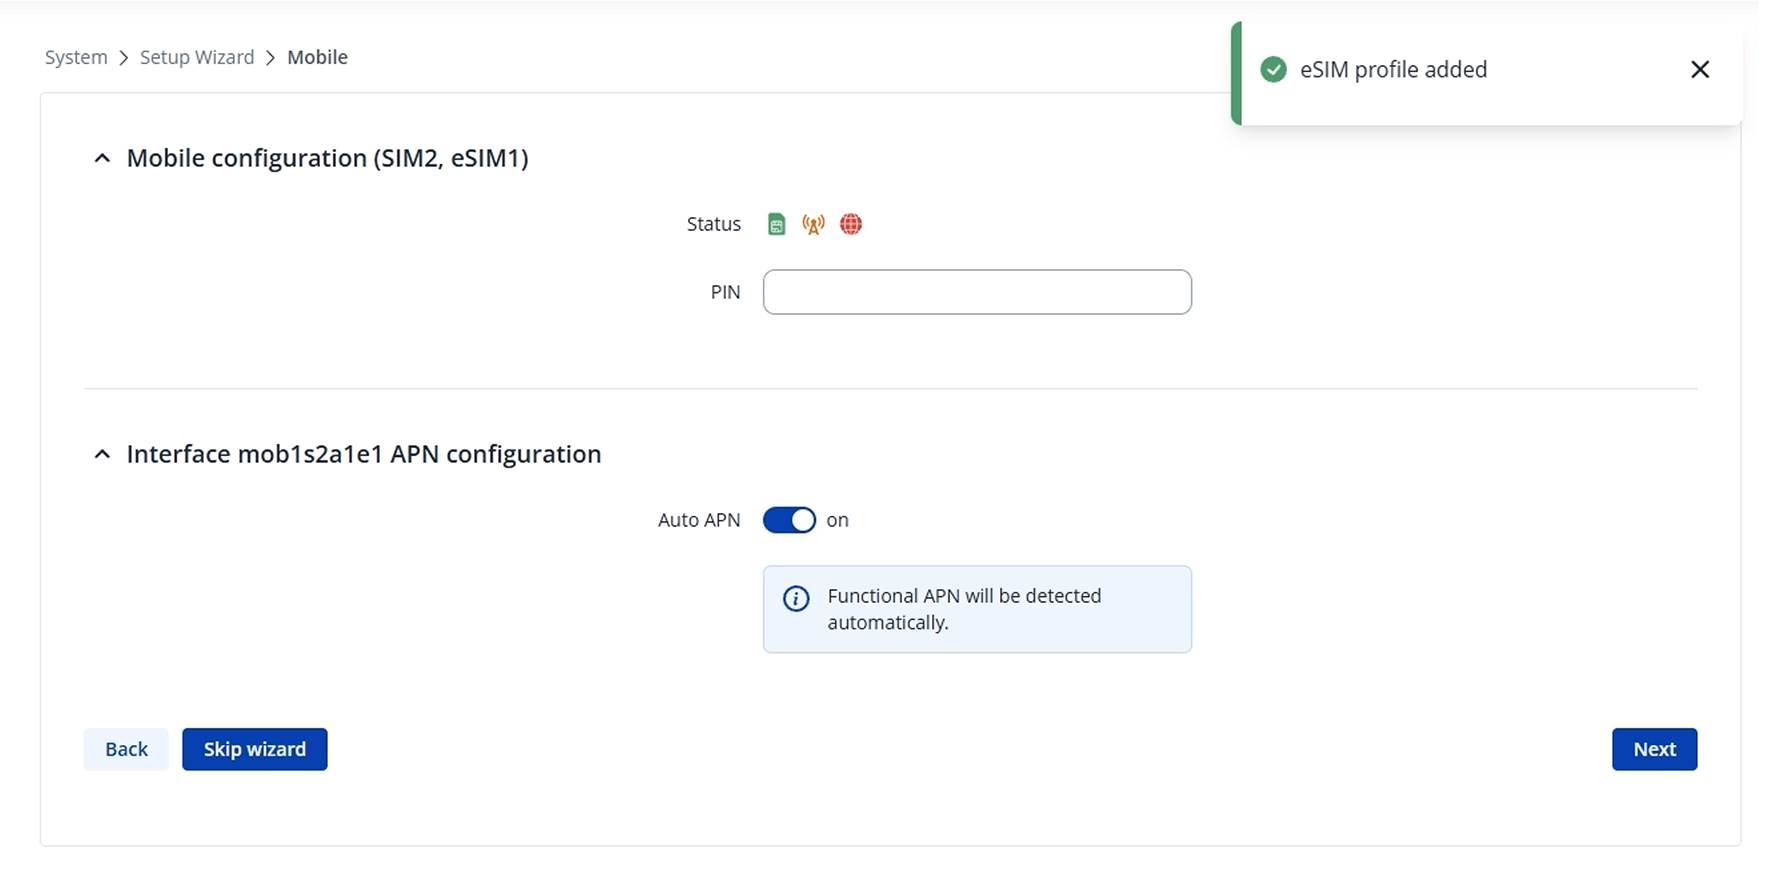
Setup Complete
In a few moments, you will get a success message of eSIM profile added. The temporary eSIM Bootstrap was removed at this point of the setup.