Difference between revisions of "Reaching Cisco router console port remotely"
From Teltonika Networks Wiki
| (2 intermediate revisions by the same user not shown) | |||
| Line 1: | Line 1: | ||
__TOC__ | __TOC__ | ||
| − | |||
| − | |||
| − | |||
| − | |||
==Prerequisites== | ==Prerequisites== | ||
You will need: | You will need: | ||
<ul> | <ul> | ||
| − | <li> | + | <li>Download and install <b>[[Media:RUT9XX T F0203 00.05.04.22 WEBUI.bin|this firmware]]</b></li> |
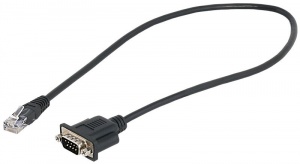
| − | <li>An | + | <li>An RS232 (male) - RJ45 cable: <br> [[File:Cisco rj45 rs232 cable.jpg|300px]]</li> |
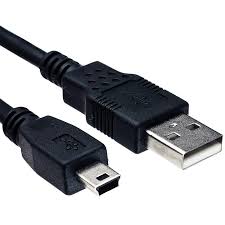
| − | <li> | + | <li>A USB type Mini - USB type A cable: <br> [[File:Cisco usb cable.jpg]]</li> |
</ul> | </ul> | ||
==Configuration== | ==Configuration== | ||
| − | + | Using RJ45 – USB type A or MiniUSB – USB type A configuration. Configured from the WebUI, Services → <b>[[RUT955 USB Tools|USB Tools]]</b> → USB to Serial page: | |
| − | + | [[File:Cisco usb config.png]] | |
---- | ---- | ||
RS232 can be configured from the Services → RS232/RS485 → <b>[[RUT955_RS232/RS485#RS232|RS232 Configuration]]</b> page. The following RS232 configuration should be used: | RS232 can be configured from the Services → RS232/RS485 → <b>[[RUT955_RS232/RS485#RS232|RS232 Configuration]]</b> page. The following RS232 configuration should be used: | ||
[[File:cisco rs config.png]] | [[File:cisco rs config.png]] | ||
| − | |||
| − | |||
---- | ---- | ||
| − | + | PuTTY configuration: | |
| − | [[File:Cisco | + | [[File:Cisco putty.png]] |
| − | === | + | ==Examples== |
| − | |||
| − | |||
| − | + | * Example of Cisco AUX port: | |
| − | |||
| − | |||
| − | |||
| − | |||
| − | |||
| − | |||
| − | [[File:IMG 20190121 155038 | + | [[File:IMG 20190121 155038 V2.jpg|500px]] |
Revision as of 09:57, 24 January 2019
Prerequisites
You will need:
- Download and install this firmware
- An RS232 (male) - RJ45 cable:
- A USB type Mini - USB type A cable:


Configuration
Using RJ45 – USB type A or MiniUSB – USB type A configuration. Configured from the WebUI, Services → USB Tools → USB to Serial page:

RS232 can be configured from the Services → RS232/RS485 → RS232 Configuration page. The following RS232 configuration should be used:

PuTTY configuration:

Examples
- Example of Cisco AUX port:


