Difference between revisions of "Template:Networking rutx08 first start configure your computer"
From Teltonika Networks Wiki
Gytispieze (talk | contribs) |
(Created page with "==Configure your computer (Windows)== <ol> <li>Enable the Ethernet network connection (go to <b>Start → Control Panel → Network and Internet → Network and Sharing C...") |
||
| (One intermediate revision by one other user not shown) | |||
| Line 2: | Line 2: | ||
<ol> | <ol> | ||
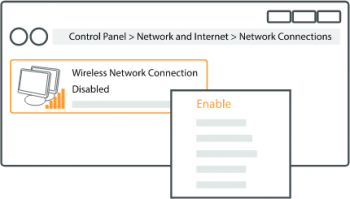
| − | <li> | + | <li>Enable the Ethernet network connection (go to <b>Start → Control Panel → Network and Internet → Network and Sharing Center</b>. In the left panel click the <b>Change adapter settings</b> link. Right click on <b>Ethernet Network Connection</b> and select <b>Enable</b>).<br><br>[[File:Qsg rutxxx enable wireless connection v2.png|350px]]</li><br> |
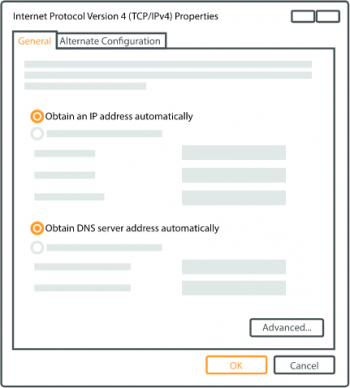
<li>Setup Ethernet network adapter on your computer (right click on <b>Ethernet Network Connection</b> and select <b>Properties</b>. After that select <b>Internet Protocol Version 4 (TCP/IP)</b> and click <b>Properties</b>).</li> | <li>Setup Ethernet network adapter on your computer (right click on <b>Ethernet Network Connection</b> and select <b>Properties</b>. After that select <b>Internet Protocol Version 4 (TCP/IP)</b> and click <b>Properties</b>).</li> | ||
<li>Select <b>Obtain IP address</b> and <b>Obtain DNS server address automatically</b> if they are not selected. Click <b>OK</b>.<br><br>[[File:Qsg rutxxx obtain ip address automatically v2.png|350px]]</li><br> | <li>Select <b>Obtain IP address</b> and <b>Obtain DNS server address automatically</b> if they are not selected. Click <b>OK</b>.<br><br>[[File:Qsg rutxxx obtain ip address automatically v2.png|350px]]</li><br> | ||
Revision as of 09:55, 28 February 2019
Configure your computer (Windows)
- Enable the Ethernet network connection (go to Start → Control Panel → Network and Internet → Network and Sharing Center. In the left panel click the Change adapter settings link. Right click on Ethernet Network Connection and select Enable).
- Setup Ethernet network adapter on your computer (right click on Ethernet Network Connection and select Properties. After that select Internet Protocol Version 4 (TCP/IP) and click Properties).
- Select Obtain IP address and Obtain DNS server address automatically if they are not selected. Click OK.


Login to device
- To enter the router's Web interface (WebUI), type http://192.168.1.1 into the URL field of your Internet browser.
- Use the following login information when prompted for authentication:
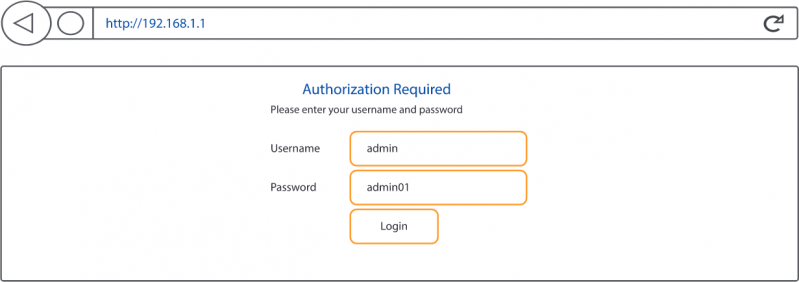
- After you login, you will be prompted to change your password for security reasons. The new password must contain at least 8 characters, including at least one uppercase letter, one lowercase letter and one digit. This step is mandatory and you will not be able to interact with the router's WebUI before you change the password.
- When you change the router's password, the Configuration Wizard will start. The Configuration Wizard is a tool used to setup some of the router's main operating parameters.


