RMS: Difference between revisions
| Line 78: | Line 78: | ||
===Adding RMS licenses to profiles=== | ===Adding RMS licenses to profiles=== | ||
---- | |||
As an admin you can give some of your licenses to newly created Sub_Profiles: | As an admin you can give some of your licenses to newly created Sub_Profiles: | ||
Revision as of 12:38, 12 December 2017
Main Page > IoT Platforms > RMS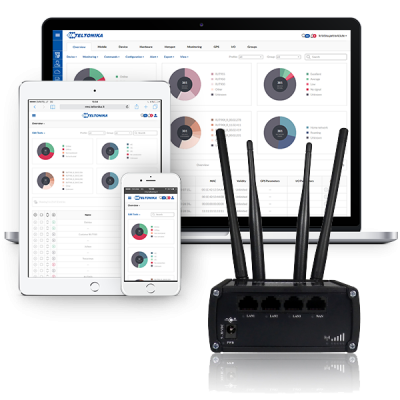
Remote Management System (RMS) is designed to conveniently monitor and manage all your Teltonika networking devices including RUT2XX, RUT8XX and RUT9XX routers.
The system allows to securely gather status information of your devices and to change their configuration even if the devices do not have public IP addresses.
Try RMS for free by clicking this link and registering your free demo account!
Features
Centralized system
Access, monitor and control whole router fleet from within a single, web browser-based interface. Compatible with browsers across all platforms, requires no installation or additional plug-ins.
Firmware and configuration updates
Deploy your desired configuration template or new firmware version to multiple units or groups of units at the same time. Over-the-air bulk upgrade and configuration significantly reduces the costs of system maintenance.
Accessibility and security
Your routers will not be dependent on having a public IP address for remote access, decreasing maintenance costs and increasing effectiveness. Communication between routers and main server is secured by hardcoded OpenVPN connection, which requires no configuration and protects communication channel from tampering.
Maintenance and diagnostics
Users receive information that helps them to visualize the unit’s location and check performance indicators like temperature, signal strength and all device details. For proactive diagnostics – remotely reboot devices, download troubleshooting or system event files for in-depth health analysis.
Statistics
Improve overall performance and efficiency of your whole network based on conclusions of reporting tools that allow creation of custom reports related to device availability, performance and exceptions. Actively know how your network is behaving.
Android Application
There is the best way to use RMS on your phone!
Creating an RMS profile and adding licenses for the client
This section is guide on how to create an RMS profile and add licenses for the client.
Creating a Profile
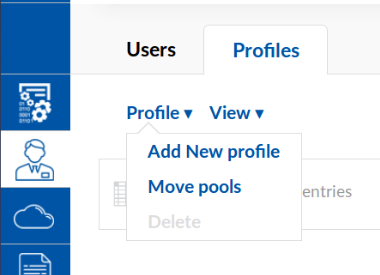
- Open RMS and navigate to the Users → Profiles menu.
- Select Profile → Add new profile, like so:
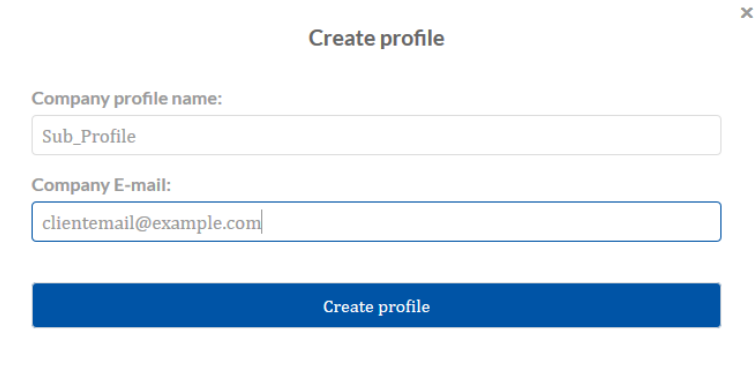
- In the Create profile window enter the client’s information:
Creating a User
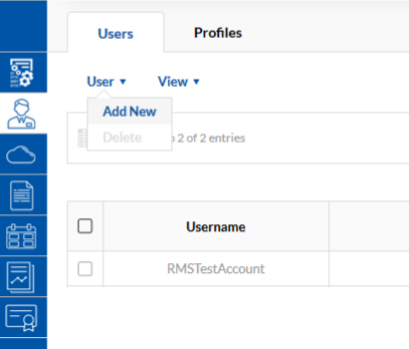
- Navigate to the Users → Users menu
- Select User → Add new:
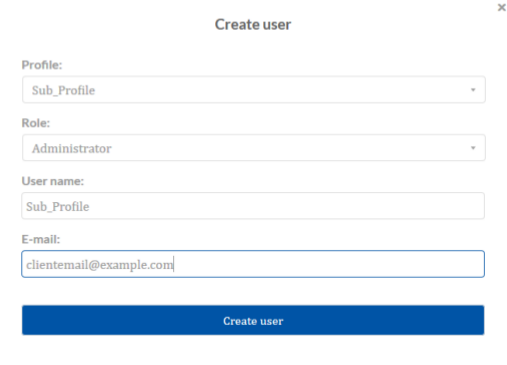
In the Create user window select the profile for which you want to create a user. Then enter it’s username and E-mail address:
RMS Profile Hierarchy
Example of RMS profile hierarchy with multiple Sub_Profiles:
There are a few available RMS user roles:
Your main RMS profile’s users with the Administrator role can create new Sub_Profiles, create new users and move license pools.
Sub_Profile users with an Administrator role can create new users to that Sub_Profile.
Users with the End clients role are unable to create new users or profiles. They can only see and manage devices on their profile.
Users with the Read only role are unable to create new users or profiles and manage or configure devices. They can only see devices on their profile.
Adding RMS licenses to profiles
As an admin you can give some of your licenses to newly created Sub_Profiles:
- Navigate to Users → Profiles menu
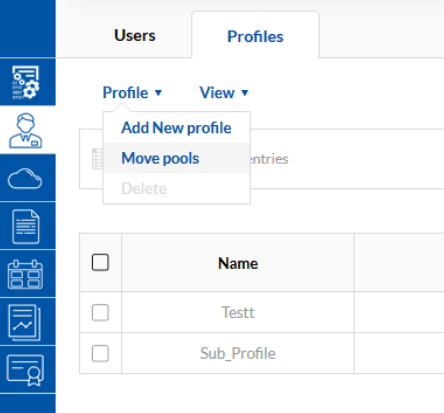
- Select Profile -> Move pools option:
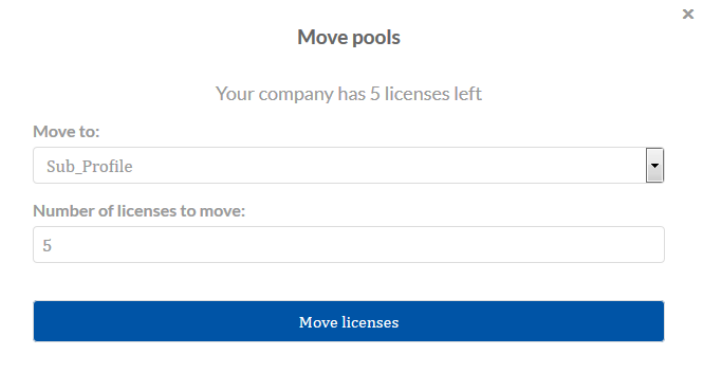
In the Move pools windows select to which profile the licenses should be moved and specify the number of licenses that you want to move:
Take note, that the only way of getting back moved licenses is by deleting the „Sub_Profile“ profile to which the licenses were moved. Once Sub_Profile is deleted all its remaining unused licenses will be refunded back to your license pool.

