Template:Rms manual reports add new: Difference between revisions
Created page with "The '''Add new''' function is used to generate new device parameter reports. ---- * Scroll your mouse pointer to the Report submenu (Reports → Reports → Reports) and click..." |
|||
| (10 intermediate revisions by the same user not shown) | |||
| Line 1: | Line 1: | ||
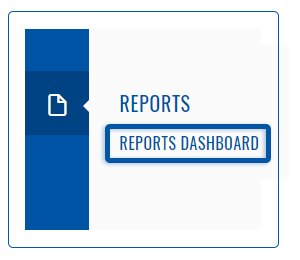
To generate a report go to the RMS web page, left sidebar panel, '''Reports''' and click on <b>Reports dashboard</b> tab (<b>Reports → Reports dashboard</b>). | |||
[[File:RMS-reports-left-sidebar-panel.png]] | |||
===Single reports=== | |||
---- | ---- | ||
Single (one time) - generates a single report for the selected period. Report(s) are generated manually by user input. | |||
'''<span style="color:#0455a4"><big>Important!</big></span>''' | |||
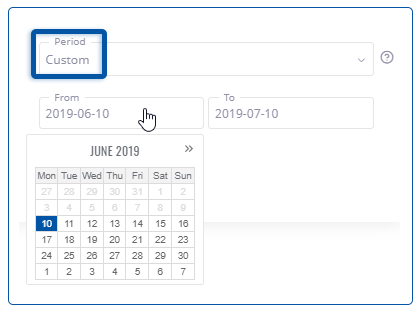
* Using custom period you can generate a report for a custom period of time. | |||
[[File:RMS-custom-period-report.png]] | |||
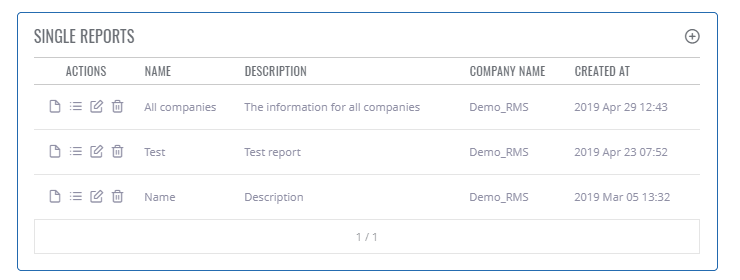
[[File: | Below is an image showing single reports table. | ||
[[File:RMS-single-reports-table.png]] | |||
===Periodic reports=== | |||
---- | ---- | ||
Periodic - generates reports periodically at the specified frequency (period). Report(s) are generated automatically. | |||
On top of the screen, you will find a number of currently active periodic reports. | |||
[[File:RMS-active-periodic-reports.png]] | |||
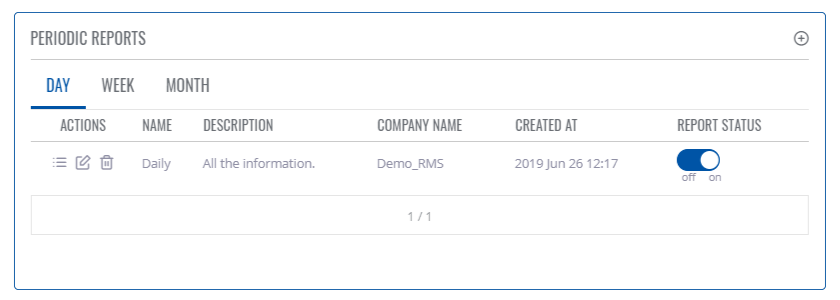
Below is an image showing a periodic reports table. | |||
[[File:RMS-periodic-reports-table.png]] | |||
===Create new=== | |||
---- | |||
<br> | |||
[[File:RMS-create report.gif]] | |||
<br> | |||
'''Instructions''' | |||
# Move your mouse pointer to on the right side of the panel click the [[File:RMS-report-plus-button.png]] plus icon. | |||
# A new ''Add new single report'' pop-up window will appear. | |||
# Fill out and select your desired options. You will find descriptions for each field down below. | |||
# When ready, click the '''Submit''' button. | |||
At the top of your screen, you will get a notification in green text: '''<span style="color:#368d3b">✔ Company created</span>'''. | |||
[[File:RMS-report-created-green-text.png]] | |||
Below are all the description explained for a new report pop-up window. | |||
'''<span style="color:#0455a4"><big>Important!</big></span>''' | |||
* Both single and periodic reports have almost identical window for creating reports. Because of that we only have one example for creating a report. | |||
* '''Name''' - a custom title for the report | * '''Name''' - a custom title for the report | ||
* '''Description''' - a custom description for the report | * '''Description''' - a custom description for the report | ||
* '''Report type''' - the type of the report; can be either: | * '''Report type''' - the type of the report; can be either: | ||
** ''Single (one time) | ** '''Single''' (one time) - generates a single report for the selected ''Period'' - '''Periodic''' - generates reports periodically at the specified frequency (''Period'') | ||
* '''Period''' - period of the report. The values for this field are dependent on the chosen ''Report type'': | * '''Period''' - period of the report. The values for this field are dependent on the chosen ''Report type'': | ||
** ''Single (one time) | ** '''Single''' (one time) - generates a single report based on the data gathered: '''Last day''' - over the last 24 hours - '''Last week ''' - over the last 7 days - '''Last month''' - over the last month | ||
** '''''Periodic''''' - generates a report: '''Daily''' - every 24 hours - '''Weekly''' - every 7 days - '''Monthly''' - every month | |||
** ''Periodic'' - generates a report: | |||
* '''Apply for''' - specifies for which devices the report will be generated: | * '''Apply for''' - specifies for which devices the report will be generated: | ||
** ''All devices'' - information on all devices in the RMS profile | ** ''All devices'' - information on all devices in the RMS profile | ||
| Line 36: | Line 68: | ||
** ''Data usage'' - sent/received data usage values for the specified period | ** ''Data usage'' - sent/received data usage values for the specified period | ||
** ''Signal strength'' - minimum, maximum and average signal strength values for the specified period | ** ''Signal strength'' - minimum, maximum and average signal strength values for the specified period | ||
===Generate report=== | |||
---- | ---- | ||
For single reports, you have to manually generate a report after you create it. | |||
* To generate a report click [[File:RMS-new-report-button.png|25px]] '''New report''' button. | |||
<br> | |||
[[File:RMS-generate-report.gif]] | |||
''' | <br> | ||
Below you will find an example of a generated report. | |||
[[File:RMS-report-sample-single.png|750px]] | |||
===Report list=== | |||
---- | |||
Single reports and periodic reports both have the '''Generated report list''' function. This section displays generated reports. And from here you can either view these reports or delete them. | |||
To access this list click [[File:RMS-generated-report-list-button.png|25px]] '''Generated report list''' button. | |||
<br> | |||
[[File:RMS-generated-report-list.gif]] | |||
<br> | |||
=====View generated reports===== | |||
---- | ---- | ||
After you accessed the [[File:RMS-generated-report-list-button.png|25px]] '''Generated report list''' to open the report click on the [[File:RMS-generated-report-details-button.png]] '''Generated report details''' button. | |||
[[File:RMS-generated-reports-details.png]] | |||
=====Download PDF report===== | |||
---- | |||
Below you will find an example of a downloaded PDF report. | |||
[[File:RMS-pdf-single-report-example.png|750px]] | |||
[[File: | Just click the download button in the generated report's page to get the report. | ||
<br> | |||
[[File:RMS-download-PDF-report.gif]] | |||
<br> | |||
====Remove generated report==== | |||
---- | ---- | ||
To remove a generated report click on [[File:RMS-delete-button.png|25px]] '''Remove''' button. | |||
[[File:RMS-remove-generated-report.png]] | |||
At the top of your screen, you will get a notification in green text: '''<span style="color:#368d3b">✔ Report deleted</span>'''. | |||
[[File: | [[File:RMS-remove-generated-report-green-text.png]] | ||
<br> | |||
===Toggle periodic reports=== | |||
---- | ---- | ||
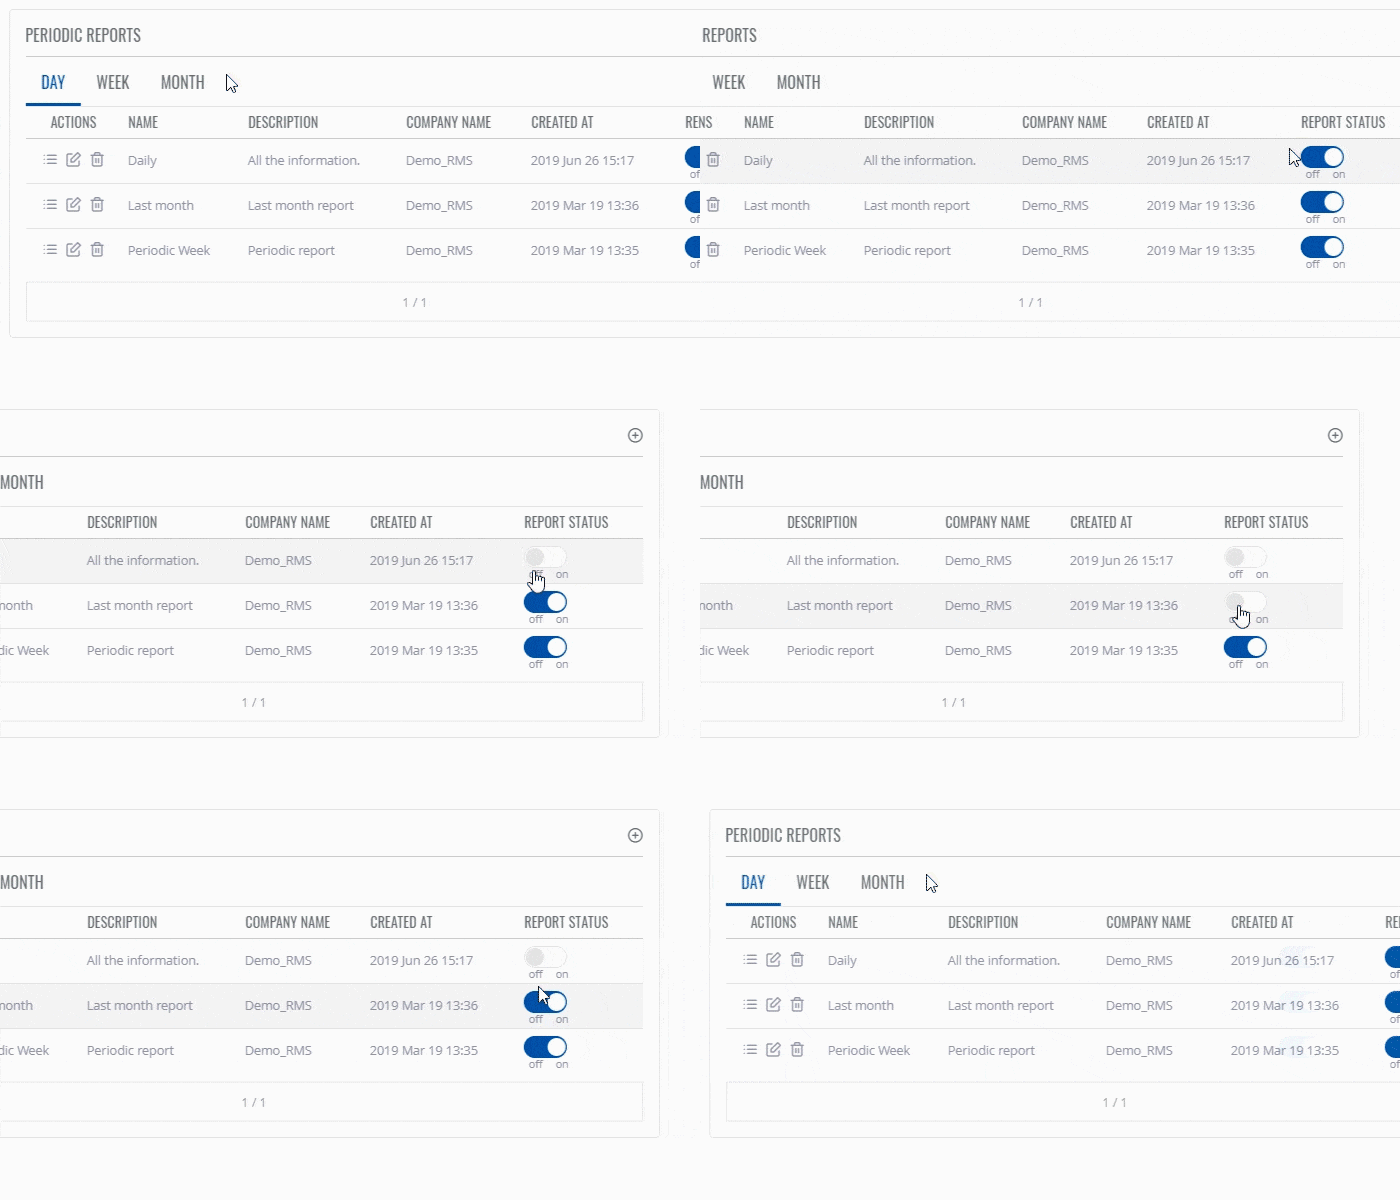
Since periodic reports are generated automatically. You may wish to stop this functionality. For this, you can toggle report off/on. | |||
<br> | |||
[[File:RMS-periodic-reports-toggle.gif]] | |||
<br> | |||
At the top of your screen, you will get a notification in green text: '''<span style="color:#368d3b">✔ Report updated</span>'''. | |||
[[File: | [[File:RMS-periodic-report-updated.png]] | ||
Latest revision as of 15:35, 11 June 2020
To generate a report go to the RMS web page, left sidebar panel, Reports and click on Reports dashboard tab (Reports → Reports dashboard).
Single reports
Single (one time) - generates a single report for the selected period. Report(s) are generated manually by user input.
Important!
- Using custom period you can generate a report for a custom period of time.
Below is an image showing single reports table.
Periodic reports
Periodic - generates reports periodically at the specified frequency (period). Report(s) are generated automatically.
On top of the screen, you will find a number of currently active periodic reports.
Below is an image showing a periodic reports table.
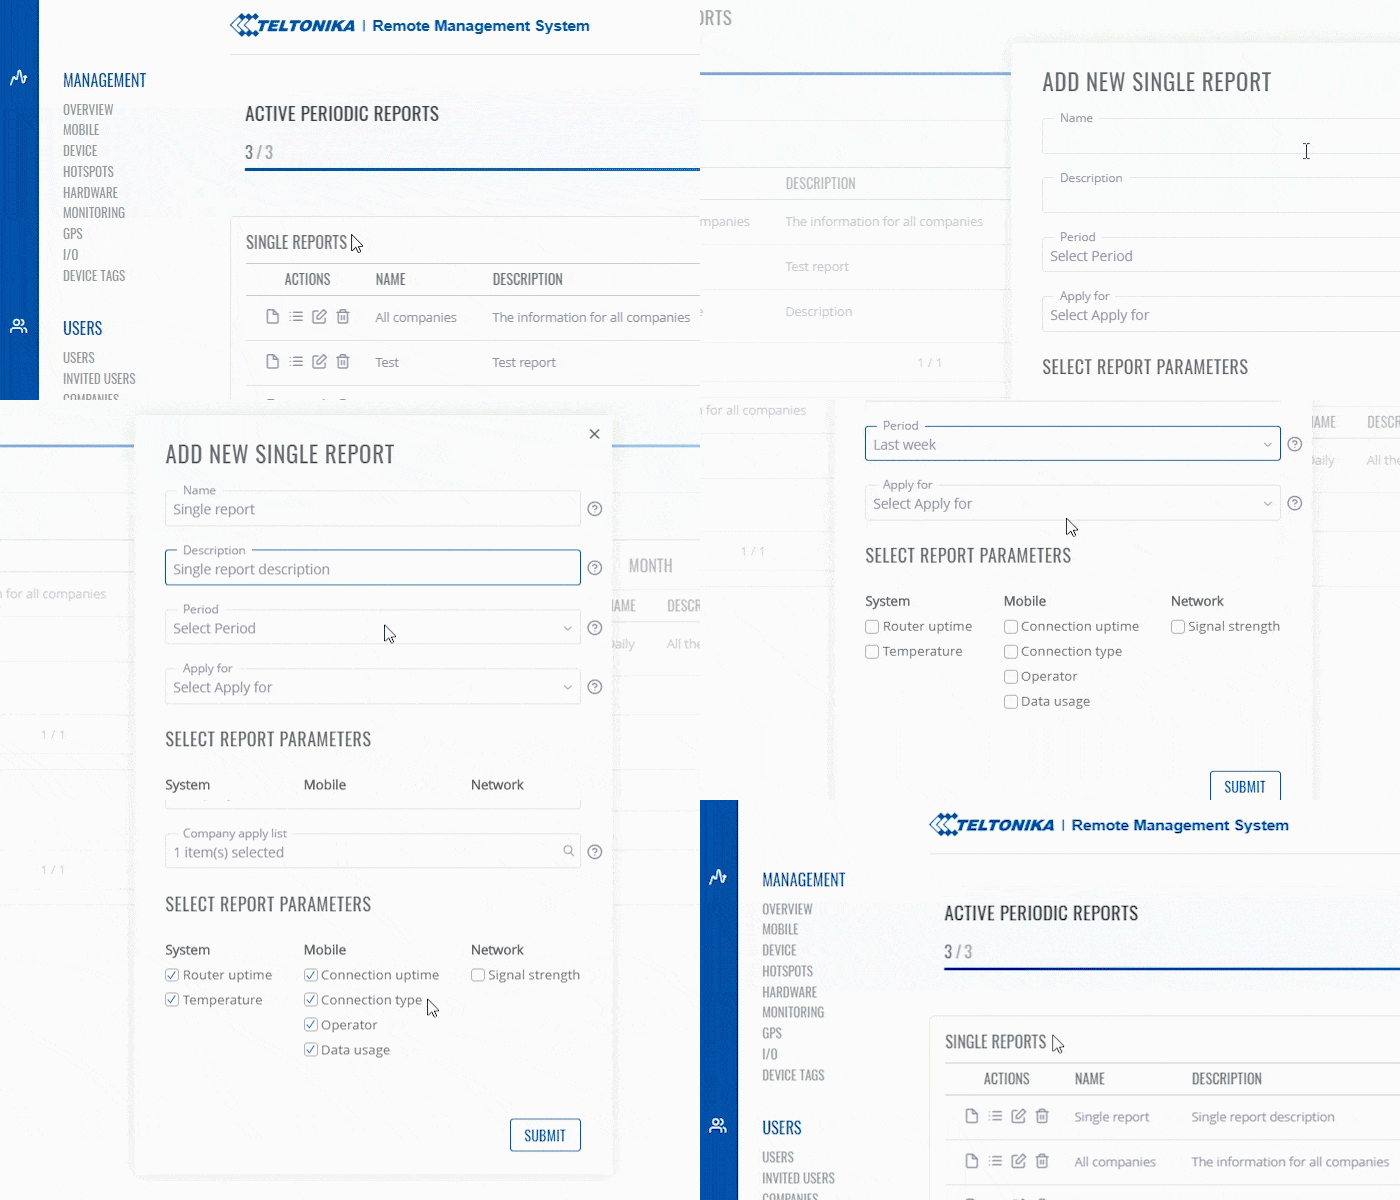
Create new
Instructions
- Move your mouse pointer to on the right side of the panel click the
 plus icon.
 - A new Add new single report pop-up window will appear.
- Fill out and select your desired options. You will find descriptions for each field down below.
- When ready, click the Submit button.
At the top of your screen, you will get a notification in green text: ✔ Company created.
Below are all the description explained for a new report pop-up window.
Important!
- Both single and periodic reports have almost identical window for creating reports. Because of that we only have one example for creating a report.
- Name - a custom title for the report
- Description - a custom description for the report
- Report type - the type of the report; can be either:
- Single (one time) - generates a single report for the selected Period - Periodic - generates reports periodically at the specified frequency (Period)
- Period - period of the report. The values for this field are dependent on the chosen Report type:
- Single (one time) - generates a single report based on the data gathered: Last day - over the last 24 hours - Last week - over the last 7 days - Last month - over the last month
- Periodic - generates a report: Daily - every 24 hours - Weekly - every 7 days - Monthly - every month
- Apply for - specifies for which devices the report will be generated:
- All devices - information on all devices in the RMS profile
- Device group - information on devices from the selected group(s) only
- Selected devices - information on selected devices only
- Select report parameters - specifies which router parameters will be displayed in the report:
- Router uptime - router's uptime value for the specified period (not the current uptime)
- Temperature - router's module's minimum, maximum and average temperature values for the specified period
- Connection uptime - mobile data connection uptime value for the specified period (not the current connection uptime)
- Operator - displays to which operators the device was connected during the specified period
- Data usage - sent/received data usage values for the specified period
- Signal strength - minimum, maximum and average signal strength values for the specified period
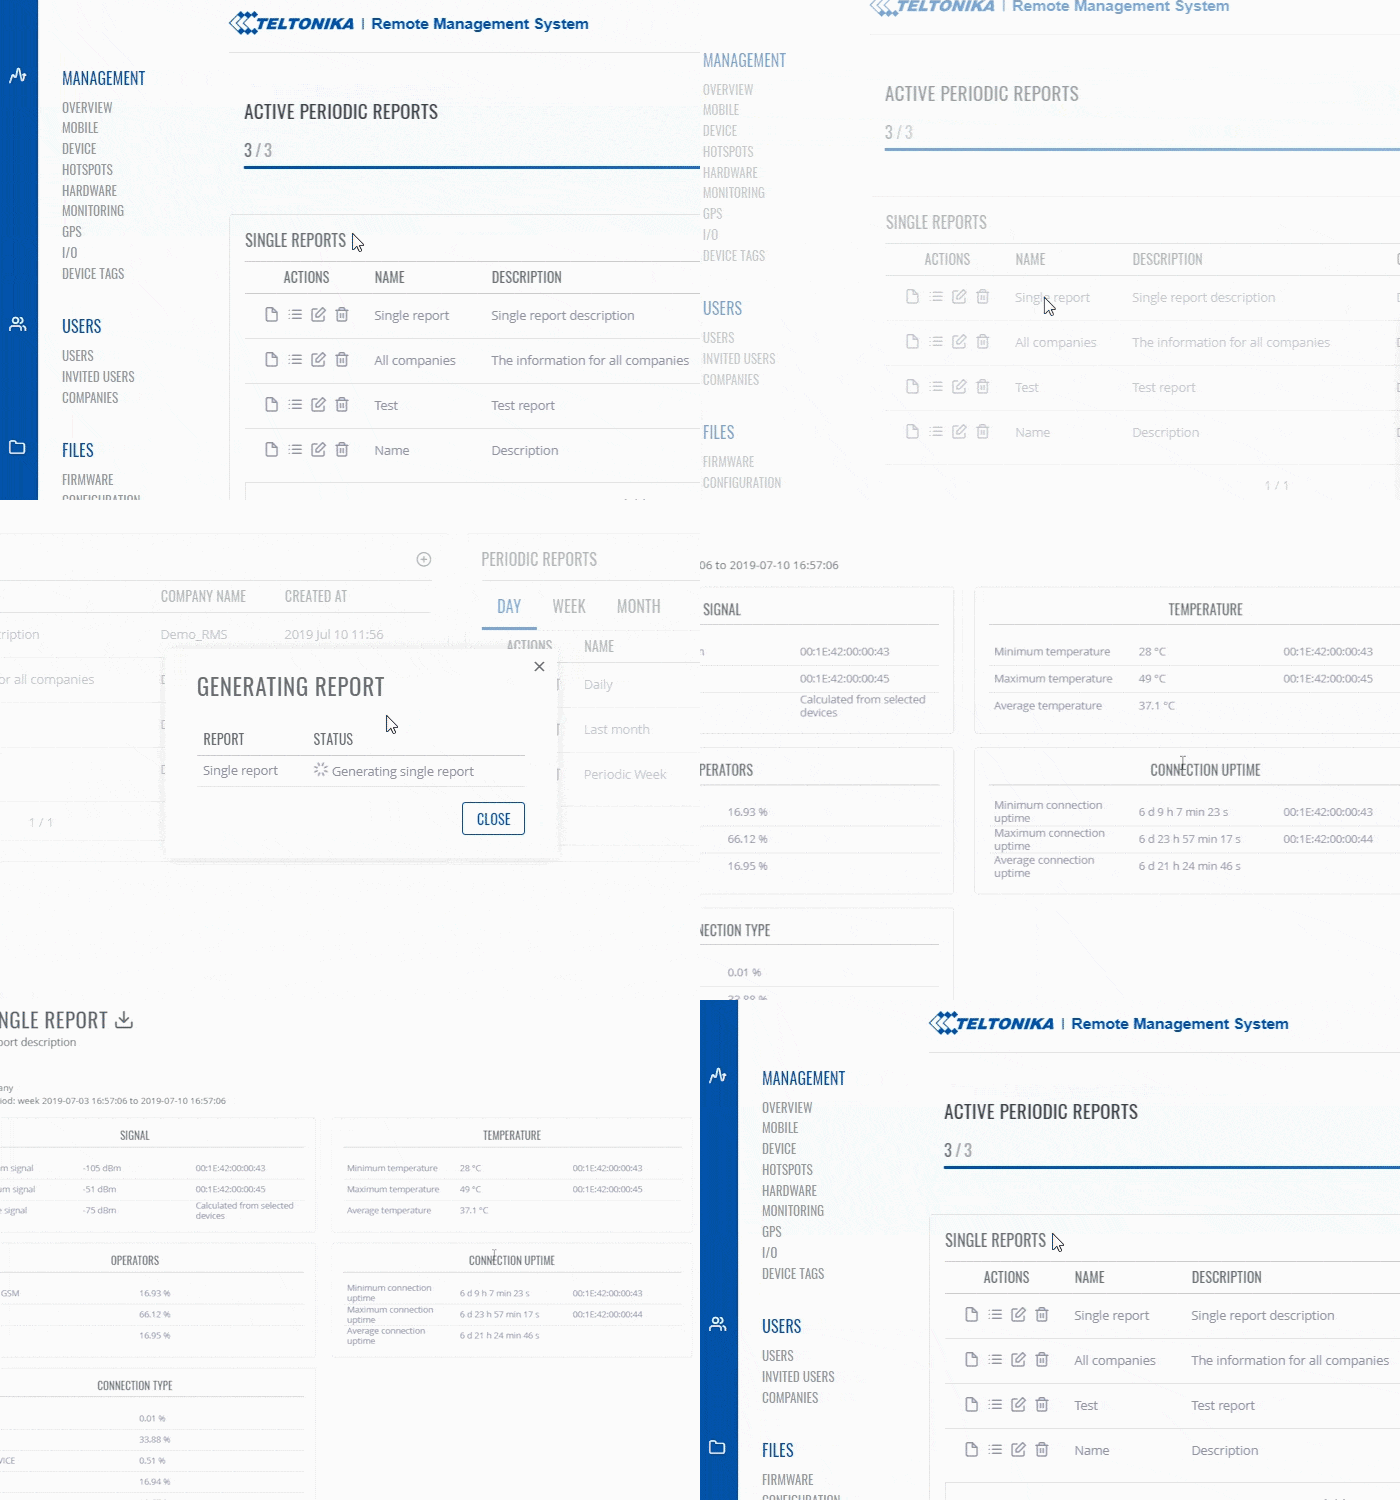
Generate report
For single reports, you have to manually generate a report after you create it.
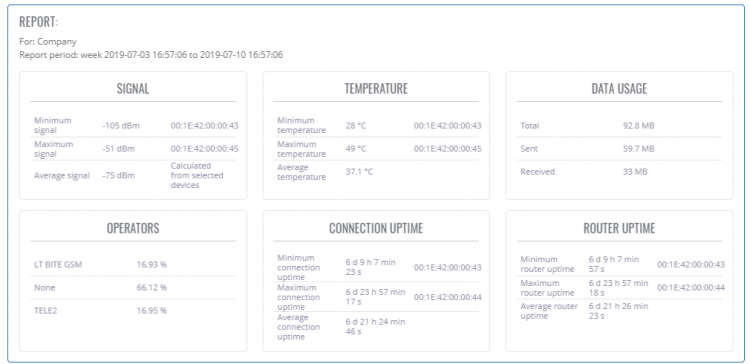
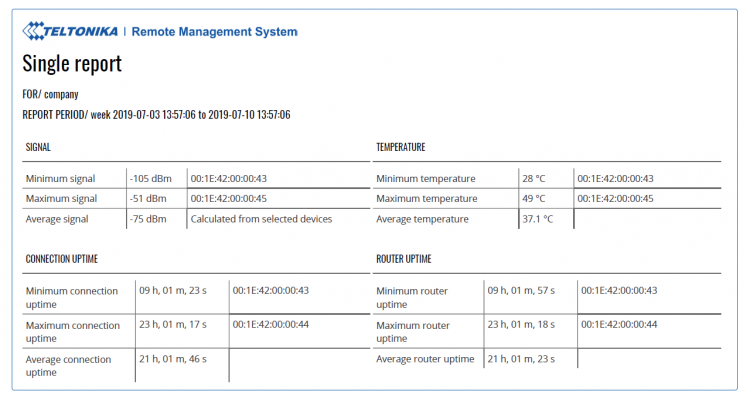
Below you will find an example of a generated report.
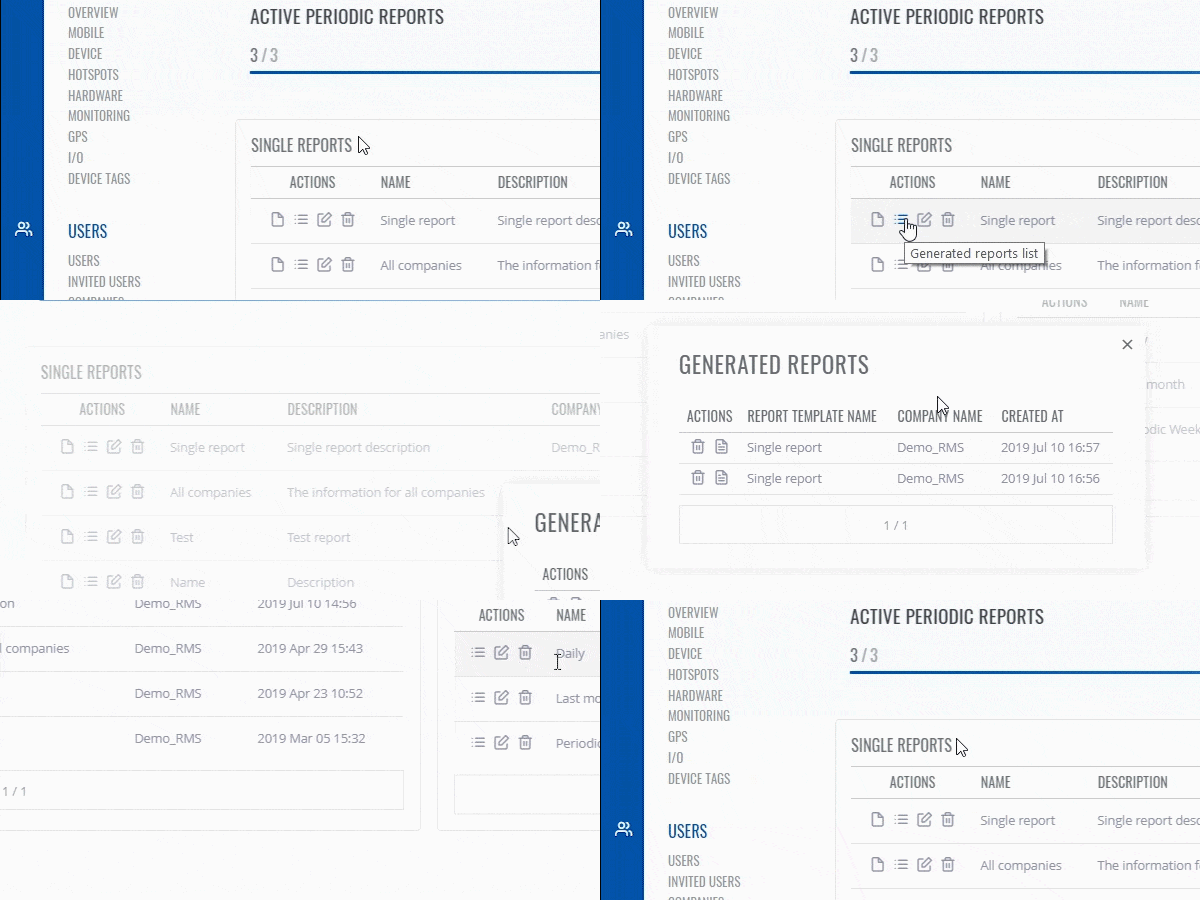
Report list
Single reports and periodic reports both have the Generated report list function. This section displays generated reports. And from here you can either view these reports or delete them.
To access this list click ![]() Generated report list button.
Generated report list button.
View generated reports
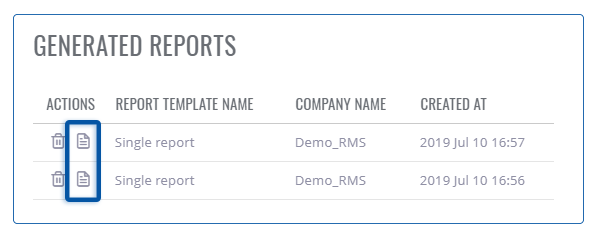
After you accessed the ![]() Generated report list to open the report click on the
Generated report list to open the report click on the ![]() Generated report details button.
Generated report details button.
Download PDF report
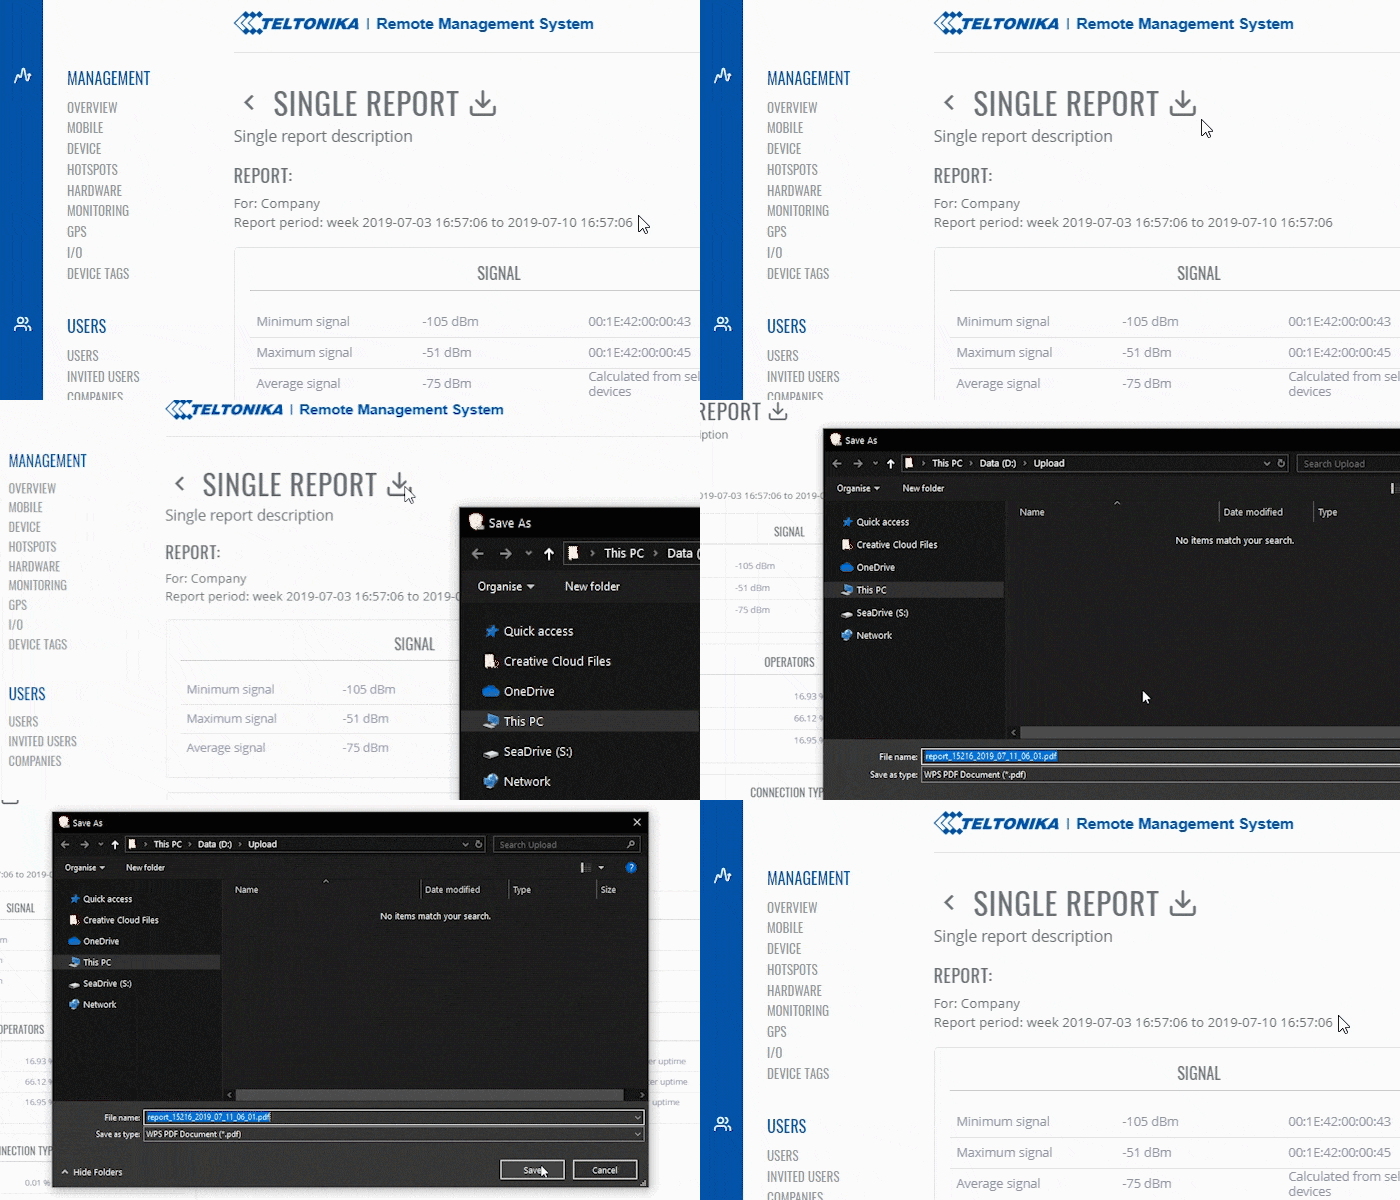
Below you will find an example of a downloaded PDF report.
Just click the download button in the generated report's page to get the report.
Remove generated report
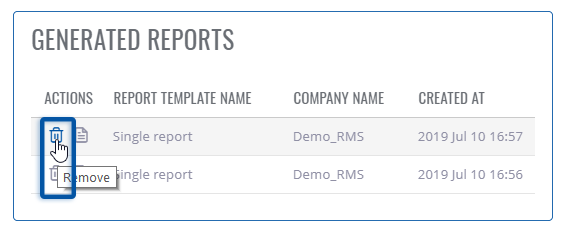
To remove a generated report click on ![]() Remove button.
Remove button.
At the top of your screen, you will get a notification in green text: ✔ Report deleted.
Toggle periodic reports
Since periodic reports are generated automatically. You may wish to stop this functionality. For this, you can toggle report off/on.
At the top of your screen, you will get a notification in green text: ✔ Report updated.

