Difference between revisions of "Network share using SAMBA"
From Teltonika Networks Wiki
Shivang.amin (talk | contribs) |
Shivang.amin (talk | contribs) |
||
| Line 16: | Line 16: | ||
# Connect a USB Drive to your RUTX router and connect your computer to routers Lan using cable or wifi. | # Connect a USB Drive to your RUTX router and connect your computer to routers Lan using cable or wifi. | ||
| − | # | + | # Login to the router's webUI, go the '''Services → USB Tools → General''' page and verify if your USB is mounted:[[File:Networking rutx configuration examples network share Verify usb is mounted or not.jpg|border|class=tlt-border]] |
# Navigate to Network Shares and Enable it. | # Navigate to Network Shares and Enable it. | ||
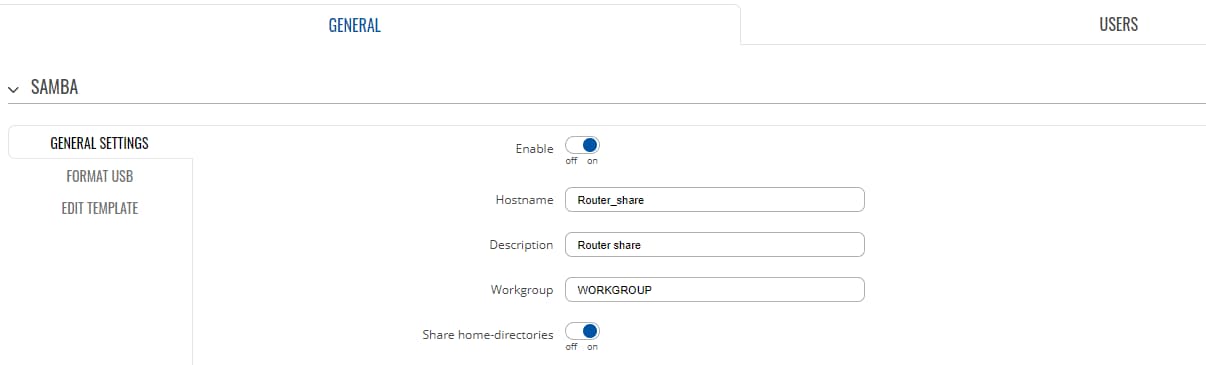
# Configure Hostname, Description, Workgroup. | # Configure Hostname, Description, Workgroup. | ||
# Enable Share home-directories if you want to share home directories. | # Enable Share home-directories if you want to share home directories. | ||
| − | # [[File:Networking rutx configuration examples Network share general setting.jpg| | + | # Click save & apply:[[File:Networking rutx configuration examples Network share general setting.jpg|border|class=tlt-border]] |
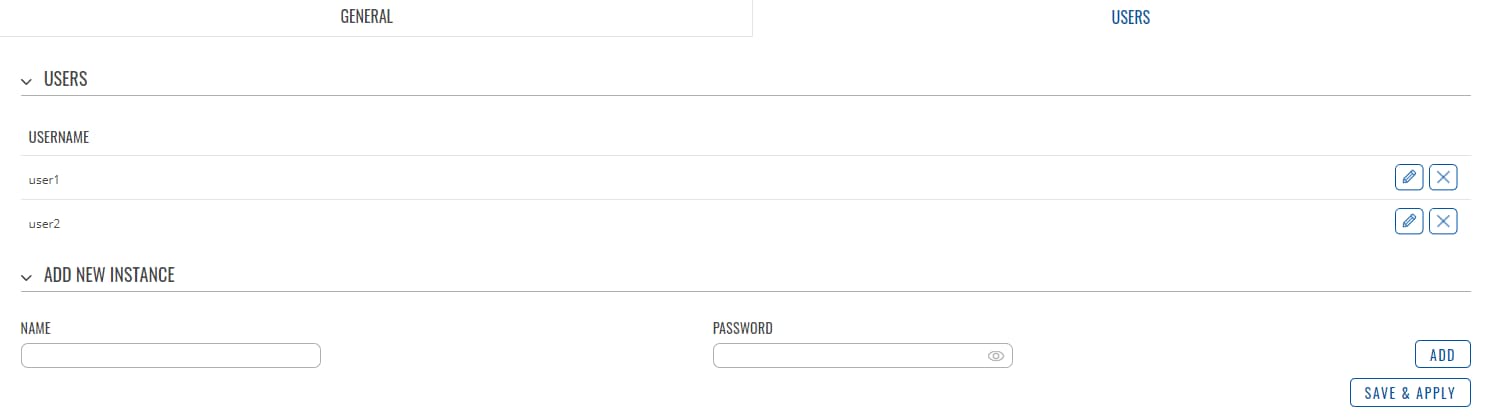
| − | # | + | # Configure Users in Users section: click save & apply:[[File:Networking rutx configuration examples network share users.jpg|border|class=tlt-border]] |
| − | + | # Go back to General tab: under Shared Directories > click ADD button, and create a directory that you want to share and select the users that you want to share directory with. Click save & apply.[[File:Networking rutx configuration examples network share add shared directories.jpg|border|class=tlt-border]] | |
| − | + | # On your PC: Open Network folder and type: “ \\192.168.1.1\netshare” in address bar.[[File:Networking rutx configuration examples network share on your pc.jpg|border|class=tlt-border]] | |
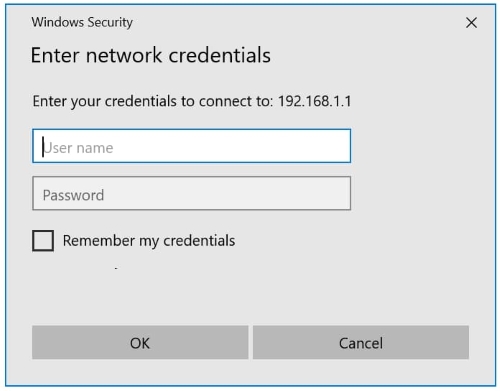
| − | # You need to provide user name and password that were created under Network Share > Users.[[File:Networking rutx configuration examples network share credentials.jpg| | + | # You need to provide user name and password that were created under Network Share > Users.[[File:Networking rutx configuration examples network share credentials.jpg|border|class=tlt-border]] |
Revision as of 16:23, 29 April 2022
Introduction
This article provides information and step by step guide to configure samba share on Teltonika routers.
The information on this page is updated in accordance with RUTX_R_00.07.01.4 firmware version.
Samba share is a software package used to provide secure, stable, and fast file and print service for clients using SMB/CIFS protocol. It is compatible to use with windows and Linux systems. SMB is a network file sharing protocol and CIFS is a network file system protocol. CIFS is a successor of SMB, and both runs on tcp or udp using port 137 and 138 for udp, 039 and 445 for tcp.
Prerequisites
You will need:
- RUTX router running FW version RUTX_R_00.07.01.4 or newer.
- A computer running Windows OS.
- A USB flash drive.
Instructions
- Connect a USB Drive to your RUTX router and connect your computer to routers Lan using cable or wifi.
- Login to the router's webUI, go the Services → USB Tools → General page and verify if your USB is mounted:File:Networking rutx configuration examples network share Verify usb is mounted or not.jpg
- Navigate to Network Shares and Enable it.
- Configure Hostname, Description, Workgroup.
- Enable Share home-directories if you want to share home directories.
- Click save & apply:
- Configure Users in Users section: click save & apply:
- Go back to General tab: under Shared Directories > click ADD button, and create a directory that you want to share and select the users that you want to share directory with. Click save & apply.

- On your PC: Open Network folder and type: “ \\192.168.1.1\netshare” in address bar.File:Networking rutx configuration examples network share on your pc.jpg
- You need to provide user name and password that were created under Network Share > Users.


