Auto APN: Difference between revisions
No edit summary |
|||
| (One intermediate revision by the same user not shown) | |||
| Line 11: | Line 11: | ||
  1. Log into your device's WebUI.<br> |   1. Log into your device's WebUI.<br> | ||
  2. Navigate to <b>Network → WAN</b> |   2. Navigate to <b>Network → WAN</b>.<br> | ||
  3. Press <b>Edit</b> on the mobile interface.<br> |   3. Press <b>Edit</b> on the mobile interface.<br> | ||
[[File:Networking_faq_autoapn_configuration_rutos_1_v2.png|border|class=tlt-border]] | [[File:Networking_faq_autoapn_configuration_rutos_1_v2.png|border|class=tlt-border]] | ||
| Line 40: | Line 40: | ||
  2. Navigate to <b>Network → WAN</b> (Basic WebUI mode) or <b>Network → Interfaces</b> (Advanced WebUI mode).<br> |   2. Navigate to <b>Network → WAN</b> (Basic WebUI mode) or <b>Network → Interfaces</b> (Advanced WebUI mode).<br> | ||
  3. Press <b>Edit</b> on the mobile interface.<br> |   3. Press <b>Edit</b> on the mobile interface.<br> | ||
[[File: | [[File:Networking_faq_autoapn_configuration_rutos_1_v2.png|border|class=tlt-border]] | ||
  4. Untoggle <b>Auto APN</b>. |   4. Untoggle <b>Auto APN</b>. | ||
[[File: | [[File:Networking faq autoapn configuration rutos 2 v2.png|border|class=tlt-border]] | ||
  5. Enter desired <b> APN</b>. |   5. Enter desired <b> APN</b>. | ||
[[File:Custom APN.png|border|center|class=tlt-border|1004x1004px]] | [[File:Custom APN v2.png|border|center|class=tlt-border|1004x1004px]] | ||
===Legacy WebUI=== | ===Legacy WebUI=== | ||
---- | ---- | ||
Latest revision as of 07:48, 22 July 2024
Main Page > FAQ > Control & Configuration > Auto APNHow does Auto APN work
Teltonika devices have an Auto APN feature that allows the device to analyze the SIM card. And automatically select the correct APN information from a pre-loaded database. This function reduces the time required to configure the device in different locations with different providers.
How to configure Auto APN
RUTOS WebUI
Instructions:
1. Log into your device's WebUI.
2. Navigate to Network → WAN.
3. Press Edit on the mobile interface.
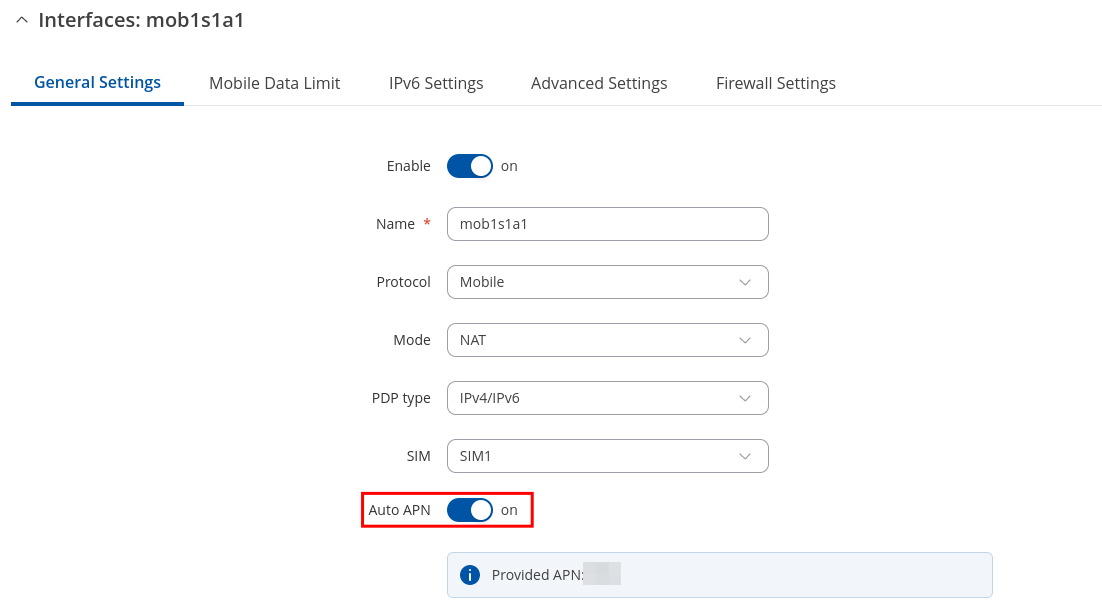
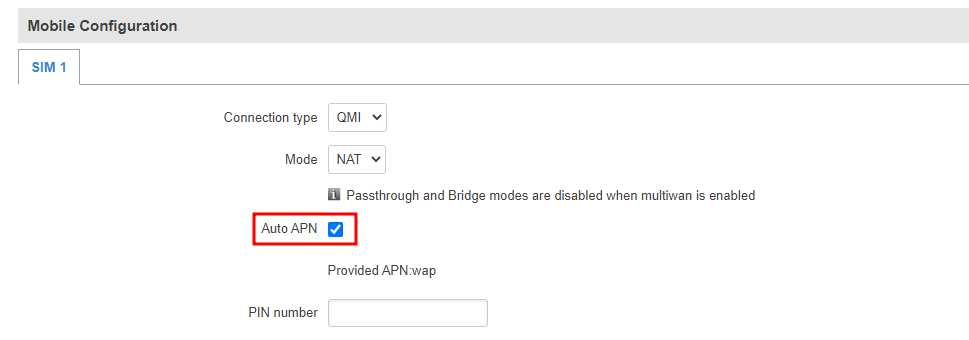
 4. Untoggle / Toggle Auto APN.
Legacy WebUI
Auto APN is enabled by default. But if you have just inserted the SIM card you might need to restart (RUT9XX/RUT2XX) routers modem first (Status/Mobile/Mobile Information).
Instructions:
- Log into your device's WebUI.
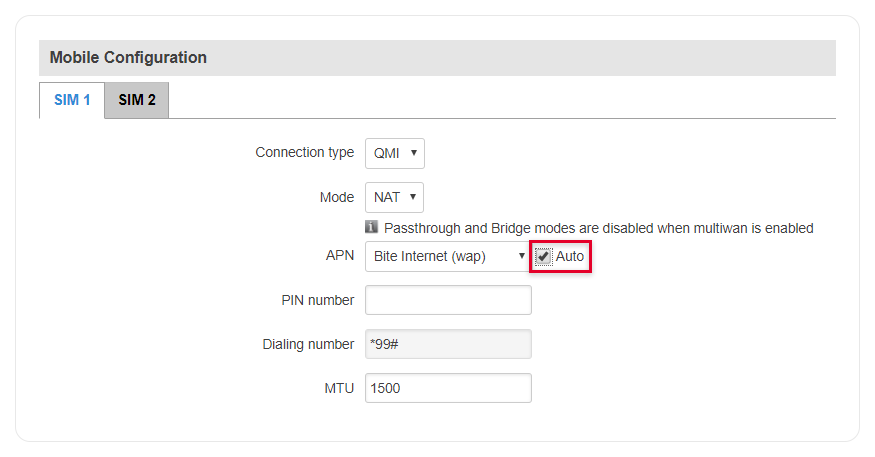
- Navigate to Network → Mobile.
- Uncheck / Check Auto next to APN.
How to configure custom APN
RUTOS WebUI
1. Log into your device's WebUI.
2. Navigate to Network → WAN (Basic WebUI mode) or Network → Interfaces (Advanced WebUI mode).
3. Press Edit on the mobile interface.
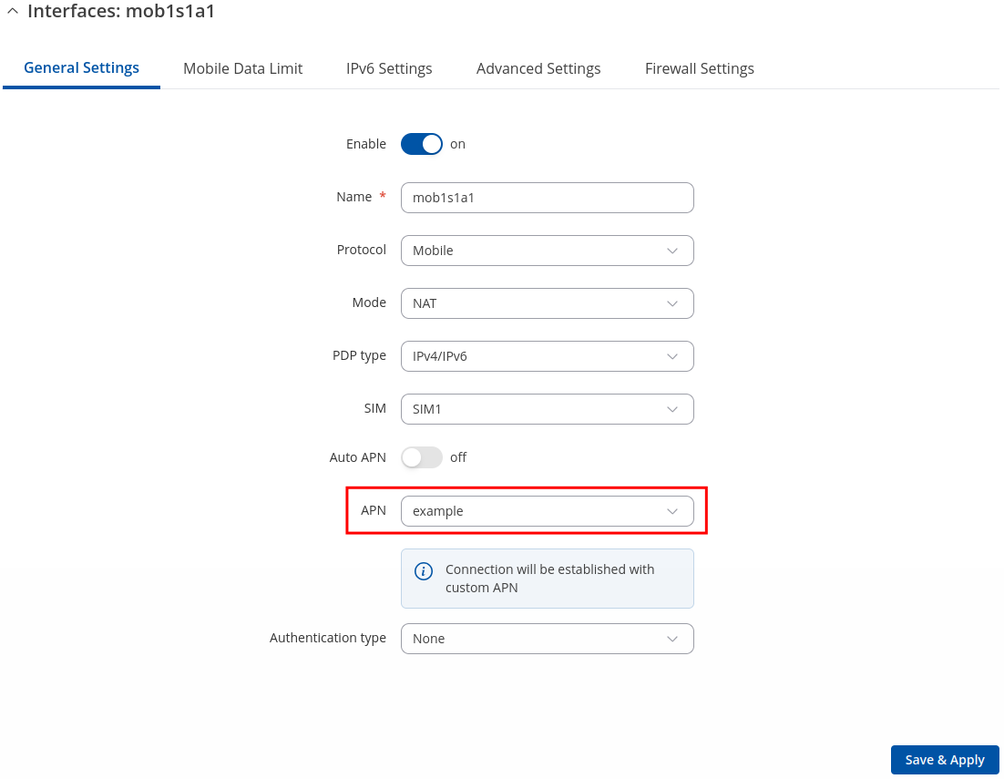
 4. Untoggle Auto APN.
 5. Enter desired APN.
Legacy WebUI
Instructions:
- Log into your device's WebUI.
- Navigate to Network → Mobile.
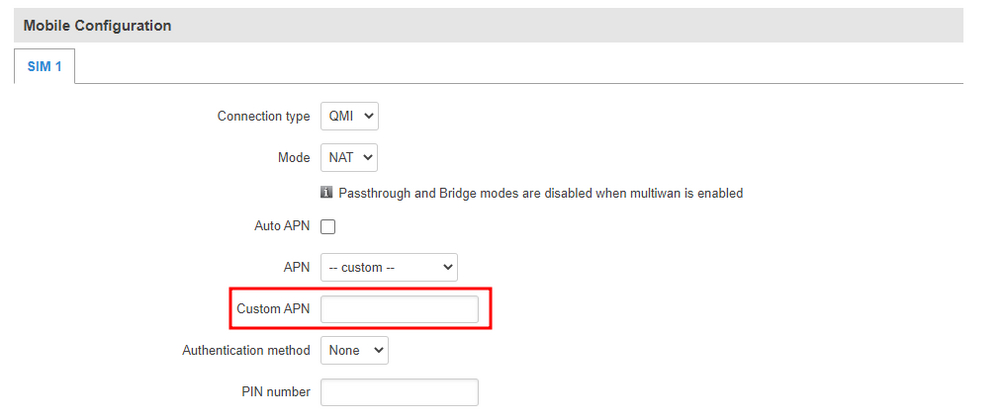
- Uncheck Auto next to APN.
5. Enter desired APN.
