Template:Networking rut cloud of things: Difference between revisions
No edit summary |
|||
| (24 intermediate revisions by the same user not shown) | |||
| Line 1: | Line 1: | ||
[[File:Networking rut telekom logo.png|right|160px]] | [[File:Networking rut telekom logo.png|right|160px]] | ||
'''Telekom Cloud of Things''' is now compatible with Teltonika | '''Telekom Cloud of Things''' is now compatible with Teltonika RUT2xx, RUT9xx and RUTXxx series routers. | ||
==Description== | ==Description== | ||
The '''Cloud of Things''' is cloud platform for the Internet of Things. It allows you to remotely monitor, manage and control your connected devices and machines – plug-and-play, without extensive installation. | The '''Cloud of Things''' is a cloud platform for the Internet of Things. It allows you to remotely monitor, manage and control your connected devices and machines – plug-and-play, without extensive installation. | ||
==Summary== | ==Summary== | ||
This example | This example will provide steps on how to connect your device to Cloud of Things. | ||
There are many things that you can monitor via this platform: | |||
Device Data - Device Model, Revision and Serial Number | |||
Mobile data - Mobile Cell ID, ICCID, IMEI, Connection Type, Operator, Signal Strength | |||
Network info - IP | |||
Availability | |||
And other... | |||
==Creating an account== | |||
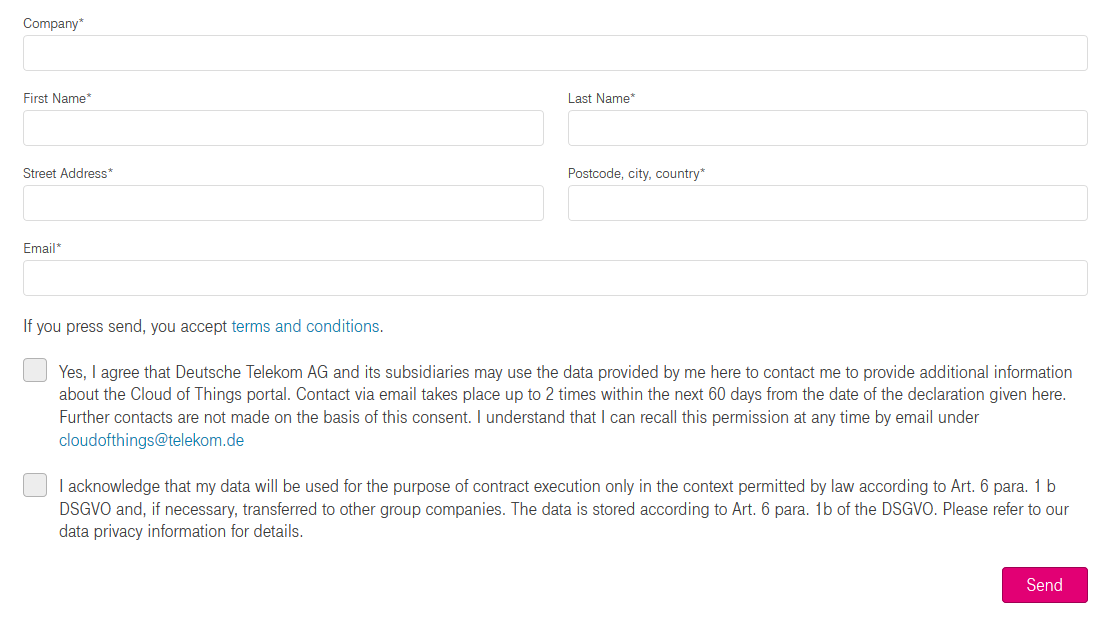
First of all, you need to create an account. After registration, you will receive free 60 days Cloud of Things trial. Registration form can be found here: https://support.ram.m2m.telekom.com/apps/demotenant/index.html#/ . Below you can see a picture of the registration form: | |||
[[Image:CoT_Demo_Account.png]] | [[Image:CoT_Demo_Account.png]] | ||
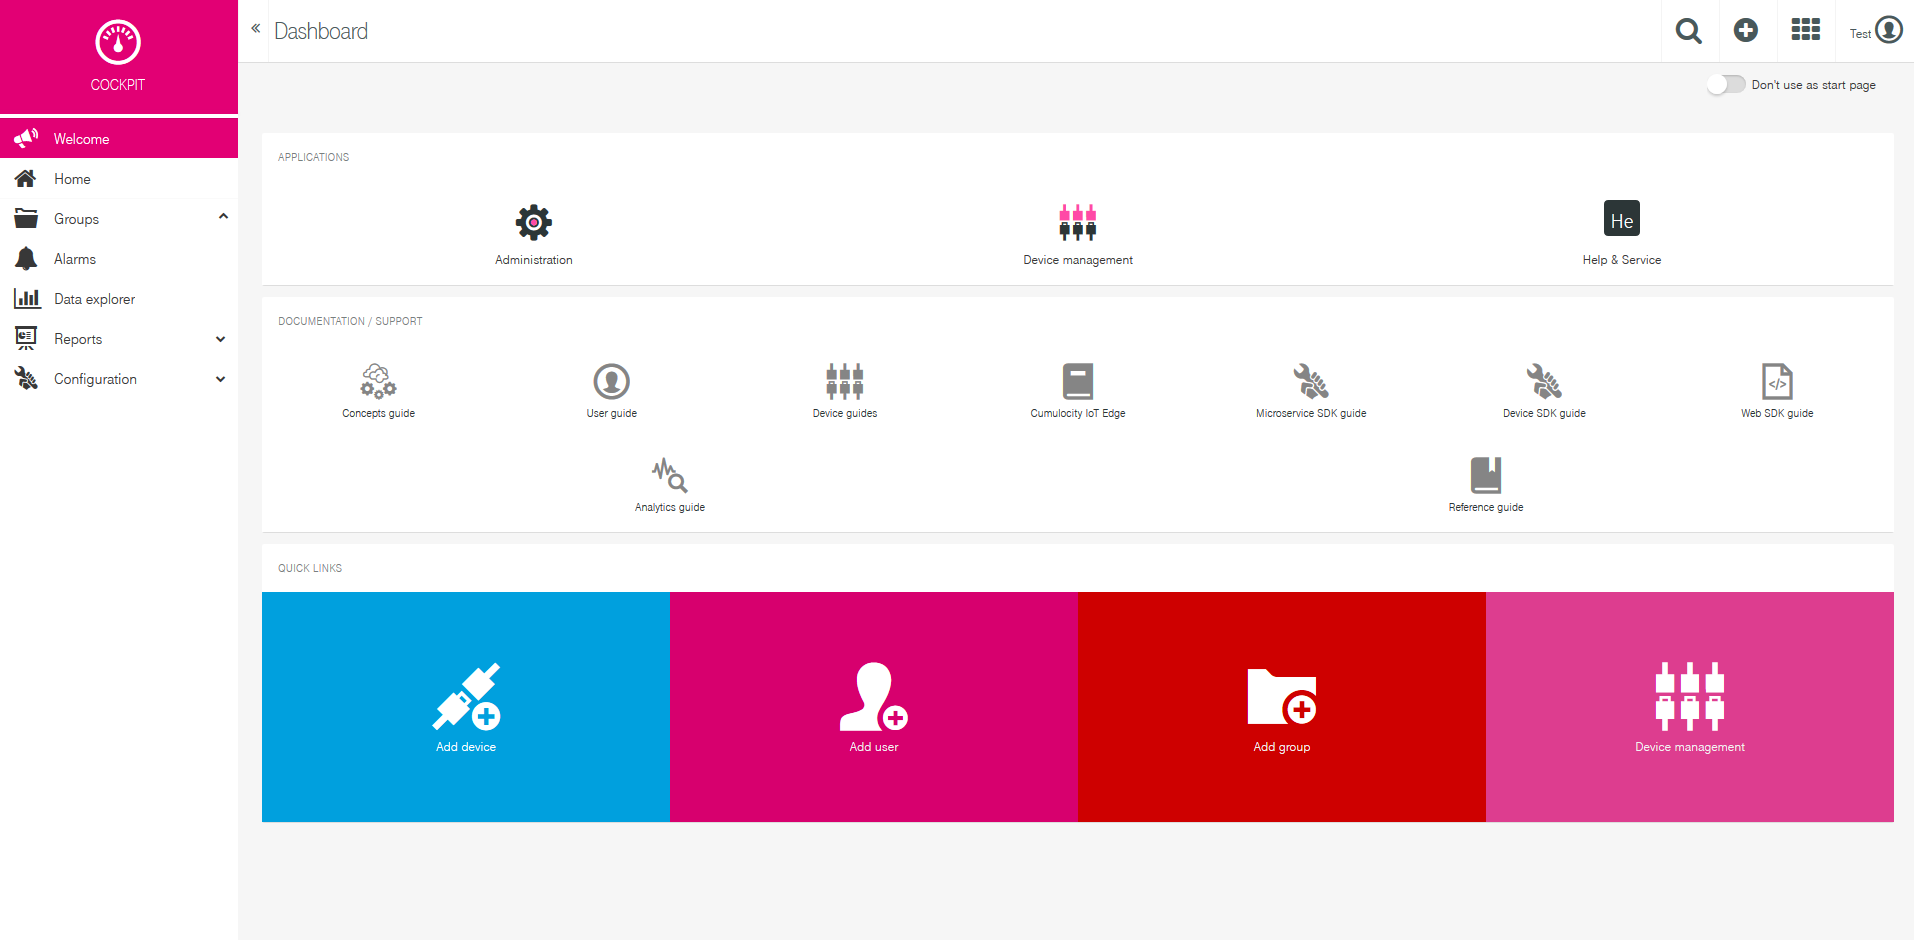
After successful registration you will receive an email with your account details (URL, username, password) and after logging in, you will be redirected to Cloud of Things Cockpit portal, see below: | After successful registration you will receive an email with your account details (URL, username, password) and after logging in, you will be redirected to Cloud of Things Cockpit portal, see below: | ||
| Line 29: | Line 31: | ||
[[Image:Cloud of things cockpit.png]] | [[Image:Cloud of things cockpit.png]] | ||
==Package installing and device registering== | ==RUT2xx / RUT9xx - Package installing and device registering== | ||
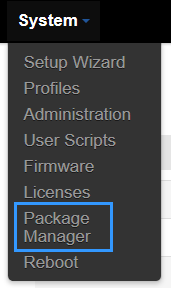
Cloud of Things IoT platform is not included in standart software package | Cloud of Things IoT platform is not included in standart software package, so in order to use the feature you will need to install it first. To do so, go to '''System>Package Manager.''' | ||
| Line 37: | Line 39: | ||
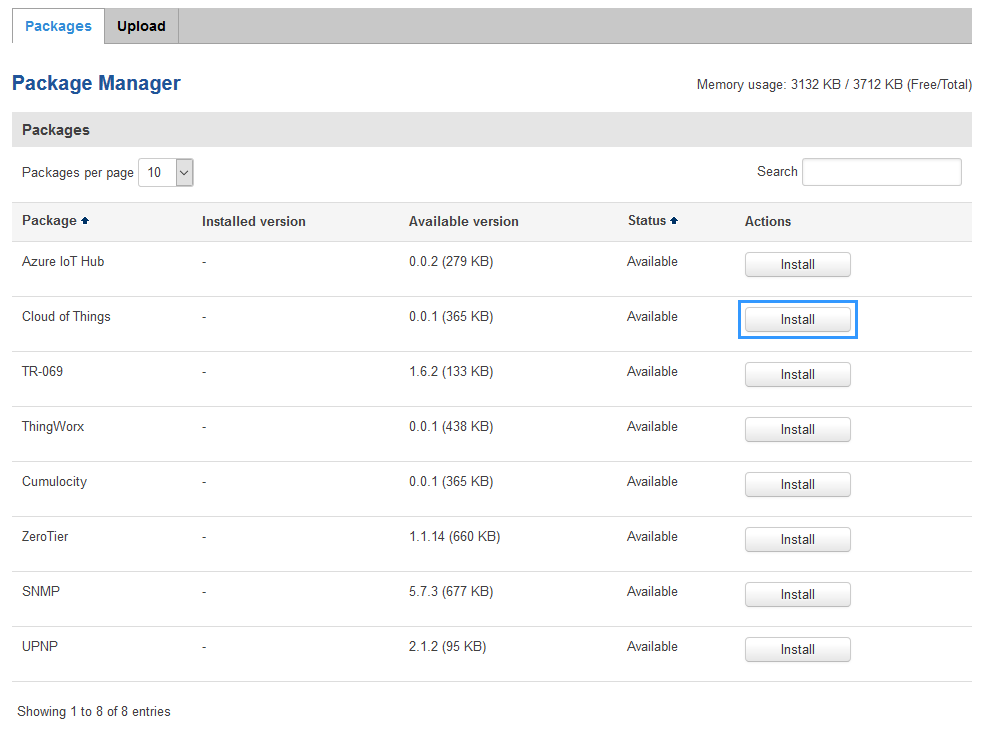
There you will find all the available packages. The one you need is called '''Cloud of Things'''. In order to install it press '''Install''' button. | There you will find all the available packages. The one you need is called '''Cloud of Things'''. In order to install it just press the '''Install''' button. | ||
| Line 43: | Line 45: | ||
Then it will ask your confirmation, whether you want to install the package. Press '''OK''' to continue. | Then it will ask for your confirmation, whether you want to install the package. Press '''OK''' to continue. | ||
| Line 61: | Line 63: | ||
In order to use the feature you will need to enable it, write '''Server Address''' and press '''Save.''' The server address is the link which was provided by '''Cloud of Things'''. | In order to use the feature, you will need to enable it, write '''Server Address''' and press '''Save.''' The server address is the link which was provided by '''Cloud of Things'''. | ||
(E.g. example.example.example.telekom.com) | (E.g. example.example.example.telekom.com) | ||
| Line 71: | Line 73: | ||
P.S. In order to re-register a device on Cloud of Things platform, you need to press '''Reset Auth''' button. If you are registering the device for the first time, pressing the button is not necessary. | P.S. In order to re-register a device on Cloud of Things platform, you need to press '''Reset Auth''' button. If you are registering the device for the first time, pressing the button is not necessary. | ||
== | ==RUTX - Package installing and device registering== | ||
Cloud of Things IoT platform is not included in standart software package, so in order to use the feature you will need to install it first. To do so, go to '''System>Package Manager.''' | |||
[[Image:Cloud of things | [[Image:Cloud of things rutx package installing 1.png]] | ||
[[Image:Cloud of things | There you will find all the available packages. The one you need is called '''Cloud of Things'''. In order to install it just press the '''Install''' button. | ||
[[Image:Cloud of things rutx package installing 2.png]] | |||
Then it will ask for your confirmation, whether you want to install the package. Press '''YES''' to continue. | |||
[[Image:Cloud of things rutx package installing 3.png]] | |||
It will take a moment to install, but when it is done, you will receive a message. | |||
[[Image:Cloud of things rutx package installing 4 v1.png]] | |||
When the package is installed, a new window in '''Services>Cloud Solutions''' section will appear, '''Cloud of Things'''. | |||
[[Image:Cloud of things rutx package installing 5.png]] | |||
In order to use the feature, you will need to enable it, write '''Server Address''' select '''Interface''' name and press '''Save & Apply.''' The server address is the link which was provided by '''Cloud of Things'''. | |||
(E.g. example.example.example.telekom.com) | |||
[[Image:Cloud of things rutx package installing 6 v1.png]] | |||
P.S. In order to re-register a device on Cloud of Things platform, you need to press '''Reset Auth''' button. If you are registering the device for the first time, pressing the button is not necessary. | |||
==Adding device(s) on Cloud of Things== | |||
After successfully installing the package and making the required configuration on the router, you now can add the device on '''Cloud of Things''' platform, steps for RUT and RUTX series routers are the same. After logging in to the website you are forwarded to Cockpit page. There press '''Device manager'''. | |||
[[Image:Cloud of things adding device 1.png]] | |||
Then select '''Devices''' and press '''Registration'''. | |||
[[Image:Cloud of things adding device 2.png]] | |||
Press '''Register device'''. | |||
[[Image:Cloud of things adding device 3.png]] | |||
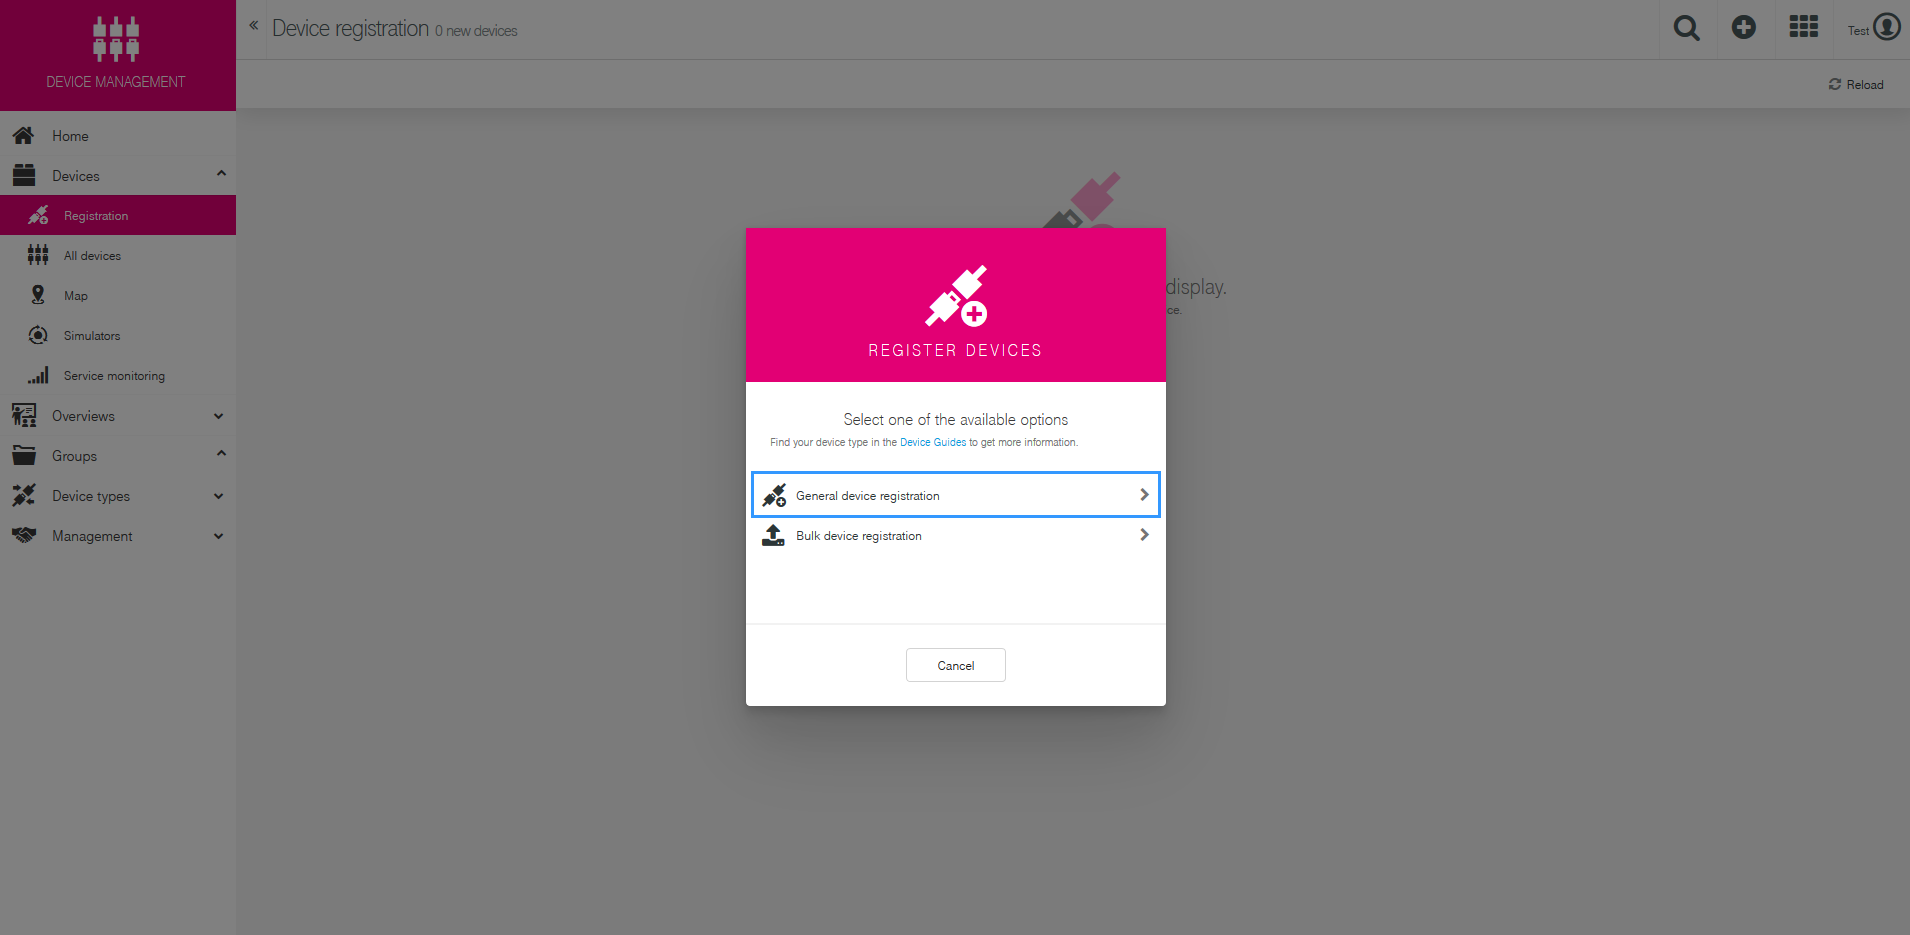
There are two ways to register your device(s) '''Bulk''' and '''General'''. Bulk is used when you are registering many devices at once. In this example we will be using the '''General''' option. | |||
[[Image:Cloud of things adding device 4.png]] | |||
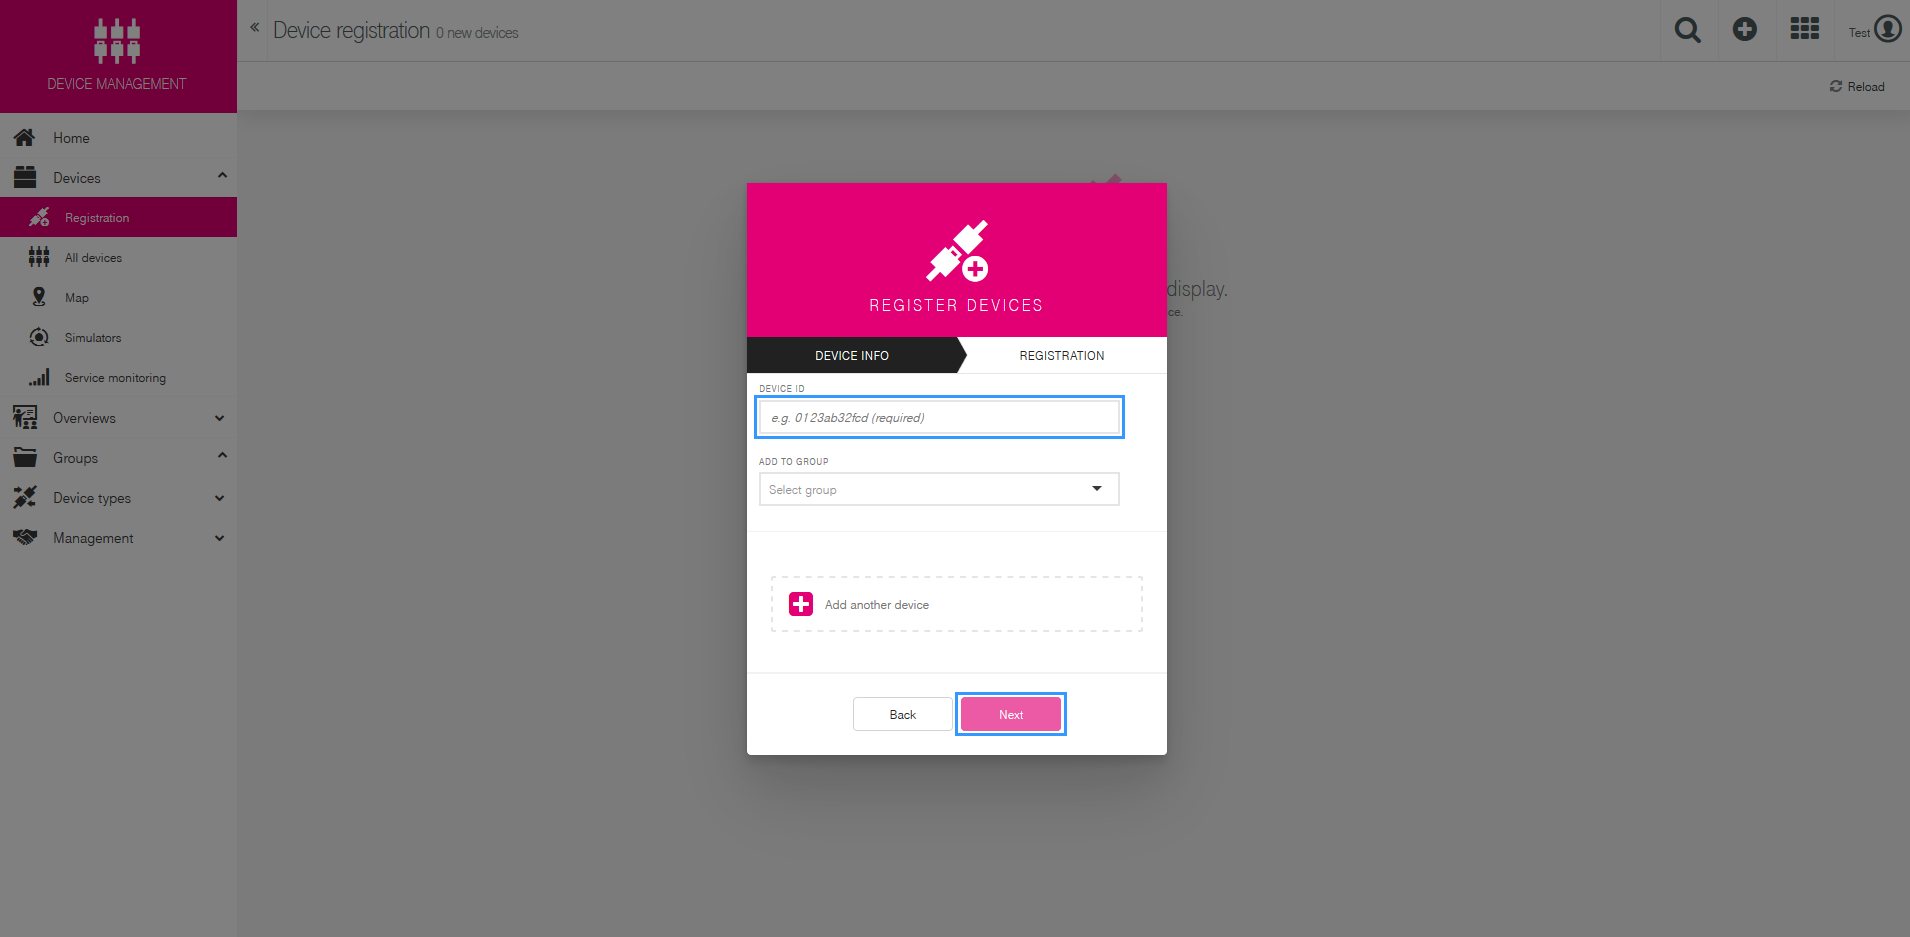
In '''Device ID''' section write the serial number of your router. You can add more than one item by pressing '''Add another device''' button. There is a possibility to assign your routers to groups, but we are not doing that in this example. | |||
[[Image:Cloud of things adding device 5.png]] | |||
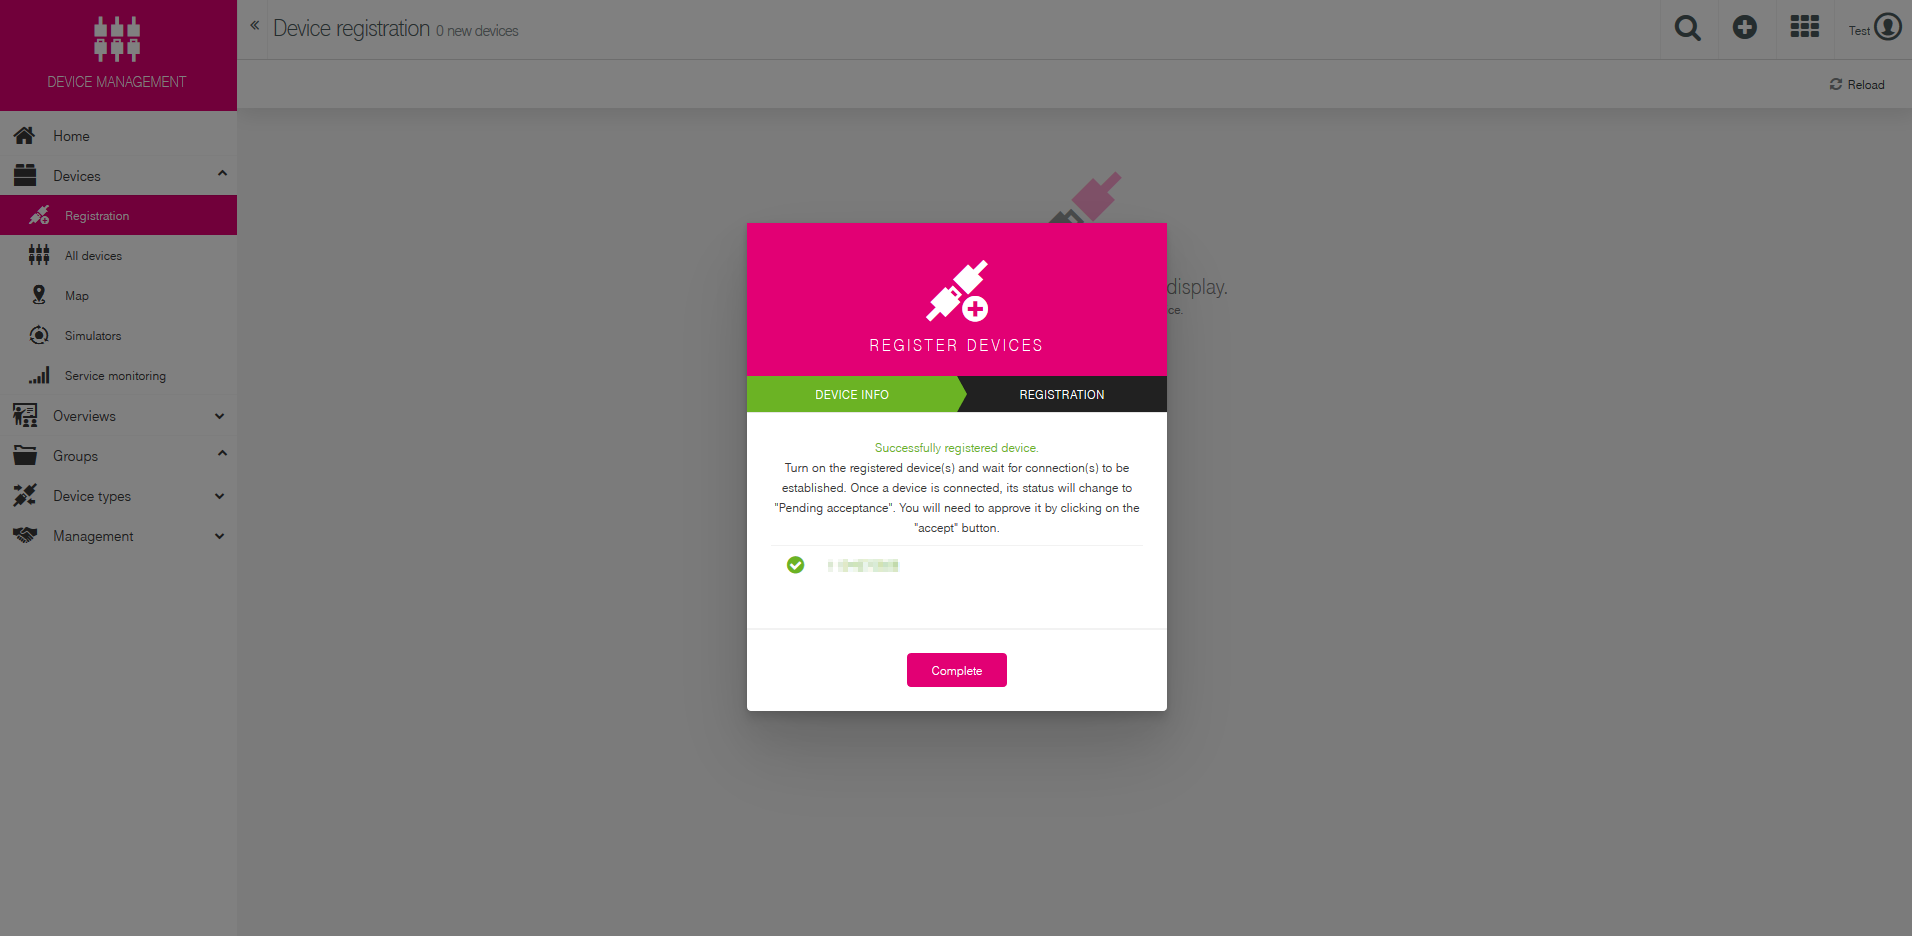
If everything was done correctly, it will show you that the registration was successful. | |||
[[Image:Cloud of things adding device 6.png]] | |||
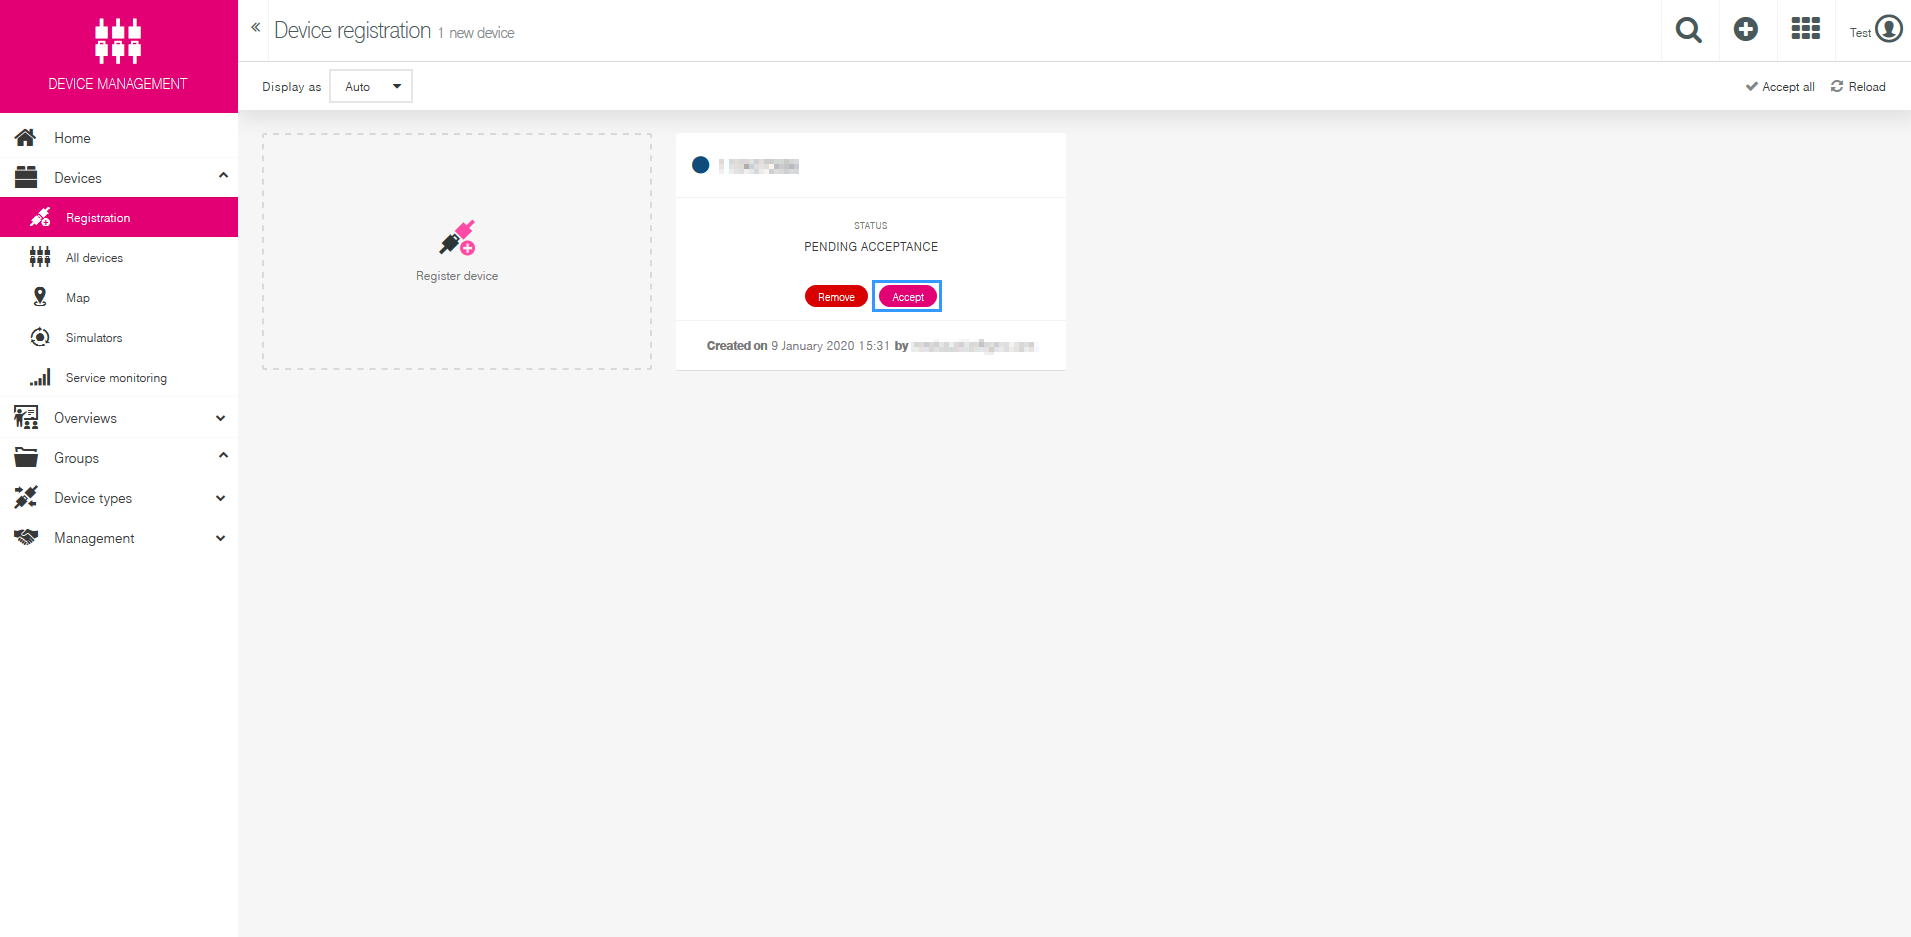
Then you will need to '''Accept''' the '''Pending Acceptance'''. | |||
[[Image:Cloud of things adding device 7.png]] | |||
Finally you will receive a message indicating that the device has been accepted. | |||
[[Image:Cloud of things adding device 8.png]] | |||
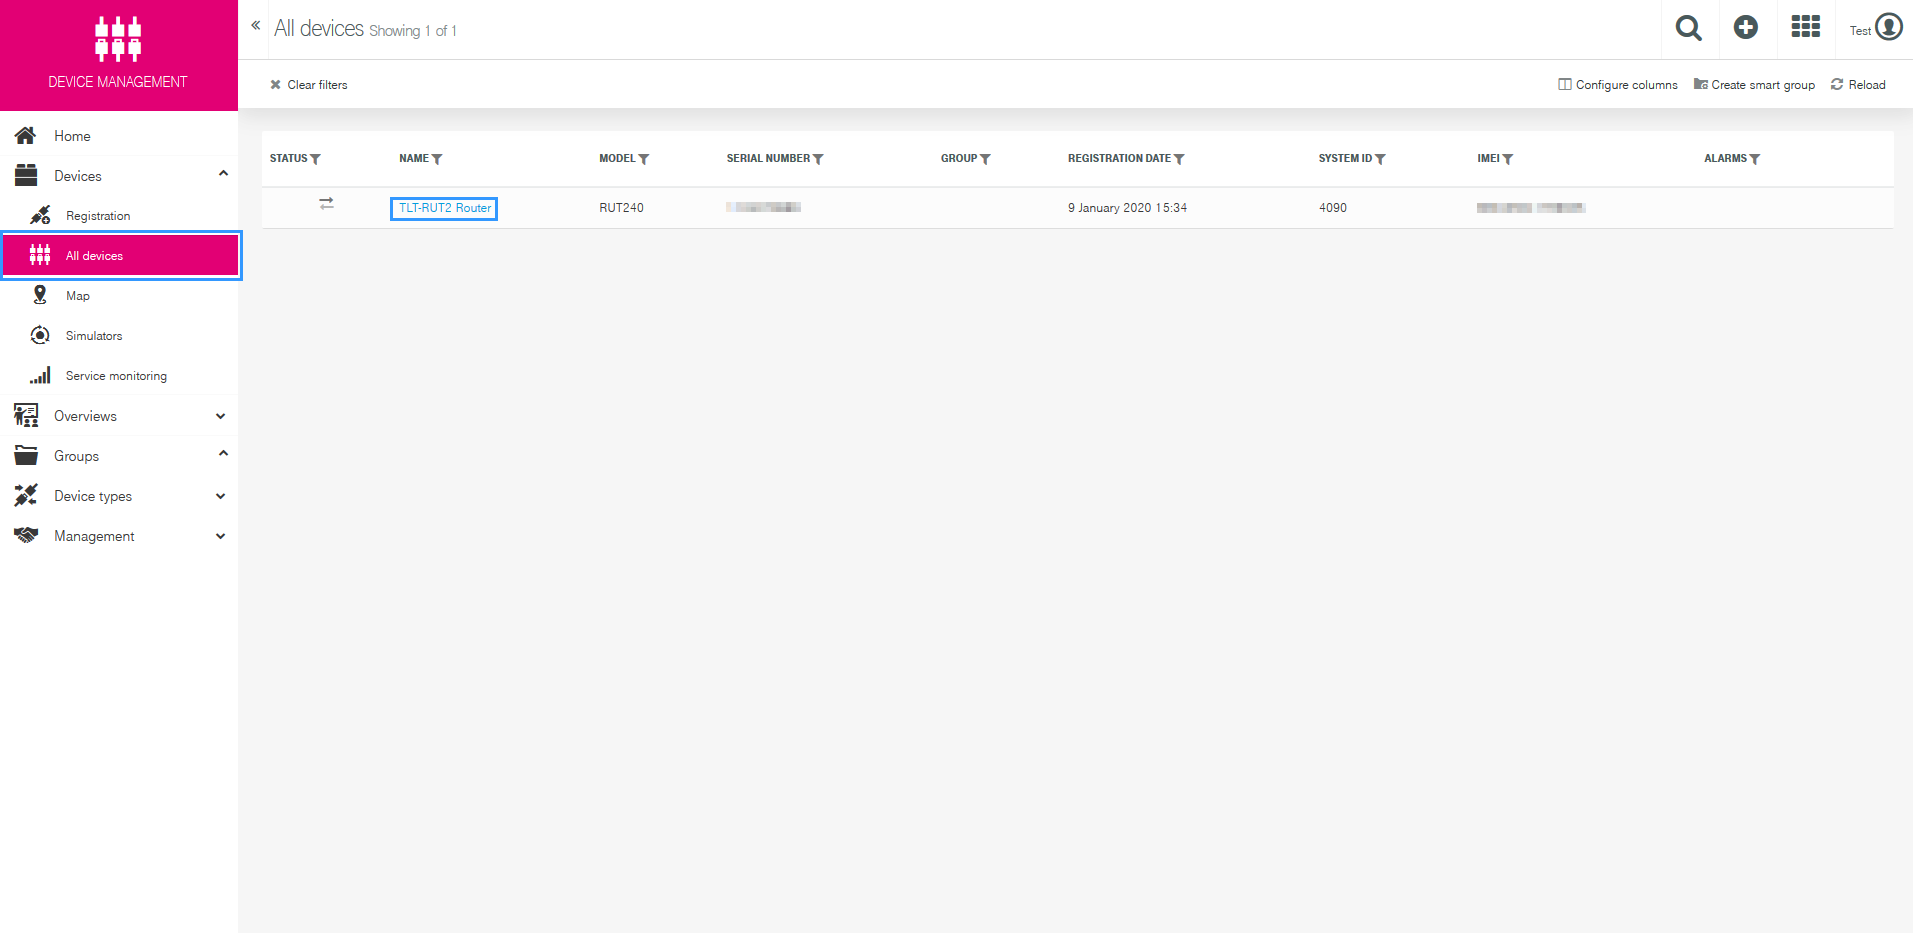
After successful device registration, there is one more thing that you need to do in order to start monitoring your equipment. Find your router at '''All devices''' page. Then simply press the name of the item and you will be forwarded to the info window. | |||
[[Image:Cloud of things adding device 9.png]] | |||
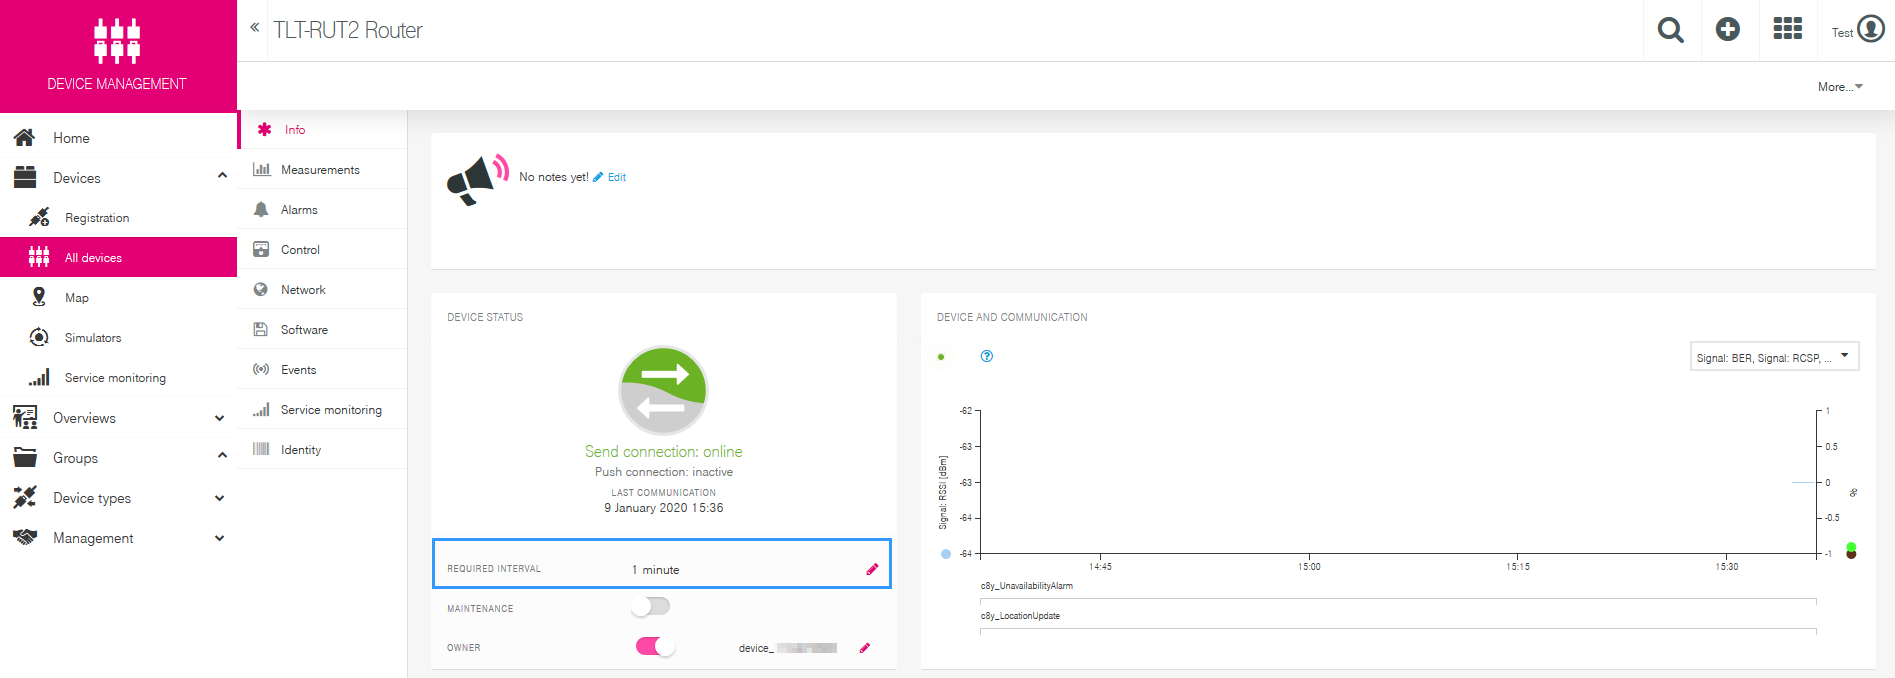
Here you will need to set the '''Required interval'''. This parameter defines how often you expect to hear from the device. If, for example, you set the required interval to 60, you expect the device at least to communicate once in an hour with Cloud of Things. RUT device sends data to the server every 10sec. | |||
[[Image:Cloud of things monitoring device 1.png]] | |||
If everything was done correctly you should now be able to monitoring your device on Cloud of Things. For more information about this platform visit this website: https://iot.telekom.com/en/platform | |||
==External Links== | ==External Links== | ||
https:// | https://iot.telekom.com/en/platform | ||
{{Template: trademark disclaimer}} | {{Template: trademark disclaimer}} | ||
Latest revision as of 16:05, 9 January 2020

Telekom Cloud of Things is now compatible with Teltonika RUT2xx, RUT9xx and RUTXxx series routers.
Description
The Cloud of Things is a cloud platform for the Internet of Things. It allows you to remotely monitor, manage and control your connected devices and machines – plug-and-play, without extensive installation.
Summary
This example will provide steps on how to connect your device to Cloud of Things.
There are many things that you can monitor via this platform:
Device Data - Device Model, Revision and Serial Number
Mobile data - Mobile Cell ID, ICCID, IMEI, Connection Type, Operator, Signal Strength
Network info - IP
Availability
And other...
Creating an account
First of all, you need to create an account. After registration, you will receive free 60 days Cloud of Things trial. Registration form can be found here: https://support.ram.m2m.telekom.com/apps/demotenant/index.html#/ . Below you can see a picture of the registration form:
After successful registration you will receive an email with your account details (URL, username, password) and after logging in, you will be redirected to Cloud of Things Cockpit portal, see below:
RUT2xx / RUT9xx - Package installing and device registering
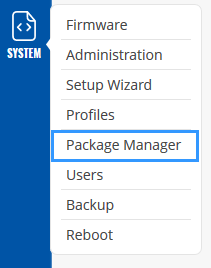
Cloud of Things IoT platform is not included in standart software package, so in order to use the feature you will need to install it first. To do so, go to System>Package Manager.
There you will find all the available packages. The one you need is called Cloud of Things. In order to install it just press the Install button.
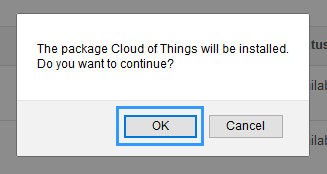
Then it will ask for your confirmation, whether you want to install the package. Press OK to continue.
It will take a moment to install, but when it is done, you will receive a message.
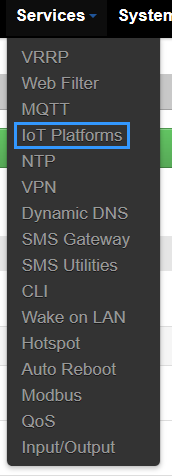
When the package is installed, a new window in Services section will appear, IoT Platforms.
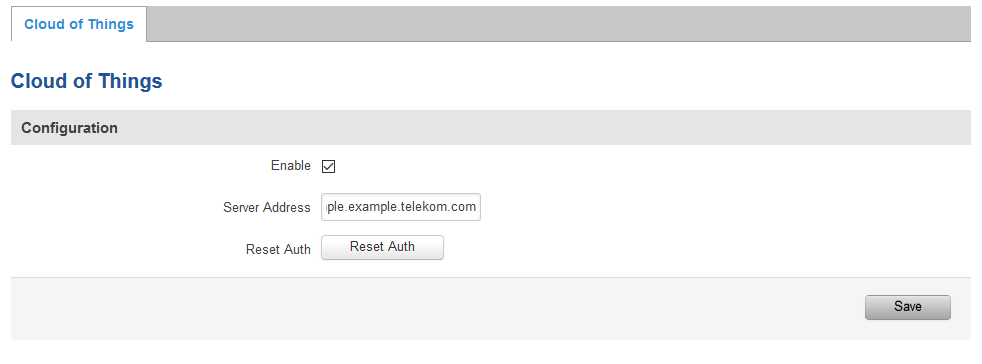
In order to use the feature, you will need to enable it, write Server Address and press Save. The server address is the link which was provided by Cloud of Things.
(E.g. example.example.example.telekom.com)
P.S. In order to re-register a device on Cloud of Things platform, you need to press Reset Auth button. If you are registering the device for the first time, pressing the button is not necessary.
RUTX - Package installing and device registering
Cloud of Things IoT platform is not included in standart software package, so in order to use the feature you will need to install it first. To do so, go to System>Package Manager.
There you will find all the available packages. The one you need is called Cloud of Things. In order to install it just press the Install button.
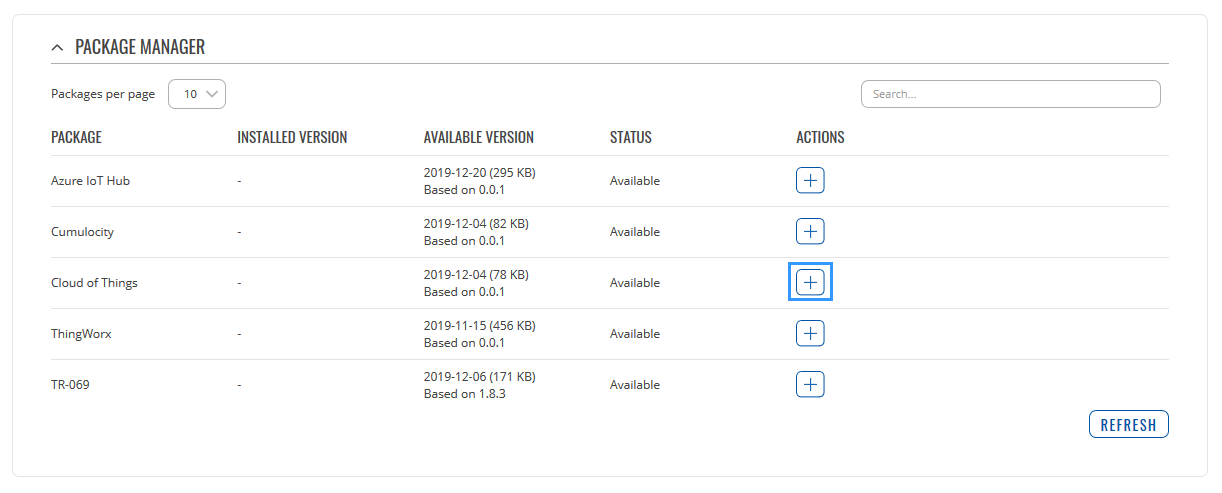
Then it will ask for your confirmation, whether you want to install the package. Press YES to continue.
It will take a moment to install, but when it is done, you will receive a message.
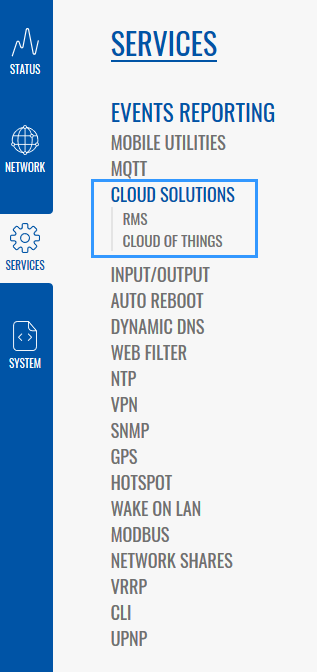
When the package is installed, a new window in Services>Cloud Solutions section will appear, Cloud of Things.
In order to use the feature, you will need to enable it, write Server Address select Interface name and press Save & Apply. The server address is the link which was provided by Cloud of Things.
(E.g. example.example.example.telekom.com)
P.S. In order to re-register a device on Cloud of Things platform, you need to press Reset Auth button. If you are registering the device for the first time, pressing the button is not necessary.
Adding device(s) on Cloud of Things
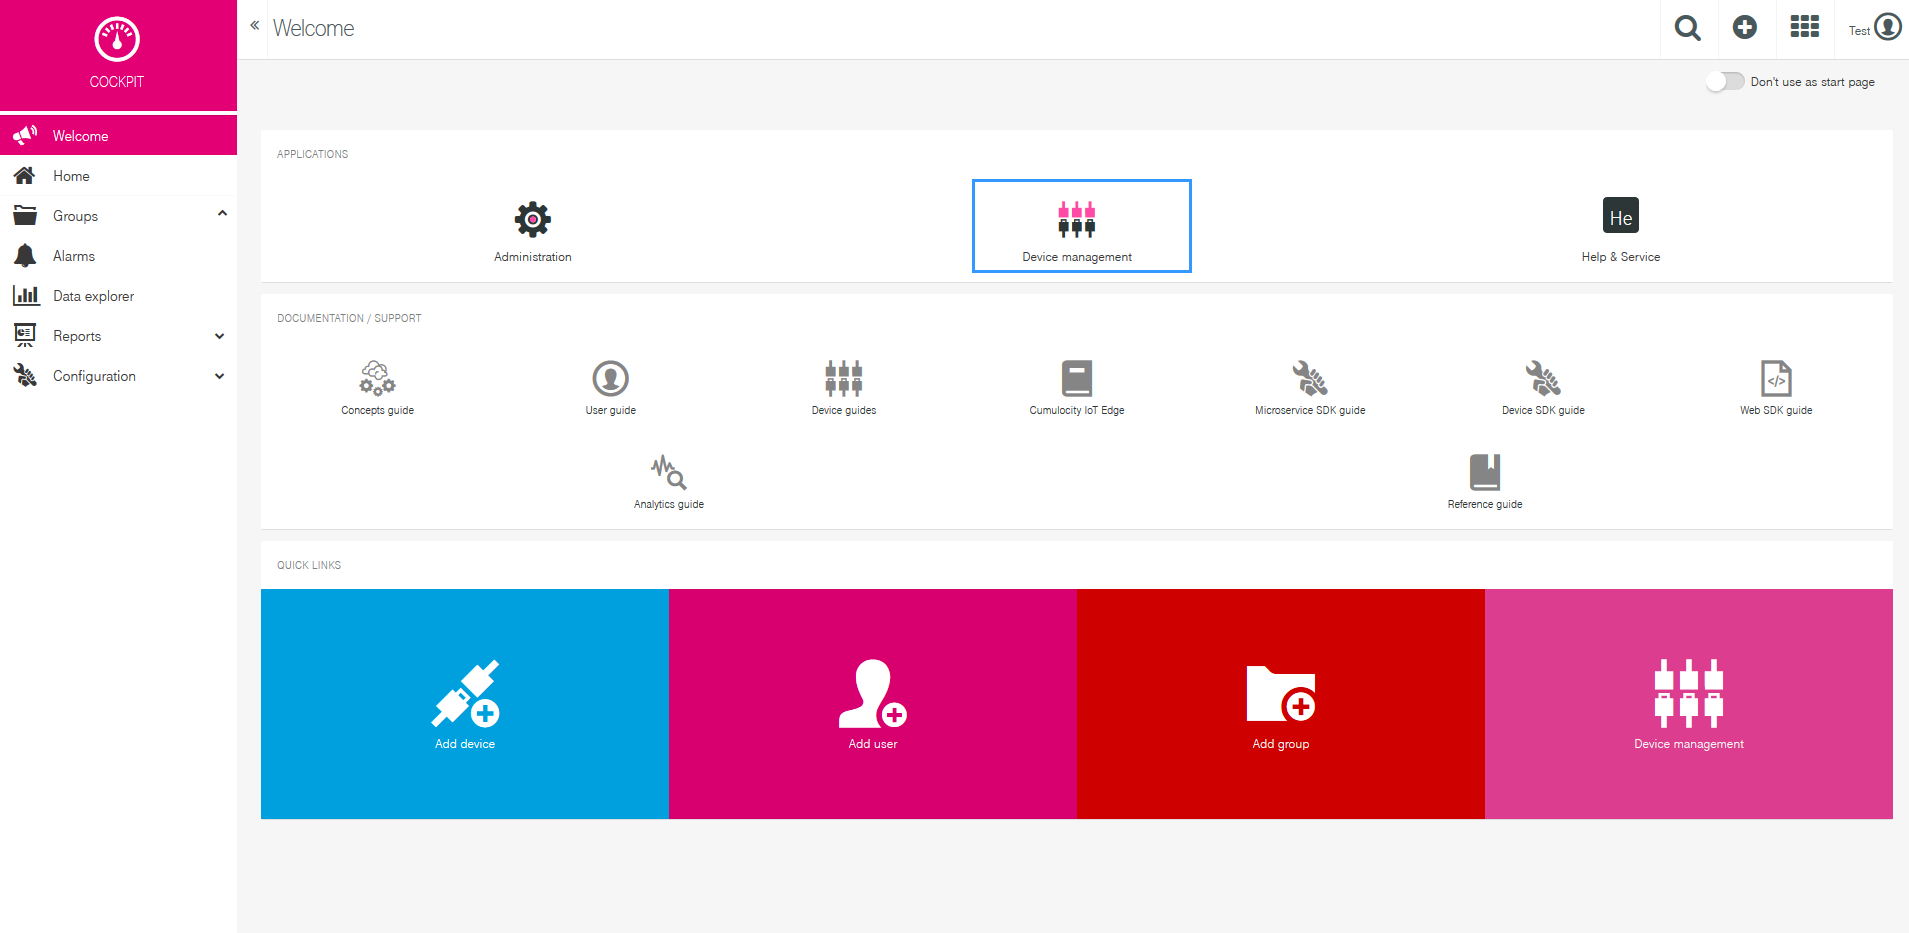
After successfully installing the package and making the required configuration on the router, you now can add the device on Cloud of Things platform, steps for RUT and RUTX series routers are the same. After logging in to the website you are forwarded to Cockpit page. There press Device manager.
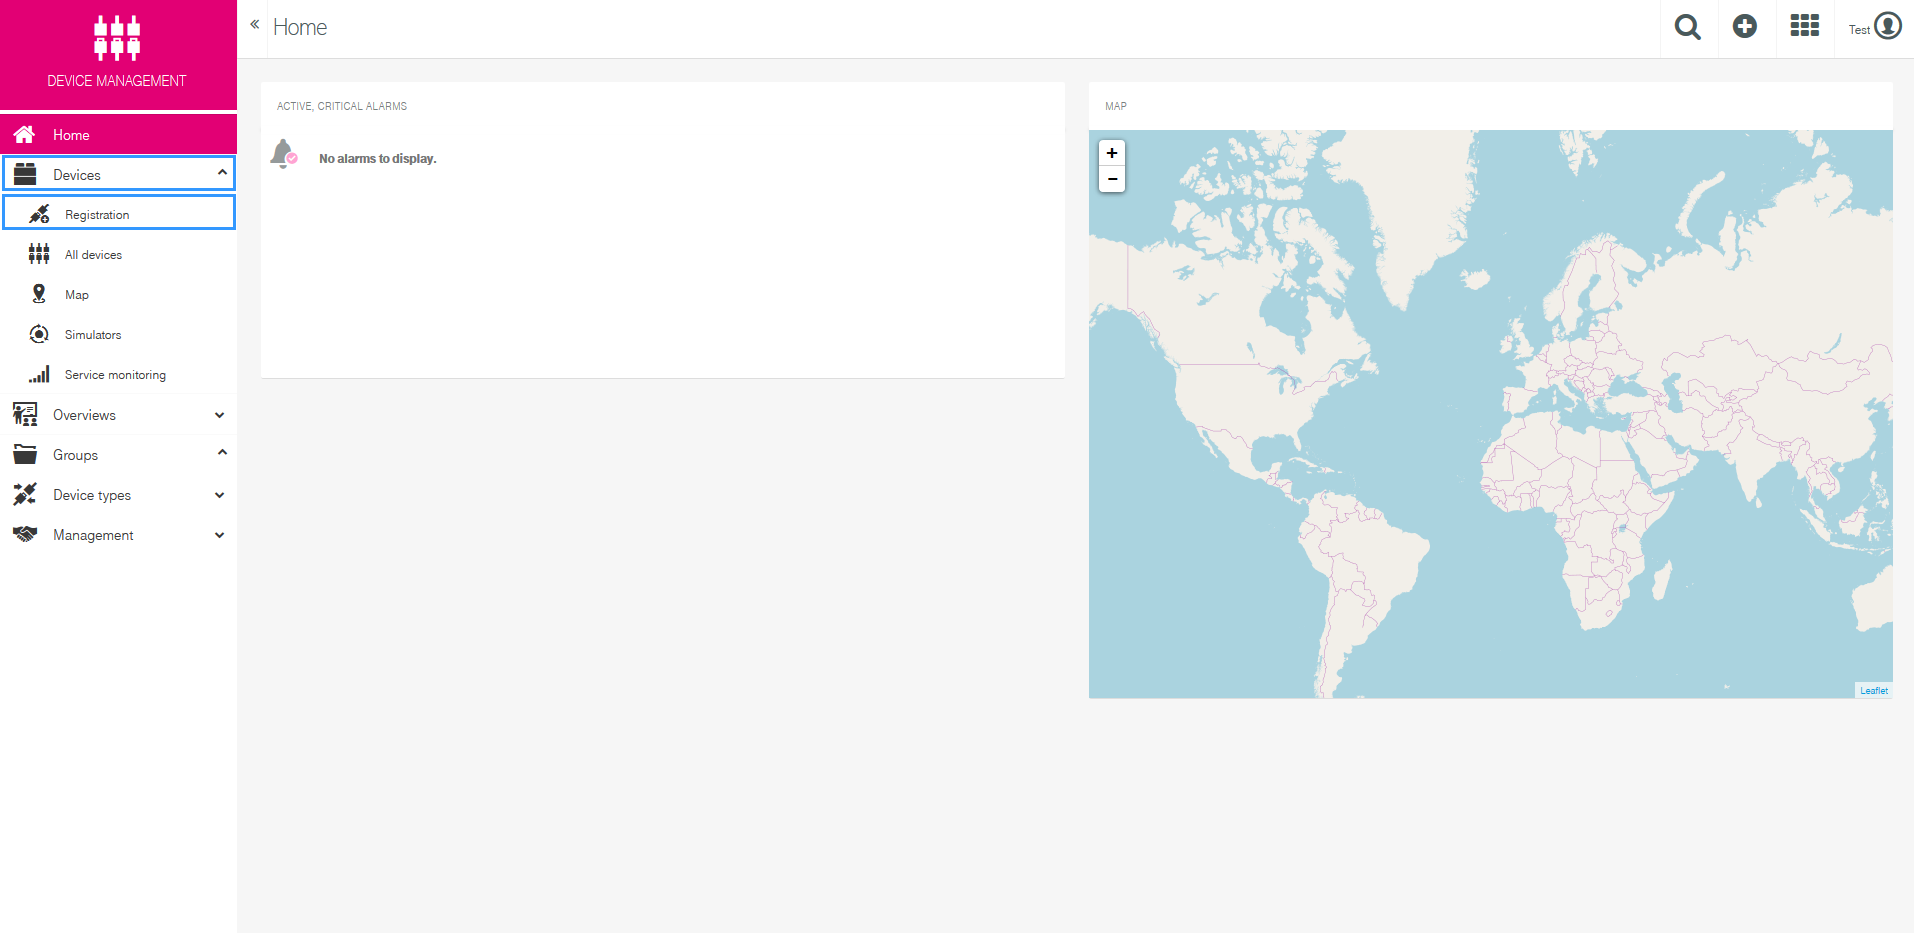
Then select Devices and press Registration.
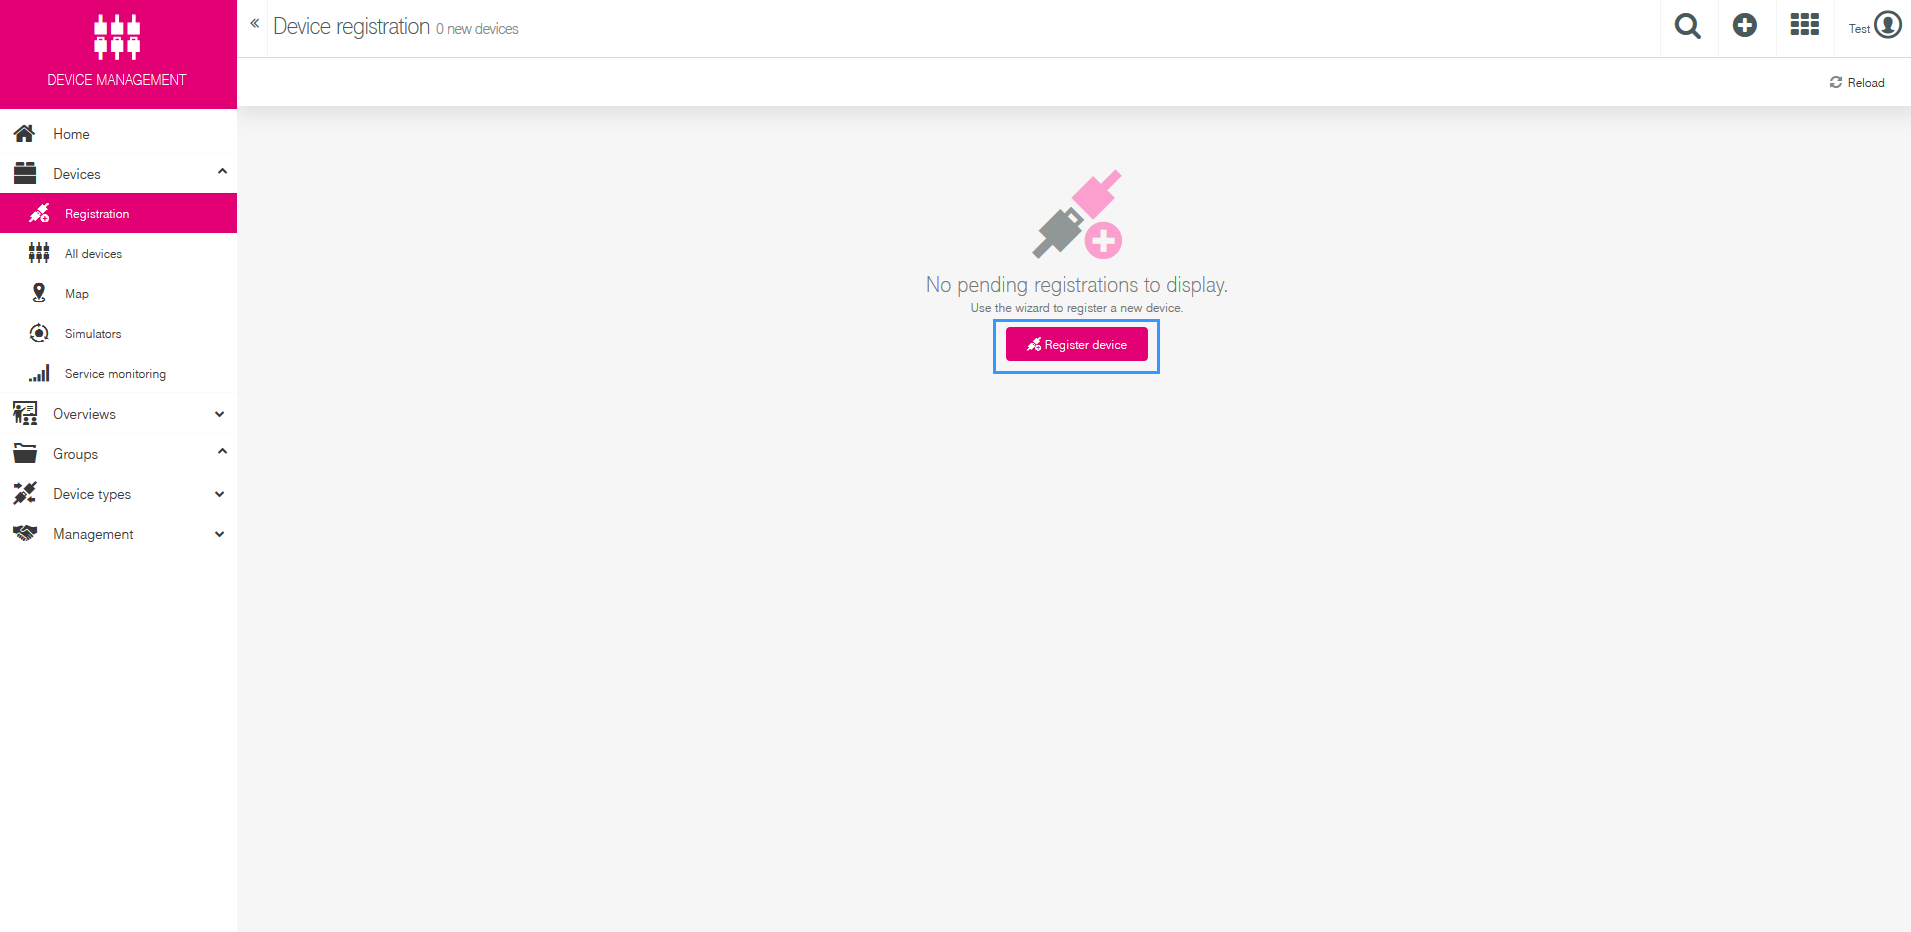
Press Register device.
There are two ways to register your device(s) Bulk and General. Bulk is used when you are registering many devices at once. In this example we will be using the General option.
In Device ID section write the serial number of your router. You can add more than one item by pressing Add another device button. There is a possibility to assign your routers to groups, but we are not doing that in this example.
If everything was done correctly, it will show you that the registration was successful.
Then you will need to Accept the Pending Acceptance.
Finally you will receive a message indicating that the device has been accepted.
After successful device registration, there is one more thing that you need to do in order to start monitoring your equipment. Find your router at All devices page. Then simply press the name of the item and you will be forwarded to the info window.
Here you will need to set the Required interval. This parameter defines how often you expect to hear from the device. If, for example, you set the required interval to 60, you expect the device at least to communicate once in an hour with Cloud of Things. RUT device sends data to the server every 10sec.
If everything was done correctly you should now be able to monitoring your device on Cloud of Things. For more information about this platform visit this website: https://iot.telekom.com/en/platform
External Links
https://iot.telekom.com/en/platform
Disclaimer:
Any of the trademarks, service marks, collective marks, design rights or similar rights that are mentioned, used or cited in the articles are the property of their respective owners.

