Noip.com DDNS configuration: Difference between revisions
No edit summary |
No edit summary Tags: Mobile edit Mobile web edit |
||
| (5 intermediate revisions by one other user not shown) | |||
| Line 1: | Line 1: | ||
Pollo | |||
==Summary== | ==Summary== | ||
This chapter is a guide on configuring a noip.com provider '''DDNS''' instance on RUT routers. | This chapter is a guide on configuring a noip.com provider '''DDNS''' instance on RUT routers. | ||
== | ==Preconditions== | ||
There is one mandatory precondition for DDNS to work - you must have a '''Static or Dynamic Public IP address'''. Dynamic DNS will not work with a '''Shared Public IP'''. You can read up more on this in our article on '''[[Private and Public IP Addresses]]'''. | There is one mandatory precondition for DDNS to work - you must have a '''Static or Dynamic Public IP address'''. Dynamic DNS will not work with a '''Shared Public IP'''. You can read up more on this in our article on '''[[Private and Public IP Addresses]]'''. | ||
| Line 9: | Line 11: | ||
The easiest way to find out this information is to log in to the router's WebUI and check the '''WAN''' widget in the '''Overview''' page. You will be automatically redirected to the Overview page after you log in and the WAN widget will be on the right side of the page, second widget from the top. If the WAN widget displays a Public IP address, your DDNS configuration should work; if it displays a Private IP address, that means you're using a Shared Public IP address and you won't be able to reach your router with the help of DDNS. | The easiest way to find out this information is to log in to the router's WebUI and check the '''WAN''' widget in the '''Overview''' page. You will be automatically redirected to the Overview page after you log in and the WAN widget will be on the right side of the page, second widget from the top. If the WAN widget displays a Public IP address, your DDNS configuration should work; if it displays a Private IP address, that means you're using a Shared Public IP address and you won't be able to reach your router with the help of DDNS. | ||
[[File:Private vs public ip.png]] | [[File:Private vs public ip.png|1150px]] | ||
==Step 1: noip.com configuration== | ==Step 1: noip.com configuration== | ||
| Line 38: | Line 40: | ||
'''<big>Example of list</big>''' | '''<big>Example of list</big>''' | ||
[[File:Hostlist2.png]] | [[File:Hostlist2.png|1150px]] | ||
==Step 2: Router configuration== | ==Step 2: Router configuration== | ||
| Line 97: | Line 99: | ||
==See also== | ==See also== | ||
[[Dynamic DNS]] - general information on the DDNS service. | |||
[[DDNS Configuration Examples]] - additional examples for different DDNS providers. | |||
==External links== | ==External links== | ||
https://www.noip.com | https://www.noip.com | ||
Latest revision as of 23:27, 9 February 2020
Pollo
Summary
This chapter is a guide on configuring a noip.com provider DDNS instance on RUT routers.
Preconditions
There is one mandatory precondition for DDNS to work - you must have a Static or Dynamic Public IP address. Dynamic DNS will not work with a Shared Public IP. You can read up more on this in our article on Private and Public IP Addresses.
The easiest way to find out this information is to log in to the router's WebUI and check the WAN widget in the Overview page. You will be automatically redirected to the Overview page after you log in and the WAN widget will be on the right side of the page, second widget from the top. If the WAN widget displays a Public IP address, your DDNS configuration should work; if it displays a Private IP address, that means you're using a Shared Public IP address and you won't be able to reach your router with the help of DDNS.
Step 1: noip.com configuration
First thing we need to do is to visit the website of our system. You can access the website by entering www.noip.com/login in your internet browser's URL bar.
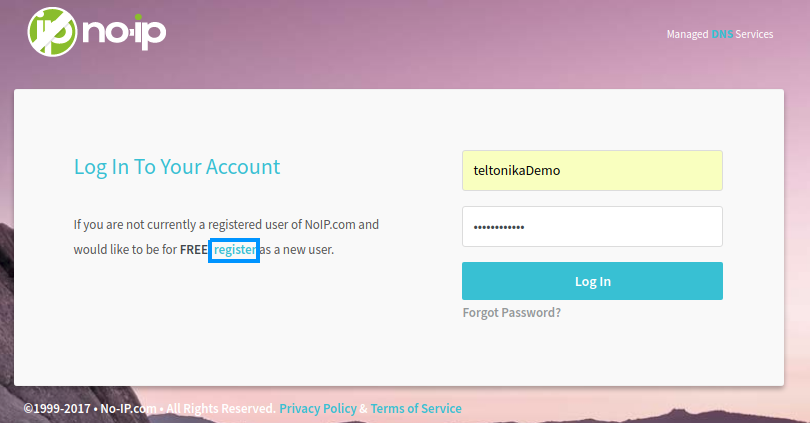
Login screen
We need to login into noip.com system using our credentials. If you don't have a registered account then you need to create one. You can do that by clicking register.
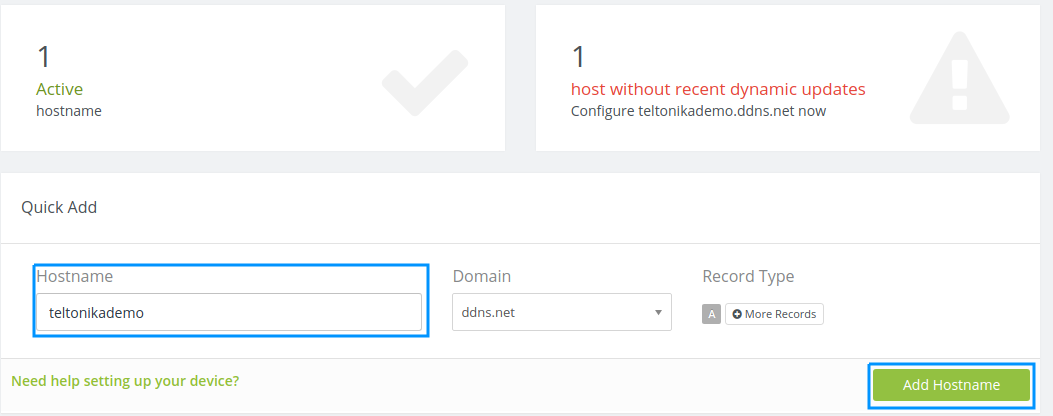
Create host
In the opened browser window, enter the name of the host and click Add Hostname
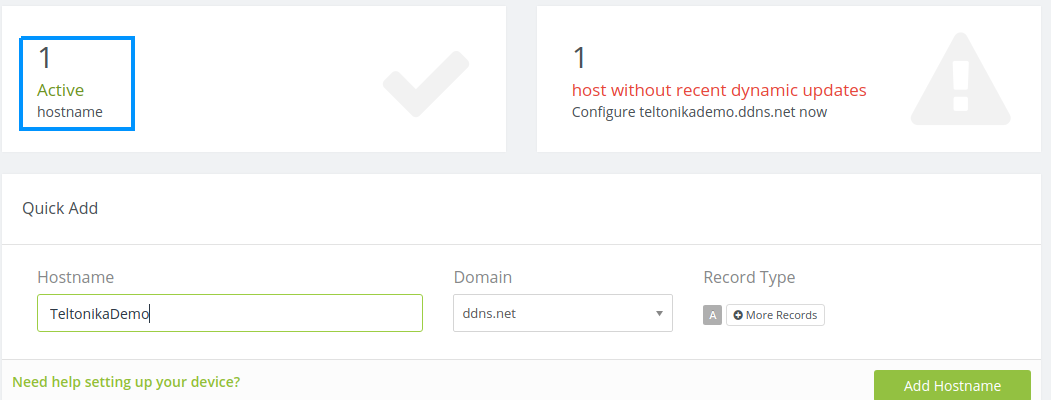
List of hosts
You can preview the list of hosts you have created by clicking the button Active
Example of list
Step 2: Router configuration
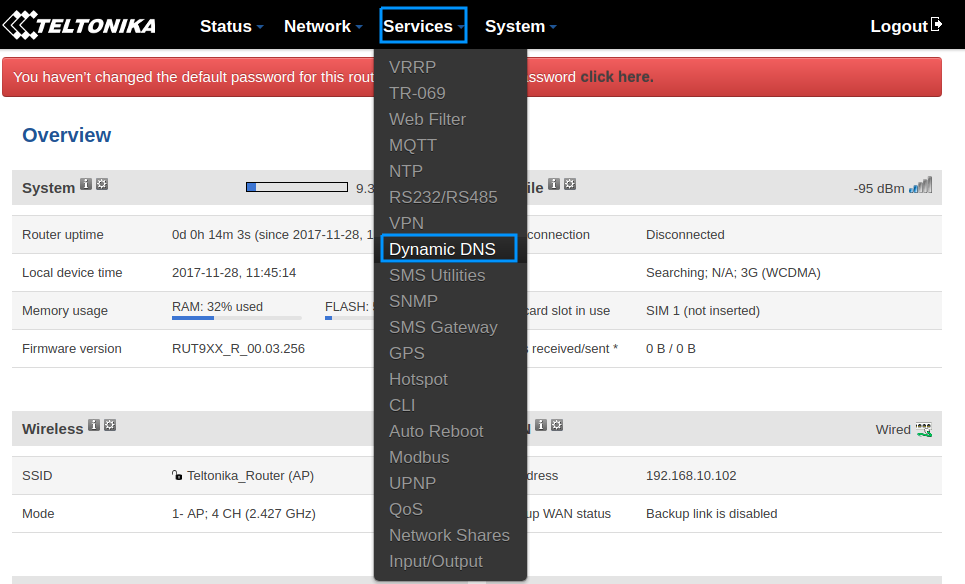
Now we need to open our RUT homepage. You can access the website by entering 192.168.1.1 in your internet browser's URL bar.
Open the DDNS configuration panel by clicking Services → Dynamic DNS
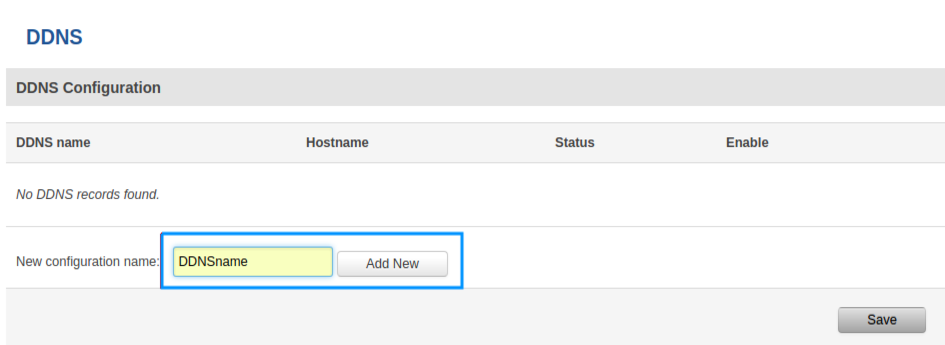
DDNS configuration name
Type in your DDNS configuration name and click Add new
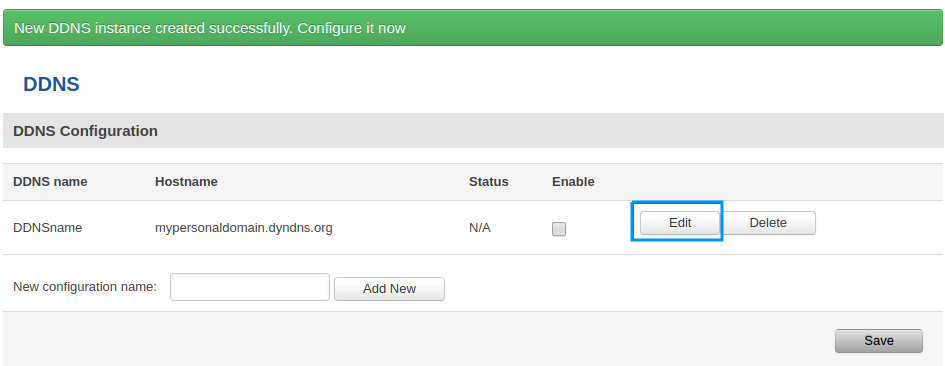
Click the Edit button to edit your DDNS instance configuration
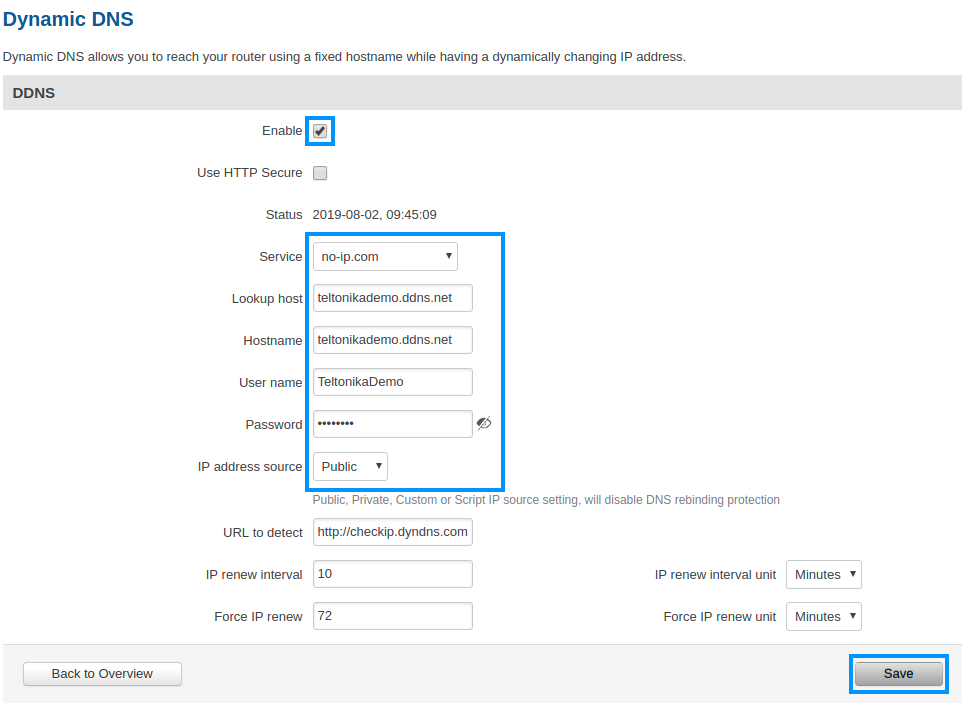
Configuration settings
Check the Enable box
Choose the noip.com service
Type your hostname, username, password and click Save
Step 3: Try your DDNS
Status
Wait up to 5 minutes from the time you saved the changes.
In the Status column, you can see when the last time the DDNS was updated.
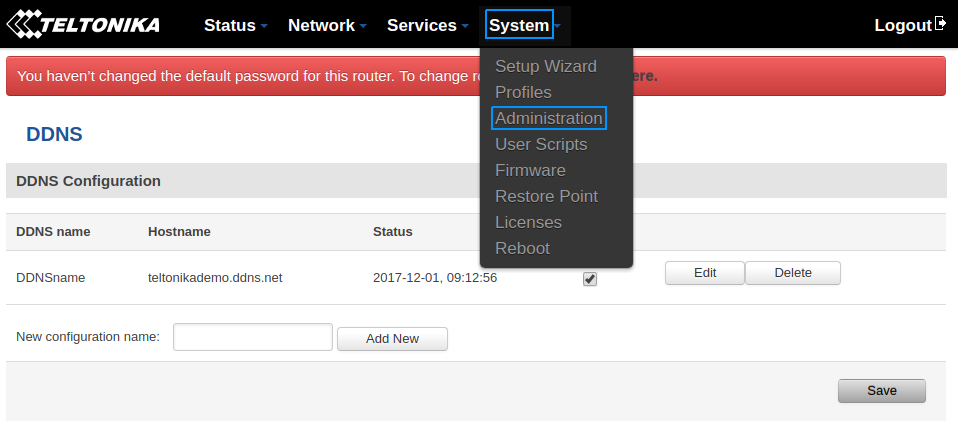
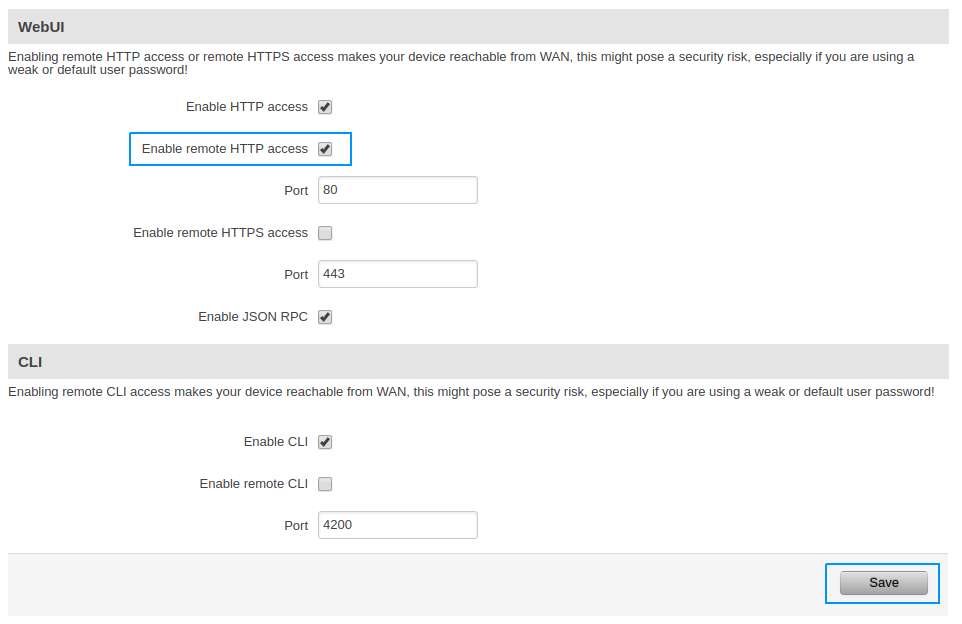
Enable remote HTTP access
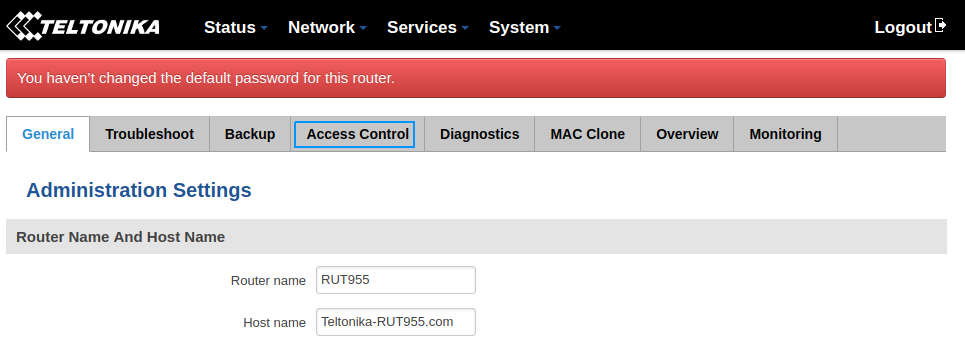
Open Administration page by clicking System → Administration
Click Access Control
Check Enable remote HTTP access box and click Save
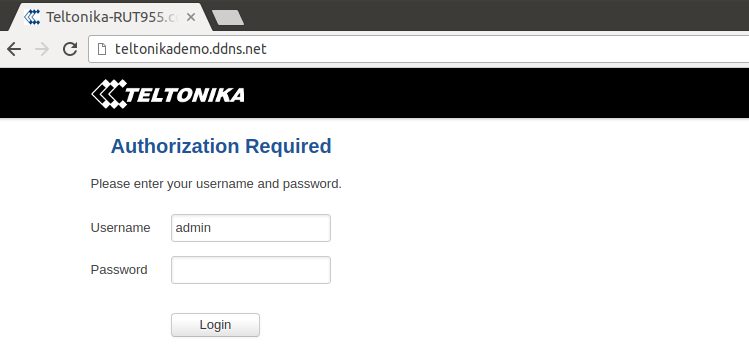
Connect to your host
Try to access the host by entering your hostname in your internet browser's URL bar.
See also
Dynamic DNS - general information on the DDNS service.
DDNS Configuration Examples - additional examples for different DDNS providers.


