Teltonika ID: Difference between revisions
No edit summary |
|||
| (4 intermediate revisions by 2 users not shown) | |||
| Line 20: | Line 20: | ||
[[File:Rms teltonika id install confirm v2.mp4|750px]] | [[File:Rms teltonika id install confirm v2.mp4|750px]] | ||
==Set up Teltonika ID on RMS== | ==Set up Teltonika ID on RMS== | ||
To | To change your 2FA method to Teltonika ID, in the top right corner click on your '''username''' and in the dropdown menu select '''Account settings''' | ||
Step by step instructions. | |||
[[File: | [[File:User settings.png|border|class=tlt-border|750px]] | ||
In the '''Account settings''' page, click on '''Security''' in the left sidebar. | |||
[[File: | [[File:Rms account settings security.png|border|class=tlt-border|300px]] | ||
There you will see a field called '''2-STEP VERIFICATION''' where you will be able to select '''Teltonika ID''' as verification type. | |||
[[File:Verification.png|border|class=tlt-border| | [[File:Verification.png|border|class=tlt-border|750px]] | ||
After selecting the verification type and saving the settings you will be asked to confirm your password and add a verification device. | After selecting the verification type and saving the settings you will be asked to confirm your password and add a verification device. | ||
[[File:Verification dev.png|border|class=tlt-border]] | [[File:Verification dev.png|border|class=tlt-border|500px]] | ||
Open Teltonika ID app in a smart device and in the top left corner click on [[File:IconH.png|20px]] icon and select ''' | Open Teltonika ID app in a smart device and in the top left corner click on [[File:IconH.png|20px]] icon and select '''Pair a system''' and enter registration code. | ||
[[File:RegV1.png| | [[File:RegV1.png|310px]] [[File:Reg devV1.jpg|300px]] | ||
==Log in with Teltonika ID== | ==Log in with Teltonika ID== | ||
Latest revision as of 13:20, 12 August 2024
Main Page > IoT Platforms > RMS > Teltonika IDSummary
Teltonika ID - smart solution which provides two-factor authentication that adds an additional layer of security to the authentication process. Teltonika ID application is designed to prevent unauthorized users from gaining access to your RMS account even if your username and password were compromised.
Download and install Teltonika ID
You can download Teltonika ID app into your smartphone or tablet from Google Play and App Store.
 |
 |
After installing the app you will be asked to enter an email address and confirm it. After confirmation, you will have to create four digits PIN code and confirm it.
Set up Teltonika ID on RMS
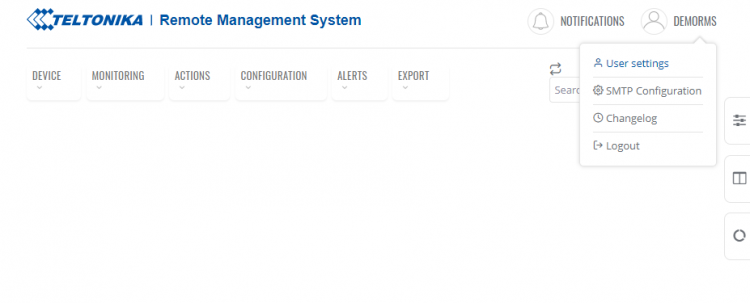
To change your 2FA method to Teltonika ID, in the top right corner click on your username and in the dropdown menu select Account settings
Step by step instructions.
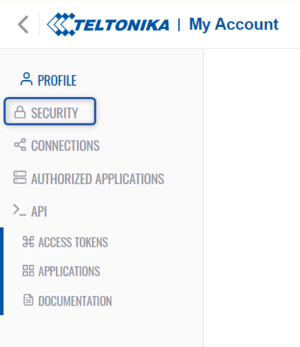
In the Account settings page, click on Security in the left sidebar.
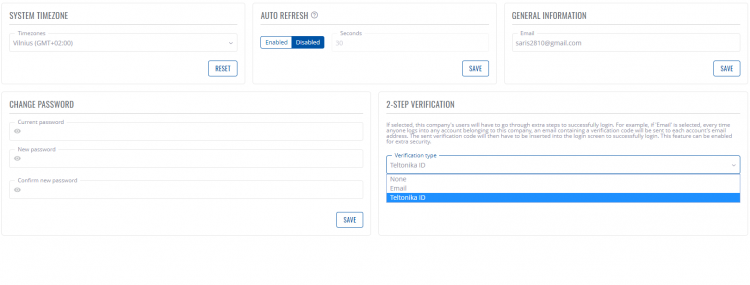
There you will see a field called 2-STEP VERIFICATION where you will be able to select Teltonika ID as verification type.
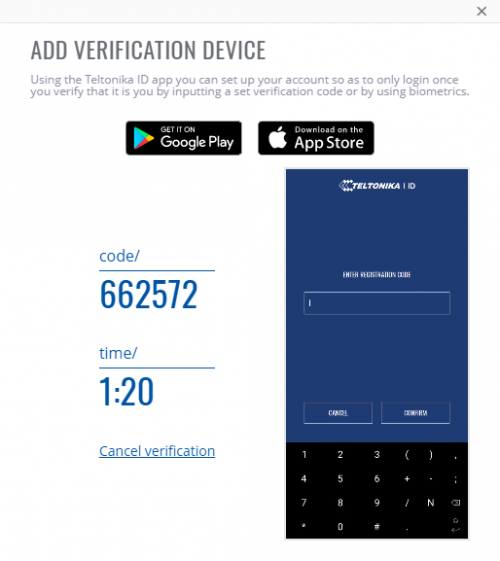
After selecting the verification type and saving the settings you will be asked to confirm your password and add a verification device.
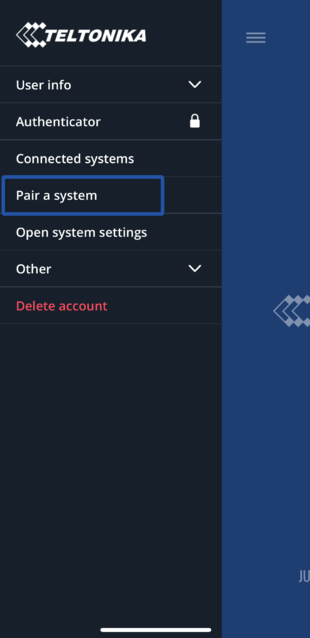
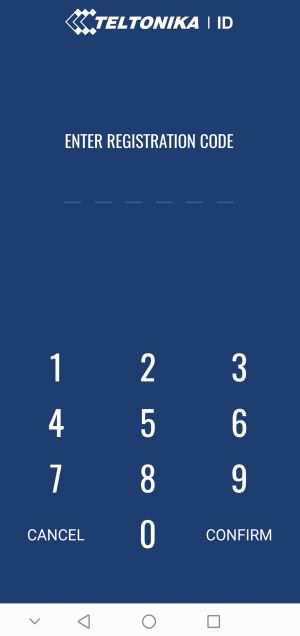
Open Teltonika ID app in a smart device and in the top left corner click on ![]() icon and select Pair a system and enter registration code.
icon and select Pair a system and enter registration code.
Log in with Teltonika ID
After successfully setting up Teltonika ID next time when you will try to login to RMS account after entering your username and password notification will be sent to your Teltonika ID application and you will be asked to verify login with PIN code or fingerprint.
In situations where more than one device will be added notification will be sent to all devices and the user will be able to verify login or ignore it.
Deleting Teltonika ID (IMPORTANT)
Please be aware that before deleting the Teltonika ID application you must disable 2-step verification in your RMS account settings. Otherwise, you will lose the ability to connect to the RMS and will have to contact Teltonika support.

