RUT240 Configuration Backup: Difference between revisions
(Created page with "{{Template: Networking_rut_configuration_examples_configuration_backup <!--------DEVICE DETAILS--------> | name = RUT240 | series = RUT | fw_version = RUT2XX_R_00.01...") |
No edit summary |
||
| Line 1: | Line 1: | ||
{{Template: | {{Template: Networking_rutos_configuration_examples_configuration_backup | ||
<!--------DEVICE DETAILS--------> | <!--------DEVICE DETAILS--------> | ||
| name = RUT240 | | name = RUT240 | ||
Latest revision as of 07:32, 10 June 2020
Main Page > EOL Products > RUT240 > RUT240 Configuration Examples > RUT240 Configuration BackupThe information in this page is updated in accordance with the RUT2XX_R_00.01.12.2 firmware version.
Introduction
This page contains instructions on how to generate and utilize configuration backup files on RUT240 devices.
Generating a new configuration file
A configuration backup file contains a device's entire configuration information, including the admin password. After you create a new backup file, you can use it to restore the configuration of the current device or upload it to other identical devices effectively applying the configuration to them.
To generate a configuration backup file, follow the steps described below.
- Configure the device according to your needs.
- Go to the System → Administration → Backup page and click the 'Download' button.

Uploading a configuration file to other devices
You can upload configuration backup files to your device if they were generated on an identical device using the same or an older firmware version (backup files created on devices with newer firmware cannot be uploaded to devices using an older firmware version).
Via the WebUI
To upload and apply a configuration backup file via the device's WebUI, follow the steps described below.
- Go to the System → Administration → Backup page.
- Click the 'Choose File' button and find your backup file on your computer.
- Click the 'Upload Archive' button.

- Wait for the device to reboot.
Via RMS
To upload and apply a configuration backup file via RMS, follow the steps described below.
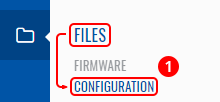
- Login to your RMS account and go to the Files → Configuration page.
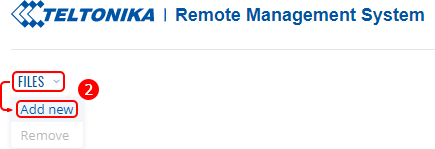
- Hover your mouse cursor over the Files tab and click Add new.
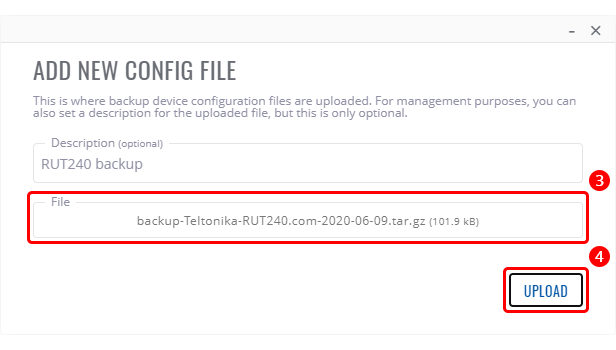
- Click the File field and find your backup file.
- Click the 'Upload' button.
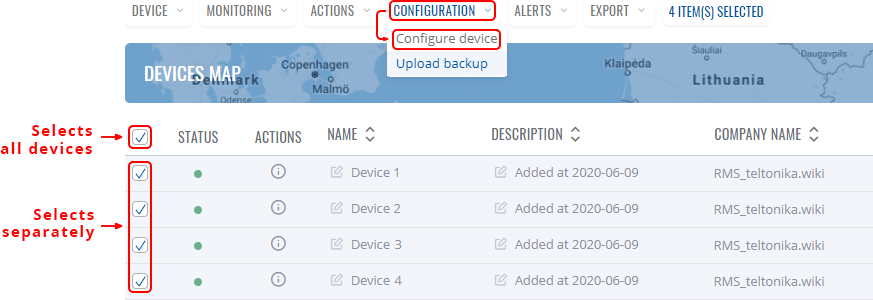
- Go back to the RMS home page and select your device in the device table.
- Hover your mouse cursor over the Configuration tab and click Configure device.

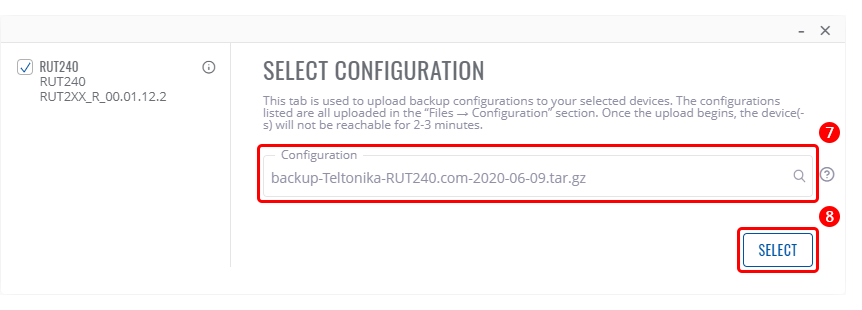
- Click the Configuration field and find your backup file.
- Click the 'Select' button.
Upload to multiple devices
You can also upload the same configuration backup file to multiple devices at once using the same method. Simply select however many devices you wish to upload to and click Upload backup.

