Template:Rms manual management groups add new: Difference between revisions
No edit summary |
No edit summary |
||
| (One intermediate revision by the same user not shown) | |||
| Line 7: | Line 7: | ||
[[File:RMS-device-menu-left-sidebar-panel.jpg]] [[File:rms_manual_top_add_new_tag_v1.png]] | [[File:RMS-device-menu-left-sidebar-panel.jpg]] [[File:rms_manual_top_add_new_tag_v1.png]] | ||
# Select a company, enter a tag name, add the description (optional) and finally click "Add". | # Select a company, enter a tag name, add the description (optional) and finally click "Add". | ||
# At the top of your screen you will get a notification: '''<span style="color:#368d3b">Tag created successfully</span>'''. | # At the top of your screen you will get a notification: '''<span style="color:#368d3b">Tag created successfully</span>'''. | ||
# The newly created tag will be visible in the '''Tags''' table. | # The newly created tag will be visible in the '''Tags''' table. | ||
[[File:Rms_manual_top_add_new_tag_pop_up_v1.png]] | |||
Latest revision as of 23:15, 10 March 2021
The Add new tag function is used to add new device tags to your RMS profile.
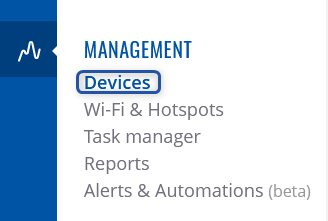
To create a new tag go to the RMS web page, Left sidebar panel, (Management → Devices) and click on Devices submenu.
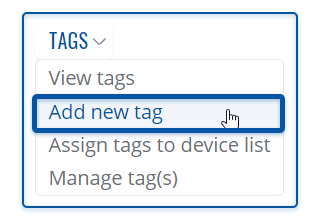
Move your mouse pointer to the Top control Tags menu and select Add new Tag (Tags → Add new Tag).
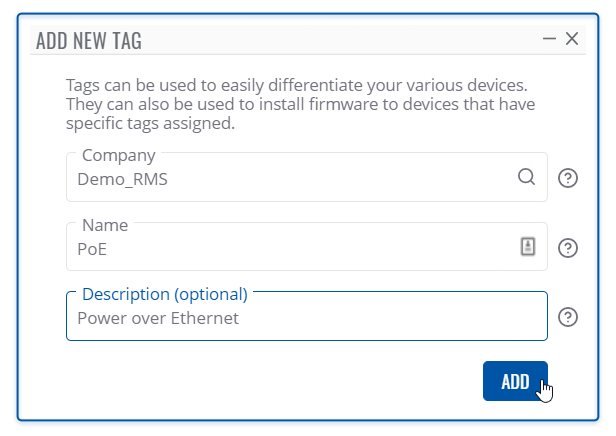
- Select a company, enter a tag name, add the description (optional) and finally click "Add".
- At the top of your screen you will get a notification: Tag created successfully.
- The newly created tag will be visible in the Tags table.


