Template:Rms manual users add new user: Difference between revisions
No edit summary |
No edit summary |
||
| Line 25: | Line 25: | ||
* A pop-up box informing that the user was registered successfully will appear as well as a new entry in the user table: | * A pop-up box informing that the user was registered successfully will appear as well as a new entry in the user table: | ||
[[File:How to add new user to rms part 3 v1.png]] <br> [[File:How to add new user to rms part 4 | [[File:How to add new user to rms part 3 v1.png]] <br> [[File:How to add new user to rms part 4 v2.png]] | ||
---- | ---- | ||
* The user will receive an email with its login information: | * The user will receive an email with its login information: | ||
[[File:How to add new user to rms part 5 v1.png]] | [[File:How to add new user to rms part 5 v1.png]] | ||
Revision as of 10:24, 15 May 2018
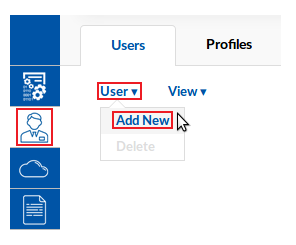
The Add new function is used to add new users to your RMS profile.
- Scroll your mouse pointer to the User submenu (Users → User) and click "Add new":
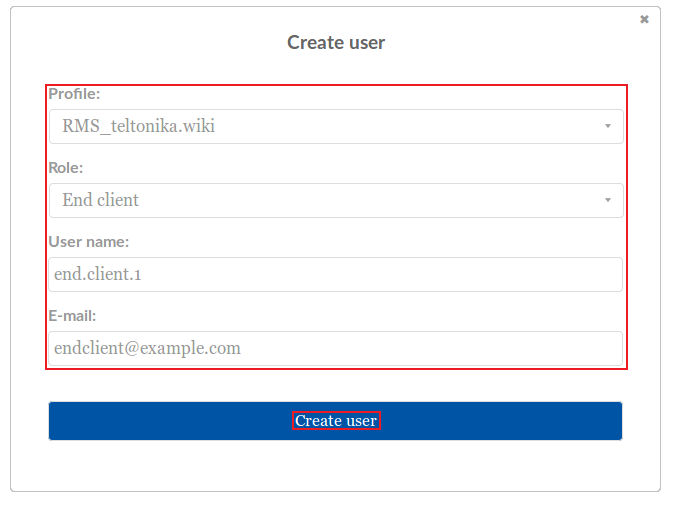
- A pop-box with user parameters will appear. All fields are mandatory, please fill them out. After everything is in order, click "Create user":
- A pop-up box informing that the user was registered successfully will appear as well as a new entry in the user table:
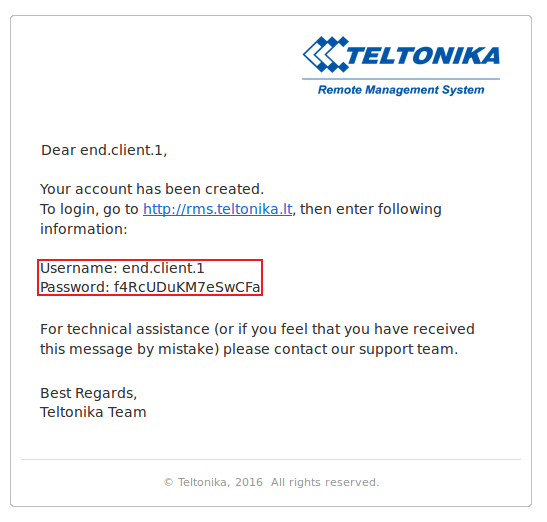
- The user will receive an email with its login information:


