VXLAN Configuration Example: Difference between revisions
| Line 53: | Line 53: | ||
[[File:Vxlan over wired lan physical settings.png|border|class=tlt-border]] | [[File:Vxlan over wired lan physical settings.png|border|class=tlt-border]] | ||
===RUT2 | ===VXLAN configuration on RUT2 device=== | ||
====RUT2 WAN configuration==== | ====RUT2 WAN configuration==== | ||
Revision as of 14:58, 20 September 2024
VXLAN support has been introduced starting with firmware version 00.07.09 and later. It is advised to update to the latest firmware available.
The information in this page is updated in accordance with 00.07.09.1 firmware version.
Summary
VXLAN (Virtual Extensible LAN) encapsulates Layer 2 Ethernet frames within Layer 3 packets, creating a Layer 2 network over a Layer 3 infrastructure. It acts as a virtual switch, interconnecting routers and all devices connected to them into an extended Layer 2 network, enhancing scalability and flexibility. In this configuration example, three methods to configure a VXLAN tunnel between two Teltonika devices will be demonstrated.
Prerequisites
- Two routers with installed VXLAN packages, will refer to these as RUT1 and RUT2
- End device like Laptop or Mobile Phone
- Two Public IP addresses for configuring VXLAN over the Mobile network
- One Public IP address for configuring VXLAN over the VPN tunnel
VXLAN package Installation
First, install the VXLAN package on both RUT1 and RUT2 devices. This package is available on firmware version 07.09 and later, therefore, updating the router's firmware is a mandatory step if it is outdated. After the update, the package can be found in the Package Manager in the WebUI.
Navigate to System > Package Manager
- In the search bar look for vxlan packet
- Click Install
Configuration of VXLAN over Wired WAN
In this section, the setup of VXLAN over Wired WAN using RUT1 and RUT2 devices will be described. The process will show how to create a VXLAN tunnel to connect the devices and allow them to communicate over the wired network.
VXLAN configuration on RUT1 device
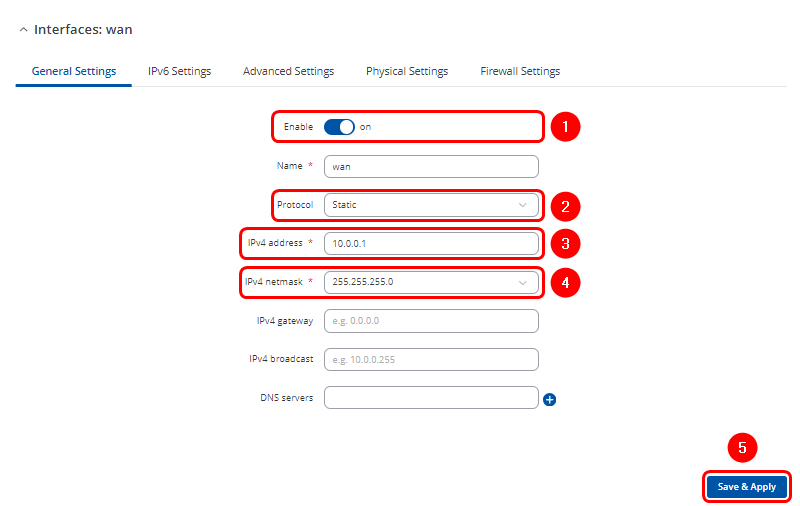
Navigate to the Network > WAN section in the WebUI, then click the Edit button for the wired WAN interface.

- Configuration window will open. Adjust following:
- Ensure interface is Enabled
- Change Protocol to Static
- Enter Ipv4 address for communication in this Wired WAN network
- Select your preferable IPv4 netmask
- Click
 twice
twice
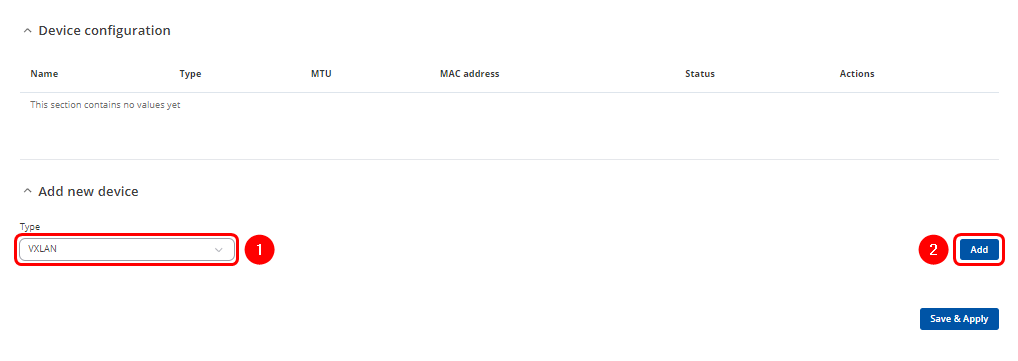
Navigate to the Network > Devices
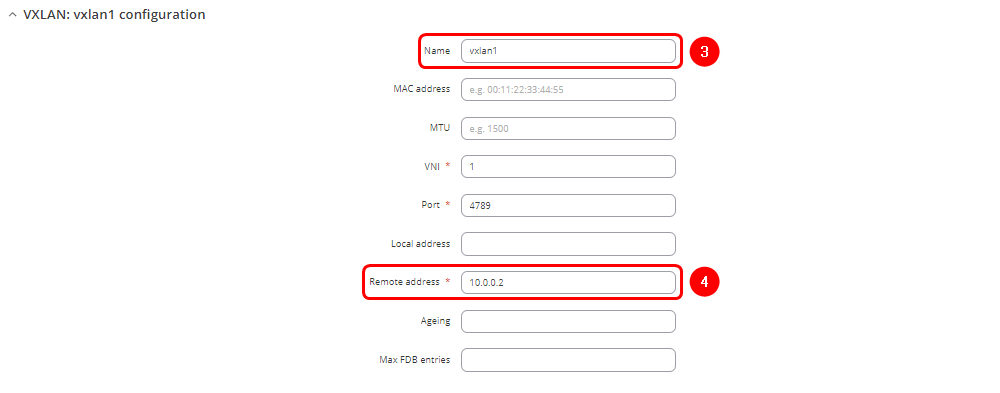
- Enter name of the new VXLAN interface
- Enter the Remote address corresponding to RUT2 wired WAN interface IP address
- Click
 twice
twice
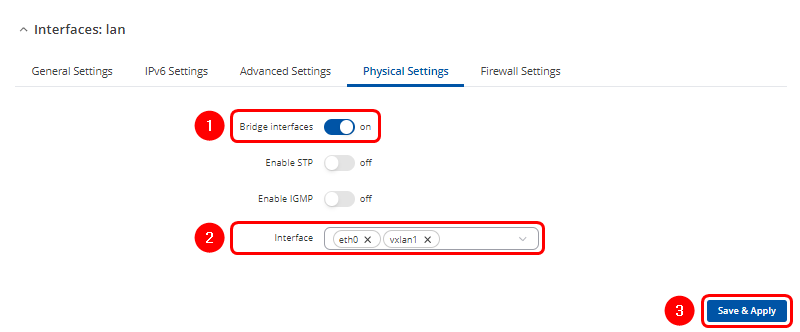
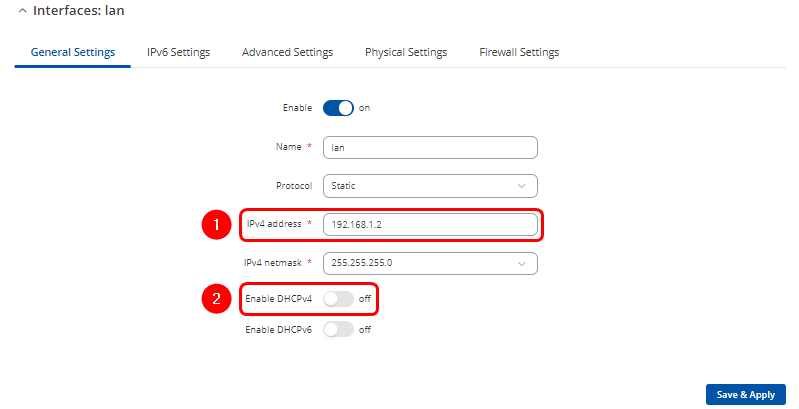
Navigate to Network > LAN and click Edit to modify existing LAN interface
- Make sure Bridge interfaces is enabled
- Click on the droplist and add vxlan1 interface
VXLAN configuration on RUT2 device
RUT2 WAN configuration
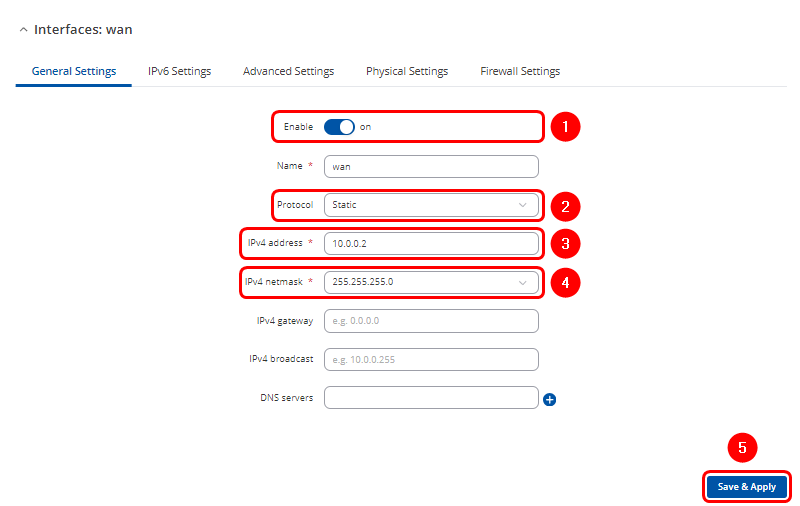
Navigate to the Network > WAN section in the WebUI, then click the Edit button for the wired WAN interface.

Configuration window will open. Adjust following:
- Ensure interface is Enabled
- Change Protocol to Static
- Enter Ipv4 address for communication in this Wired WAN network
- Select your preferable IPv4 netmask
- Click
 twice
twice
RUT2 VXLAN configuration
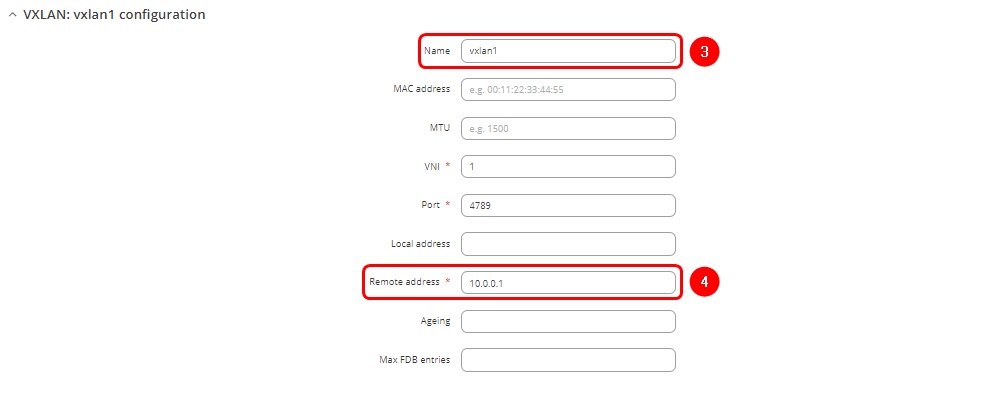
Navigate to the Network > WAN
- Enter name of the new VXLAN interface
- Enter the Remote address corresponding to RUT2 wired WAN interface IP address
- Click
 twice
twice
RUT2 LAN configuration
Configuring VXLAN over 2 Public IP addresses
The same steps will be followed to configure the WAN interfaces on RUT1 and RUT2, which will be on the same subnet but with different IP addresses, enabling layer 3 communication between them.


