Template:Rms actions generate password: Difference between revisions
Created page with "To generate password(s) for your selected device(s) go to the RMS web page, Left sidebar panel, (<b>Management → Overview</b>) and click on <b>Overview</b> submenu. Move yo..." |
No edit summary |
||
| Line 1: | Line 1: | ||
==Generate password== | |||
'''Generate password''' feature is used to generate random passwords of a certain length for selected devices. Selected devices will have their passwords changed to random ones of a given length. All generated passwords can then be downloaded in one convenient CSV file where all devices and their new passwords are listed. | |||
'''<span style="color:#0455a4"><big>Important!</big></span>''' | |||
* The generated passwords CSV file can only be '''downloaded ONCE''', after which it will be removed and no longer stored from the server. | |||
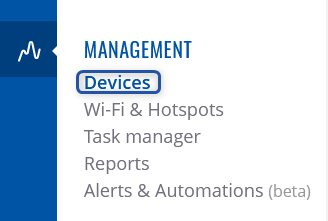
To generate password(s) for your selected device(s) go to the RMS web page, Left sidebar panel, (<b>Management → Overview</b>) and click on <b>Overview</b> submenu. | To generate password(s) for your selected device(s) go to the RMS web page, Left sidebar panel, (<b>Management → Overview</b>) and click on <b>Overview</b> submenu. | ||
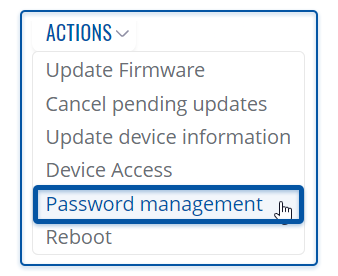
Move your mouse pointer to the Top control '''Actions''' menu and select '''Generate password''' (Actions → Generate password). | Move your mouse pointer to the Top control '''Actions''' menu and select '''Generate password''' (Actions → Generate password). | ||
[[File:RMS-device-menu-left-sidebar-panel.jpg]] [[File:RMS-top-menu-actions- | [[File:RMS-device-menu-left-sidebar-panel.jpg]] [[File:RMS-top-menu-actions-generate-password.png]] | ||
The '''Generate password''' function provides you an option to generate new password(s) for your selected device(s). | The '''Generate password''' function provides you an option to generate new password(s) for your selected device(s). | ||
<br> | <br> | ||
[[File: | [[File:RMS-actions-generate-password-instructions.gif]] | ||
<br> | <br> | ||
=== | ===Instruction=== | ||
---- | ---- | ||
# Locate and select router(s) in the device table. | |||
# Locate and select | # Move your mouse pointer to the "Actions" menu and click '''Generate password'''. | ||
# Move your mouse pointer to the "Actions" menu and click ''' | # New pop-up window will open, enter the length of the password and check the checkmark to include special symbols (optional). | ||
# New pop-up window will open, | # Click the button Generate. | ||
# In the new pop-up window you will get a message: '''<span style="color:#6CAF8F">✔</span> Device password was change successfully.''' Click '''Close''' button. | |||
# | # You will get a Warning message '''Generated passwords can only be downloaded ONCE...'''. Click '''Ok''' button to continue. | ||
# | |||
[[File:RMS-generated-passwords-tab.png]] | |||
===Download generated CSV password file=== | |||
== | |||
---- | ---- | ||
# Follow the steps above to open '''Generate password''' window. | |||
# Click on '''Generated Passwords''' to open the download window. | |||
# Click on [[File:RMS-download-button-icon.png]] '''Download password list''' icon to download the CSV file. | |||
[[File:RMS- | [[File:RMS-generated-passwords-tab-window.png]] | ||
Below is an image of the generated CSV file. | |||
[[File:RMS-generate-password-CSV-file-example.png]] | |||
Revision as of 13:36, 7 August 2019
Generate password
Generate password feature is used to generate random passwords of a certain length for selected devices. Selected devices will have their passwords changed to random ones of a given length. All generated passwords can then be downloaded in one convenient CSV file where all devices and their new passwords are listed.
Important!
- The generated passwords CSV file can only be downloaded ONCE, after which it will be removed and no longer stored from the server.
To generate password(s) for your selected device(s) go to the RMS web page, Left sidebar panel, (Management → Overview) and click on Overview submenu.
Move your mouse pointer to the Top control Actions menu and select Generate password (Actions → Generate password).
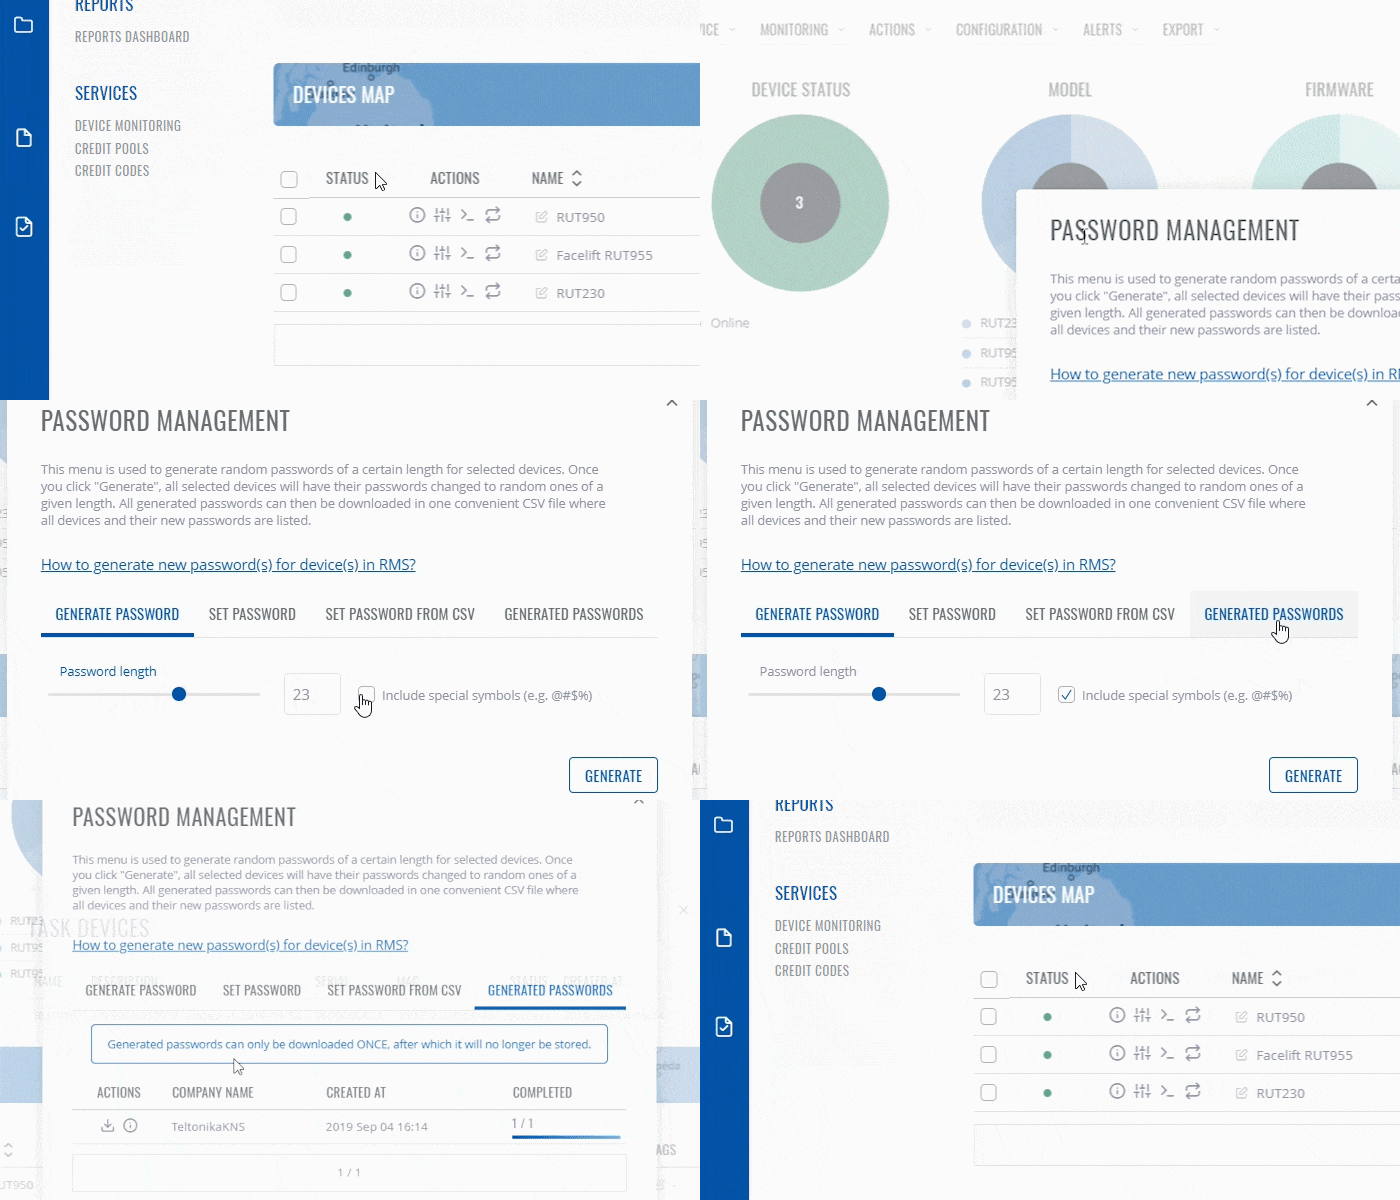
The Generate password function provides you an option to generate new password(s) for your selected device(s).
Instruction
- Locate and select router(s) in the device table.
- Move your mouse pointer to the "Actions" menu and click Generate password.
- New pop-up window will open, enter the length of the password and check the checkmark to include special symbols (optional).
- Click the button Generate.
- In the new pop-up window you will get a message: ✔ Device password was change successfully. Click Close button.
- You will get a Warning message Generated passwords can only be downloaded ONCE.... Click Ok button to continue.
Download generated CSV password file
- Follow the steps above to open Generate password window.
- Click on Generated Passwords to open the download window.
- Click on
 Download password list icon to download the CSV file.
Below is an image of the generated CSV file.


