AWS MQTT cloud connection: Difference between revisions
(Created page with "=Introduction= In this article you will find instructions on how to setup AWS IoT as a MQTT Broker and how to setup a RUT router as a MQTT Publisher and send data over to this...") |
No edit summary |
||
| Line 7: | Line 7: | ||
You will need: | You will need: | ||
* An AWS account | |||
* A router from the RUT2xx, RUT9xx or RUTXxx series | * A router from the RUT2xx, RUT9xx or RUTXxx series | ||
* | * A computer with mosquitto application (optional) | ||
=Setting up AWS IoT= | =Setting up AWS IoT= | ||
First off, open the AWS Management Console and login with your credentials. After that, you will see a screen similar to this: | First off, open the [https://aws.amazon.com/pt/console/ AWS Management Console] and login with your credentials. After that, you will see a screen similar to this: | ||
[[File:Image987.png|none|thumb| | [[File:Image987.png|none|thumb|862x862px]] | ||
On the search bar on the top, search for "IoT Core", and click on the first search result. You will see a screen like the one below, open the "Manage" section and click on "Things". | On the search bar on the top, search for "IoT Core", and click on the first search result. You will see a screen like the one below, open the "Manage" section and click on "Things". | ||
[[File:Image986.png|left|thumb|865x865px]] | [[File:Image986.png|left|thumb|865x865px]] | ||
Then you will do the following procedure to create a Thing: click on the "Create Things" button -> "Create single thing" -> Give it any name -> "No shadow" -> "Auto-generate a new certificate (recommended)" -> "Create thing". | |||
You will be prompted to download the certificates, those will be used by Publishers and Subscribers to connect to your AWS MQTT Broker, download the "Device certificate", "Private key file, "Public key file" and "Amazon Root CA 1". | |||
[[File:Image985.png|none|thumb|478x478px]] | |||
Move all the 4 files to a folder on the C:\ drive, so it's easy to locate them. Then, i'd recommend renaming them as following: Keep the "AmazonRootCA1.pem" as it is, the file xxxxx.'''pem.crt''' as device_certificate.pem.crt, the file xxxxx-'''private.pem.key''' as private_key.pem.key and the file xxxxx-'''public.pem.key''' as public_key.pem.key. After that, you will have the following: | |||
[[File:Image874.png|none|thumb|406x406px]] | |||
The last thing you hav | |||
Revision as of 20:39, 25 May 2022
Main Page > General Information > Configuration Examples > Third party services > IoT platforms > AWS MQTT cloud connectionIntroduction
In this article you will find instructions on how to setup AWS IoT as a MQTT Broker and how to setup a RUT router as a MQTT Publisher and send data over to this AWS Broker.
With that, you will be able to configure any other device as a MQTT Subscriber, and listen to any published info by the router or other devices on this same broker.
Prerequisites
You will need:
- An AWS account
- A router from the RUT2xx, RUT9xx or RUTXxx series
- A computer with mosquitto application (optional)
Setting up AWS IoT
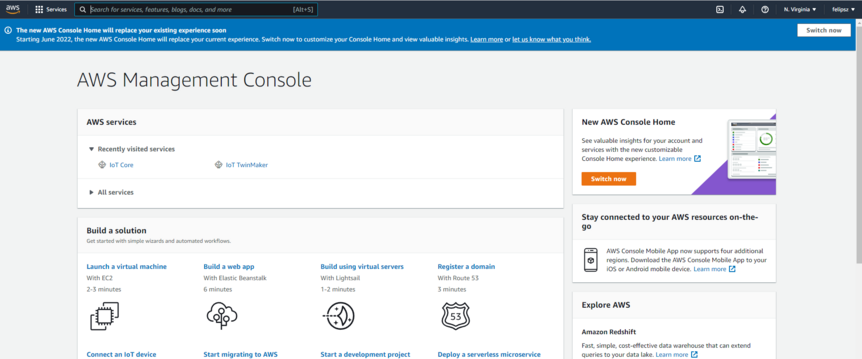
First off, open the AWS Management Console and login with your credentials. After that, you will see a screen similar to this:

On the search bar on the top, search for "IoT Core", and click on the first search result. You will see a screen like the one below, open the "Manage" section and click on "Things".

Then you will do the following procedure to create a Thing: click on the "Create Things" button -> "Create single thing" -> Give it any name -> "No shadow" -> "Auto-generate a new certificate (recommended)" -> "Create thing".
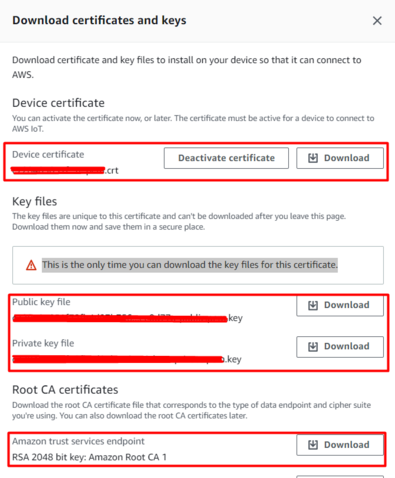
You will be prompted to download the certificates, those will be used by Publishers and Subscribers to connect to your AWS MQTT Broker, download the "Device certificate", "Private key file, "Public key file" and "Amazon Root CA 1".

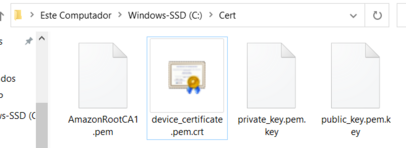
Move all the 4 files to a folder on the C:\ drive, so it's easy to locate them. Then, i'd recommend renaming them as following: Keep the "AmazonRootCA1.pem" as it is, the file xxxxx.pem.crt as device_certificate.pem.crt, the file xxxxx-private.pem.key as private_key.pem.key and the file xxxxx-public.pem.key as public_key.pem.key. After that, you will have the following:

The last thing you hav
