Setting up external Radius server for Hotspot authentication: Difference between revisions
mNo edit summary |
mNo edit summary |
||
| Line 4: | Line 4: | ||
In this example we will perform a basic external Radius server configuration and test it with RUT device for Hotspot authentication. We will use ''freeradius'' package to set up a local Radius server on Ubuntu operating system. A router with a public IP address will be directly connected to the Radius server and forward authentication requests to a LAN IP address of the server via default Radius ports. | In this example we will perform a basic external Radius server configuration and test it with RUT device for Hotspot authentication. We will use ''freeradius'' package to set up a local Radius server on Ubuntu operating system. A router with a public IP address will be directly connected to the Radius server and forward authentication requests to a LAN IP address of the server via default Radius ports. | ||
[[File:External_Radius_server_topology_v1.png|alt=|center|772x772px]] | |||
[[File: | |||
==Prerequisites== | ==Prerequisites== | ||
Revision as of 10:28, 8 December 2022
Main Page > General Information > Configuration Examples > WIFI > Setting up external Radius server for Hotspot authenticationSummary
In this example we will perform a basic external Radius server configuration and test it with RUT device for Hotspot authentication. We will use freeradius package to set up a local Radius server on Ubuntu operating system. A router with a public IP address will be directly connected to the Radius server and forward authentication requests to a LAN IP address of the server via default Radius ports.
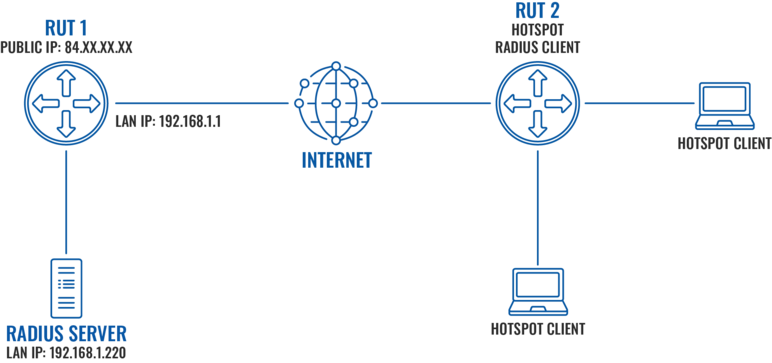
Prerequisites
- RUT1 - Router with a Public IP address to make local server able to accept external authentication requests
- Ubuntu machine - To host a local freeradius server
- RUT2 - To configure Hotspot and test Radius authentication method using our installed server
Preparing Ubuntu machine
Installing the server
Firstly, update the package list and upgrade to the latest packages:
sudo apt update
sudo apt upgrade
Next, install freeradius package:
sudo apt install freeradius
Defining a Client
Client - Hotspot that will use freeradius to authenticate users. In order to add/edit clients, we need to access clients.conf file, use your favourite text editor to access it:
sudo nano /etc/freeradius/3.0/clients.conf
For this example we will add the following lines in order to accept any IP address as a client:
client 0.0.0.0/0 {
     secret = demosecret
     shortname = 0.0.0.0/0
}
Note: IP of a specific Public IP of the client can be used instead of 0.0.0.0/0
Defining a User and Password
Before we create a user and password, let us use MD5 encryption instead of a clear text password. We will generate MD5 encryption for demo123 password using the following command:
echo -n demo123| md5sum | awk '{print $1}'
We will now define credentials for user demo. Use your favourite text editor to open users file:
sudo nano /etc/freeradius/3.0/users
Add required lines to the file:
demo     MD5-Password:= "62cc2d8b4bf2d8728120d052163a77df"
        Reply-Message := "%{User-Name} authenticated successfully"
Once these changes are made, start the freeradius service:
sudo /etc/init.d/freeradius start
Preparing RUT1
Main requirements for RUT1:
- Static Public IP address
- Static lease set for Ubuntu server
- Ports 1812 and 1813 forwarding to local Ubuntu server
Firstly, let us set a static lease for the Ubuntu machine running Radius server and configure port forwarding:
- Login to WebUI and navigate to Network → Interfaces → LAN
- Add a static lease to the MAC address of Ubuntu machine.
- Navigate to Network → Firewall → Port Forwards and add two new rules to forward 1812 and 1813 ports from WAN to Radius server on the same ports.
Radius server is now set with basic configuration and ready to be tested with RUT2 to authenticate Hotspot users.
Preparing RUT2
Setting up Hotspot
Main requirements for RUT2:
- Internet connection
- Hotspot service
In order to start our Hotspot, we need to create a Wifi access point without a dedicated interface nor with any authentication:
- Navigate to Network → Wireless and click add
- Select "--No network--" in General setup → Network
- Select "No encryption" in Wireless security → Encryption
- Save & Apply
- Navigate to Services → Hotspot (Or install the package if it is not present by navigating to Services → Package Manager)
- Add new Hotspot instance by selecting Wireless access point created earlier
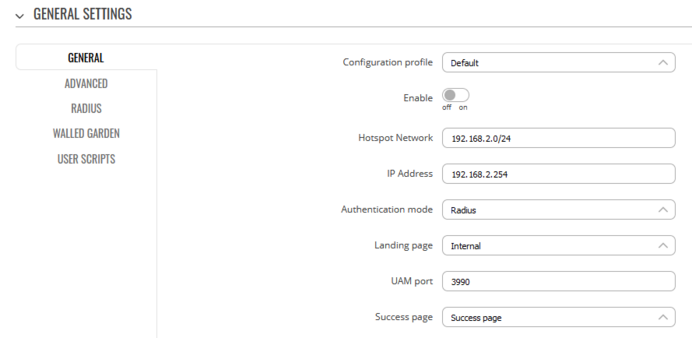
- Enable the Hotspot and select Radius as Authentication mode in General settings.
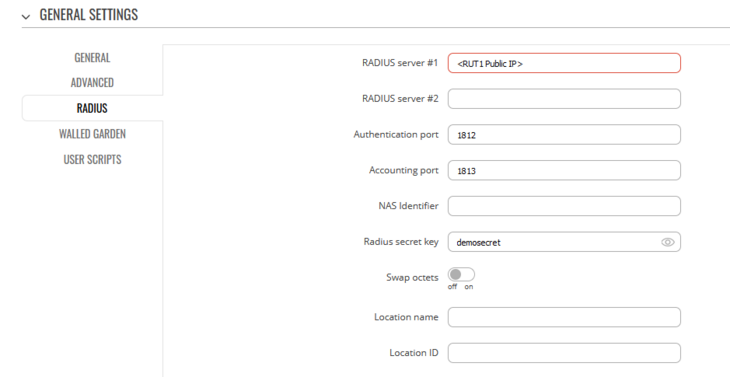
- Go to Radius menu, insert Public IP of the Radius server (RUT1 WAN IP address) and Radius secret key we created for the client before.
Our configuration is complete.
Testing Authentication
Now that we have the setup configured, we can test if the server authenticates the users.
In order to see authentication requests on the server side:
a. Run radius server in debug mode by first disabling the freeradius service using command
sudo /etc/init.d/freeradius stop
and then running the following command:
sudo freeradius -X
b. Tail the log file using the following command:
sudo tail -f /var/log/freeradius/radius.log
Once we see the logs, we can connect to the Hotspot using user credentials defined from either a smartphone or another computer:
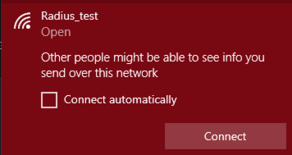
- Connect to the wireless network
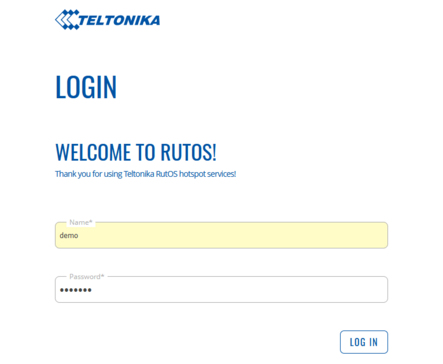
- Login using credentials defined in the Radius server users
- You should see authorization success window
- Logs should show Login OK message


