Template:Rms manual users add new user: Difference between revisions
Appearance
Created page with "The '''Add new''' function is used to add new users to your RMS profile. ---- * Scroll your mouse pointer to the User submenu ('''Users → User''') and click "Add new": F..." |
No edit summary |
||
| Line 9: | Line 9: | ||
{| class="wikitable" style="border:2px solid white; background: white" | {| class="wikitable" style="border:2px solid white; background: white" | ||
|+ | |+ | ||
| style="border:1px solid white; width: 686px; vertical-align: top;" | [[File:How to add new user to rms part 2 | | style="border:1px solid white; width: 686px; vertical-align: top;" | [[File:How to add new user to rms part 2 v2.png|left]] | ||
| style="border:1px solid white; vertical-align: top;" | | | style="border:1px solid white; vertical-align: top;" | | ||
{|style="margin: 0 auto; valign="left";" | {|style="margin: 0 auto; valign="left";" | ||
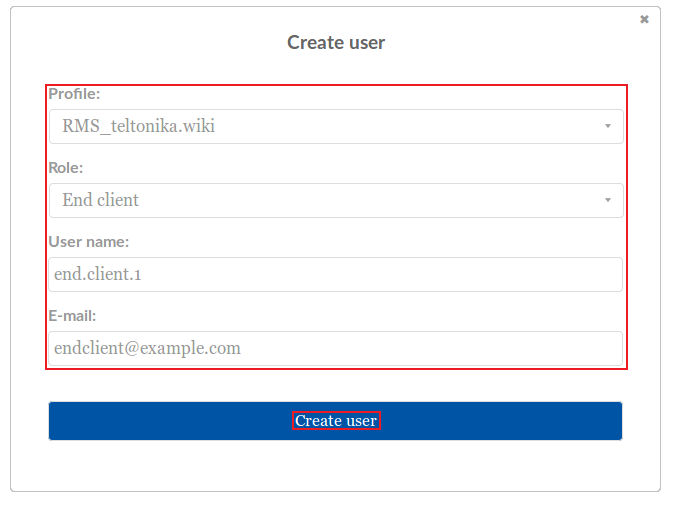
* '''Profile''' - specifies to which profile the new user will be assigned | * '''Profile''' - specifies to which profile the new user will be assigned | ||
* '''Role''' - defines the user's role. Each role has different user rights on RMS. Possible roles: | * '''Role''' - defines the user's role. Each role has different user rights on RMS. Possible roles: | ||
** | ** ''Read only'' - users can only login to RMS and view data but not change anything | ||
** | ** ''End client'' - users can view data, add and manage devices | ||
** | ** ''Administrator'' - users can view data, add and manage devices and other users, distribute licence pools | ||
* '''User name''' - user's login name | * '''User name''' - user's login name | ||
* '''Email''' - user's email address | * '''Email''' - user's email address | ||
Revision as of 10:22, 15 May 2018
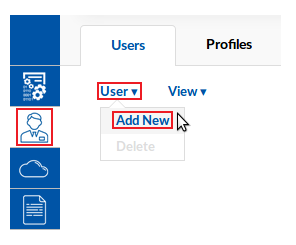
The Add new function is used to add new users to your RMS profile.
- Scroll your mouse pointer to the User submenu (Users → User) and click "Add new":
- A pop-box with user parameters will appear. All fields are mandatory, please fill them out. After everything is in order, click "Create user":
- A pop-up box informing that the user was registered successfully will appear as well as a new entry in the user table:
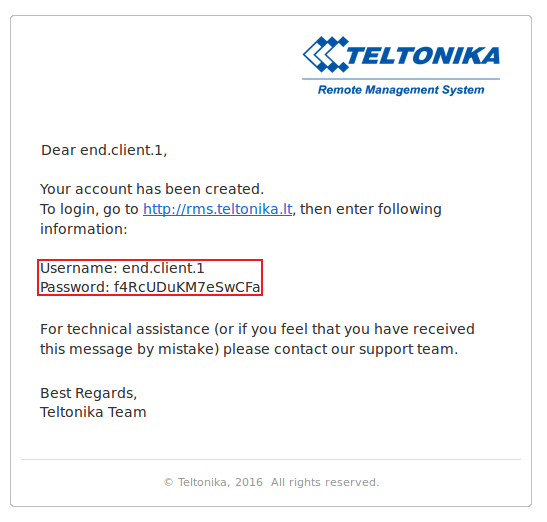
- The user will receive an email with its login information:


