Template:Rms manual fota authorization: Difference between revisions
Appearance
No edit summary |
No edit summary |
||
| Line 1: | Line 1: | ||
<span style="color:#e21111">'''The information on this page is out of date. This feature is deprecated and not available on the current version of RMS.'''</span>'' | |||
The '''Authorization''' function is used to set up a user authentication system for devices in FOTA. | The '''Authorization''' function is used to set up a user authentication system for devices in FOTA. | ||
---- | ---- | ||
Revision as of 15:02, 11 July 2019
The information on this page is out of date. This feature is deprecated and not available on the current version of RMS.
The Authorization function is used to set up a user authentication system for devices in FOTA.
- Select the device(s) for which you would like to set up an authentication system:
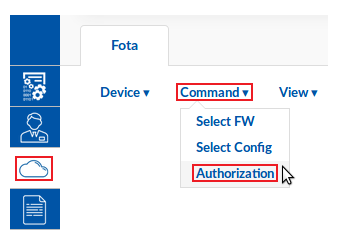
- Scroll your mouse pointer to the Command submenu (Fota → Fota → Command) and click "Authorization":
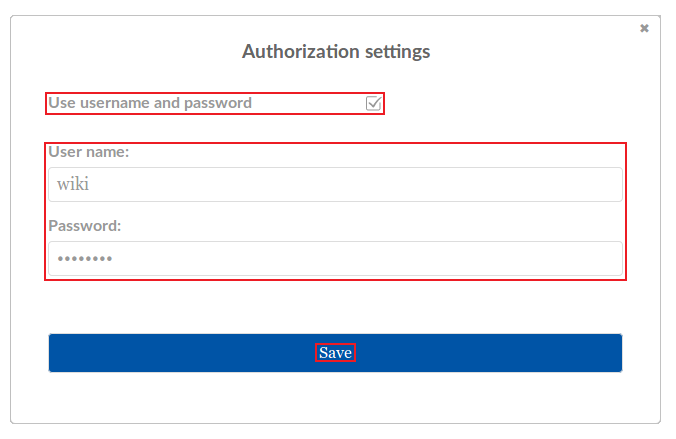
- Place a check mark next to the "Use username and password" field, enter the desired user name and password and click "Save":
- Check the FOTA device table. Under the "Authorization" for the device(s) that you selected an icon with a small lock (File:Fota encryption icon v2.png) should appear:
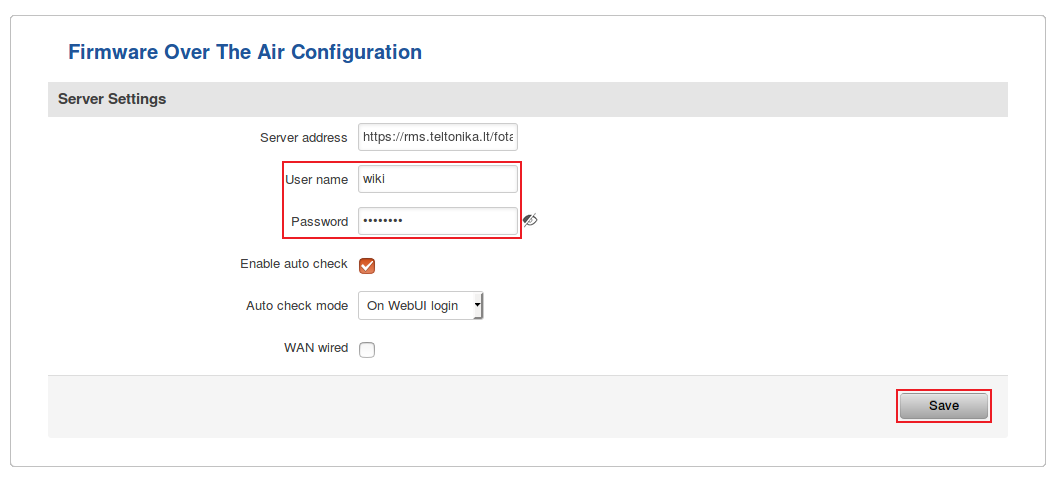
- Once the authorization has been set up, your devices will not be able to upgrade firmwares and configs from FOTA until you update their FOTA configuration with the new authentication info. To do so, login to the router's WebUI, navigate to System → Firmware → FOTA and enter the FOTA authentication settings:


