RUT955 Setting a GRE tunnel via cli: Difference between revisions
Oscar.morao (talk | contribs) (Created page with "{{Template:Netoworking_rut_configuration_example_gre_via_cli | name = RUT900 | fw_version = RUT9XX_R_00.06.05.3 | file_scheme = Networking_rut955_configuration_example...") |
Oscar.morao (talk | contribs) No edit summary |
||
| Line 1: | Line 1: | ||
{{Template:Netoworking_rut_configuration_example_gre_via_cli | {{Template:Netoworking_rut_configuration_example_gre_via_cli | ||
| name = | | name = RUT950 | ||
| fw_version = RUT9XX_R_00.06.05.3 | | fw_version = RUT9XX_R_00.06.05.3 | ||
| file_scheme = Networking_rut955_configuration_examples_gre_via_cli_scheme_v1.jpg | | file_scheme = Networking_rut955_configuration_examples_gre_via_cli_scheme_v1.jpg | ||
}} | }} | ||
Revision as of 21:16, 13 March 2020
Main Page > EOL Products > RUT955 > RUT955 Configuration Examples > RUT955 Setting a GRE tunnel via cliIntroduction
The information in this page is updated in accordance with the RUT9XX_R_00.06.05.3 firmware version.
Generic Routing Encapsulation (GRE) is a tunneling protocol that can encapsulate a wide variety of network layer protocols inside virtual point-to-point links over an Internet Protocol network.
This article provides an extensive configuration example with details on how to create a tunnel connection between two GRE Tunnel instances, configured on two RUTxxx router devices.
To do this instruction is necessary to know how to use CLI or SSH connection, the instructions to remote access are in this link https://wiki.teltonika-networks.com/view/Command_line_interfaces
Prerequisites
You will need:
- Two RUTxxx routers
- A PC to configure the routers
- Both routers must have a Public Static or Public Dynamic IP addresses
Configuration scheme
GRE instance 1 Configuration
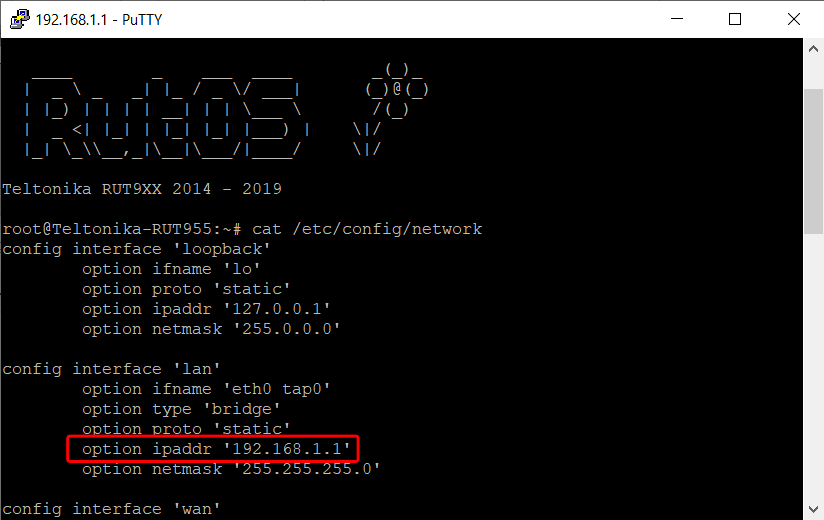
To set up the first instance we have to check the subnet LAN interface and the GRE config file.
- Configuring the LAN interface.
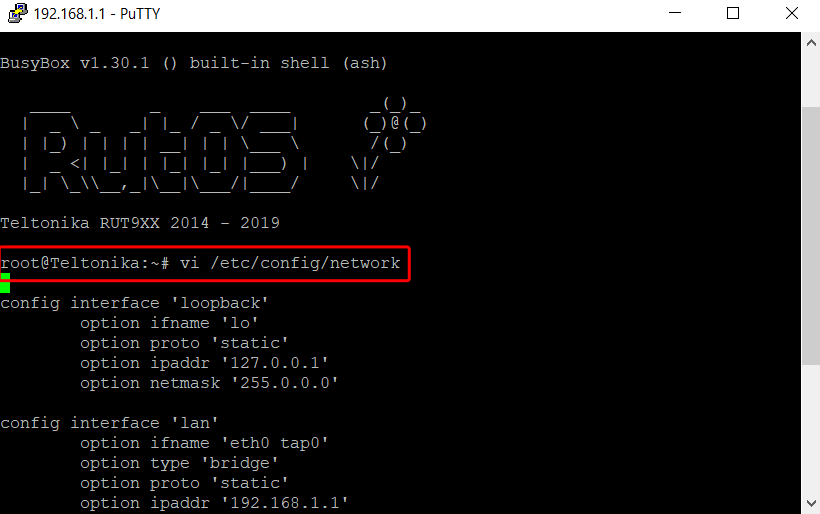
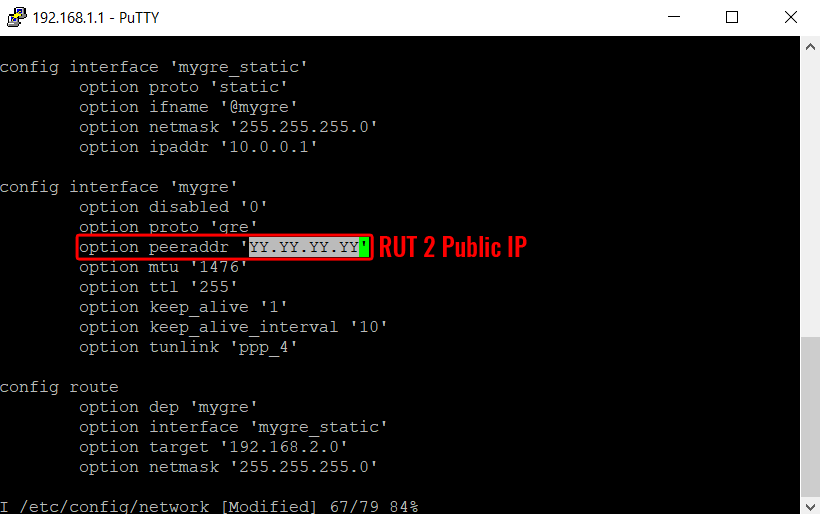
- Configuring GRE Tunnel
Add the GRE tunnel config according with the following picture.
Use the ESC key, write :wq and press Enter to save the changes. Since you are in the root windows, write /etc/init.d/network restart and wait a seconds until the router.
GRE instance 2 Configuration
Access via CLI or SSH and write vi /etc/config/network, then press on the i key and navigate to the end of the file with the arrow keys.
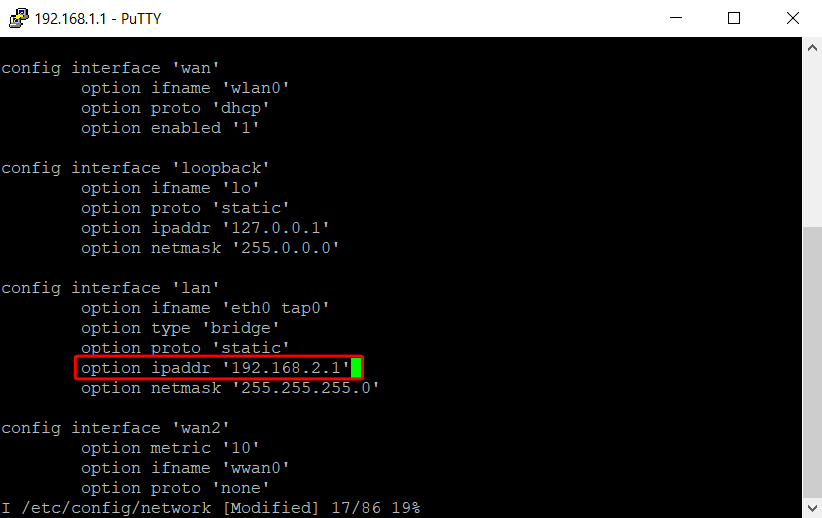
Also Add the GRE tunnel config according with the following picture.
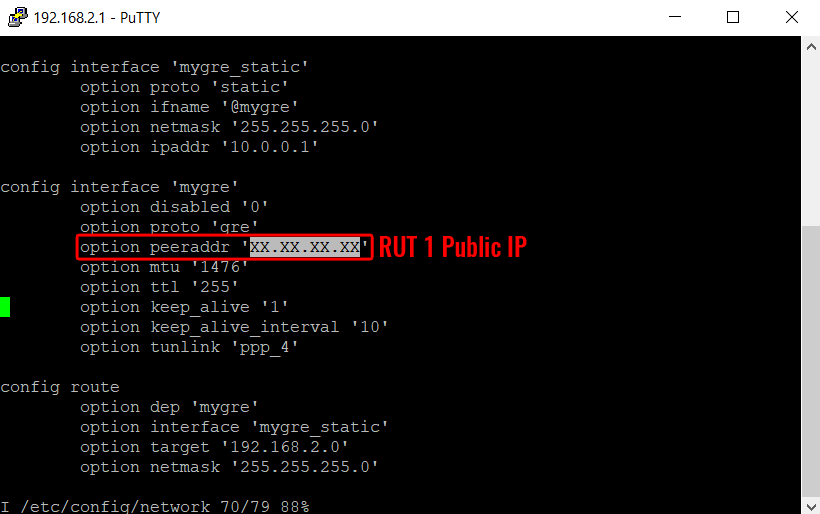
Use the ESC key, write :wq and press Enter to save the changes.
Since you are in the root windows, write /etc/init.d/network restart and wait a seconds until the system restart.
Testing configuration
If you've followed all the steps presented above, your configuration should be finished. But as with any other configuration, it is always wise to test the setup in order to make sure that it works properly.
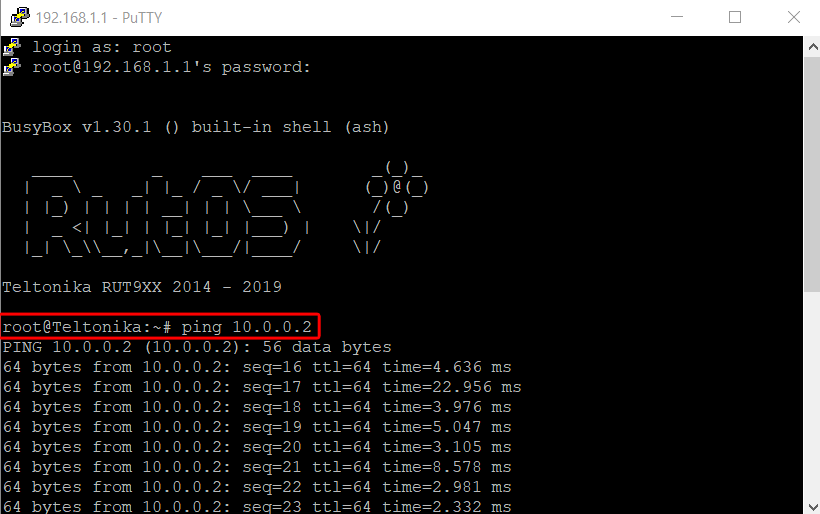
In order to test the GRE Tunnel connection, login to SHH or CLI and From there you should then be able to ping the opposite instance's virtual IP address. To use a ping command, type ping <ip_address> and press the "Enter" key on your keyboard:
If the ping requests are successful, congratulations, your setup works! If not, we suggest that you review all steps once more.


