Template:Networking rutos configuration example dynu.com ddns: Difference between revisions
Oscar.morao (talk | contribs) No edit summary |
Oscar.morao (talk | contribs) No edit summary |
||
| Line 36: | Line 36: | ||
[[File:Networking rutos configuration example ddns dynu landpage v1.png|border|class=tlt-border]] | [[File:Networking rutos configuration example ddns dynu landpage v1.png|border|class=tlt-border]] | ||
---- | |||
Once you access to the '''DDNS Services''' is needed to add a new instance. To do it, you should click on '''+ Add''' button. | Once you access to the '''DDNS Services''' is needed to add a new instance. To do it, you should click on '''+ Add''' button. | ||
[[File:Networking rutos configuration example ddns dynu add instance v1.png|border|class=tlt-border]] | [[File:Networking rutos configuration example ddns dynu add instance v1.png|border|class=tlt-border]] | ||
In the '''Add Dynamic DNS''' menu, you should enter your customized domain. | |||
[[File:Networking rutos configuration example ddns dynu new instance v1.png|border|class=tlt-border]] | [[File:Networking rutos configuration example ddns dynu new instance v1.png|border|class=tlt-border]] | ||
# Select your DDNS domain name in the '''Host''' input text. | |||
# Select your prefered '''Top Level''' domain. | |||
# Click on '''+ Add''' button | |||
---- | |||
[[File:Networking rutos configuration example ddns dynu confirm v1.png|border|class=tlt-border]] | |||
If you are using the device you are trying to set up as your WAN source when visiting this website, it should automatically assign your IP address to that hostname you have just created. If it does not, or you are using a different WAN source, you can change the IP address. | |||
# Confirm or change the public IP | |||
# Click on '''+ Add''' button | |||
---- | |||
[[File:Networking rutos configuration example ddns dynu list v1.png|border|class=tlt-border]] | [[File:Networking rutos configuration example ddns dynu list v1.png|border|class=tlt-border]] | ||
---- | ---- | ||
<span style="color: red;">'''Note: The IP/Target should be the same as the {{{device}}}'s public IP.'''</span> | <span style="color: red;">'''Note: The IP/Target should be the same as the {{{device}}}'s public IP.'''</span> | ||
Revision as of 21:48, 11 June 2020
Introduction
Dynamic DNS (DDNS or DynDNS) is a service, that automatically and periodically updates your DNS records when your IP address changes. This is most often utilized when the end-user has a dynamic IP address and wants to bind it to a static hostname.
The device is compatible with many different third-party DNS services, that provide the possibility to create a custom hostname and bind it to an IP address. The DDNS service periodically updates the IP address information of the hostname, making sure that the device remains reachable via the same hostname even in cases when its IP address has changed.
This chapter is a guide on configuring a dynu.com provider DDNS instance on {{{name}}} {{{device}}}.
Prerequisites
You will need:
- One {{{name}}} {{{device}}}
- At least one end device (PC, Laptop) to configure the {{{device}}} and DDNS provider
- Static or Dynamic Public IP address
How to know what IP address you have?
There is one mandatory precondition for DDNS to work, you must have a Static or Dynamic Public IP address. One of the easiest ways to check what IP address you have is to simply visit a website such as www.whatismyipaddress.com and compare the IP address shown there to the one you see in the {{{device}}}'s WebUI. There are many ways how you can check what IP address your device has, a couple of those are:
- Go to {{{device}}}'s WebUI Overview page and check that in one of the widgets.
- Go to Network → Interfaces page and check what IP address your WAN interface has.
If the IP address shown in www.whatismyipaddress.com is different to the one you see in the WebUI, it means that you're using a Shared Public IP and you won't be able to reach your device even if you would use DDNS.
Dynu.com configuration
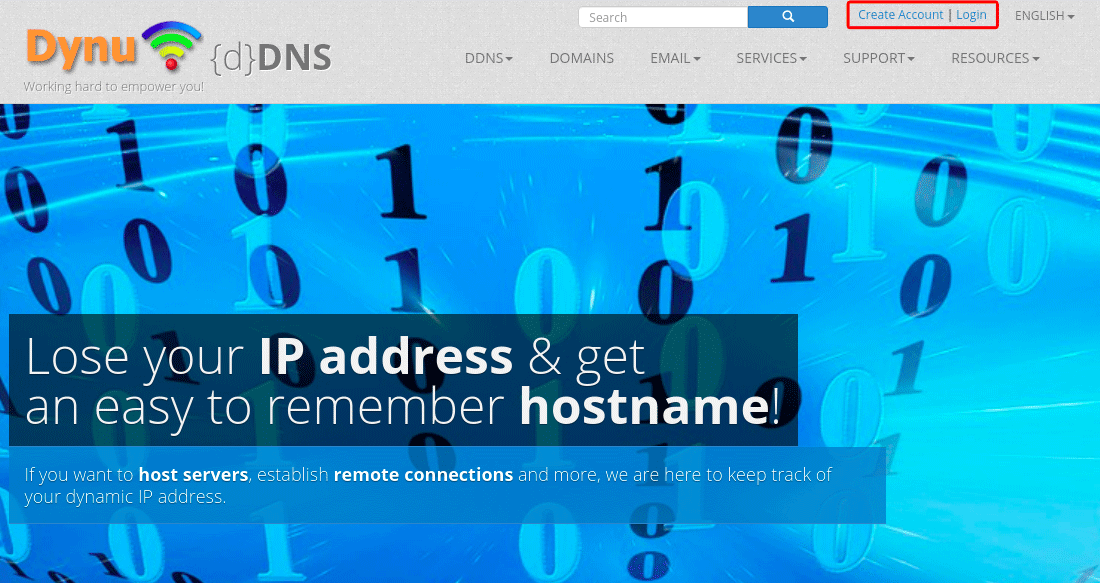
The first thing you will need to do is to visit the DDNS provider website. You can access it by entering www.dynu.com to your internet browser's URL bar and searching the login page.
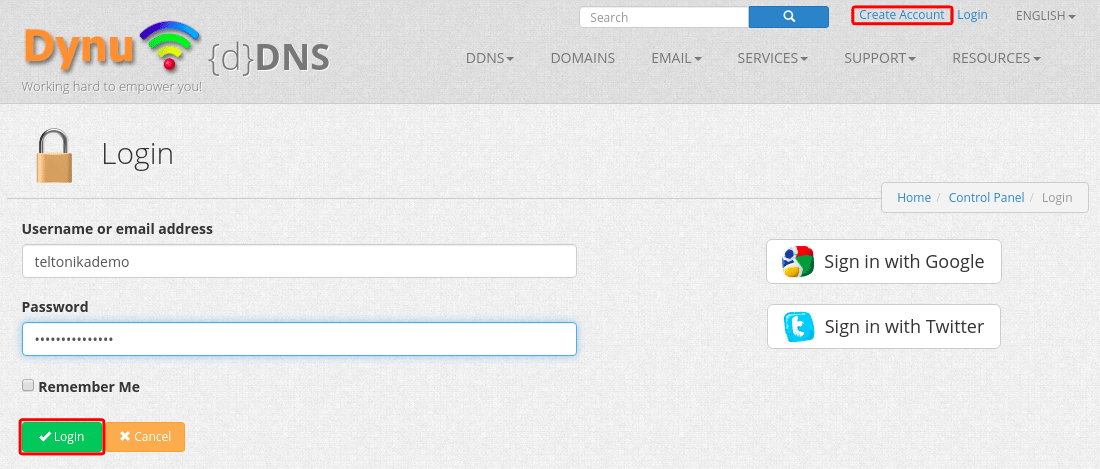
Then you will need to log in to your account. If you don't have a registered account yet, you will need to create one. You can do that by clicking the Create account button.
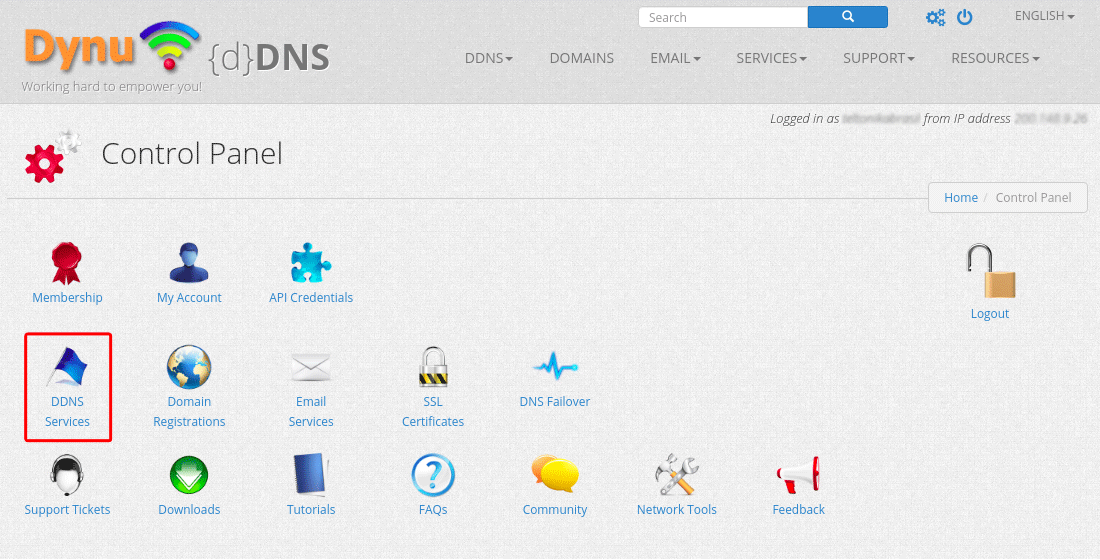
When you will log in to the website, you will be automatically forwarded to the Dashboard page, there you should click on the DDNS Services Button.
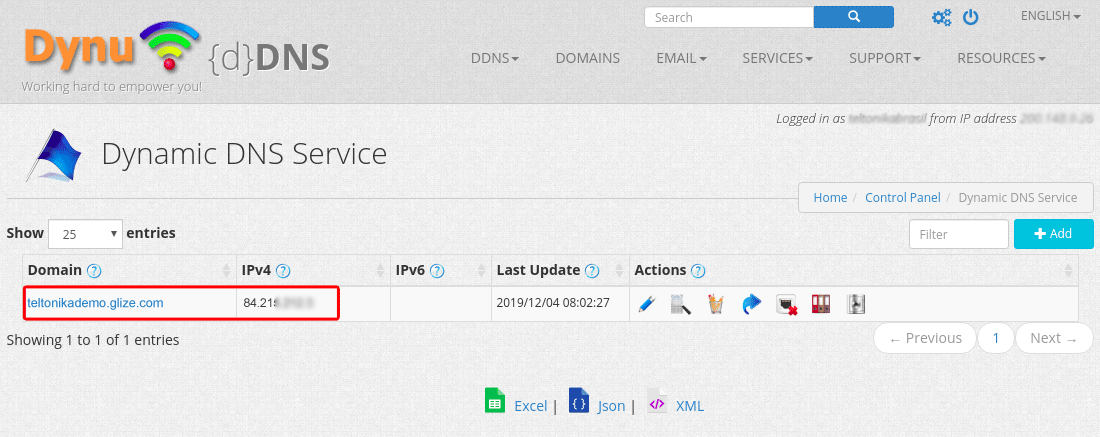
Once you access to the DDNS Services is needed to add a new instance. To do it, you should click on + Add button.
In the Add Dynamic DNS menu, you should enter your customized domain.
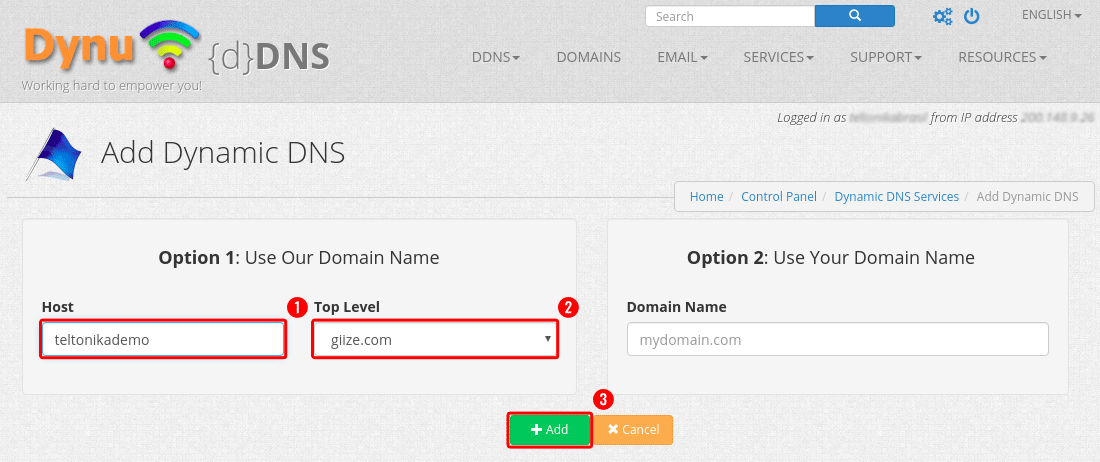
- Select your DDNS domain name in the Host input text.
- Select your prefered Top Level domain.
- Click on + Add button
 If you are using the device you are trying to set up as your WAN source when visiting this website, it should automatically assign your IP address to that hostname you have just created. If it does not, or you are using a different WAN source, you can change the IP address.
- Confirm or change the public IP
- Click on + Add button
Note: The IP/Target should be the same as the {{{device}}}'s public IP.
{{{name}}} configuration
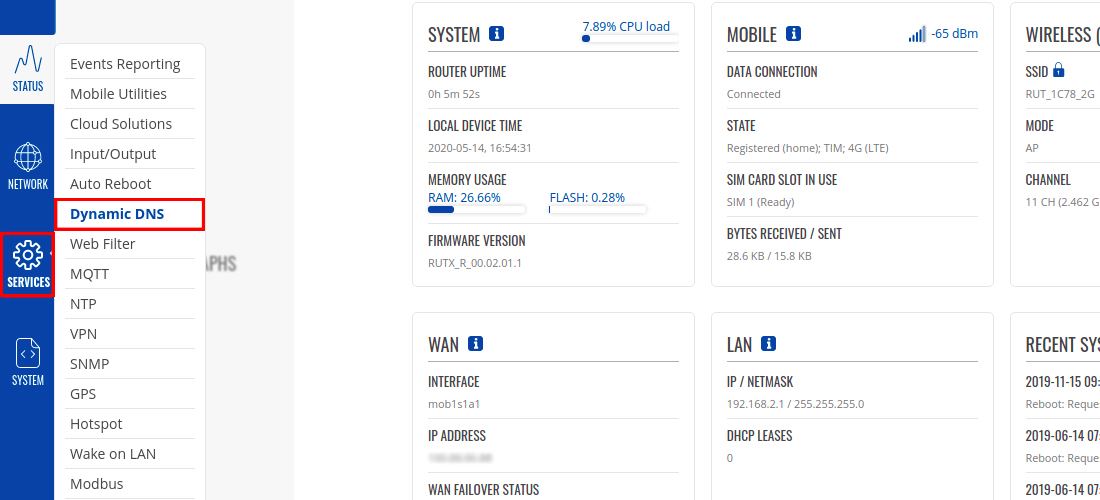
Log in to the {{{device}}}'s WebUI by entering its LAN IP address to your internet browser's URL bar and then go Services → Dynamic DNS.
There create a new DDNS configuration by writing the Name and clicking Add button. Then you will be automatically forwarded to the new configuration settings.
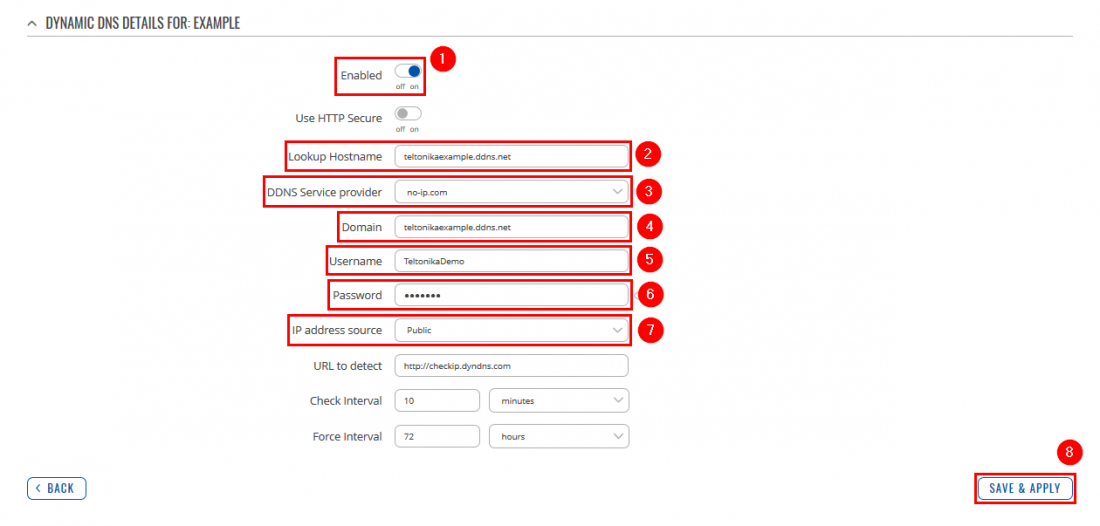
Now apply the following configuration:
- Check the Enable box.
- Type your Lookup hostname.
- Select DDNS Service provider: no-ip.com
- Type your noip Domain.
- Type your noip Username.
- Type your noip Password.
- Set IP address source to Public.
- Click Save & Apply button.
Wait for about 5 minutes from the time you saved the changes. In the Status column, you should see the last time the DDNS was updated and whether the service is running. (If it does not change for a while, try changing the Check and Force intervals in DDNS settings, or reboot your {{{device}}}).
Results
One of the easiest ways to check whether the DDNS service works is by trying to access the {{{device}}}'s WebUI by using it. In order to enable remote HTTP/HTTPS access go to System → Administration and after that click on Access Control. There check Enable remote HTTP/HTTPS access boxes and click Save
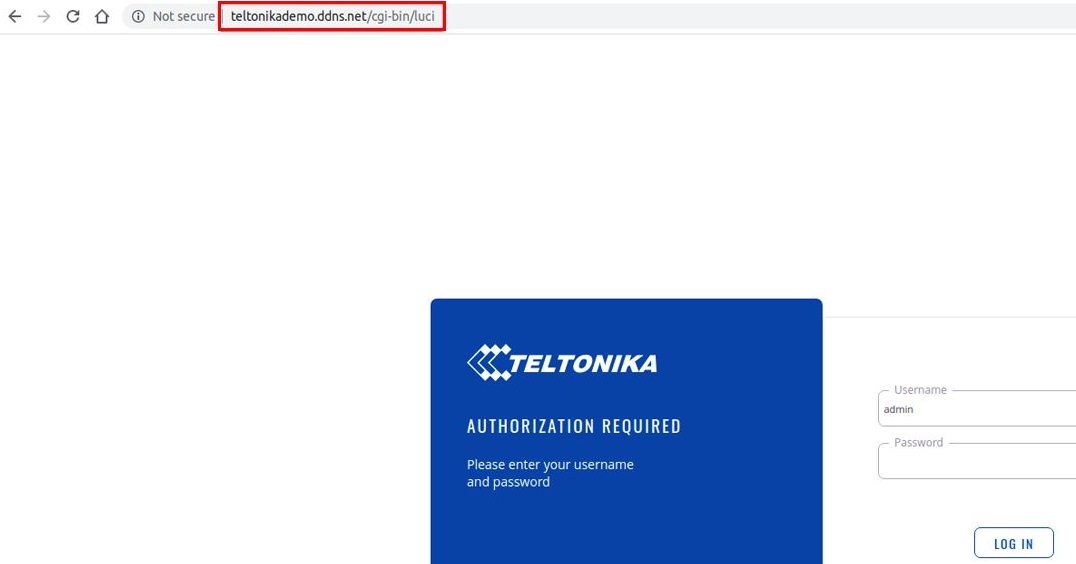
Try to access the {{{device}}} by entering the hostname in your internet browser's URL bar.
Note: you won't be able to access your {{{device}}}'s WebUI through WAN if you are using the same device as your WAN source. You will need to use a different WAN source to do that.

