Template:Netoworking rutos configuration example nordvpn: Difference between revisions
| Line 39: | Line 39: | ||
<tr> | <tr> | ||
<td style="border-bottom: 1px solid white> | <td style="border-bottom: 1px solid white> | ||
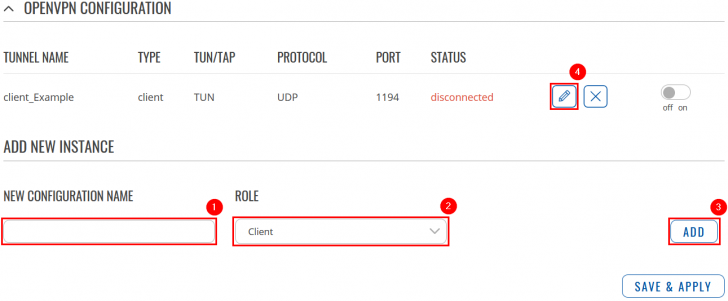
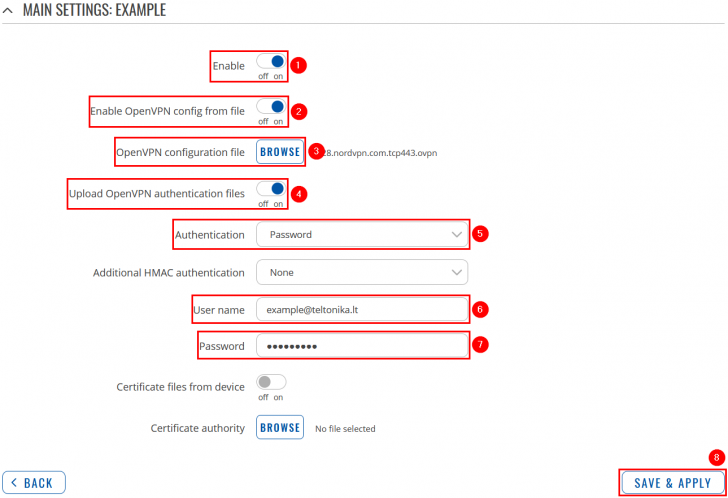
Access RUTX WebUI and go to '''Services > VPN > OpenVPN'''. There create a new configuration by | Access RUTX WebUI and go to '''Services > VPN > OpenVPN'''. There create a new configuration by writing '''New configuration name''', selecting role '''Client''' and pressing '''Add''' button. It should appear after a few seconds. Then press '''Edit'''. | ||
</td> | </td> | ||
</tr> | </tr> | ||
Revision as of 15:46, 29 July 2020
| [[File:{{{topology}}}|border|class=tlt-border|750px|right]] | |
|---|---|
|
|
Introduction
Virtual private networks (VPNs) are affordable, easy to use, and a vital component in your PC and smartphone set up. Along with a firewall and antivirus/anti-malware solution, you should have a VPN installed to keep every moment you spend online completely private. NordVPN is a personal virtual private network (VPN) service provider. It is supported on various different devices and RUTX routers are one of those. This article contains step-by-step instructions on how to set up NordVPN VPN connection using RUTX routers.
Prerequisites
You will need:
- One RUTX router
- An end device to configure the router (PC, Laptop, Tablet, Smartphone)
- NordVPN account and subscription
Choosing and downloading server files
In order to set up your router to connect to NordVPN server you will need to download OVPN configuration files. Those can be found at NordVPN website. It is necessary to choose a server which can provide the best possible performance, visit this website and it will automatically show you which server will provide you the best experience. Also when it comes to choosing TCP or UDP you need to decide what you are trying to achieve. TCP is reliable, data sent using this protocol is guaranteed to be delivered to the receiver. If data is lost in transit it will recover the data and resend it. TCP will also check packets for errors and track packets so that data is not lost or corrupted, but that effects internet speed. UDP is unreliable, it does not provide guaranteed delivery and a datagram packet may become corrupt or lost in transit, but you will get greater internet speed.
Home network configuration (RUTX)
 |
|
|---|---|
|
Now apply the following configuration:
|
Results
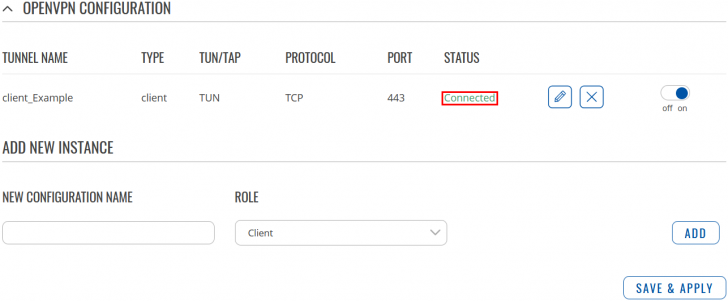
If configured correctly all of your internet traffic now should go through VPN server. One of the easiest ways to check whether everything is working correctly is to check whether your public IP address has changed. You can do so by simply visiting a website such as www.whatismyipaddress.com and comparing your IP address before and after you connect to server also there you can find information about IP location, so when you connect to server it should change to a different address/country. Or you can visit NordVPN website and there on the very top of the website you can indicate whether you are protected or not.
External links
Disclaimer:
Any of the trademarks, service marks, collective marks, design rights or similar rights that are mentioned, used or cited in the articles are the property of their respective owners.

