DHCP Relay configuration example: Difference between revisions
m AistisKa moved page Draft:DHCP Relay to DHCP Relay Configuration |
m Protected "DHCP Relay Configuration" ([Edit=Allow only administrators] (indefinite) [Move=Allow only administrators] (indefinite)) |
(No difference)
| |
Revision as of 12:04, 2 February 2022
Main Page > General Information > Configuration Examples > Router control and monitoring > DHCP Relay configuration exampleIntroduction
DHCP Relay is a router that forwards IP addresses from the DHCP Server to the user devices, even if the server is on a different network. The main benefit of this approach is that a single DHCP Server can distribute IP addresses to multiple networks. Bellow you will find an example of how to configure a basic DHCP Relay configuration.
Configuration overview and prerequisites
For this configuration you will need 2 routers. One as a DHCP Server and the other as a DHCP Relay.
Prerequisites:
DHCP Relay device WAN port needs to be connected to DHCP server LAN port.
DHCP Relay network settings:
LAN IP/subnet: 192.168.2.1/24
WAN IP: 192.168.4.194
DHCP server network settings:
LAN IP/subnet: 192.168.4.1/24
Configuration scheme:
Configuration Steps
1. Enable DHCP Relay feature on device which will relay DHCP requests. In WebUI navigate to Network -> Interface -> LAN -> DHCP Server and change Enable DHCP field value from Enable to Relay and then type in the DHCP Server IP address and click on Save & Apply.
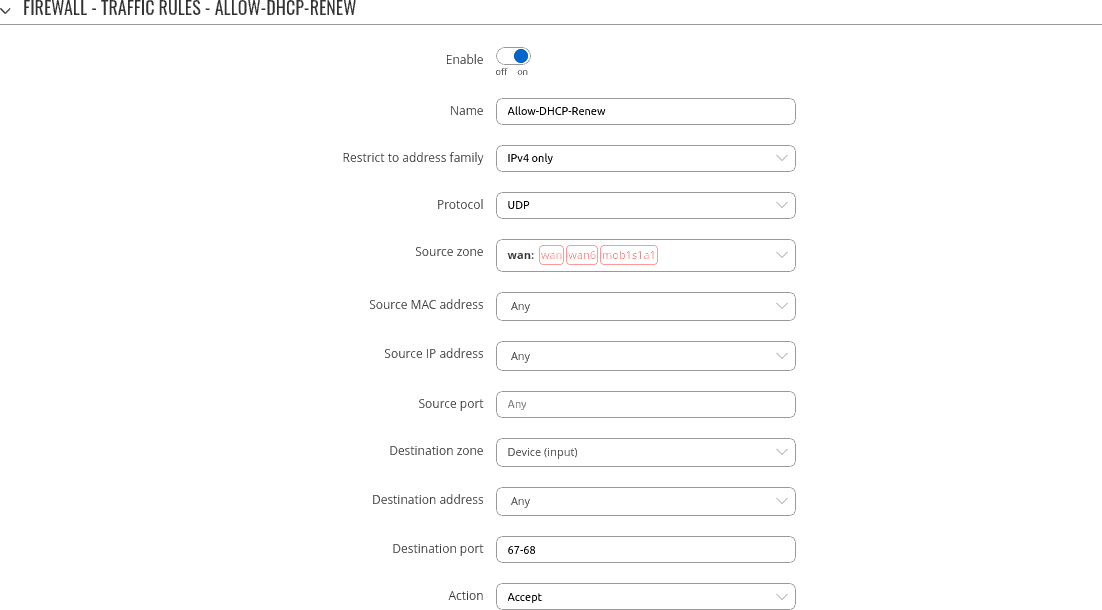
2. Modify Enable-DHCP-renew firewall rule in Network -> Firewall -> Traffic rules to additionally allow destination port 67.
3. DHCP Server must be able to assign addresses from 192.168.2.0/24 IP address pool. If DHCP Server is a Teltonika device running RUTOS then you can add this address pool via router's CLI by running command:
echo "dhcp-range=192.168.2.100,192.168.2.200,12h" >> /etc/dnsmasq.conf
- 192.168.2.100 - specifies start of DHCP address pool range
- 192.168.2.200 - specifies end of DHCP address pool range
- 12h - specifies DHCP lease time
4. In this topology DHCP Server has no route to DHCP Relay's network so it must be added manually. Static route can be added via Network -> Routing -> Static IPv4 routes.
- Interface: Network interface where DHCP Relay resides
- Target: Network of DHCP Relay
- IPv4 netmask: Subnet of DHCP Relay network
- IPv4 Gateway: IP address of DHCP relay interface which is connected to DHCP Server
Additional notes
Note: It's strongly recommended to use static IP configuration for DHCP Relay WAN interface otherwise there might be cases when WAN interface will receive new IP address which will cause static route to stop working.


