DNP3 TCP Client Configuration example: Difference between revisions
No edit summary |
No edit summary |
||
| Line 13: | Line 13: | ||
After that navigate to Services>DNP3 | After that navigate to Services>DNP3 | ||
[[File:Networking rutx11 example DNP3 service features v1.png|boarder|class=tlt-boarder]] | [[File:Networking rutx11 example DNP3 service features v1.png|boarder|class=tlt-boarder]] | ||
DNP3 Protocol contains two features. ‘TCP MASTER’ and ‘DNP3 OUTSTATION’. | |||
'''TCP MASTER''' | |||
TCP Master requests specific information from DNP3 outstation through the communication channel. | |||
To setup TCP MASTER click on the TCP Master Button and click ‘ADD’ to add a new master. | |||
[[File:Networking rutx11 example DNP3 TCP master overview v1.png|border|class=tlt-border]] | |||
Revision as of 17:07, 24 June 2022
Main Page > General Information > Configuration Examples > DNP3 > DNP3 TCP Client Configuration exampleSummary
Distributed Network Protocol 3 (DNP3) is a set of communications protocols used between components in process automation systems. It is primarily used for communications between a “master station” and Remote Terminal Units (RTUs) or Intelligent Electronic Devices (IEDs).
This example provides an Step by Step instructions on how to configuration DNP3 functionality in RUTX11 device.
Installing DNP3 Package
DNP3 can be installed using the package manager
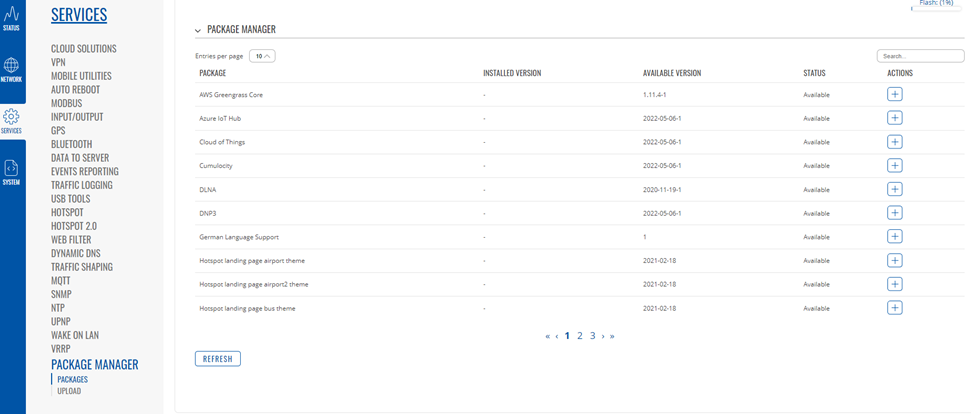
Open the ‘Services’ tab and click the ‘Package Manager’ button. On DNP3 click the ‘+’ button to install DNP3 package.

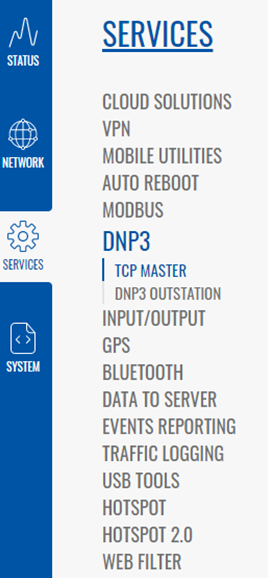
After that navigate to Services>DNP3
DNP3 Protocol contains two features. ‘TCP MASTER’ and ‘DNP3 OUTSTATION’.
TCP MASTER
TCP Master requests specific information from DNP3 outstation through the communication channel.
To setup TCP MASTER click on the TCP Master Button and click ‘ADD’ to add a new master.


