Removing of HTTPS security warning: Difference between revisions
No edit summary |
No edit summary |
||
| Line 23: | Line 23: | ||
5. The final page: | 5. The final page: | ||
[[File:Getacert3.png|center|alt=|border|1102x1102px]] | [[File:Getacert3.png|center|alt=|border|1102x1102px]] | ||
6. Click on (+) beside '''Open Private Key''': | 6. Click on (+) beside '''Open Private Key''': | ||
| Line 28: | Line 29: | ||
Copy the text to a new Notepad file, and rename it to '''name.crt''' in my case I used a simple name '''cer.crt''' | Copy the text to a new Notepad file, and rename it to '''name.crt''' in my case I used a simple name '''cer.crt''' | ||
7. Click on (+) beside Open Public Key: | 7. Click on (+) beside Open Public Key: | ||
[[File:Getacert5.png|center|alt=|border|1102x1102px]] | [[File:Getacert5.png|center|alt=|border|1102x1102px]] | ||
Copy the text to a new Notepad file, and rename it to '''name.key''' in my case I used a simple name '''key.key''' | Copy the text to a new Notepad file, and rename it to '''name.key''' in my case I used a simple name '''key.key''' | ||
[[File: | 8. Click on the [.p12] file, and it will be downloaded: | ||
[[File:Getacert6.png|center|alt=|border|1102x1102px]] | |||
9. Go to the Microsoft search bar and type: '''cer''' then choose Manage user certificates: | |||
[[File:Windows1.png|center|alt=|border]] | |||
10. Go to Trusted Root Certification Authorities: | |||
[[File:Windows2.png|center|alt=|border|1102x1102px]] | [[File:Windows2.png|center|alt=|border|1102x1102px]] | ||
11. Right-click and highlight '''All Tasks''', click '''Import…'''[[File:Windows3.png|center|alt=|border|1102x1102px]] | |||
12. Choose the .p12 file downloaded before: | 12. Choose the .p12 file downloaded before: | ||
[[File:Windows4.png|center|alt=|border]] | [[File:Windows4.png|center|alt=|border]] | ||
Revision as of 12:31, 2 November 2022
For accessing the device WebaUI using HTTPS it requires a certificate, else it will show the below error:

In this example, we will be able to access the device webpage using HTTPs, with a free certificate from a free CA.
Certificate creation and trust:
1. You must have a DNS record linked to the IP of the router; in my case, I’m using a Windows server to act as a DNS server.
   As shown, I choose a hostname rut955.teltonika.uae and it's linked with 172.16.16.1 the LAN IP of the router.
   This hostname will be used for creating the certificate later.
2. Go to: GetAcert website.
3. Fill in the information regarding your requirements:

   NOTE: 1,2 and 3 are the names you want to use in the browser.
   Other information isn’t mandatory. Click Next Page.
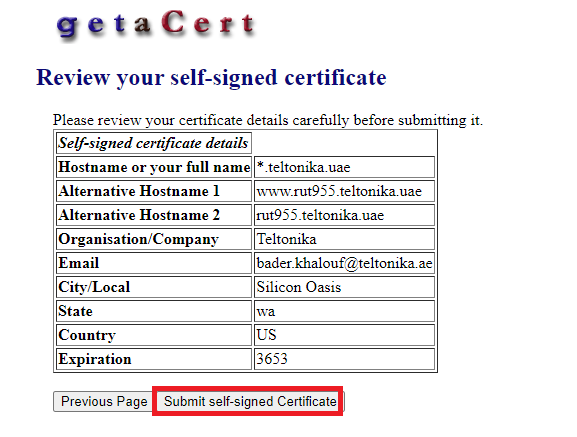
4. Check the data once again, if everything is okay click Submit self-signed Certificate:
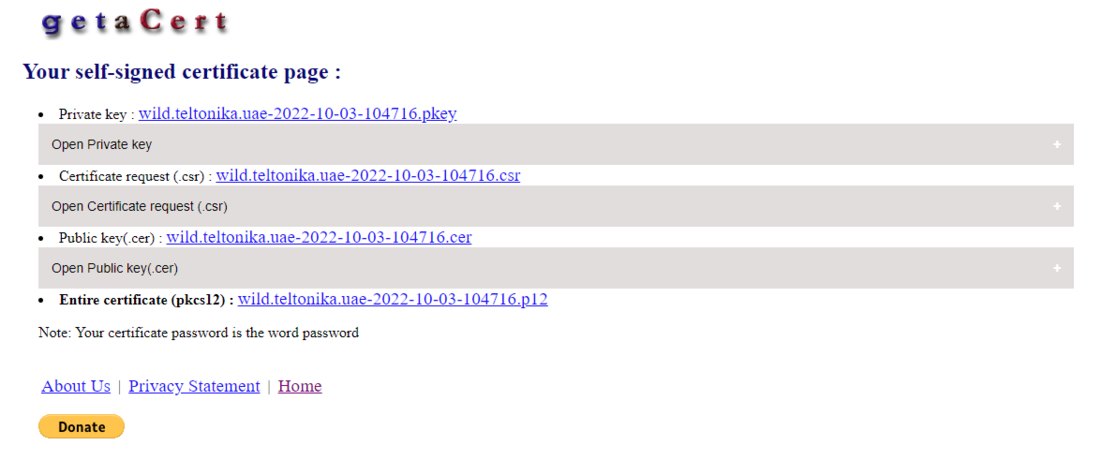
5. The final page:
6. Click on (+) beside Open Private Key:
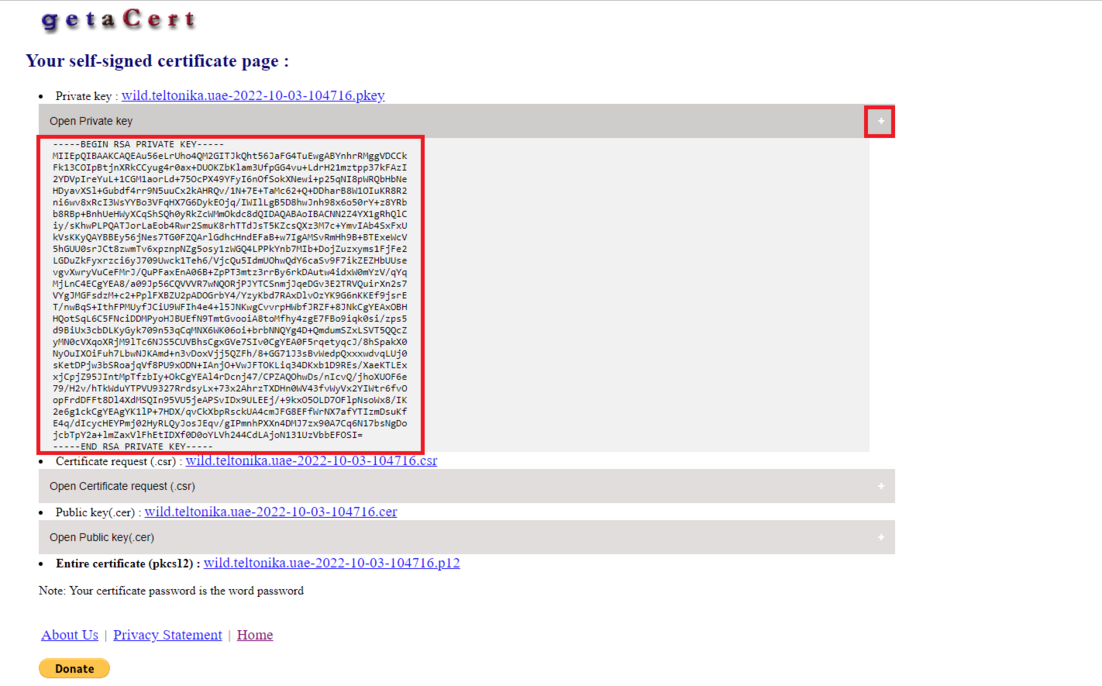
Copy the text to a new Notepad file, and rename it to name.crt in my case I used a simple name cer.crt
7. Click on (+) beside Open Public Key:
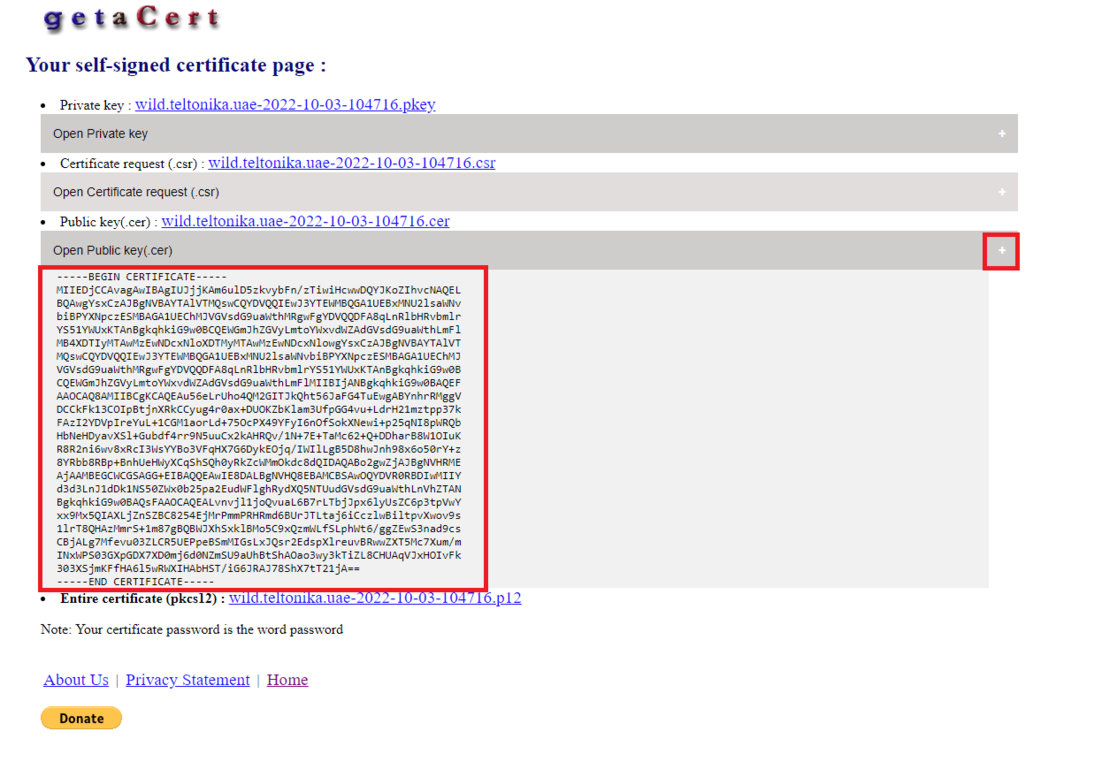
Copy the text to a new Notepad file, and rename it to name.key in my case I used a simple name key.key
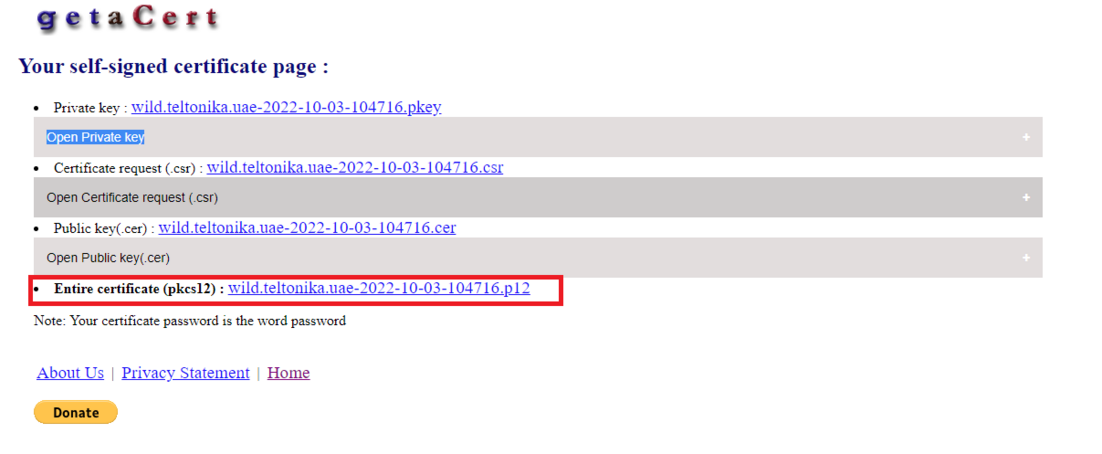
8. Click on the [.p12] file, and it will be downloaded:
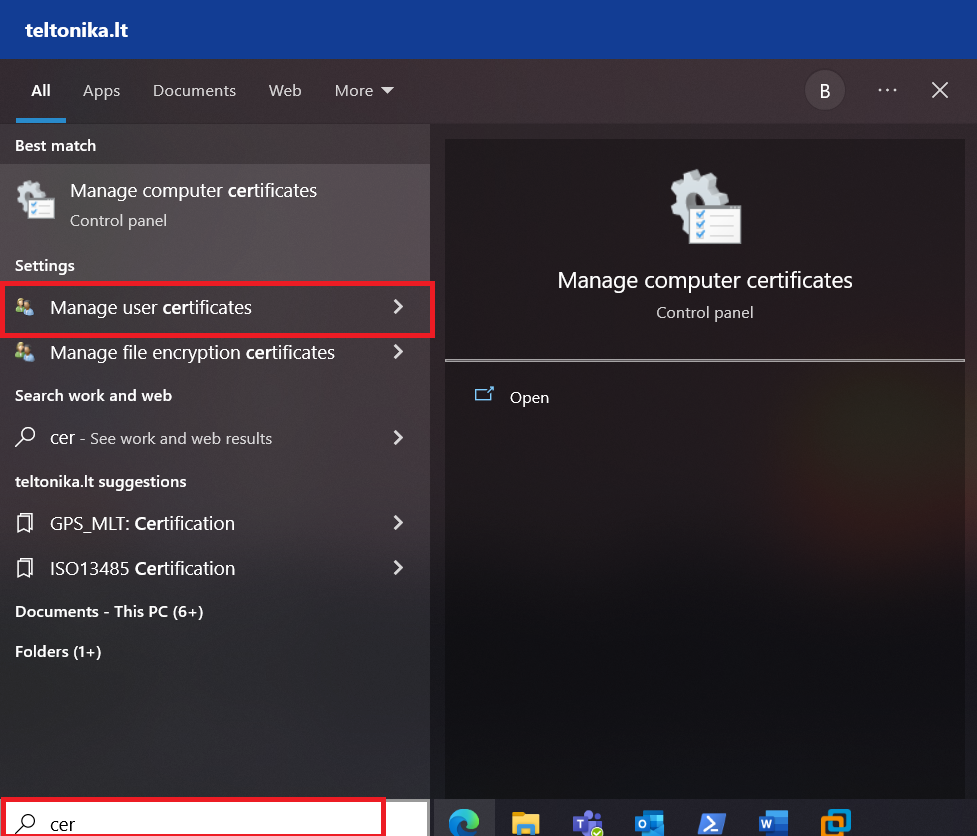
9. Go to the Microsoft search bar and type: cer then choose Manage user certificates:
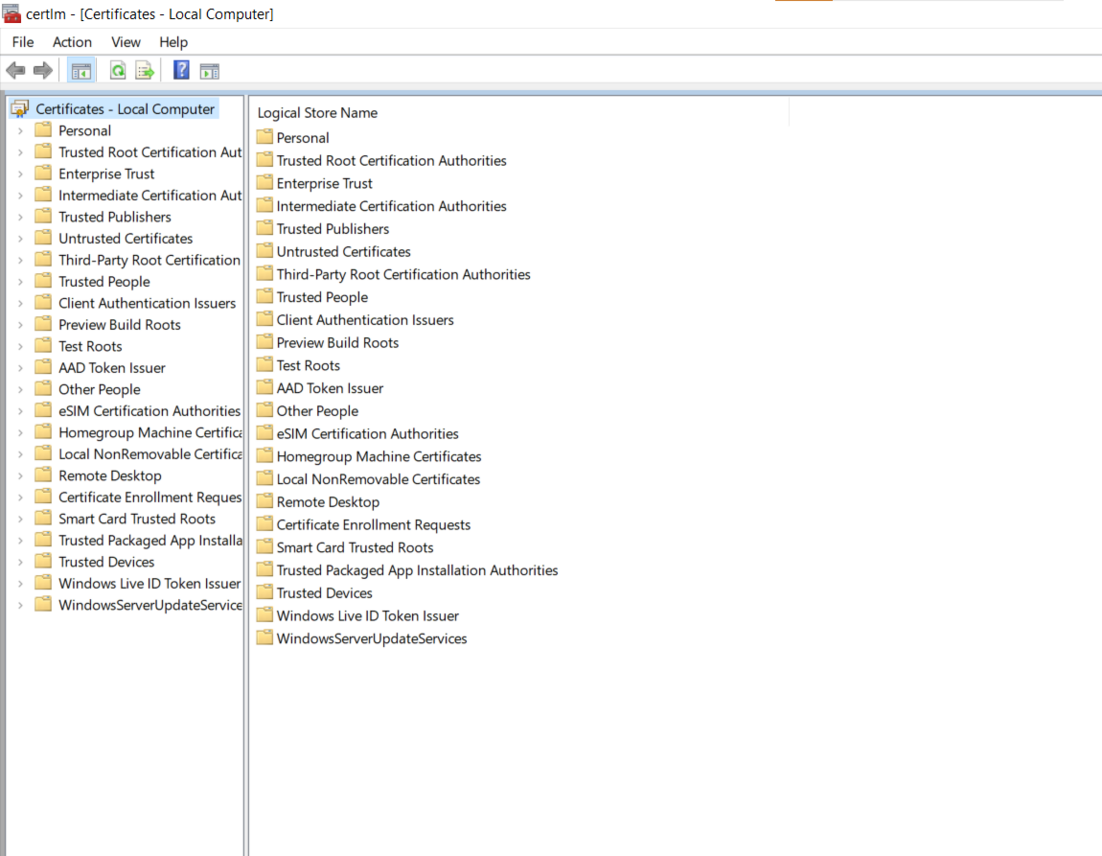
10. Go to Trusted Root Certification Authorities:
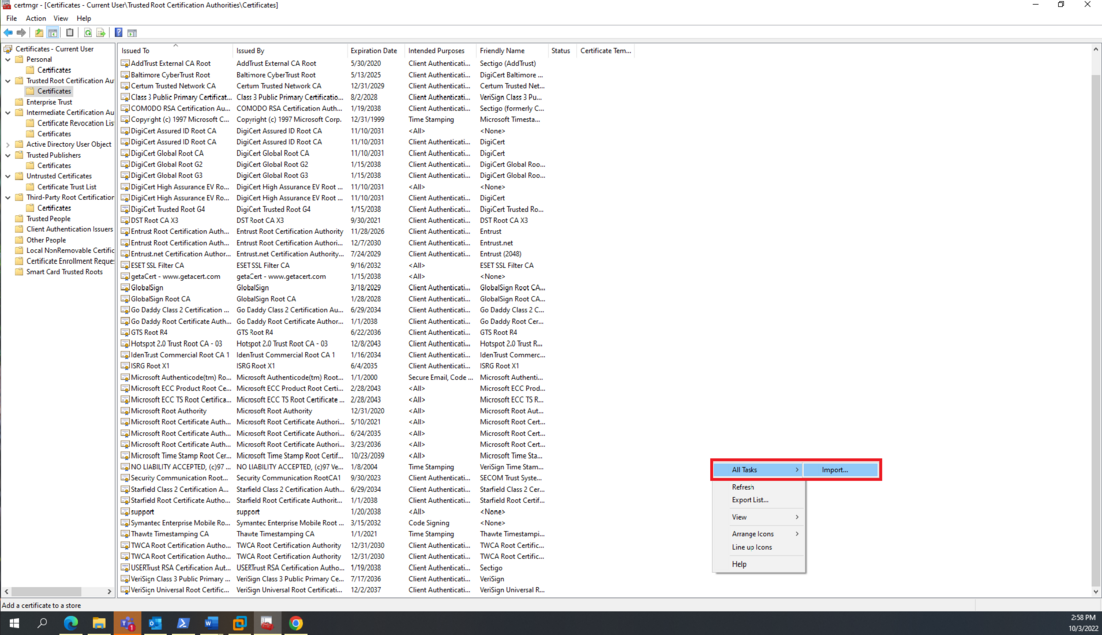
11. Right-click and highlight All Tasks, click Import…
12. Choose the .p12 file downloaded before:
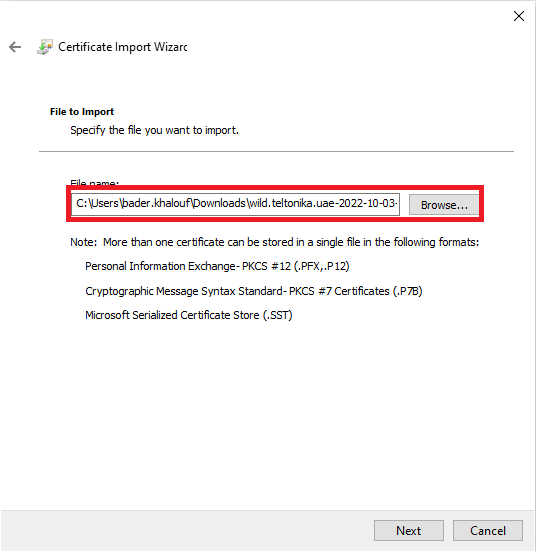
Then Next, then Next, then Finish.
RUT configuration:
   The final part:
   Go to System → Access Control → WEBUI
1) Turn off Certificate files from device.
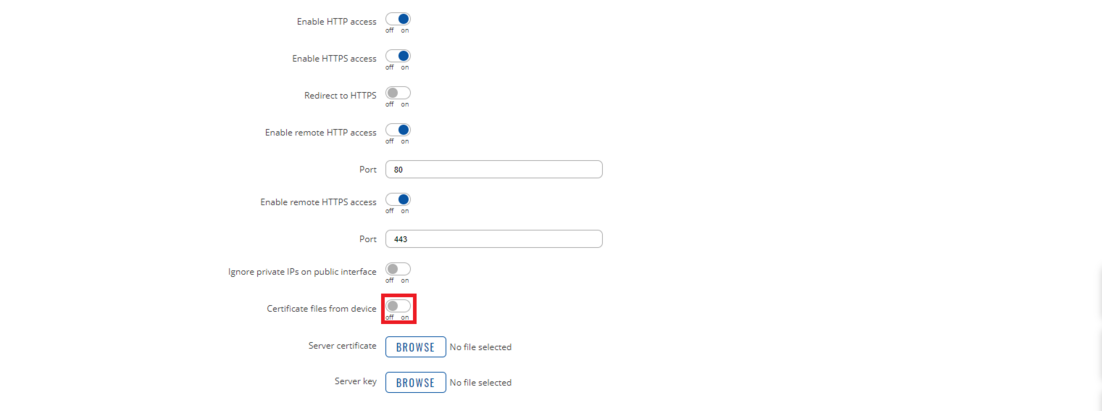
2) Click browse in Server certificate and choose the [.crt] file created.
3) Click browse in Server key and choose the [.key] file created.
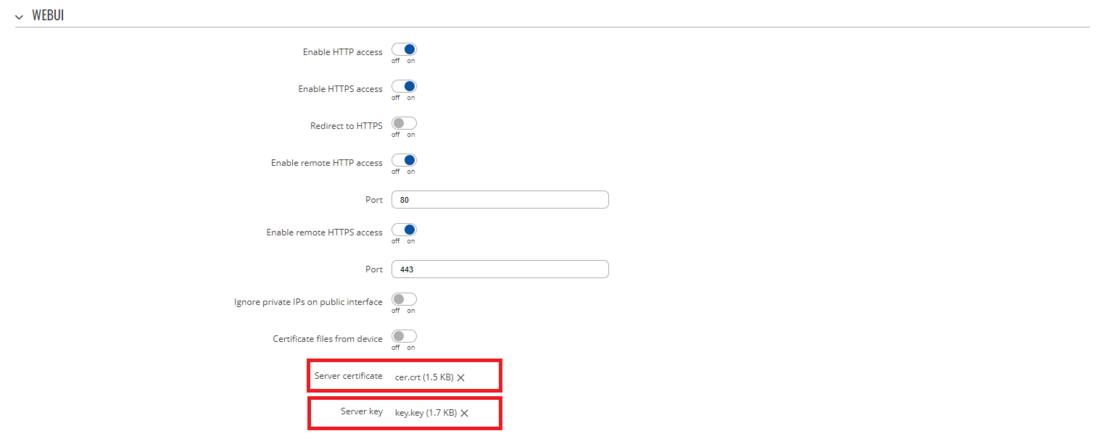
4) Click SAVE & APPLY.
Open the WebUI again using the DNS record:
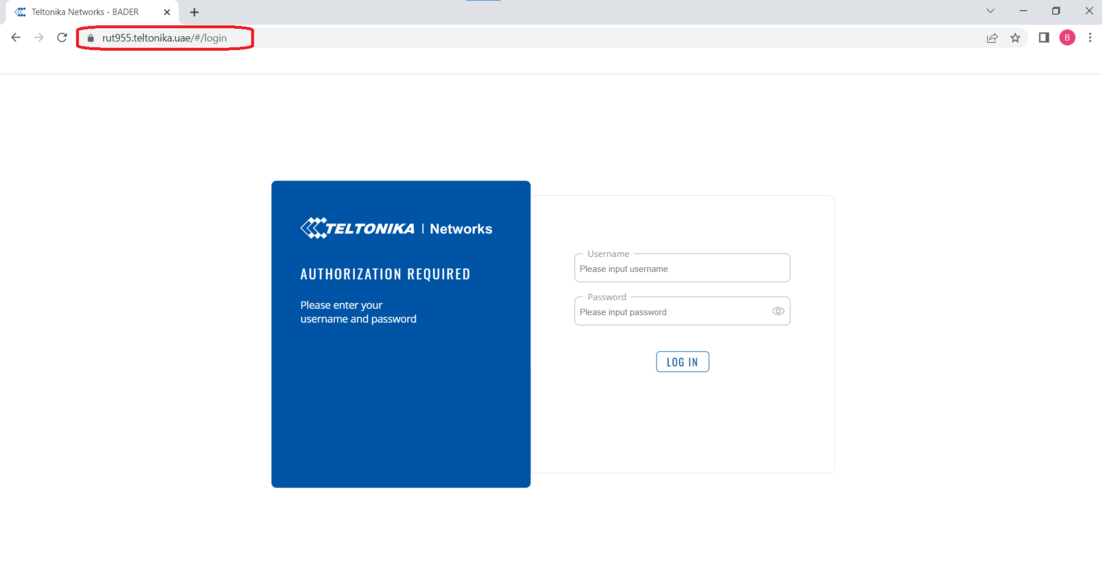
Now we can access the WebUI securely, and we can turn of the HTTP access.
