DMVPN configuration
Introduction
Dynamic Multipoint VPN (DMVPN) is a dynamic tunneling form of a virtual private network (VPN) supported on Cisco routers. This article contains step-by-step instructions on how to configure DMVPN between a "Hub" and two "Spokes" using RUT9xx routers.
Prerequisites and overview
You will need:
- At least two RUT9xx routers
- A PC to configure the routers
- (optional) A Cisco router
- HUB has to be reachable from spokes (HUB must have Public IP address, or has to be in the same WAN network as Spokes)
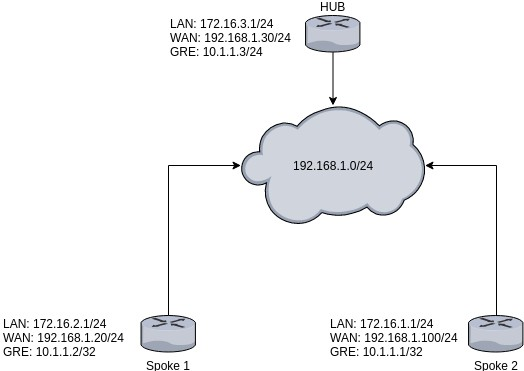
Configuration scheme:
Spoke configuration
This section contains information on how to configure DMVPN Spokes. Firstly, we'll configure the DMVPN instance to make to the connection possible. Then we'll set the Border Gateway Protocol (BGP) parameters as our dynamic routing solution.
Note: at the moment, BGP is the only stable dynamic routing solution that can work with DMVPNs.
Spoke configuration: DMVPN
Navigate to the Services → VPN → DMVPN page and follow the instructions provided below.
Step 1: create a new DMVPN instance: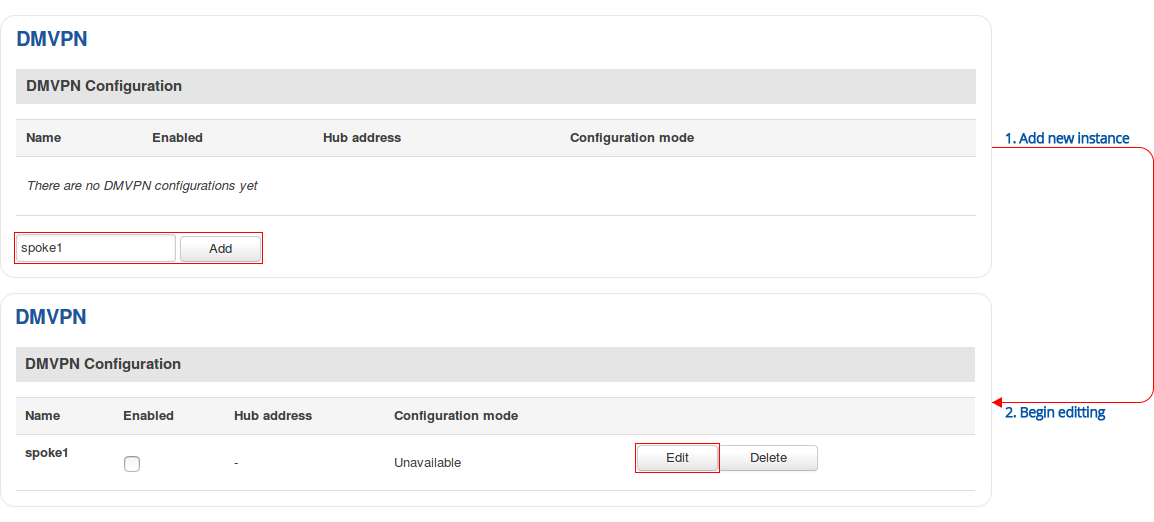
Step 2: configure DMVPN parameters:
Step 3: configure GRE parameters:
Step 4: configure IPsec parameters: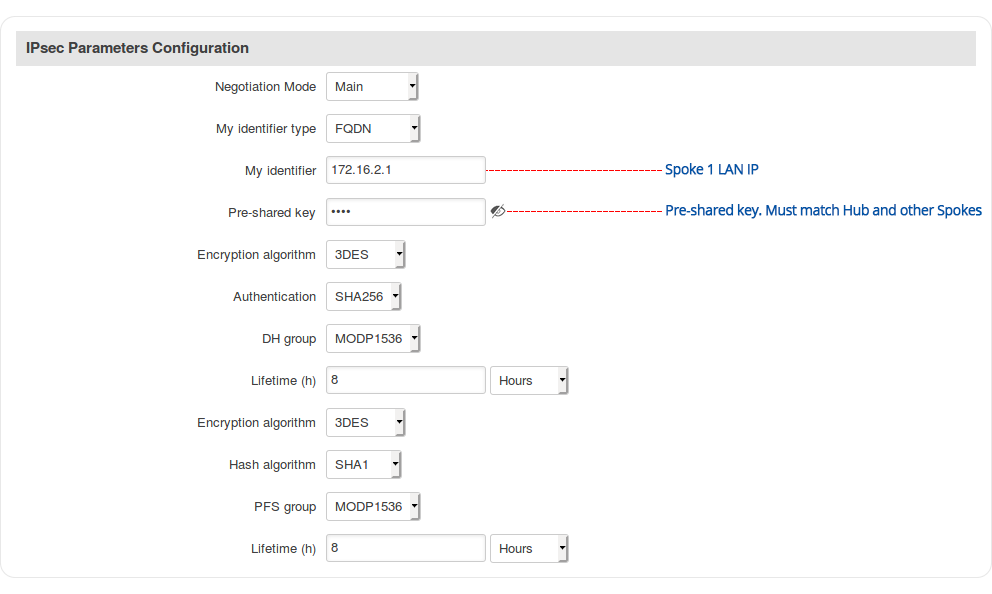
Step 5: configure NHRP parameters or leave default values:
Step 6: save changes
Repeat this on different routers as many times as the number of Spokes that you need. Remember that other Spokes will have different LAN, WAN and GRE IP addresses.
Spoke configuration: BGP
Navigate to the Network → Routing → Dynamic Routes → BGP Protocol page and follow the instructions provided below.
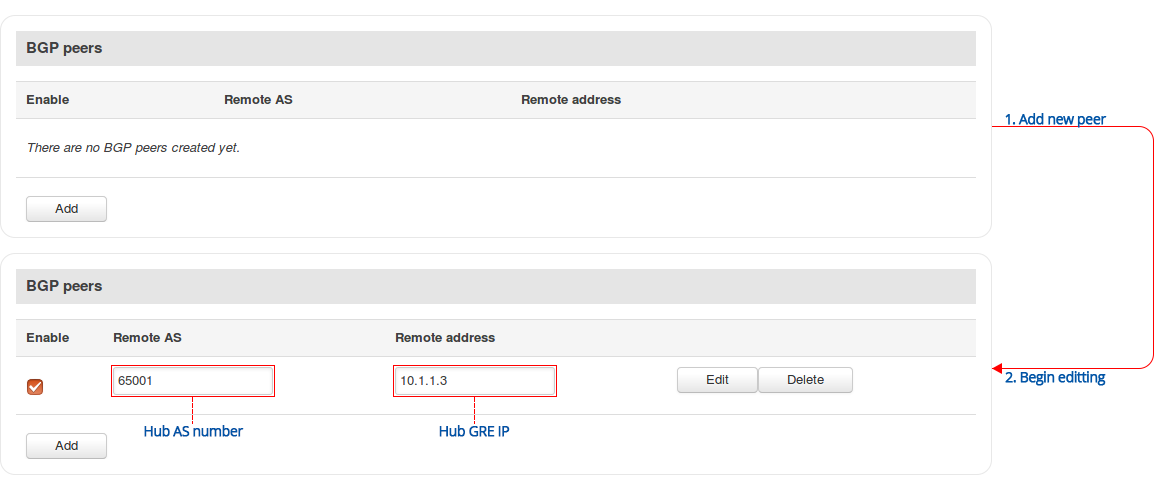
Step 2: configure BGP instance: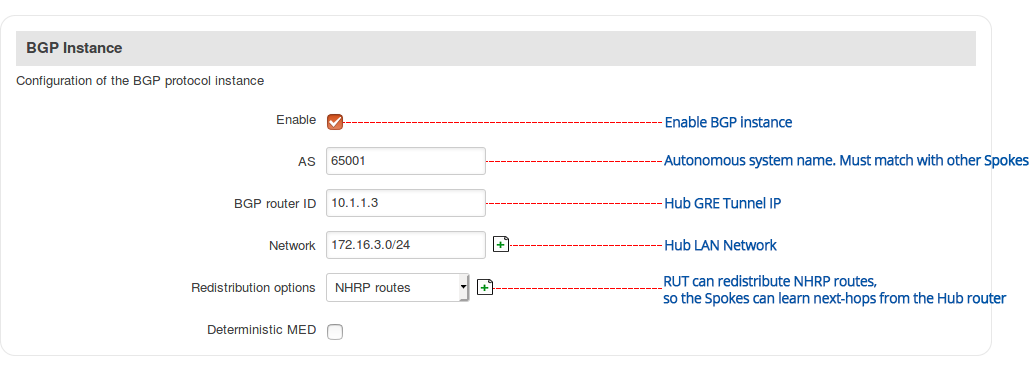
Step 4: save changes
Hub configuration
Hub configuration: DMVPN
Navigate to the Services → VPN → DMVPN page and follow the instructions provided below.
Step 1: create a new DMVPN instance: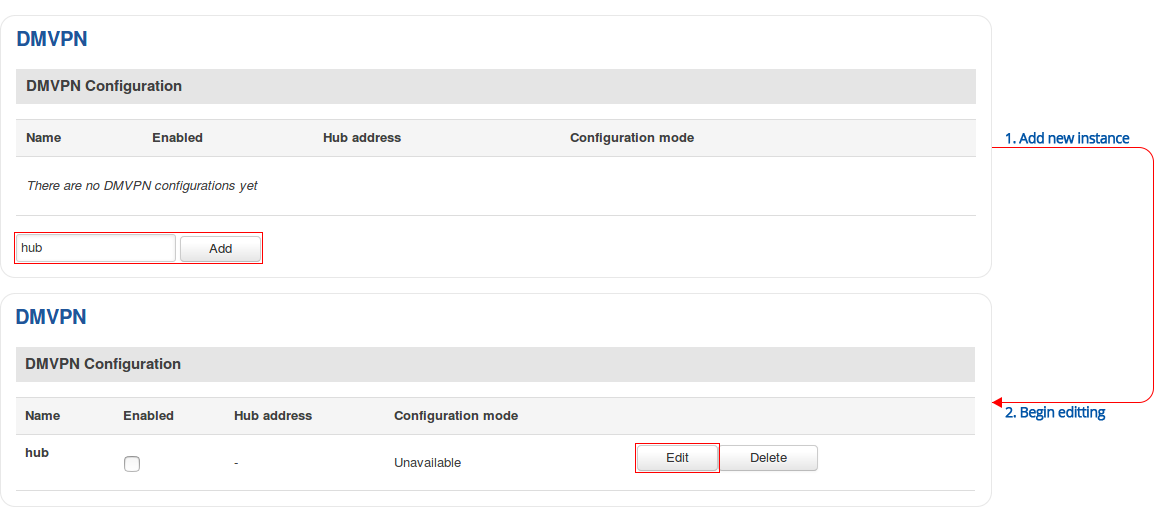
Step 2: configure DMVPN parameters:
Step 3: configure GRE parameters:
Step 4: configure IPsec parameters: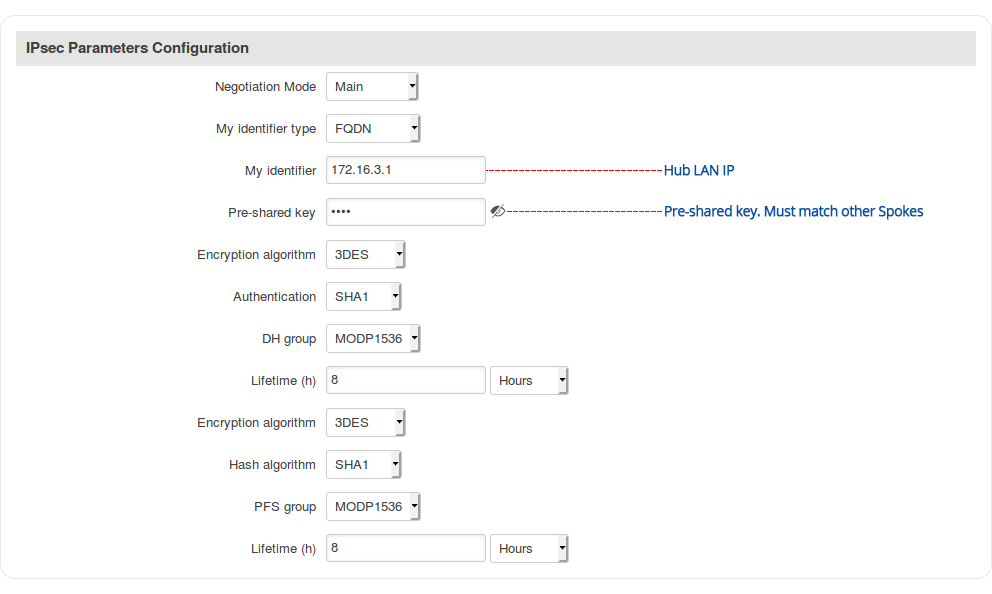
Step 5: configure NHRP parameters or leave default values:
Step 6: save changes
Hub configuration: BGP
Navigate to the Network → Routing → Dynamic Routes → BGP Protocol page and follow the instructions provided below.
Step 2: configure BGP instance:
Step 3: configure BGP peer group: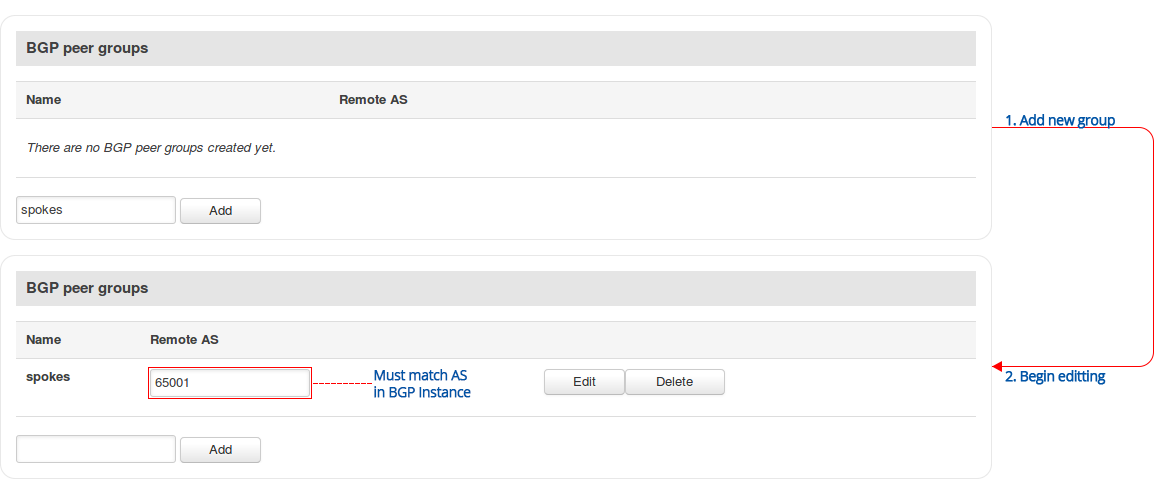
Step 4: save changes
Cisco configuration
If you plan on using a Cisco router with this topology, you can use the configuration provided in this section. The configuration is set in accordance with the configuration scheme in section 2 of this article.
Cisco Spoke configuration: DMVPN
crypto isakmp policy 1
encr aes
hash md5
authenticatio pre-share
group 5
!
crypto isakmp key 1234 address 192.168.1.30
!
!
crypto ipsec transform-set DMVPN-TS esp-3des esp-md5-sha256
mode transport
!
crypto ipsec profile DMVPN
set security-association lifetime secnds 86400
set transform-set DMVPN-TS
!
interface Tunnel0
description mGRE - DMVPN Tunnel
ip address 10.1.1.1 255.255.255.0
ip nhrp network-id 1
ip nhrp nhs 10.1.1.3 nbma 192.168.1.30
ip nhrp shortcut
ip nhrp redirect
tunnel source GigabitEthernet0/0/1
tunnel destination 192.168.1.30
tunnel key 1234
tunnel protectio ipsec profile DMVPN
!
interface GigabitEthernet0/0/1
description Wired DMVPN
ip address 192.168.1.100 255.255.255.0
negotiation auto
Cisco Spoke configuration: BGP
router bgp 65001
bgp log-neighbor-changes
network 10.1.1.0 mask 255.255.255.0
neighbor spokes-ibgp peer-group
neighbor spokes-ibgp remote-as 65001
neighbor spokes-ibgp route-reflector-client
neighbor spokes-ibgp soft-reconfiguration inbound
neighbor 10.1.1.3 peer-group spokes-ibgp
Cisco Hub configuration
interface Tunnel0
description mGRE - DMVPN Tunnel
ip address 10.1.1.3 255.255.255.0
ip nhrp network-id 1
ip nhrp nhs dynamic nbma multicast
ip nhrp shortcut
ip nhrp redirect
tunnel source GigabitEthernet0/0/1
tunnel key 1234
tunnel protection ipsec profile DMVPN
!
router bgp 65001
bgp log-neighbor-changes
network 10.1.1.0 mask 255.255.255.0
neighbor spokes-ibgp peer-group
neighbor spokes-ibgp remote-as 65001
neighbor spokes-ibgp route-reflector-client
neighbor spokes-ibgp soft-reconfiguration inbound
neighbor 10.1.1.3 peer-group spokes-ibgp
neighbor 10.1.1.2 peer-group spokes-ibgp

