Serial OverIP communication between Server and Client
Introduction
This article provides a configuration example to enable communication from a serial device connected to the TRB142/5 to another serial device (e.g. RUT955/6) using OverIP via public IP or RMS VPN.
Configuration Overview and Prerequisites
TRB142/5 and RUT955/6 have serial communication ports, that combined with Serial-Over-IP functionality on server enabled to gather of all information from clients, and simultaneously send to all clients in remote sites.
Prerequisites
- 2 devices with serial port (e.g. TRB142/5, RUT955/6, TRB245/55)
- 2 end devices capable of serial communication (we're going to use a PC and Hercules app)
- Serial cables to connect to the end device ( 2 x RS232-USB will be used)
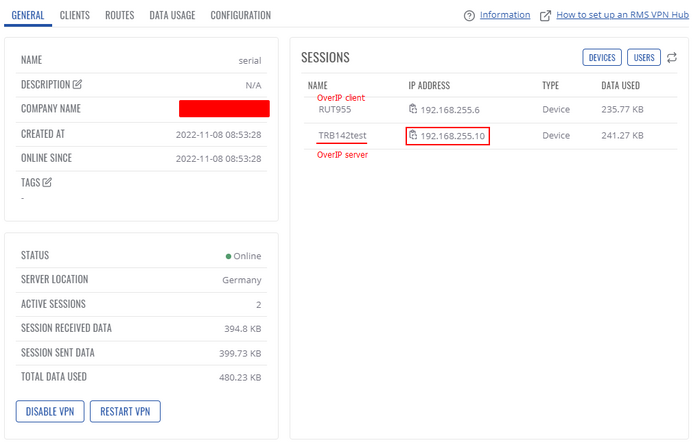
- Public IP or RMS VPN configured.
Topology
Configuration
OverIP server
Firstly, we'll need to configure the Serial-Over-IP server. Navigate to Services->RS232, or (if you're going to use RS485, navigate there instead).
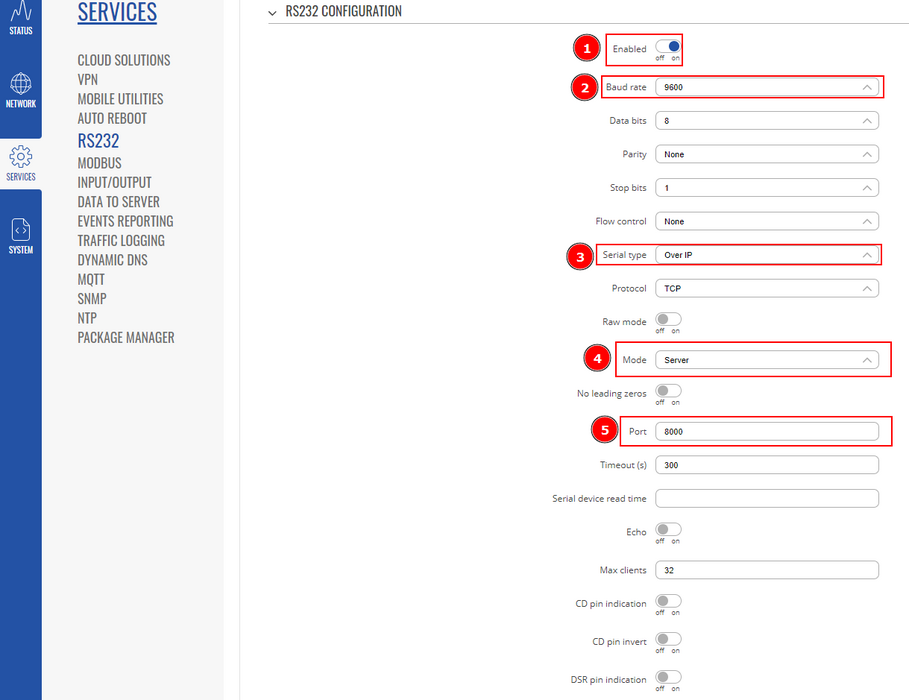
- Enable the interface
- Select baud rate (9600)
- Serial type (Over IP)
- Mode Server
- Select port (8000)
Now, you should let specific IP through, or just use 0.0.0.0/0 for the whole internet to be allowed in.
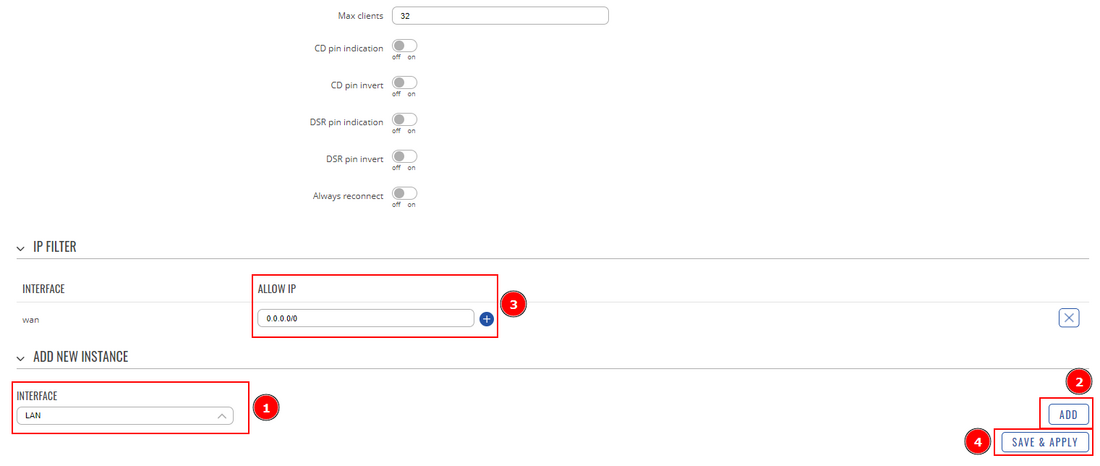
- Select through which interface serial packets will come in
- Add it
- Type, which IPs will be allowed in
- Save
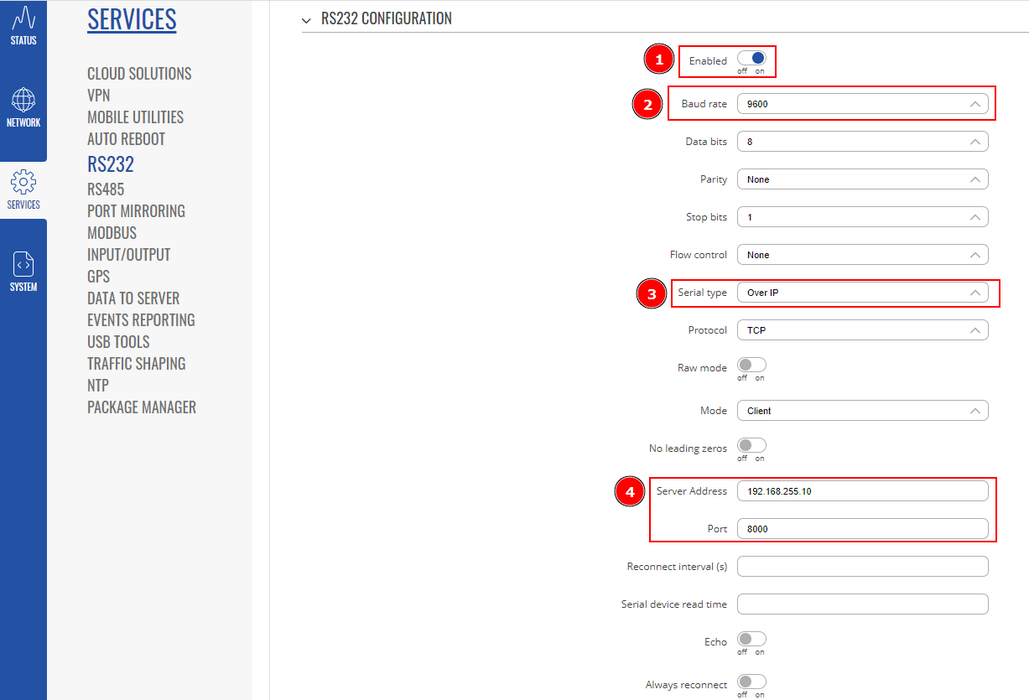
OverIP client
- Enable the interface
- Select baud rate (9600)
- Serial type (Over IP)
- Mode Client
- Type in the server's public IP or RMS VPN's IP
- Select port (8000)
Testing
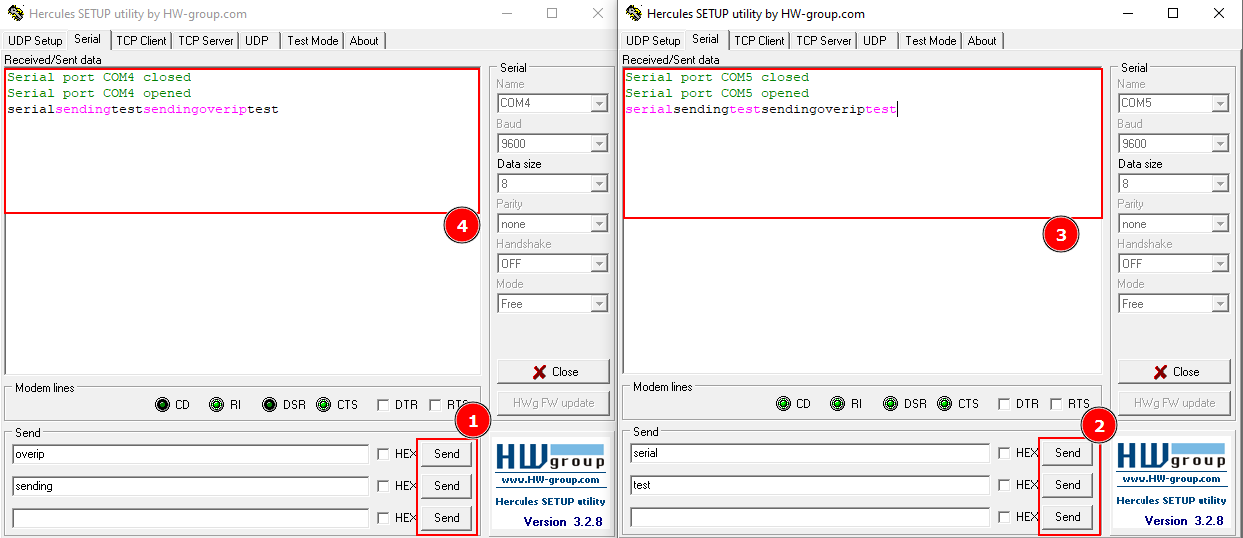
After configuration has been complete, we'll need to test it. Launch Hercules on both PCs and connect using serial protocol to connect to TRB142/5 and RUT955/6.
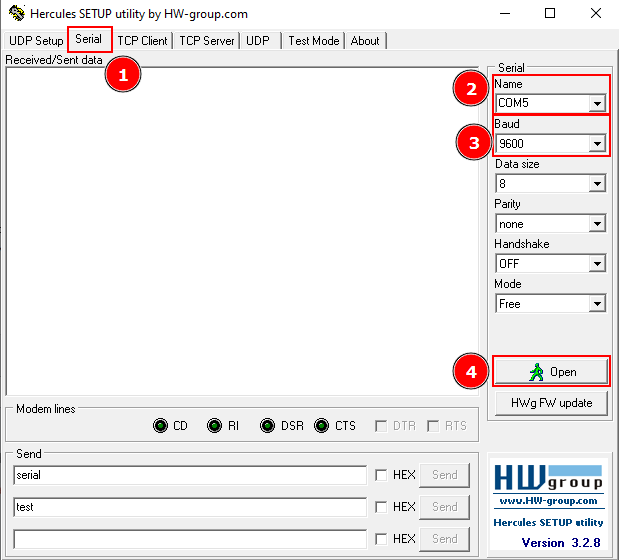
- Select serial protocol
- Select the COM port to which your device is connected (On PC you can use Device Manager (Windows) to check this)
- Match the baud rate to which you've configured in the device
- Open the connection
- Now try sending any message from the client to the server and vice versa.
- You should see the message you've sent appearing on the other side of the serial device.


