Template:Networking rutos configuration example guest wifi
Introduction
Most of us are aware, that network security is extremely important. If your WiFi network is not properly secured, it makes you and all of your home or office resources vulnerable to a variety of security threats. To stay ahead of the curve, many companies and home users have guest WiFi. Unlike your regular WiFi network that you or your company members use, the guest WiFi network restricts what your guests can do in your network. It gives visitors access to the Internet connection, but nothing else making you or your company a lot more secure. This chapter is a guide on configuring a guest WiFi.
Configuring router (RUTX)
Before you start configuring the router turn on "Advanced WebUI" mode. You can do that by clicking the "Basic" button under "Mode", which is located at the top-right corner of the WebUI.
New Wireless
 |
|
|---|---|
|
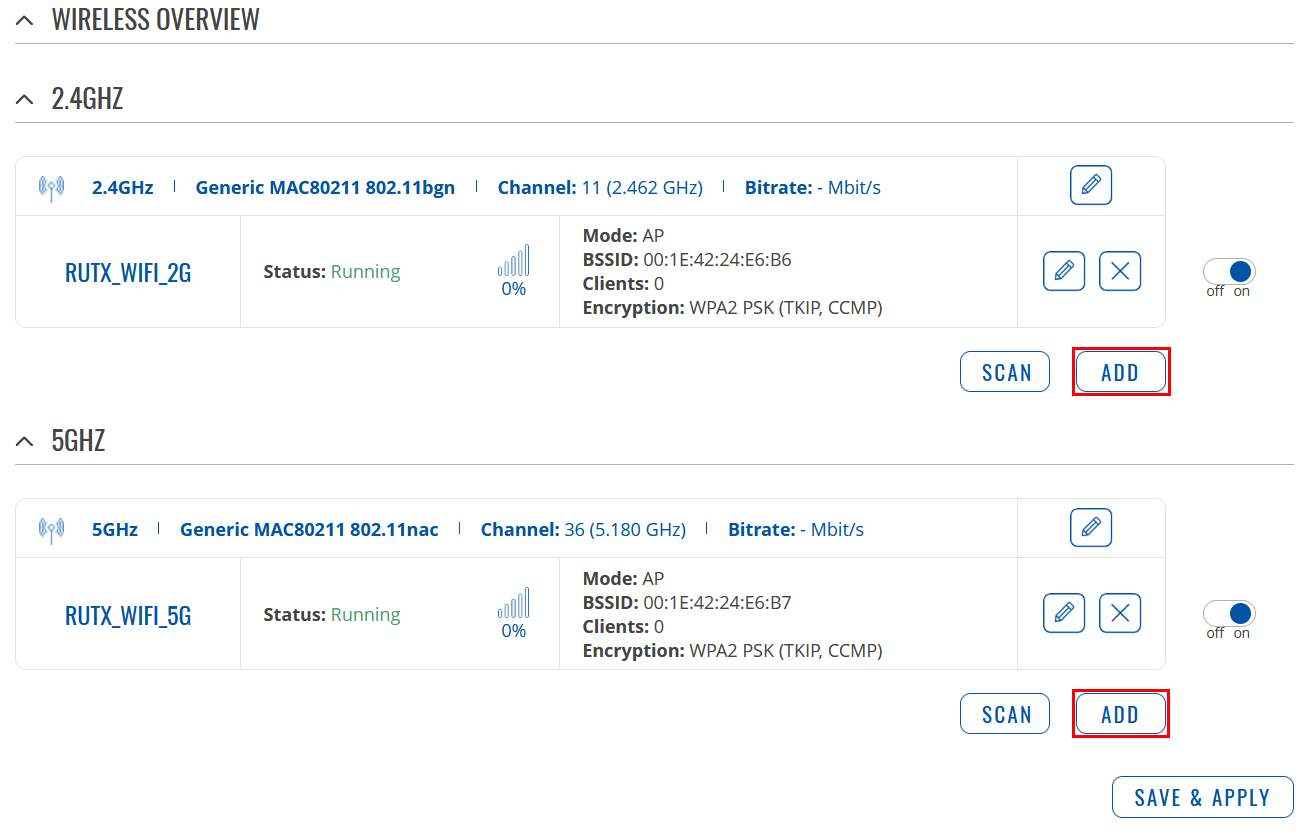
Login to the router's WebUI, navigate to the Network → Wireless page and do the following:
|
 |
|
|---|---|
|
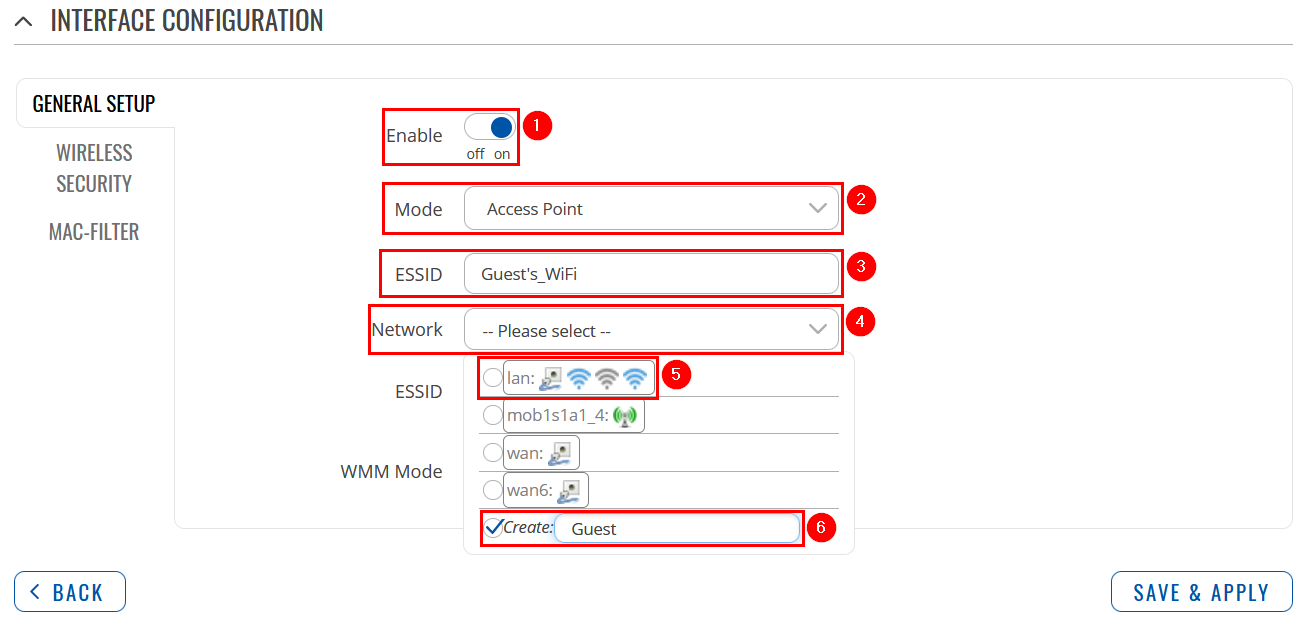
On General Setup tab do the following:
|
 |
|
|---|---|
|
Switch to Wireless Security tab and do the following:
|
 |
|
|---|---|
|
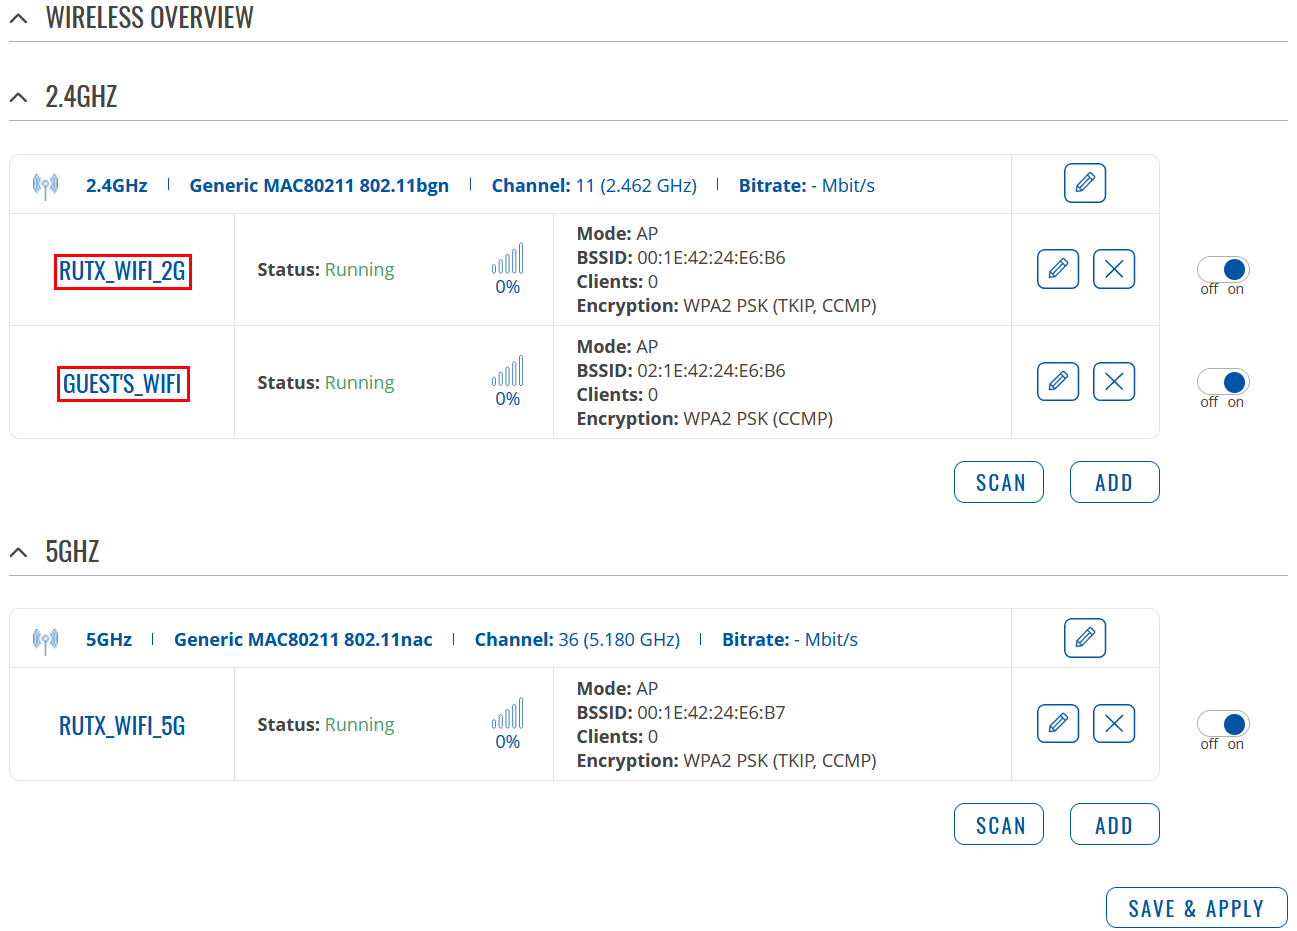
Wait for configuration to apply. Two Wireless Access Points should be enabled |
New LAN
 |
|
|---|---|
|
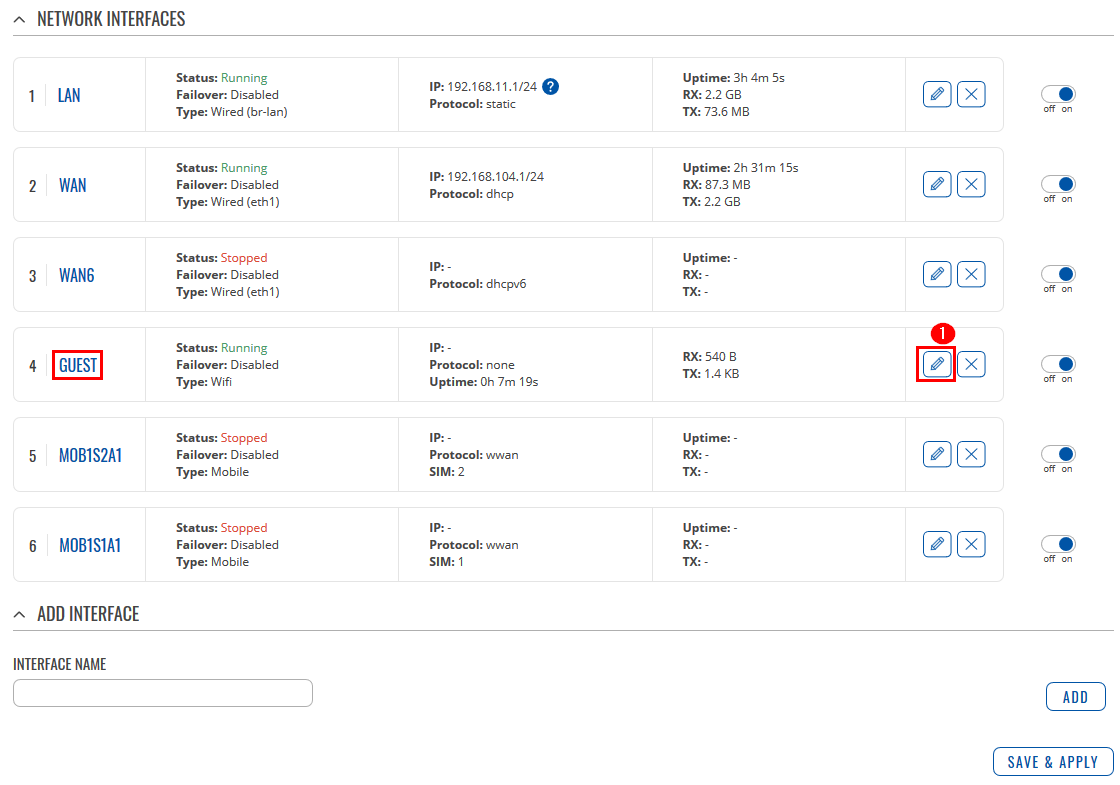
Navigate to the Network → Interfaces page and do the following:
|
 |
|
|---|---|
|
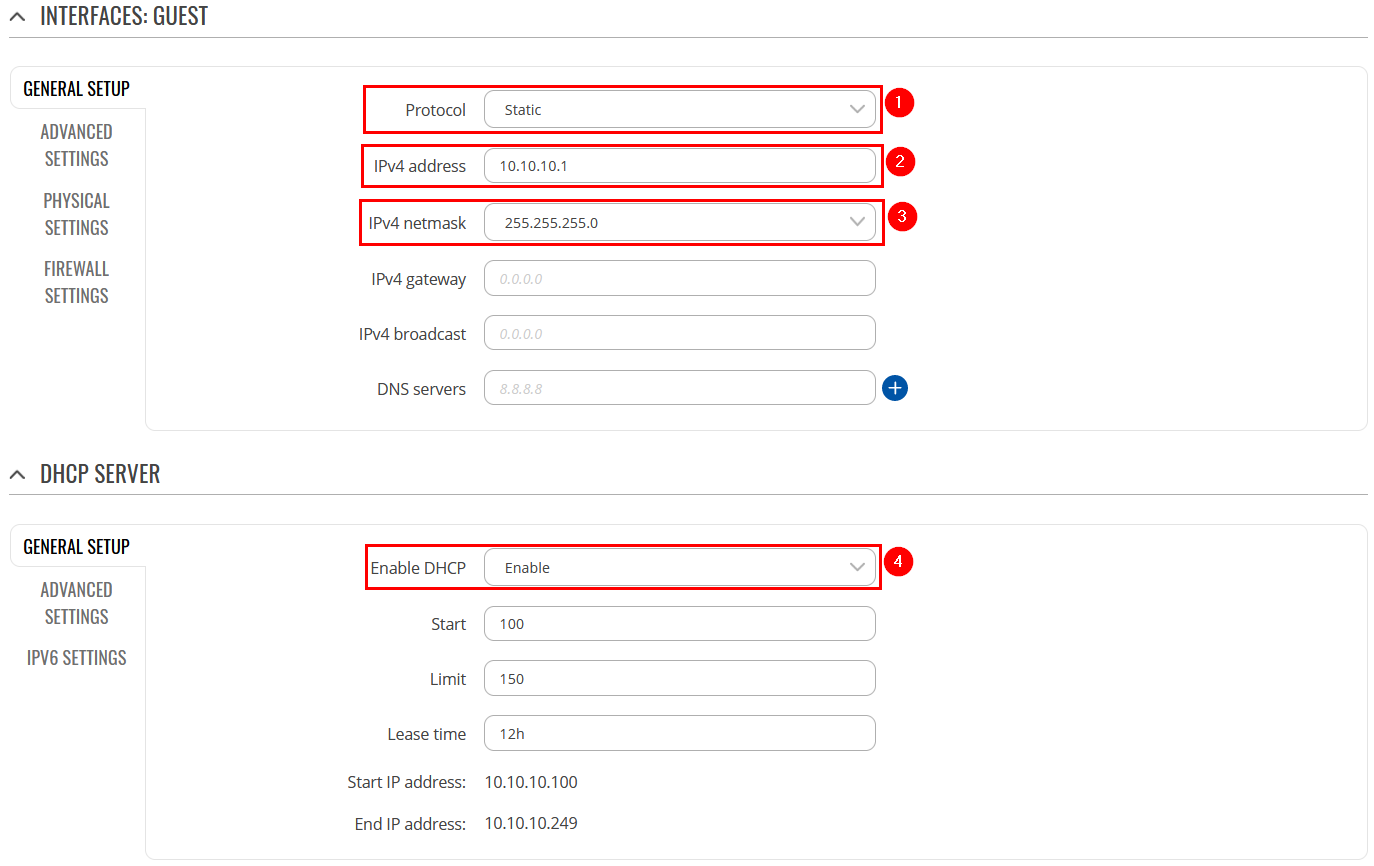
In the LAN interfaces page, do the following:
|
Edit Firewall zone
 |
|
|---|---|
|
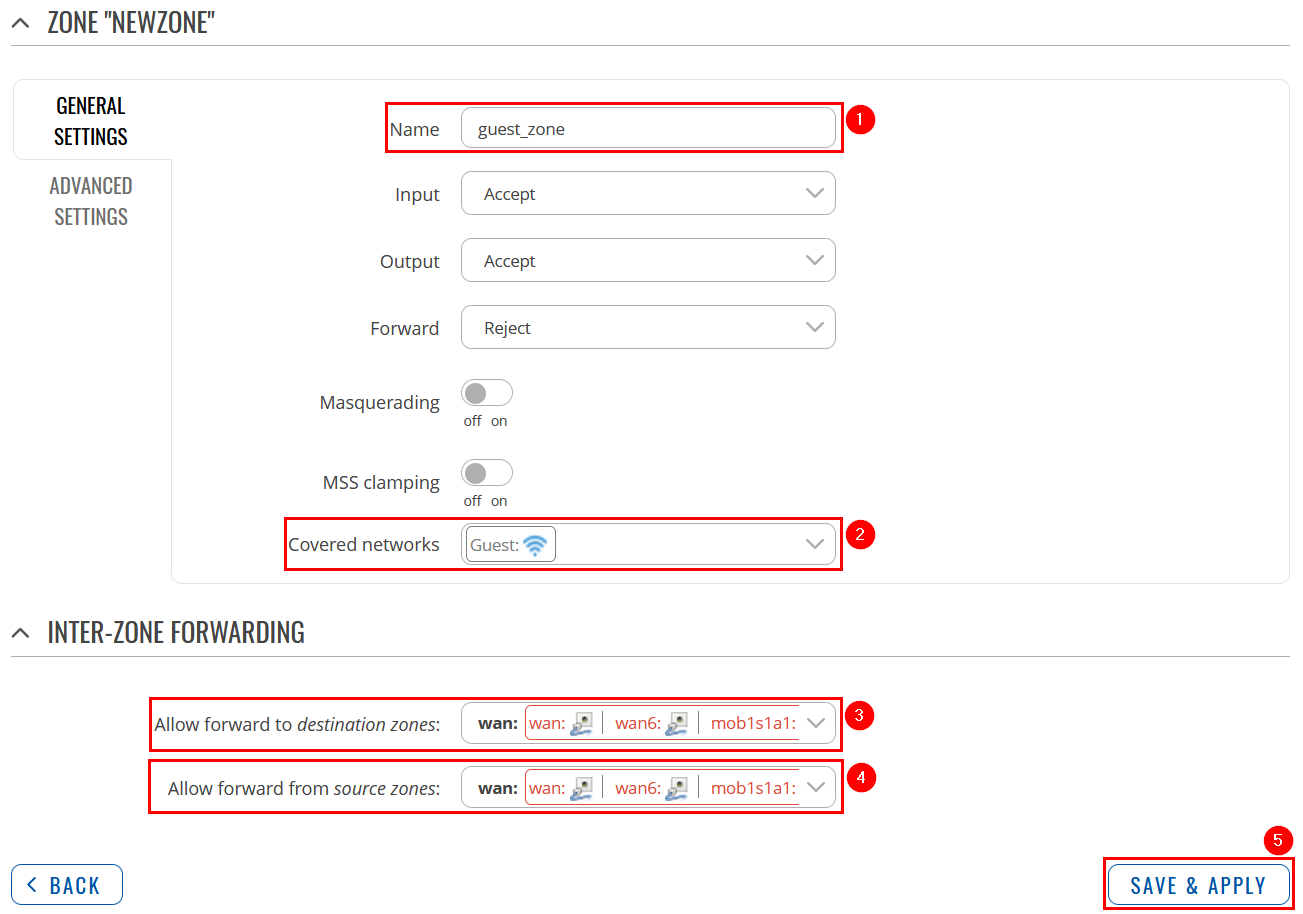
Navigate to the Network → Firewall → General Settings page and do the following
|
Results
If you've followed all the steps presented above, your configuration should be finished. If you are near a RUT, that is, in a wireless zone, turn on WiFi on your device and view the available networks. You should see the available SSID - "RUT_WiFi" and "Guest_WiFi". Select one of them and enter the appropriate WiFi password.
Wireless users connected to SSID: “RUTX_WIFI”, will be assign to “LAN”, and will get IP from main pool 192.168.1.0/24.
Wireless users connected to SSID: “GUEST'S_WIFI”, will be assign to LAN “Guest”, and will get IP from new pool 10.10.10.0/24.
Guest hosts are unable to access any data from pool 192.168.1.0/24.


