Template:Networking rutos configuration example Setting up a ZeroTier tunnel between RUTX devices
ZeroTier One is an open source software product which establishes Peer to Peer VPN (P2PVPN) connection between laptops, desktops, phones, embedded devices, cloud resources, and apps.
Introduction
This article contains step-by-step instructions on how to set up and manage a Zerotier network tunnel using two Teltonika-Networks RUTX devices.
Prerequisites
You will need:
- Two Teltonika RUTX routers
- A PC to configure the routers
Configuration scheme
Setting up a ZeroTier network
- Go to https://my.zerotier.com/login and log in or create an account if you haven't already.
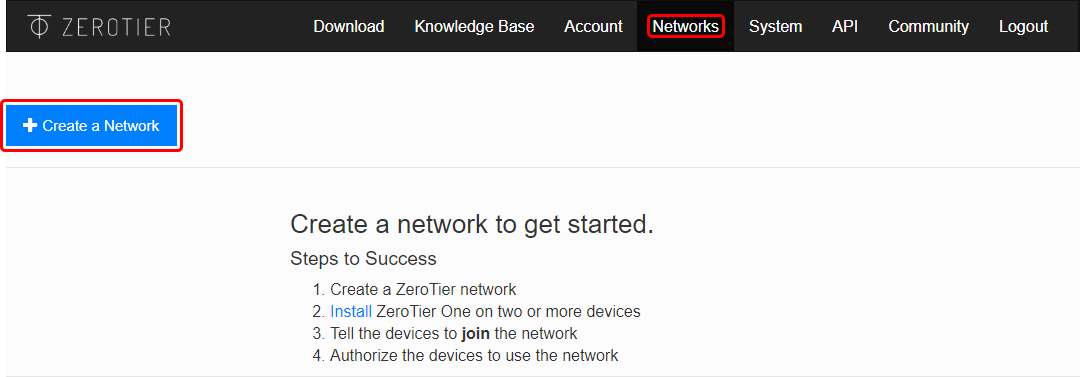
- Open the 'Networks' tab and click the 'Create a Network' button.
- Click the newly created network to begin configuration.

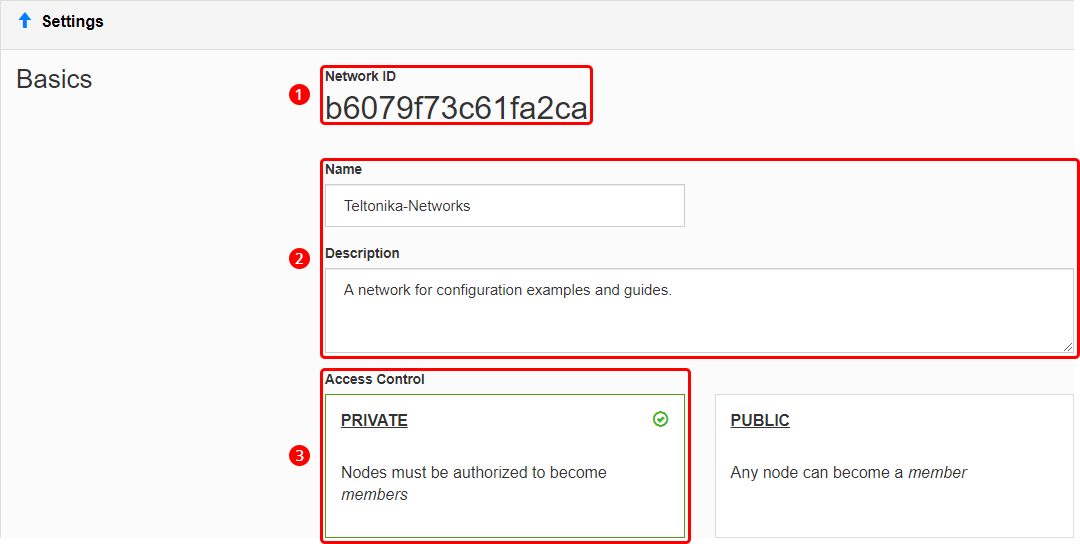
- Before configuring anything else, you may want to set up some basic settings.
- Copy the Network ID; you will need it later for ZeroTier node configuration.
- Optionally, set up a name and description for your network for easier management.
- Select 'Private' access control type; unless you want nodes to connect freely, without authorization.
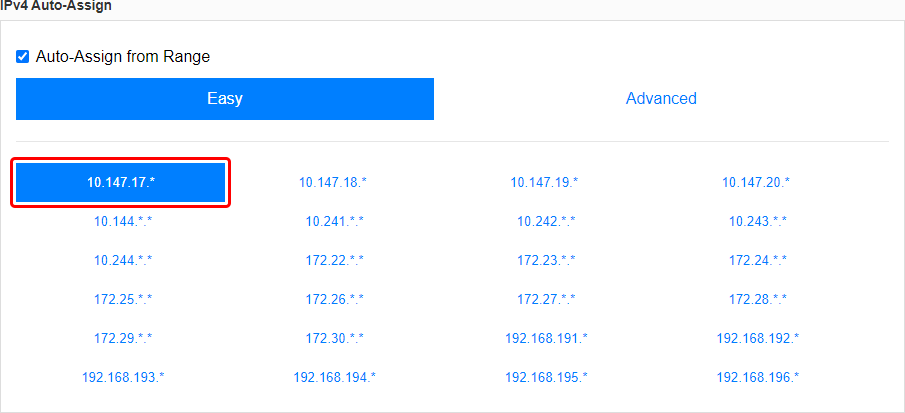
- Scroll down to find the 'IPv4 Auto-Assign' section. Select one of the provided private IP ranges for your network or click 'Advanced' and set up the range manually. For this example we'll be using the 10.147.17.* selection which means our network will be using the 10.147.17.0/24 IP range.


The last step concludes the ZeroTier network configuration. However, you may want to modify to the settings based on your specific requirements, but the network will function without any additional settings.
The next step is configuring members (aka nodes) for our ZeroTier network.
Node configuration
Zerotier nodes or members are clients that can connect to a ZeroTier network. This section provides information on how to configure ZeroTier nodes on different types of machines.
Teltonika-Networks device
- Log in to your device's WebUI, and navigate to the Services → Package Manager page.
- Find the ZeroTier package in the list and install it.
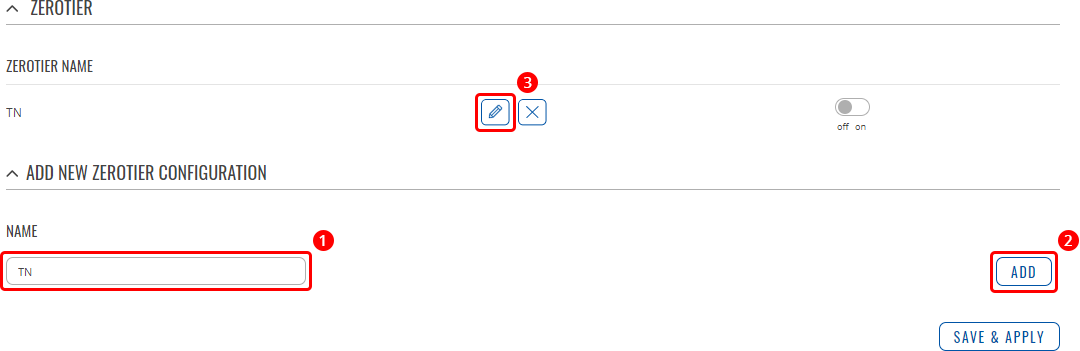
- Navigate to the Services → VPN → ZeroTier page and create a new ZeroTier configuration.
- Enter a custom name for the configuration.
- Click 'Add'.
- Click the 'Edit' button next to the newly created configuration.
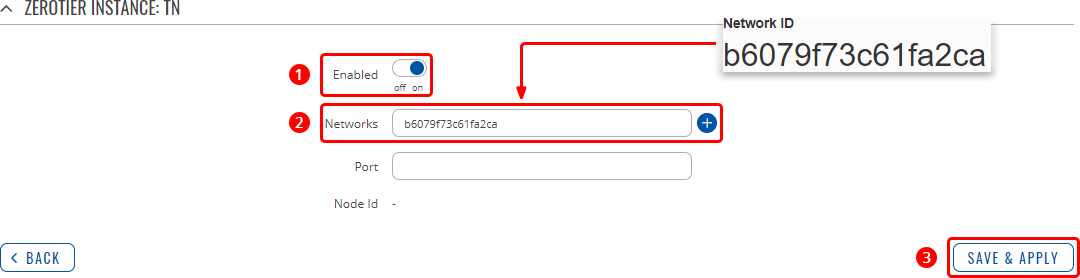
- Complete the configuration.
- Turn the configuration on.
- Paste the ZeroTier Network ID into the 'Networks' field.
- Click 'Save & Apply'.


RUTX configuration
Connect to router's WebUI, go to Services > VPN > GRE Tunnel. Enter a name for your GRE instance, click ADD and when instance appears in GRE Configuration field, click Edit.

Then apply the configuration presented below.

- Enable instance.
- Select Tunnel source (select your WAN interface).
- Enter Remote endpoint IP address (Cisco WAN IP).
- Set MTU to 1440.
- Enable Don't fragment.
- Write Local GRE interface IP address (create GRE tunnel IP address or just use the same as in the example).
- Write Local GRE interface netmask (create GRE tunnel netmask or just use the same as in the example)
- Leave everything else as default and click Save & Apply.
Testing configuration
If you've followed all the steps presented above, your configuration should be finished. But as with any other configuration, it is always wise to test the setup in order to make sure that it works properly. In order to test the GRE Tunnel connection, login to RUTX WebUI and go to Services → CLI. Login with user name: root and the router's admin password. From there you should then be able to ping the opposite instance's virtual IP address. To use a ping command, type ping <ip_address> and press the "Enter" key on your keyboard:

If the ping requests are successful, congratulations, your setup works! If not, we suggest that you review all steps once more.

