Setting up a Static IP address on a macOS
Introduction
This article provides a short guide on how to configure a Static IP address on a macbook that uses a macOS Operating System (OS). A Static IP configuration on a PC may be required when:
- Upgrading the router's Bootloader version (Bootloader upgrade guide)
- Upgrading the router's Firmware via the Bootloader menu (Firmware upgrade via the Bootloader menu guide)
- You lose access to your router's LAN] network (for example, when configuring Mobile Passthrough mode, Mobile Bridge mode, when you accidentally disable the router's DHCP server, etc.)
- You're trying to connect to another device that has a Static IP address (for example, an IP camera)
Or any other case that you may think of.
Set up
The instruction below are aimed to be applied and used with the macOS 12.0 Monterey Operating System (OS), although the configuration is quite similar on other versions of macOS.
Step 1:
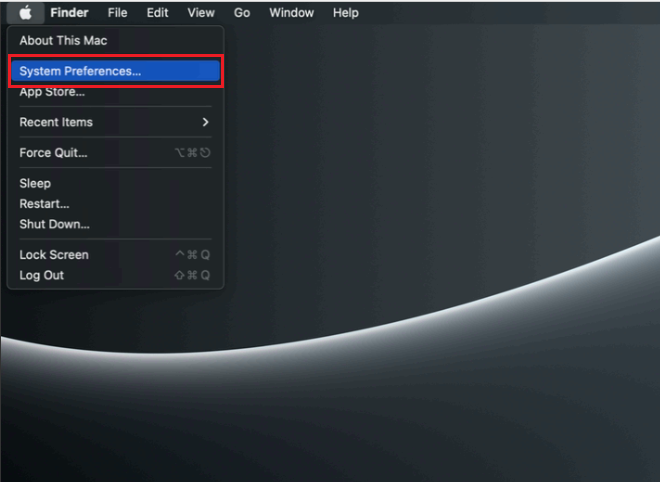
To set up a static IP address on your PC, you must first press "Apple" logo button in the top left corner and select "System Preferences...".

Step 2:
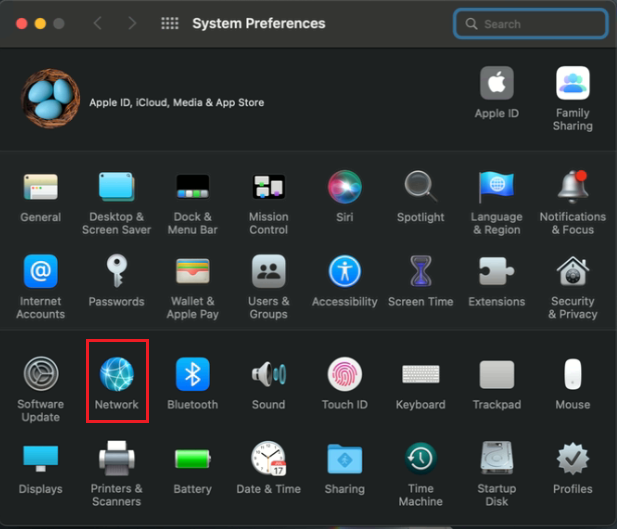
When in the System Preferences window, click Network:
Step 3:
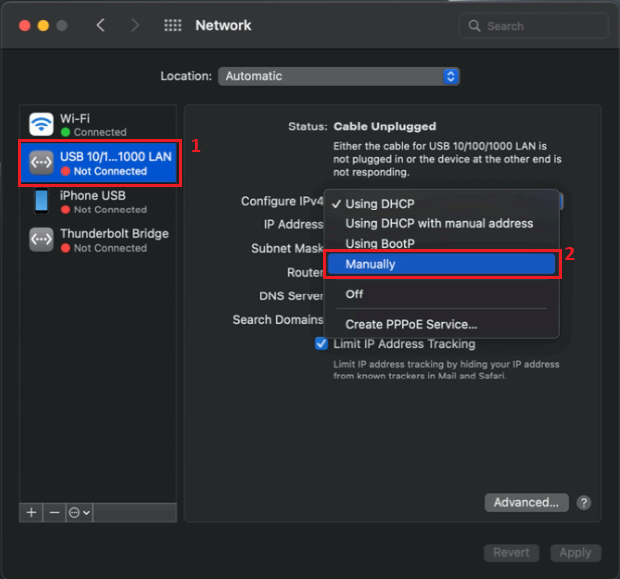
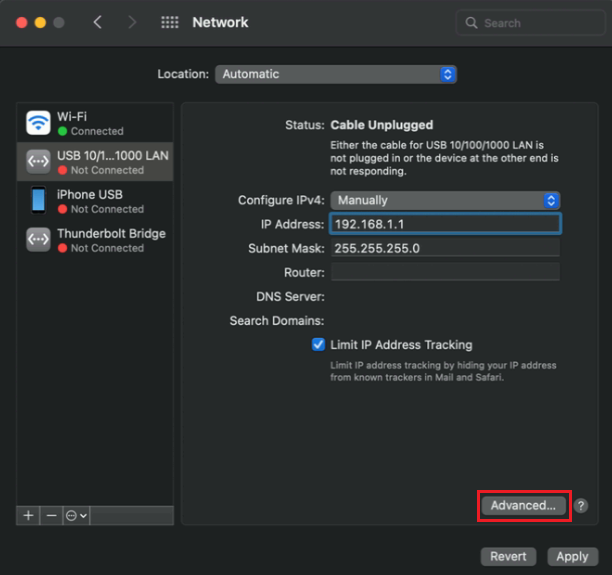
Next, on the left side of Network settings window, right-click on the Network connection associated with your Ethernet adapter and on the right side of Network settings window select Manually in the "Configure IPv4:" option field:
Step 4:
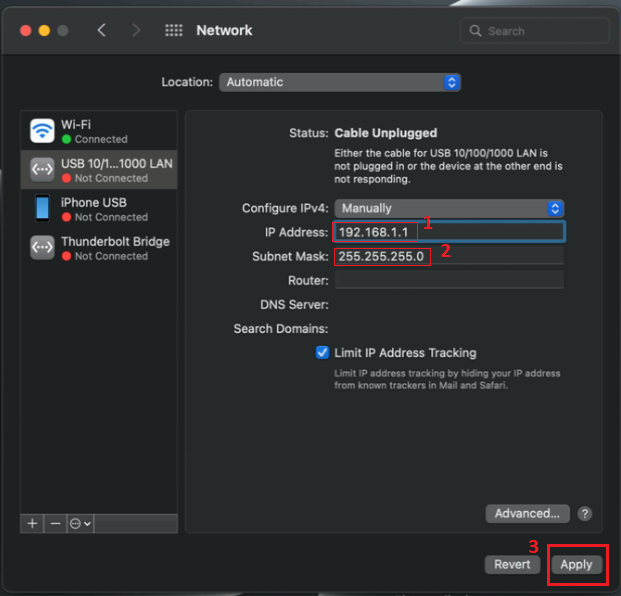
Finally, enter a static IP for your PC (e.g., 192.168.1.1) and Subnet mask - 255.255.255.0 then press "Apply" for saving the changes:
Step 5 (optional): DNS set up
If there is a need to set up specific DNS settings, press "Advanced...". By opening Advanced settings window you also are available to edit IPv4 and IPv6 settings; WINS; 802.1X; Proxies and Hardware settings.
Step 6 (optional): DNS set up
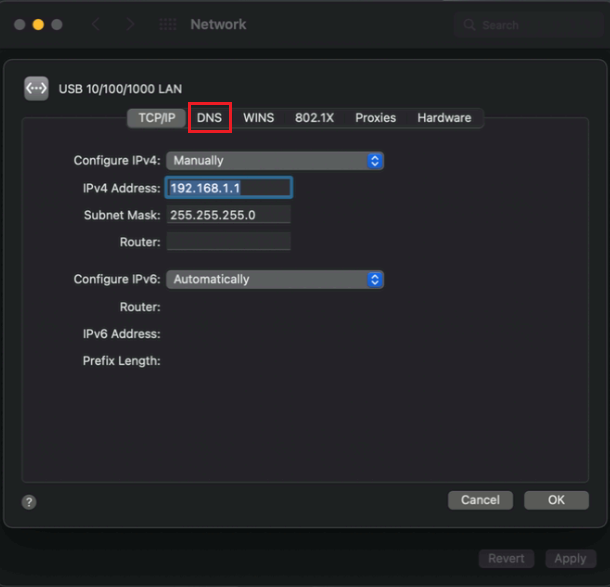
After Advanced settings window open up, select "DNS" field:
Step 7 (optional): DNS set up
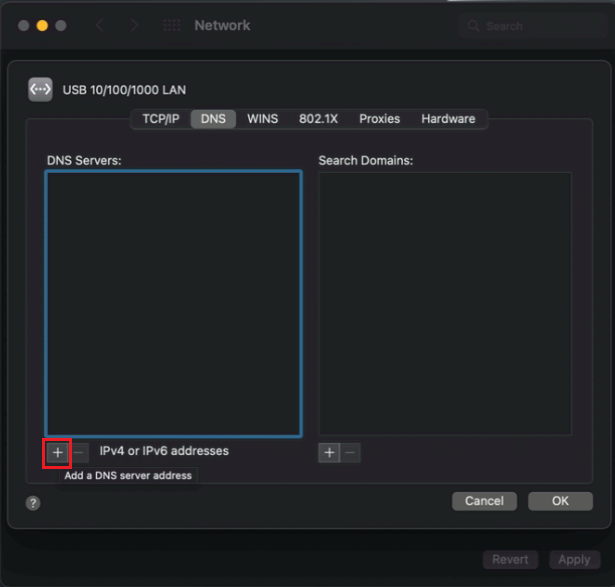
Now you are in the DNS settings field. Press "+" symbol on the bottom left corner for adding the DNS server:
Step 8 (optional): DNS set up
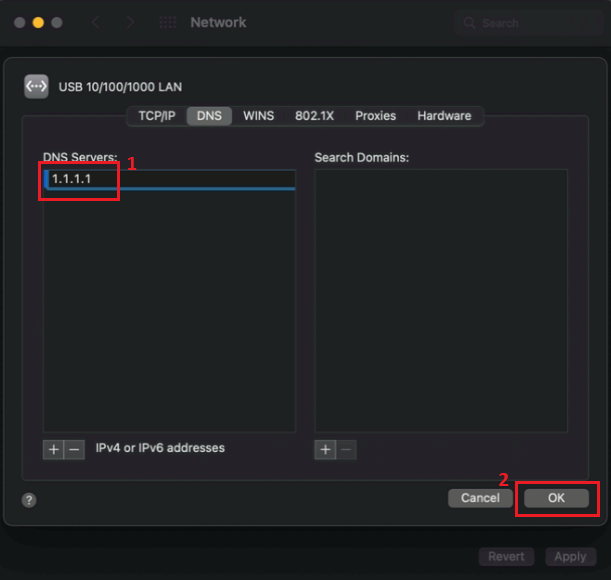
Type in DNS (e.g., 1.1.1.1) and press "OK" button on the bottom right corner. After DNS server is added do not forget to press "Apply" once again in the Network settings window for saving the changes:
additional notes
- Note: once you are done with your configurations (the reason you needed a Static IP), you should undo the changes that you made to the computer's IPv4 configuration, because otherwise, you might not have an Internet connection. To undo these changes, go back to the Network settings window and check automatically in the "Configure IPv4:" option field.

