Cumulocity Configuration
Cumulocity IoT is a cloud-based, real-time IoT management platform that's also compatible with Teltonika-Networks devices.
Introduction
This article contains step-by-step instructions on how to set up a Cumulocity server and register a Teltonika-Networks device on it.
Basic setup
Basic setup consists of:
- Creating a Cumulocity account
- Configuring Cumulocity on a Teltonika-Networks device
- Registering the device on your Cumulocity server
Create an account
First of all, you will need to set up your Cumulocity environment (server).
- Register an account on Cumulocity.
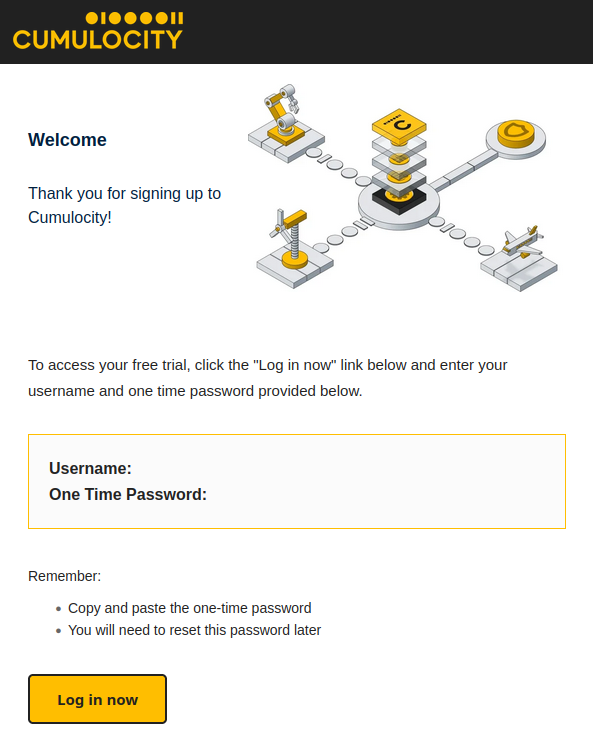
- Wait a few minutes after the registration, open your email account and look for an email with the subject 'Welcome to Cumulocity IoT'. Open it and click 'Login to now'.
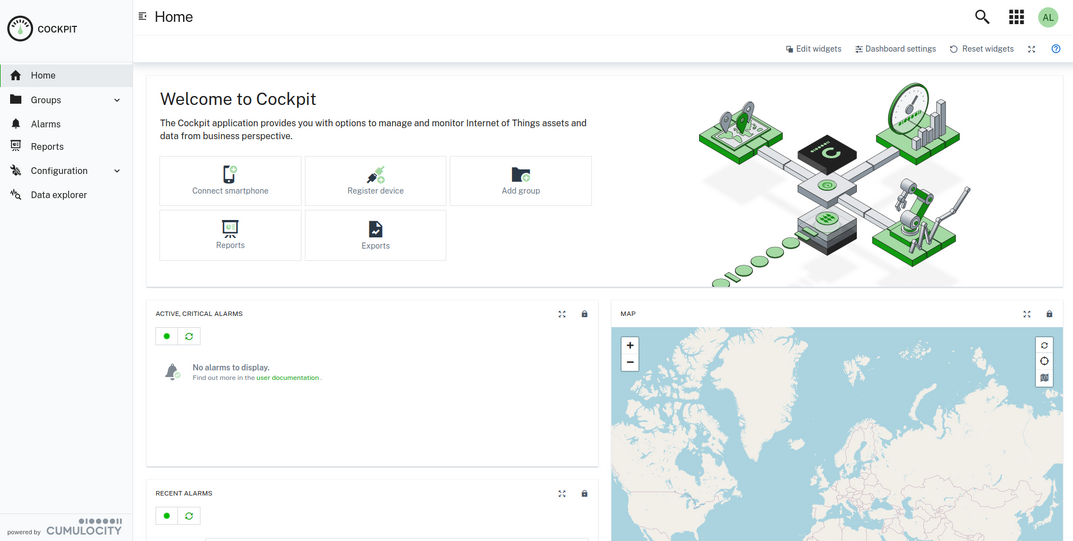
- Upon a successful login you should be redirected to the Cumulocity Cockpit.


Configure a device
Set up Cumulocity on your Teltonika-Networks device.
- Log in to your device's WebUI.
- Go to System → Package Manager and install Cumulocity - Cloud of Things.

- Go to Services → Cloud Solutions → Cumulocity and configure it as follows.
- Enable Cumulocity
- Enable SSL/TLS
- Specify your Cumulocity server's address in the 'Server Address' field.
- Set a connection frequency interval (at least 1 minute).
- Click 'Save & Apply'.


Register a device
Register your Teltonika-Networks device on Cumulocity.
- Find the 'Application switcher' in the top-right corner of the Cumulocity dashboard and go to 'Device management'.

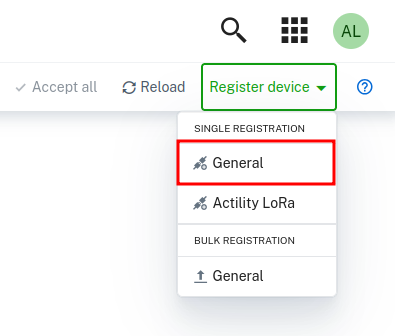
- Then expand the 'Devices' tab in left-hand menu, go to 'Registration' and click 'Register device'.

- In the drop-down menu select option 'General'.
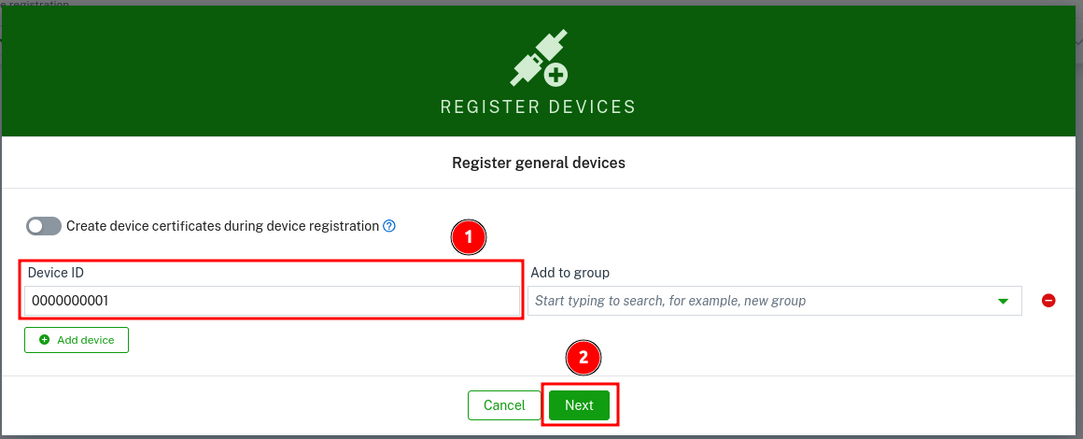
- To complete the registration:
- Enter your device's serial number into the 'Device ID' field. The serial number can be found on the device's housing, box or in the WebUI, Status → System page.
- Click 'Next'.
- If the device connects successfully, you should see an indication similar to the one below. Click 'Close' .

- When pop-up window is closed, connection status has to be accepted by clicking button 'Accept'. If needed, user can add security token when adding the device.

- Now added device can be seen in the 'Devices' tab in left-hand menu, go to 'All devices'.
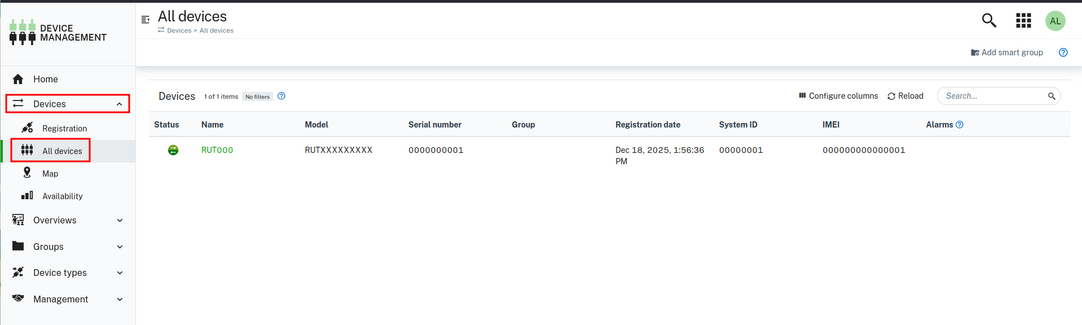 Here is successfully added device to the list and ready to use.


Explanation of example application
There are two steps when adding new properties:
1. Writing template
2. Writing lua script which will stream information.
By default, template location inside router is „/usr/local/usr/lib/lua/cm/srtemplate.txt“. It contains such content:
Teltonika-Networks_RUTOS_v1.0
10,100,GET,/identity/externalIds/SerialNumber/%%,,application/json,%%,STRING,
10,101,POST,/inventory/managedObjects,application/json,application/json,%%,STRING,"{""name"":""%%"",""c8y_IsDevice"":{},""com_cumulocity_model_Agent"":{}}"
10,102,POST,/identity/globalIds/%%/externalIds,application/json,,%%,STRING STRING,"{""externalId"":""%%"",""type"":""SerialNumber""}"
10,103,PUT,/inventory/managedObjects/%%,application/json,,%%,UNSIGNED STRING STRING,"{""name"": ""%%"", ""type"": ""%%""}"
10,104,PUT,/inventory/managedObjects/%%,application/json,,%%,UNSIGNED STRING STRING STRING STRING STRING STRING STRING STRING STRING STRING STRING STRING STRING STRING STRING STRING,"{""name"": ""%%"",""type"": ""%%"",""c8y_Hardware"":{""model"":""%%"",""revision"":""%%"",""serialNumber"":""%%""},""c8y_Firmware"":{""name"":""%%"",""version"":""%%"",""url"":""%%""},""c8y_Mobile"":{""imei"":""%%"",""cellId"":""%%"",""iccid"":""%%"",""imsi"":""%%"",""currentOperator"":""%%"",""connType"":""%%"",""mnc"":""%%"",""lac "":""%%""},""c8y_SupportedOperations"":[""c8y_Restart"", ""c8y_Firmware""]}"
10,105,POST,/measurement/measurements,application/json,,%%,NOW UNSIGNED NUMBER,"{""time"":""%%"",""source"":{""id"":""%%""},""type"":""c8y_SignalStrength"",""c8y_SignalStrength"":{""rssi"":{""value"":%%,""unit"":""dBm""}}}"
10,106,PUT,/inventory/managedObjects/%%,application/json,,%%,UNSIGNED STRING STRING,"{""c8y_Network"":{""c8y_WAN"":{""ip"":""%%""}},""wanType"":""%%""}"
10,107,PUT,/inventory/managedObjects/%%,application/json,,%%,UNSIGNED STRING,"{""c8y_SupportedOperations"":[""%%""]}"
10,108,PUT,/devicecontrol/operations/%%,application/json,,%%,UNSIGNED STRING,"{""status"":""%%""}"
10,109,PUT,/inventory/managedObjects/%%,application/json,,%%,UNSIGNED STRING,"{""c8y_Connection"":{""status"": ""%%""}}"
10,110,PUT,/inventory/managedObjects/%%,application/json,,%%,UNSIGNED STRING STRING,"{""c8y_Availability"":{""lastMessage"": ""%%"", ""status"": ""%%""}}"
10,111,PUT,/inventory/managedObjects/%%,application/json,,%%,UNSIGNED NUMBER,"{""c8y_RequiredAvailability"":{""responseInterval"": %%}}"
10,112,POST,/identity/globalIds/%%/externalIds,application/json,,%%,STRING STRING,"{""externalId"":""%%"",""type"":""c8y_Serial""}"
11,500,$.managedObject,,$.id
11,501,,$.c8y_IsDevice,$.id
11,502,,$.c8y_Restart,$.id,$.deviceId
11,503,,$.c8y_Firmware,$.id,$.c8y_Firmware.url,$.c8y_Firmware.name,$.deviceId
First line contains template version. In this case it is „Teltonika-Networks_RUTOS_v1.0“.
When template is updated, version must be updated as well, otherwise device will use non-updated template version.
The following lines contains requests starting with a number „10“ and responses - starting with a number „11“. Now explanation of request:
Type - 10
Code - 101
Method - POST
URI - /inventory/managedObjects
Content Type - application/json
Accept - application/json
Placeholder - %%
Params - STRING STRING
Template - JSON
Type – requests are identified by a number 10.
Code – request identifier number, each request must contain unique number.
Method – HTTP method of request.
URI – URL that will be used in request.
Content Type – it is Content-Type header field value.
Accept – it is Accept header field value, mostly equal to Content Type.
Placeholder - string which will be replaced in URI or Template.
Params – what kind of params are replaced, JSON template contains two strings.
Template – sent as JSON or plain-text payload after the placeholders have been replaced with the parameter values.
Explanation of response:
Type - 11
Code - 502
Cond - <none>
Value 1 - $.c8y_Restart
Value 2 - $.id
Value 3 - $.deviceId
Type – responses are identified by a number 11.
Code – response identifier code, each response must contain unique number.
Cond – JSON path base pointing to an object or object list from which values are extracted.
Value … - JSON values. Unlimited number of values can be specified.
Take a look for more information about templates: https://cumulocity.com/docs/smartrest/smartrest-introduction/.
Now explanation of logic inside lua script. Custom lua scripts can be placed in „/usr/local/usr/lib/lua/cm/“. Application will scan this folder for any *.lua files and load them if they contains „init“ function. Here is an example of a custom lua script:
  -- stream.lua
  local utl = require "luci.util"
  local sys = require "luci.sys"
  local DEVICE_NAME = 'TLT-RUT955 Router'
  local DEVICE_TYPE = 'Router'
  function restart(r)
     local deviceId = r:value(2)
     c8y:send('108,'..deviceId..',SUCCESSFUL')
     sys.exec("reboot")
  end
  function init()
     srInfo('*** Stream Init ***')
     -- set device name and type
     c8y:send('103,'..c8y.ID..','..DEVICE_NAME..','..DEVICE_TYPE)
     -- set restart as supported operation
     c8y:send('107,'..c8y.ID..',c8y_Restart')
     -- set imei, cellid and iccid first time
     mobileDataStream()
     -- create timer which will stream mobile info data
     local m_timer = c8y:addTimer(10 * 1000, 'mobileDataStream')
     m_timer:start()
     -- register restart handler
     c8y:addMsgHandler(502, 'restart')
     return 0
  end
  function mobileDataStream()
     local imei = utl.trim(sys.exec("gsmctl -i"))
     local cell = utl.trim(sys.exec("gsmctl -C"))
     local icc = utl.trim(sys.exec("gsmctl -J"))
     local type = utl.trim(sys.exec("gsmctl -t"))
     local oper = utl.trim(sys.exec("gsmctl -o"))
     local sign = utl.trim(sys.exec("gsmctl -q"))..' dBm'
     local req = '105,'..c8y.ID
     req = req..','..imei
     req = req..','..cell
     req = req..','..icc
     req = req..','..type
     req = req..','..oper
     req = req..','..sign
     -- send mobile info
     c8y:send(req)
     local wantype = utl.trim(sys.exec("uci get -q network.wan.ifname"))
     local wanip = utl.trim(sys.exec("curl -s http://whatismyip.akamai.com"))
     -- send wan info
     c8y:send('106,'..c8y.ID..','..wanip..','..wantype)
  end
Once application finds lua script, it will call „init“ function. This is where all initialization of timers and other stuff should be.
Sending information is quite simple:
c8y:send('103,'..c8y.ID..','..DEVICE_NAME..','..DEVICE_TYPE)
By using „c8y:send“ function, first string contains request code, which was defined in the template, earlier. Then comma must appear after each value. The above line shows how we update device name and device type with our own.
For more information about Lua API, download Cumulocity C++ SDK: https://bitbucket.org/m2m/cumulocity-sdk-c/downloads and look up inside „sdk/doc/lua.html“ with a browser.