DMVPN with IPsec Phase 3
Introduction
This article contains instructions on how to configure DMVPN Phase 3 between a "Hub" and two "Spokes" using Teltonika devices.
Prerequisites and overview
You will need:
- 2 Teltonika Routers for "Spokes" and one for "Hub"
- A PC to configure the routers
- HUB must have a Public IP address
HUB configuration
This section contains information on how to configure DMVPN HUB. Firstly, we'll configure the DMVPN instance to make the connection possible. Then we'll set the Border Gateway Protocol (BGP) parameters as our dynamic routing solution.
Note: at the moment, BGP is the only stable dynamic routing solution that can work with DMVPNs.
HUB configuration: DMVPN
Navigate to the Services → VPN → DMVPN page and follow the instructions provided below.
Step 1: create a new DMVPN instance: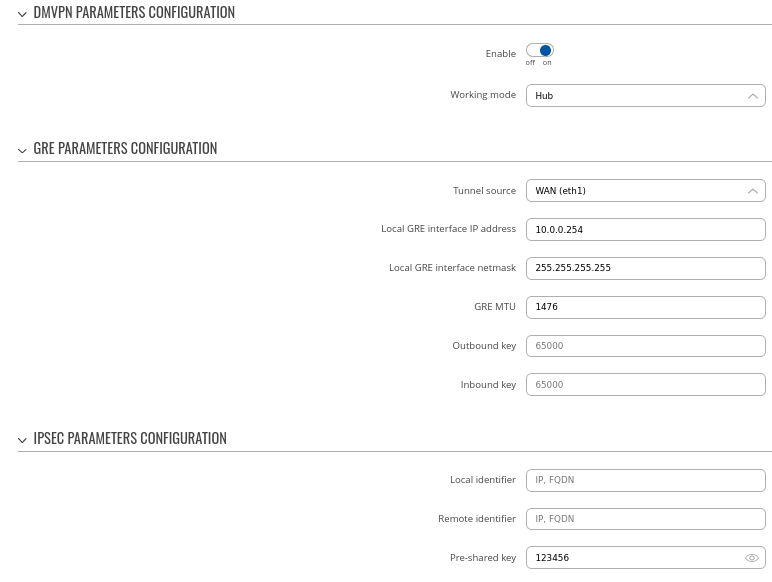
Step 2: configure DMVPN Phase 1 parameters:
Step 3: configure DMVPN Phase 2 parameters:
Step 4: configure DMVPN NHRP parameters:
Step 5: save changes
Hub configuration: BGP
Navigate to the Network → Routing → Dynamic Routes → BGP Protocol page and follow the instructions provided below.
Step 1: enable BGP and configure General section: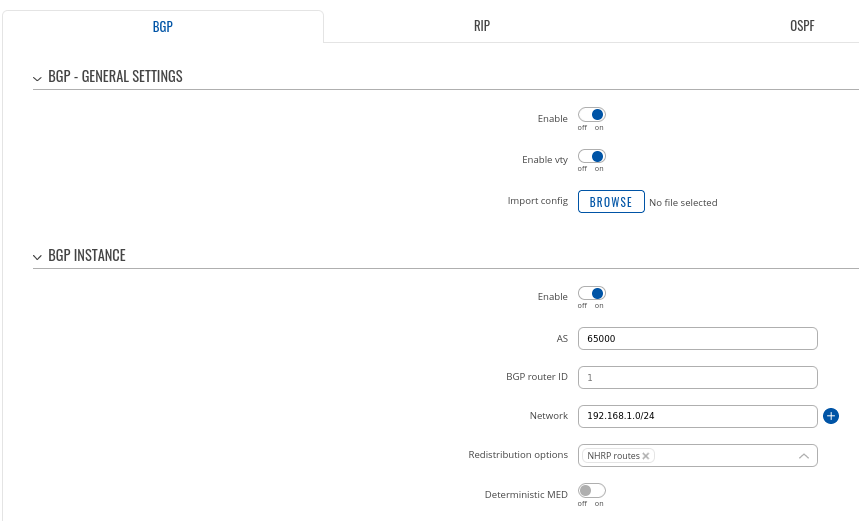
Step 2: Create BGP Peer Group: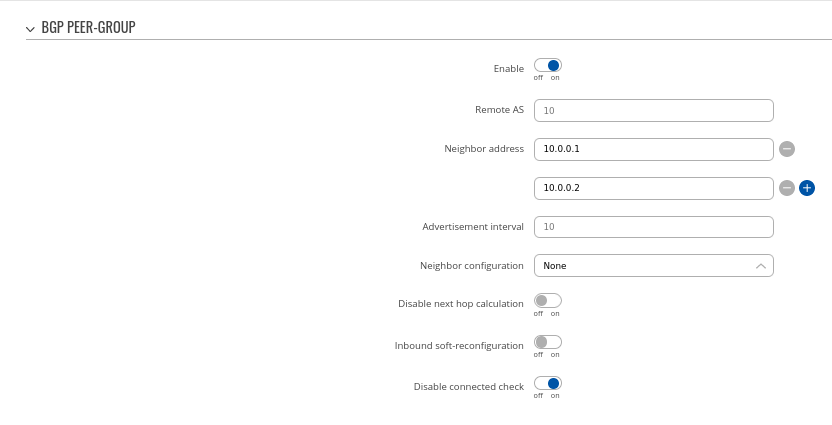
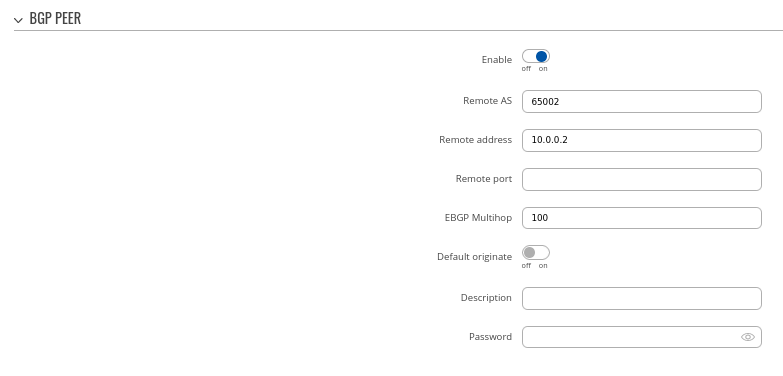
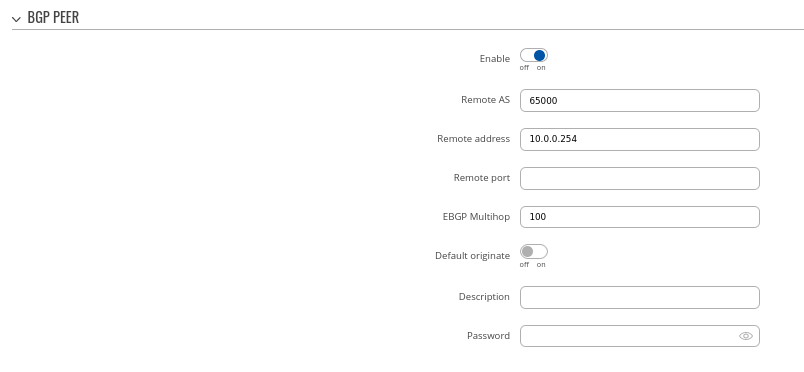
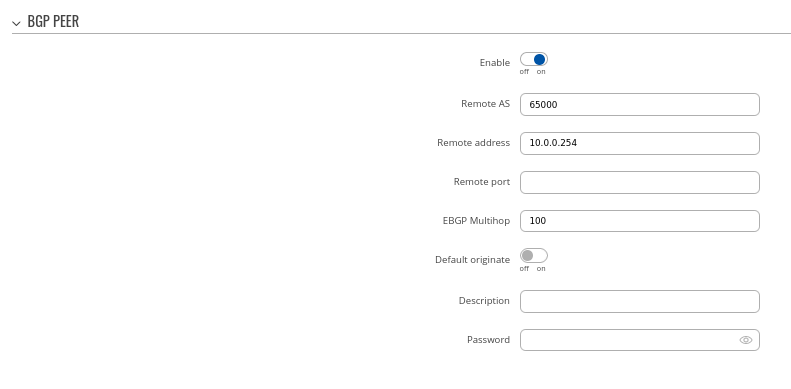
Step 3: Add two BGP peers for each spoke: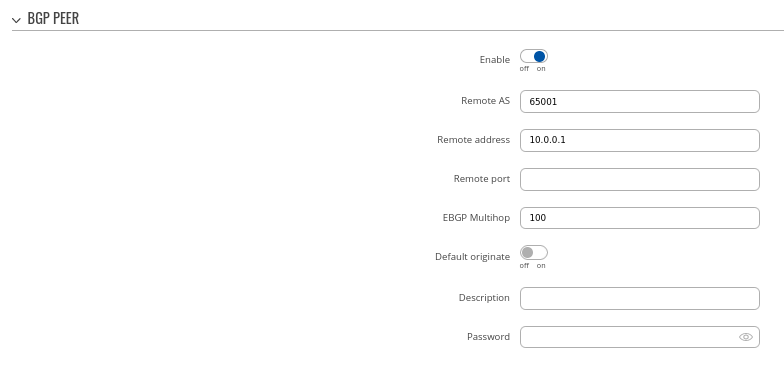
Spoke 1 configuration: DMVPN
Navigate to the Services → VPN → DMVPN page and follow the instructions provided below.
Step 1: create a new DMVPN instance: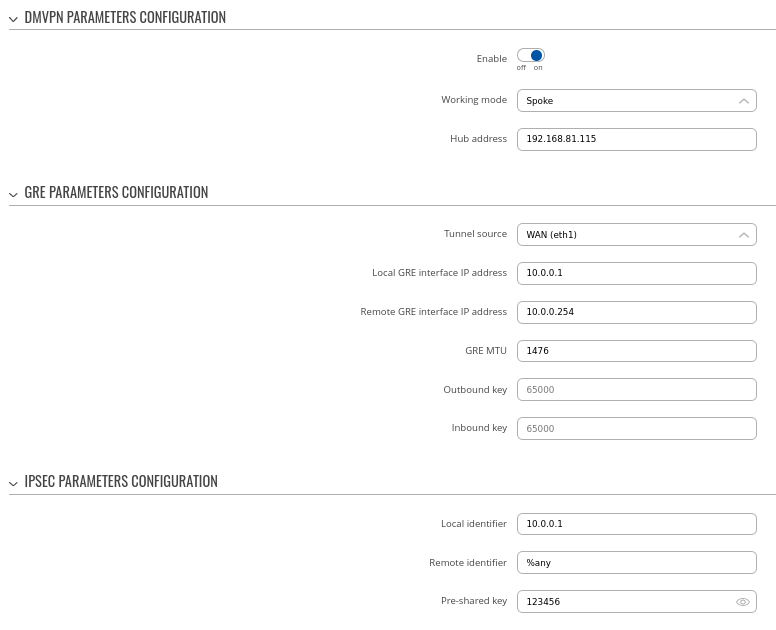
Step 2: configure DMVPN Phase 1 parameters:
Step 3: configure DMVPN Phase 2 parameters:
Step 4: configure DMVPN NHRP parameters:
Step 5: save changes
Spoke 1 configuration: BGP
Navigate to the Network → Routing → Dynamic Routes → BGP Protocol page and follow the instructions provided below.
Step 1: enable BGP and configure General section: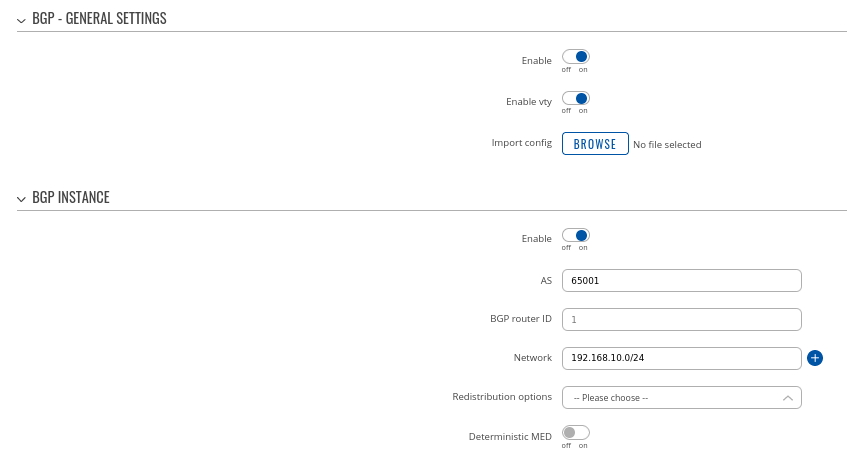
Spoke 2 configuration: DMVPN
Navigate to the Services → VPN → DMVPN page and follow the instructions provided below.
Step 1: create a new DMVPN instance: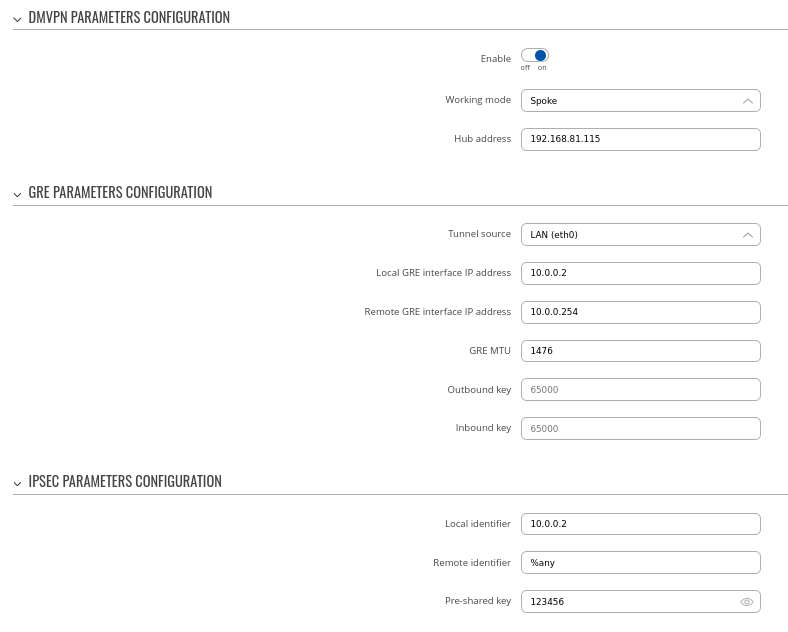
Step 2: configure DMVPN Phase 1 parameters:
Step 3: configure DMVPN Phase 2 parameters:
Step 4: configure DMVPN NHRP parameters:
Step 5: save changes
Spoke 2 configuration: BGP
Navigate to the Network → Routing → Dynamic Routes → BGP Protocol page and follow the instructions provided below.
Step 1: enable BGP and configure General section: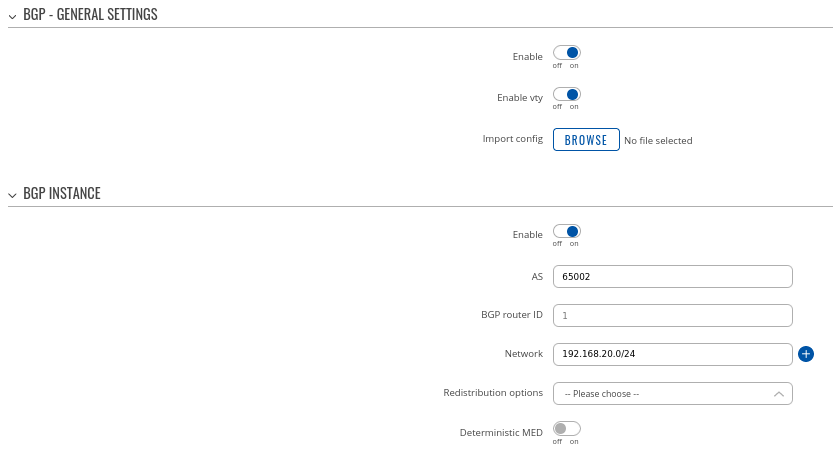
Important Note
For HUB in Network > Firewall GRE zone change from REJECT to ACCEPT on FORWARD.
For setups behind NAT specify Local identifier in the Services → VPN → DMVPN → IPsec section

