Difference between revisions of "Dyn.com DDNS configuration"
| Line 46: | Line 46: | ||
Once you have completed all steps before you will see window with important DDNS configuration settings. | Once you have completed all steps before you will see window with important DDNS configuration settings. | ||
First of all, check "'''Enable'''" box | First of all, check "'''Enable'''" box | ||
| − | |||
| − | |||
Next, you need to select service provider: '''Service''', however our routers do not have Dynu as default provider, so you have to select '''custom'''. | Next, you need to select service provider: '''Service''', however our routers do not have Dynu as default provider, so you have to select '''custom'''. | ||
| Line 64: | Line 62: | ||
<br /> | <br /> | ||
Complete URL example: http://teltonikaDemo:[email protected]/nic/update?hostname=teltonikademo.dyndns.tv&myip=84.15.129.227&wildcard=NOCHG&mx=NOCHG&backmx=NOCHG | Complete URL example: http://teltonikaDemo:[email protected]/nic/update?hostname=teltonikademo.dyndns.tv&myip=84.15.129.227&wildcard=NOCHG&mx=NOCHG&backmx=NOCHG | ||
| − | |||
| − | |||
| − | |||
Once you created URL you need to fill in last three fields: | Once you created URL you need to fill in last three fields: | ||
| Line 78: | Line 73: | ||
And click "'''Save'''" | And click "'''Save'''" | ||
<br /> | <br /> | ||
| − | [[File: | + | |
| + | [[File:dynConfig.png]] | ||
=== Remote access configuration === | === Remote access configuration === | ||
Revision as of 14:22, 4 May 2018
Preconditions
There is one mandatory precondition for DDNS to work - you must have a Static or Dynamic Public IP address. Dynamic DNS will not work with a Shared Public IP. You can read up more on this in our article on Private and Public IP Addresses.
The easiest way to find out this information is to log in to the router's WebUI and check the WAN widget in the Overview page. You will be automatically redirected to the Overview page after you log in and the WAN widget will be on the right side of the page, second widget from the top. If the WAN widget displays a Public IP address, your DDNS configuration should work; if it displays a Private IP address, that means you're using a Shared Public IP address and you won't be able to reach your router with the help of DDNS.
Step 1. DDNS configuration
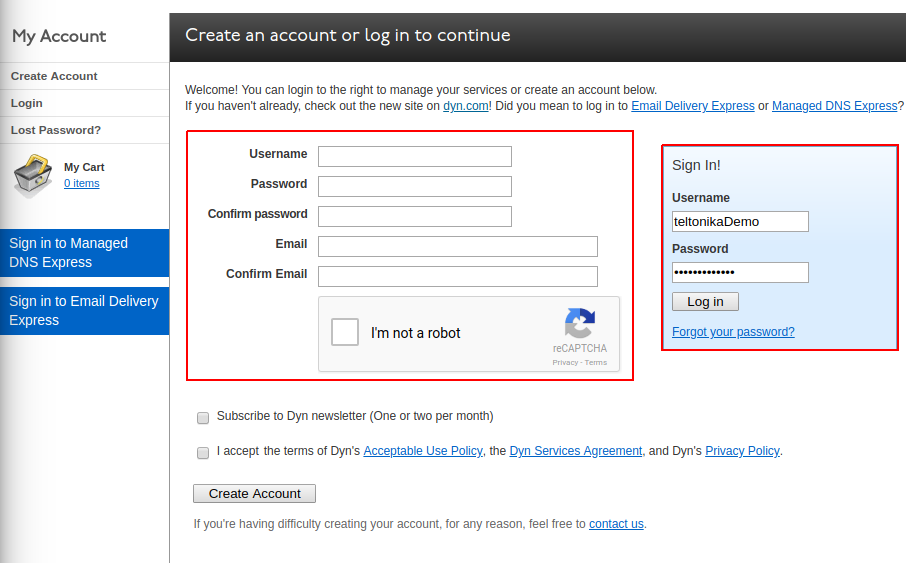
First of all we need to visit DDNS provider website - [1], once we are here we have two options: create new user or use existing one.
You need to login into the system using your credentials. If you don’t have a registered account then you need to create one by entering your new account info (you will have to subscribe for a plan with your payment method or you can get a 7 day trial)
Adding new host
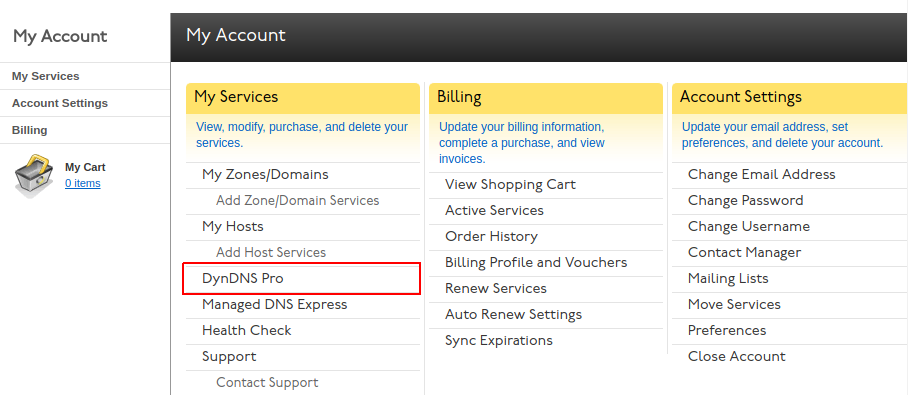
In the opened browser windows navigate to DynDNS Pro:
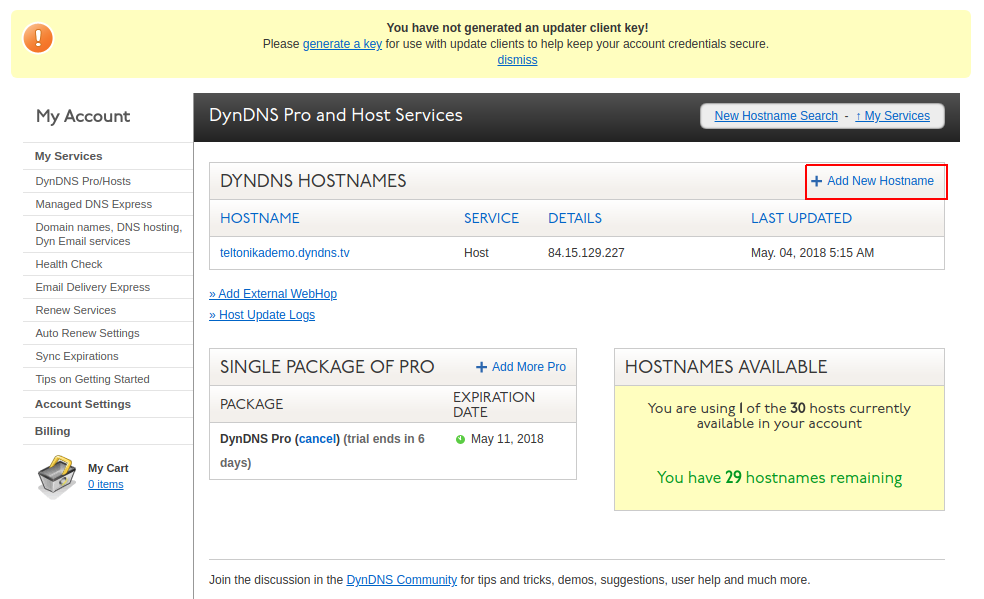
You will se all hosts you have created. To add a host press Add New Hostname button:
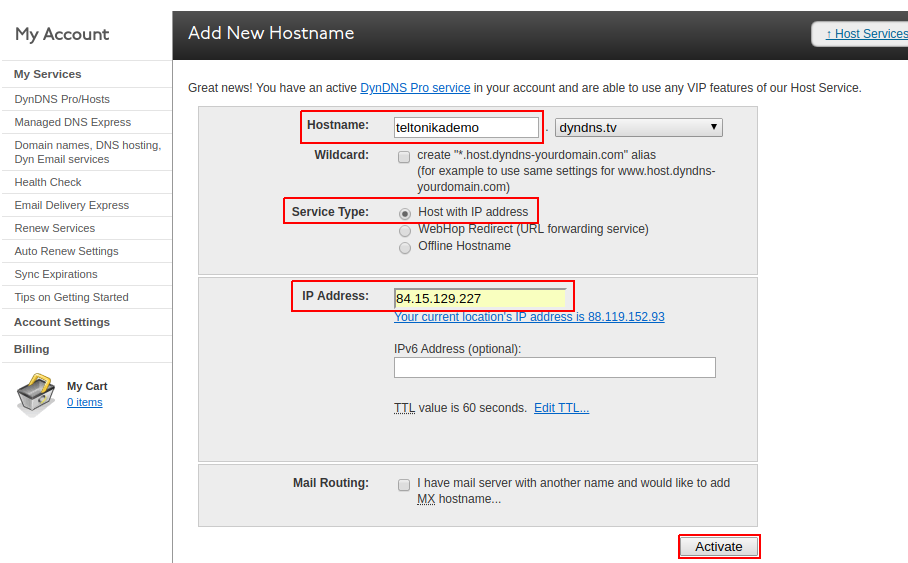
You will be redirected to host creation page. Enter the hostname, select Host with IP address, enter the router’s public IP address and press Activate:
Step 2. Router configuration
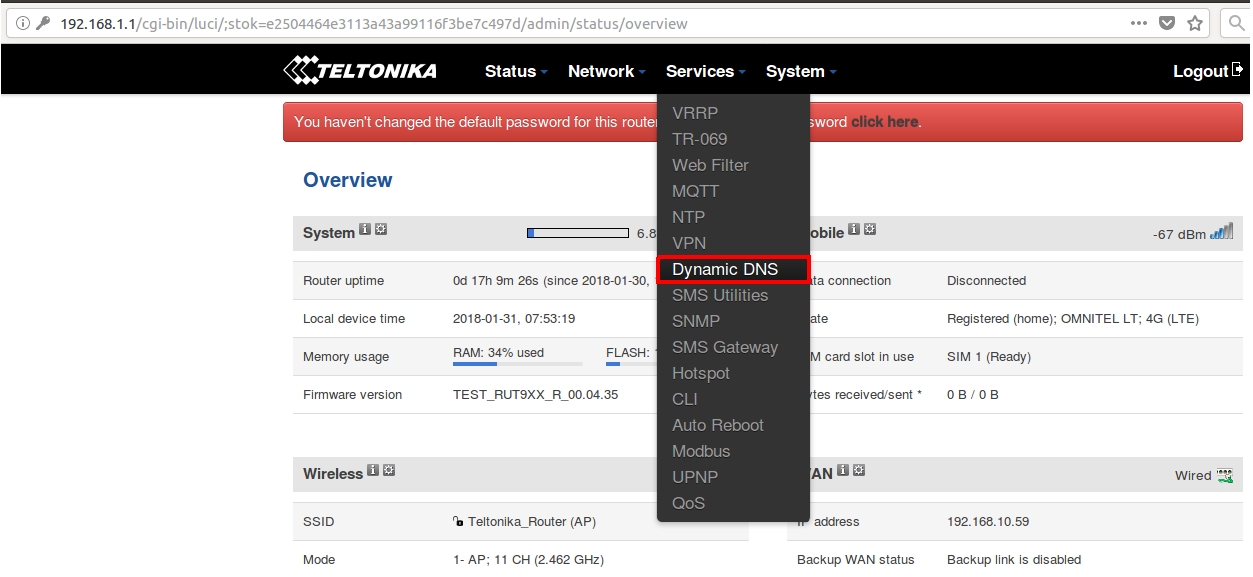
To configure router we need to enter RUT homepage. To access it enter your router IP (eg. 192.168.1.1), into browser's URL bar. After that you should click "Dynamic DNS": Services -> Dynamic DNS
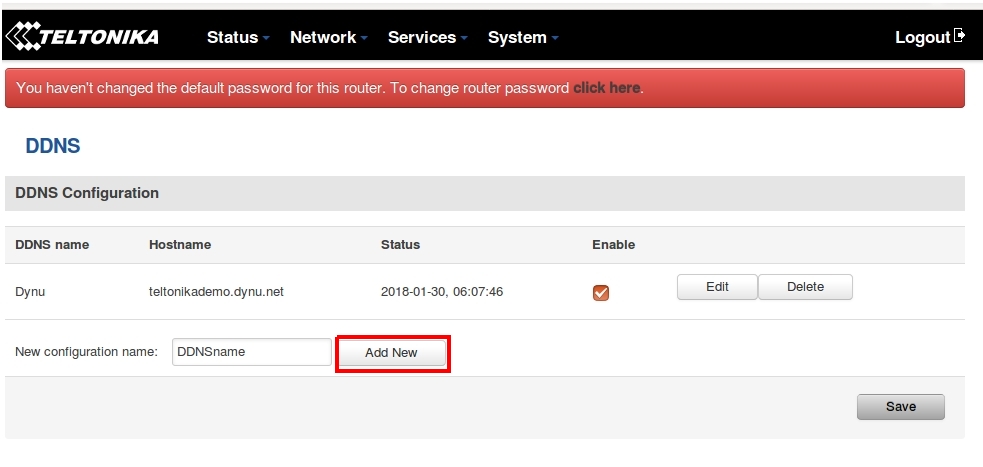
Then enter new configuration name and click Add new
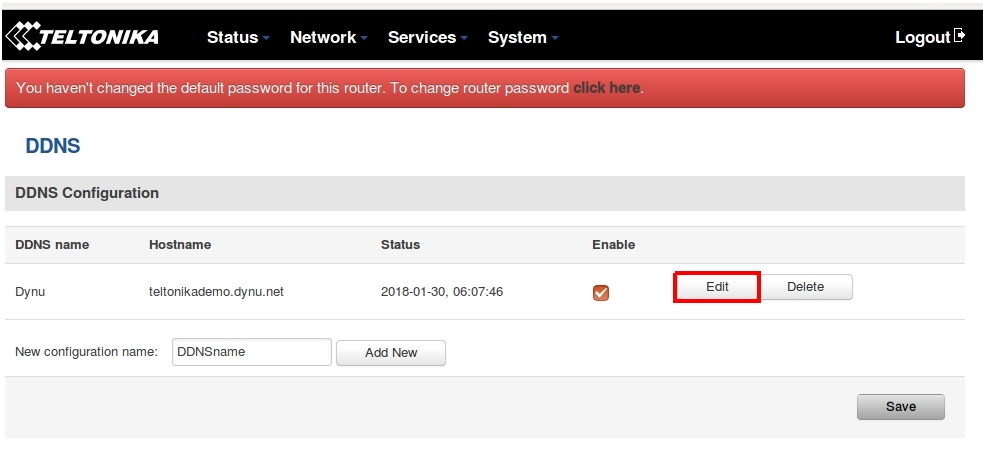
After that you will see new line with two options "Delete" and "Edit". Click Edit
Dynamic DNS configuration
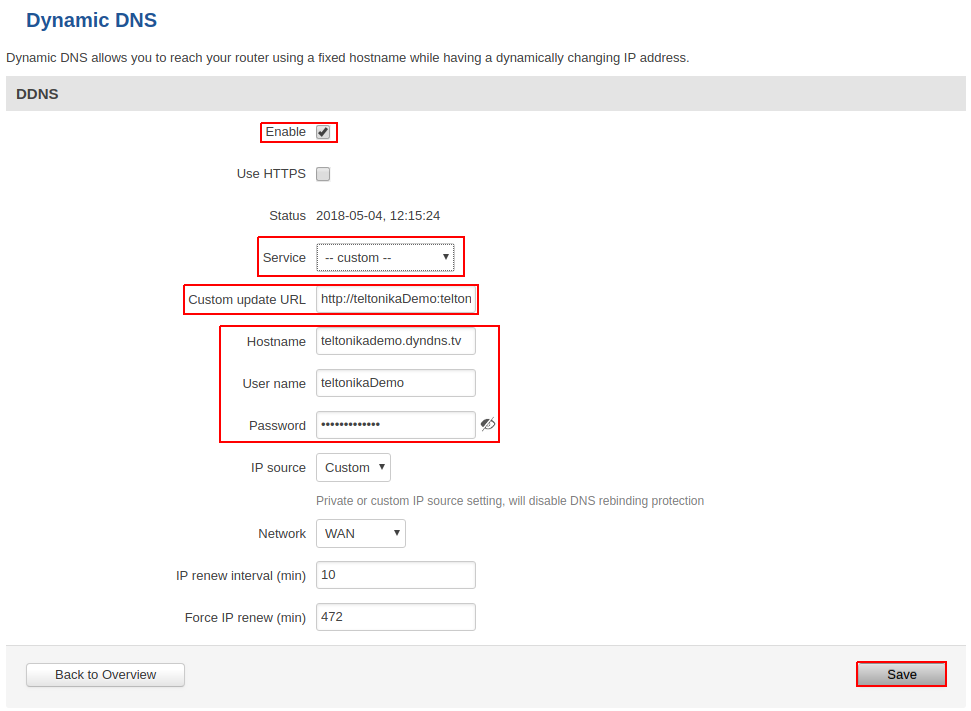
Once you have completed all steps before you will see window with important DDNS configuration settings. First of all, check "Enable" box
Next, you need to select service provider: Service, however our routers do not have Dynu as default provider, so you have to select custom.
After that it is important to create good "Custom update URL". It should look like this:
http://[username]:[password]@members.dyndns.org/nic/update?hostname=[hostname]&myip=[IP address]&wildcard=NOCHG&mx=NOCHG&backmx=NOCHG
DOMAIN -> your registered domain eg. teltonikademo.dyndns.tv
IP -> your IP address eg. 84.15.129.227
USERNAME -> your dyn.com account username eg. teltonikaDemo
PASSWORD -> your dyn.com account password eg. yourpassword
Complete URL example: http://teltonikaDemo:[email protected]/nic/update?hostname=teltonikademo.dyndns.tv&myip=84.15.129.227&wildcard=NOCHG&mx=NOCHG&backmx=NOCHG
Once you created URL you need to fill in last three fields:
Hostname -> your registered domain eg. teltonikademo.dyndns.tv
Username -> your dyn.com account username eg. teltonikademo
Password -> your dyn.com account password eg. yourpassword
And click "Save"
Remote access configuration
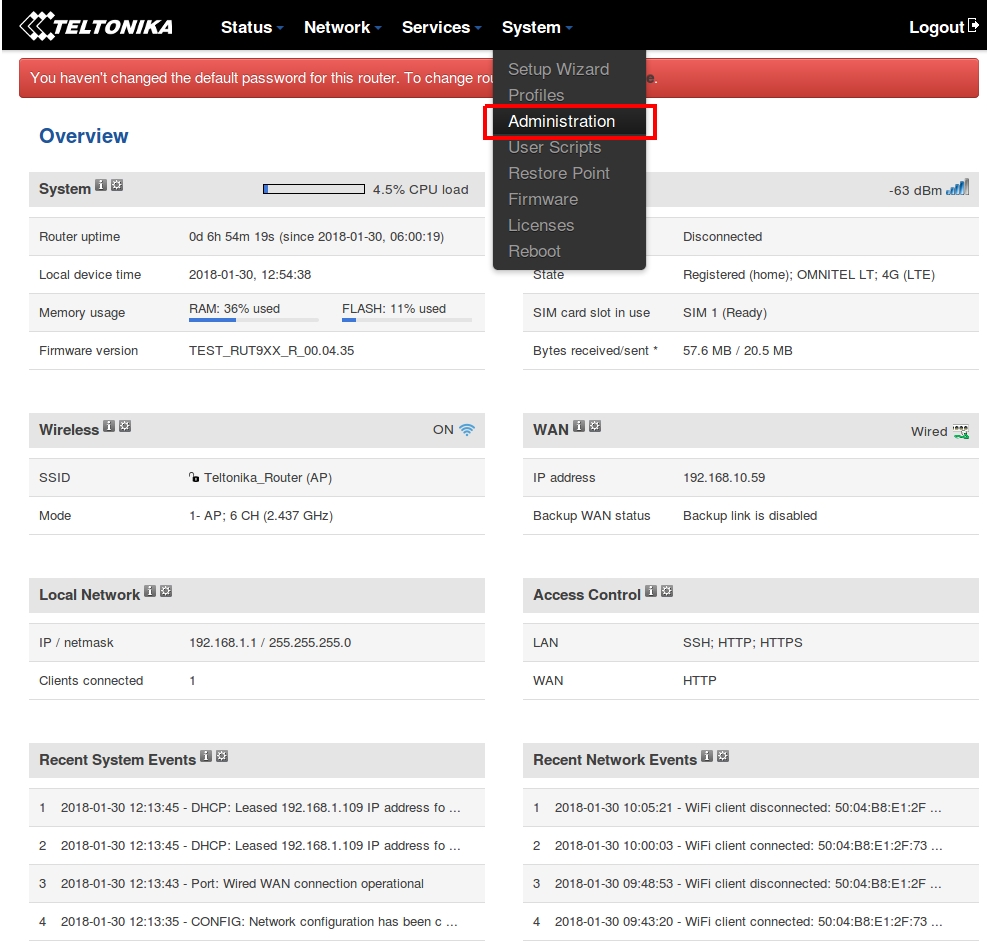
After you complete DDNS configuration last thing you need to do is to allow Remote access using HTTP. These options can be found System -> Administration -> Access control
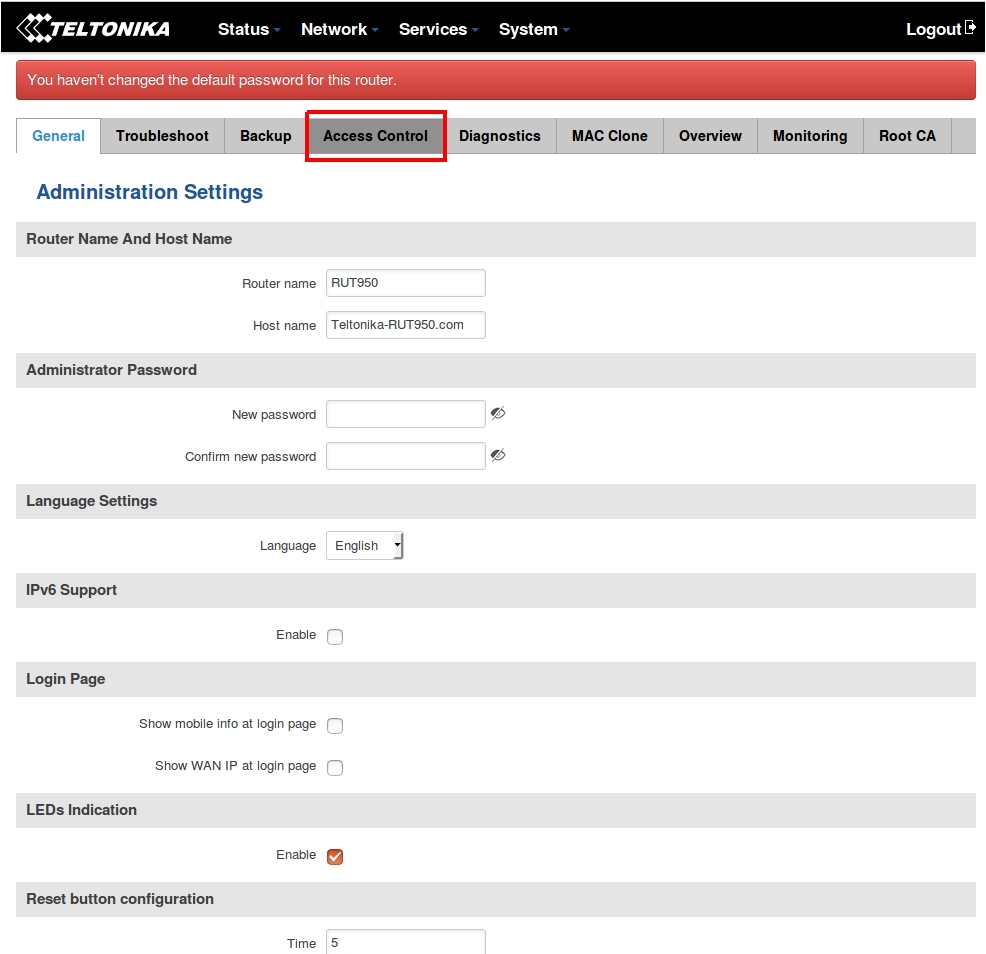
And then click "Access Control" tab
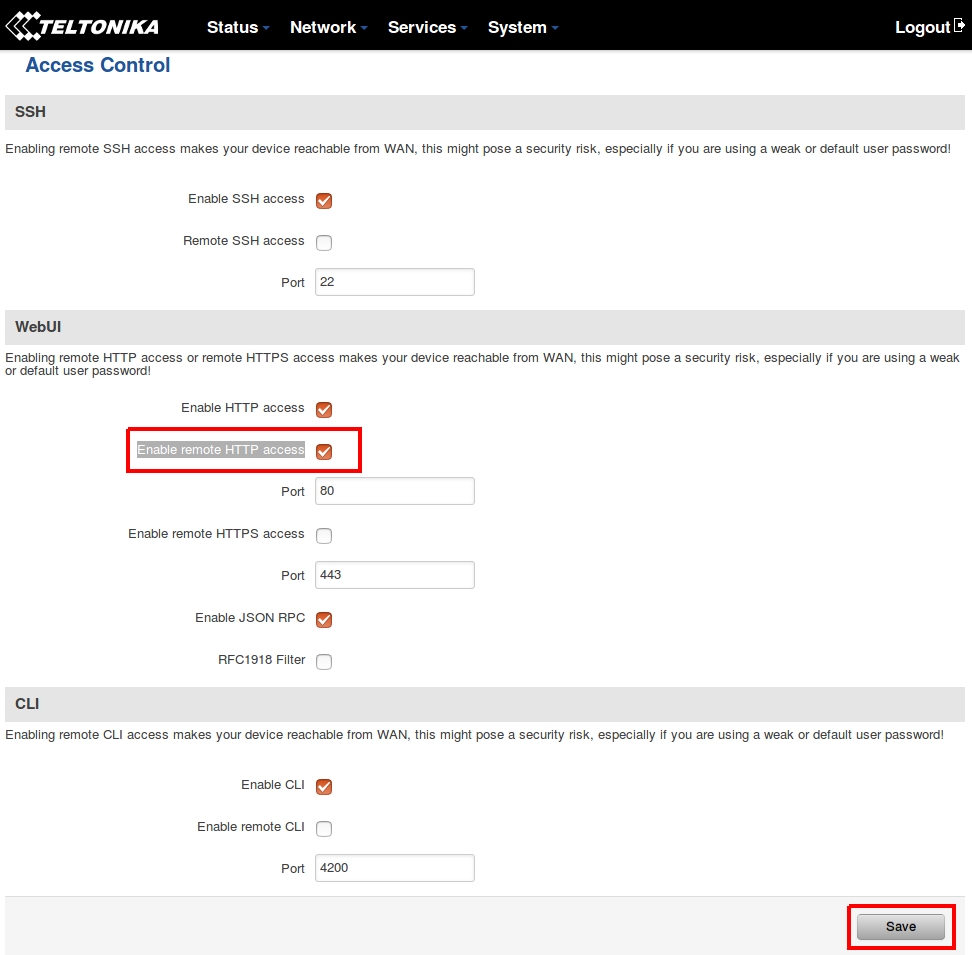
Here you need to select "Enable remote HTTP access" option and press Save
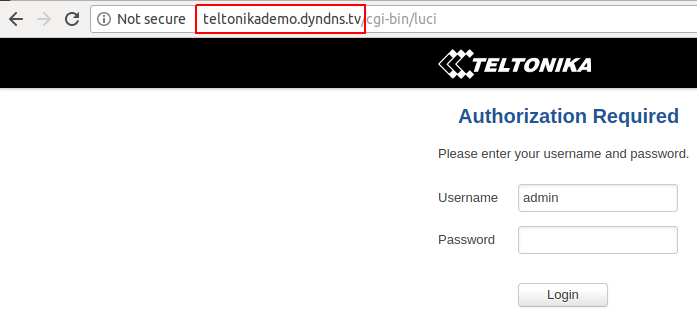
Test your DDNS
Enter your hostname into browser and you should see something similar

