Difference between revisions of "Dynu.com DDNS configuration"
| Line 49: | Line 49: | ||
Next, you need to select service provider: '''Service''', however our routers do not have Dynu as default provider, so you have to select '''custom'''. | Next, you need to select service provider: '''Service''', however our routers do not have Dynu as default provider, so you have to select '''custom'''. | ||
| + | <br /> | ||
After that it is important to create good "'''Custom update URL'''". It should look like this: | After that it is important to create good "'''Custom update URL'''". It should look like this: | ||
| + | <br /> | ||
http://api.dynu.com/nic/update?hostname=['''DOMAIN''']&myip=['''IP''']&username=['''USERNAME''']&password=['''PASSWORD'''] | http://api.dynu.com/nic/update?hostname=['''DOMAIN''']&myip=['''IP''']&username=['''USERNAME''']&password=['''PASSWORD'''] | ||
<br /> | <br /> | ||
Revision as of 15:12, 30 January 2018
Step 1. Dynu DDNS configuration
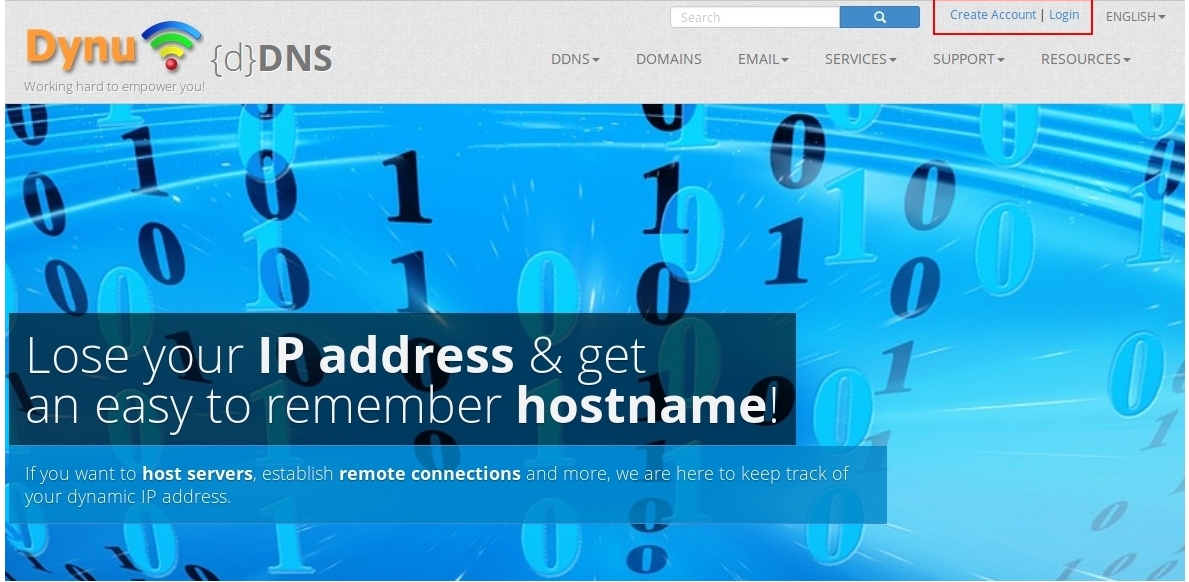
First of all we need to visit DDNS provider website - https://www.dynu.com, once we are here we have two options: create new user or use existing one.
If you want to create new account click "Create Account"
After successful account creation you need to Add new host
Adding new host
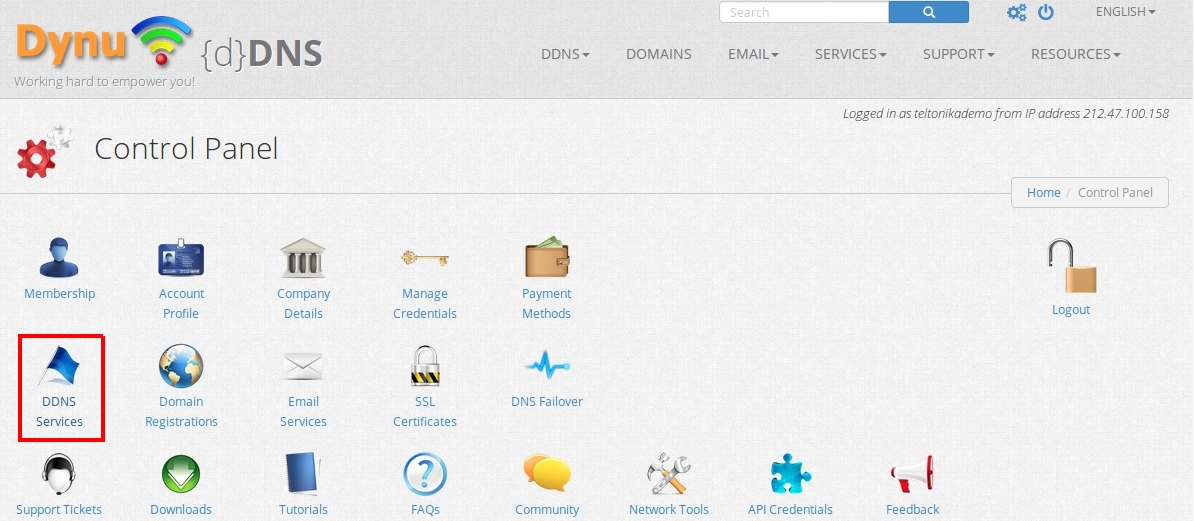
You need to click "DDNS services"
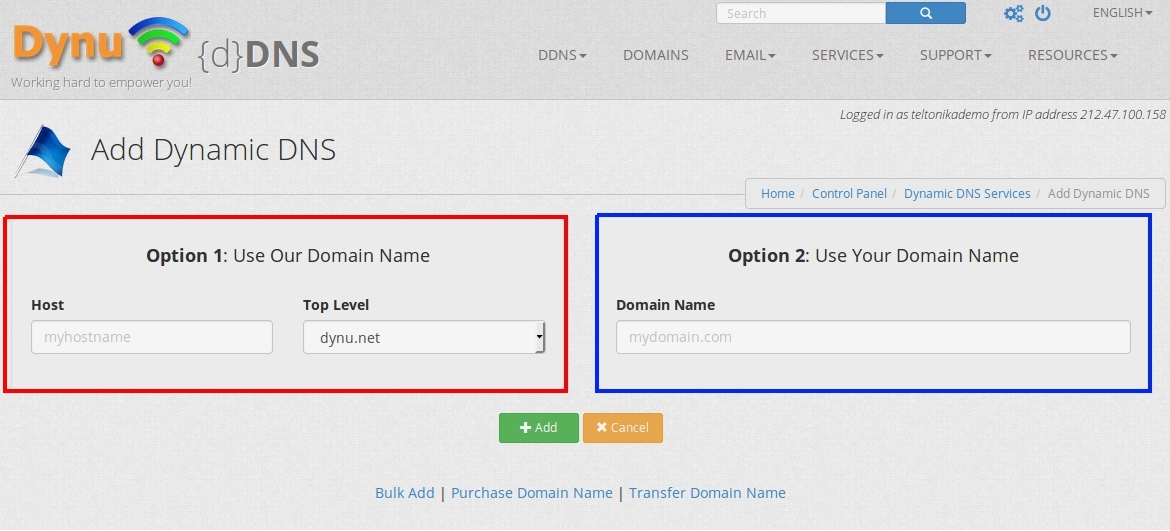
Then "Add"
And finally you need to choose one of two options to use their domain name (red square) or your personal domain name (blue square) and click "Add"
After all these steps you should see this window this
Step 2. Router configuration
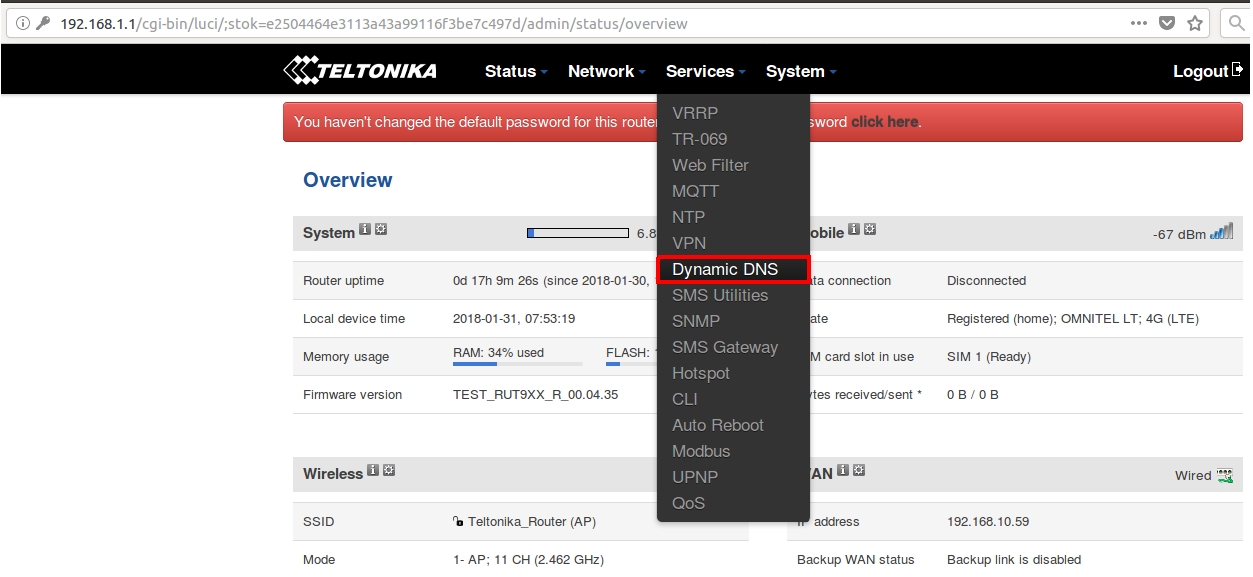
To configure router we need to enter RUT homepage. You can do so by entering default IP, that can be found on router (eg. 192.168.1.1), into browser's URL bar. After that you should click "Dynamic DNS": Services -> Dynamic DNS
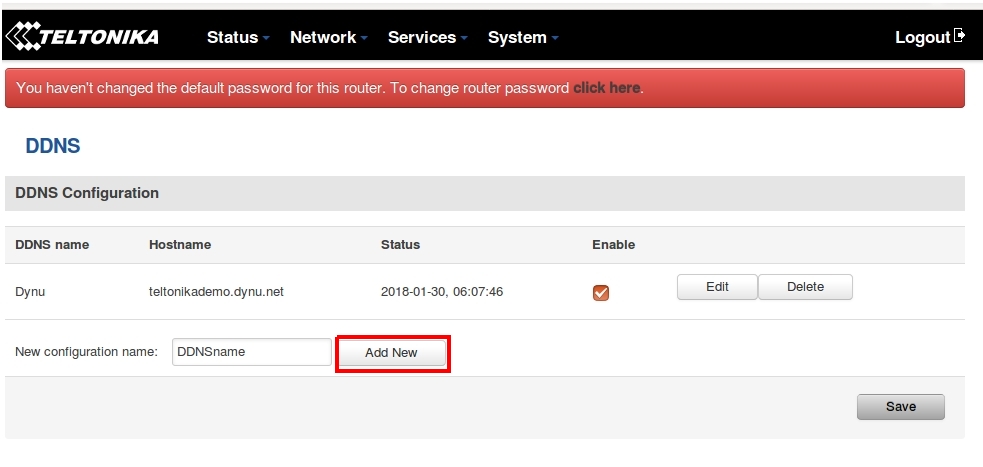
Then enter new configuration name and click Add new
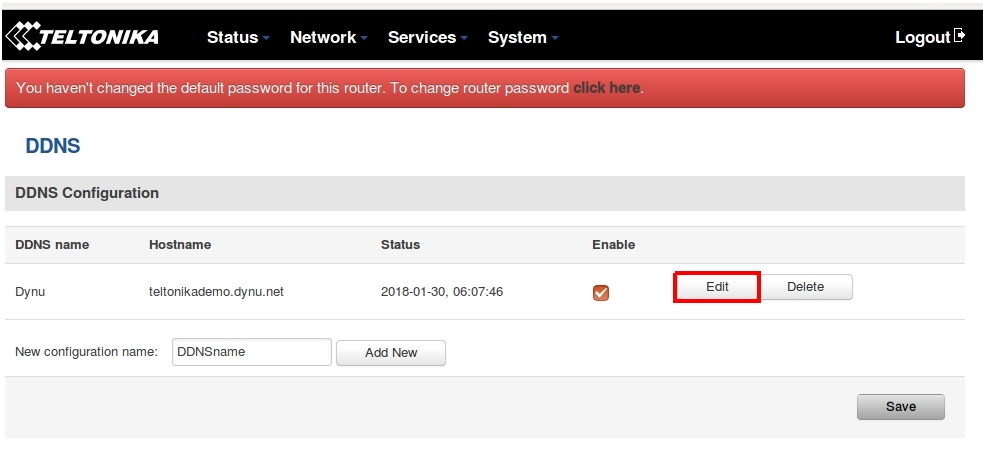
After that you will see new line with two options "Delete" and "Edit". Click Edit
Dynamic DNS configuration
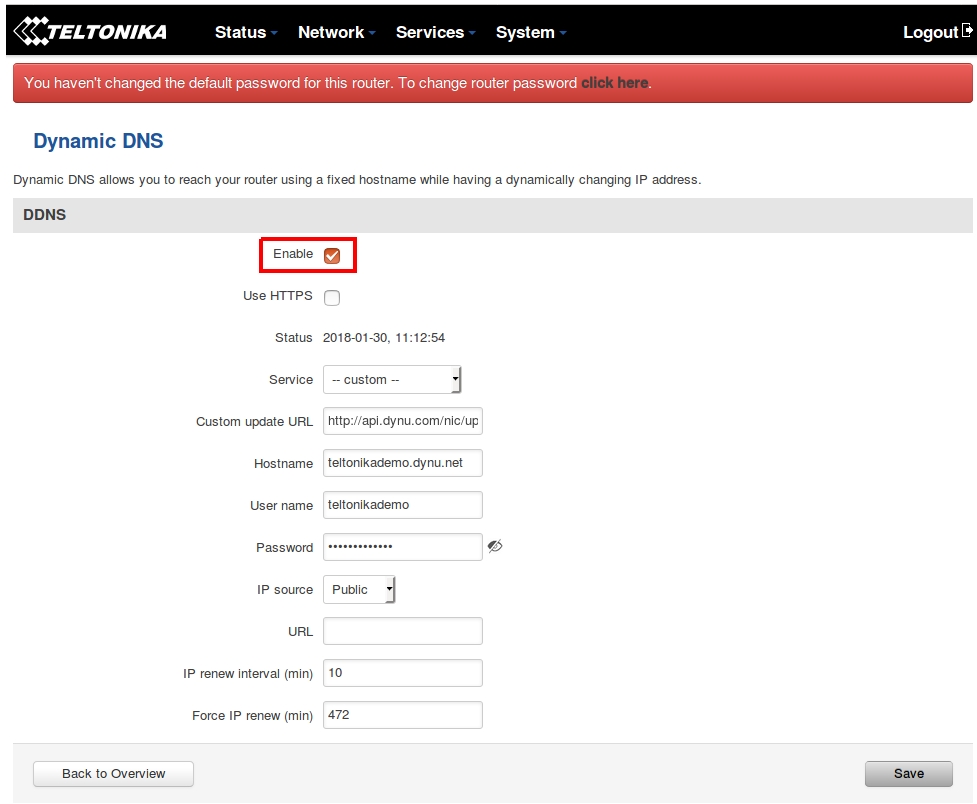
Once you have completed all steps before you will see window with important DDNS configuration settings. First of all, check "Enable" box
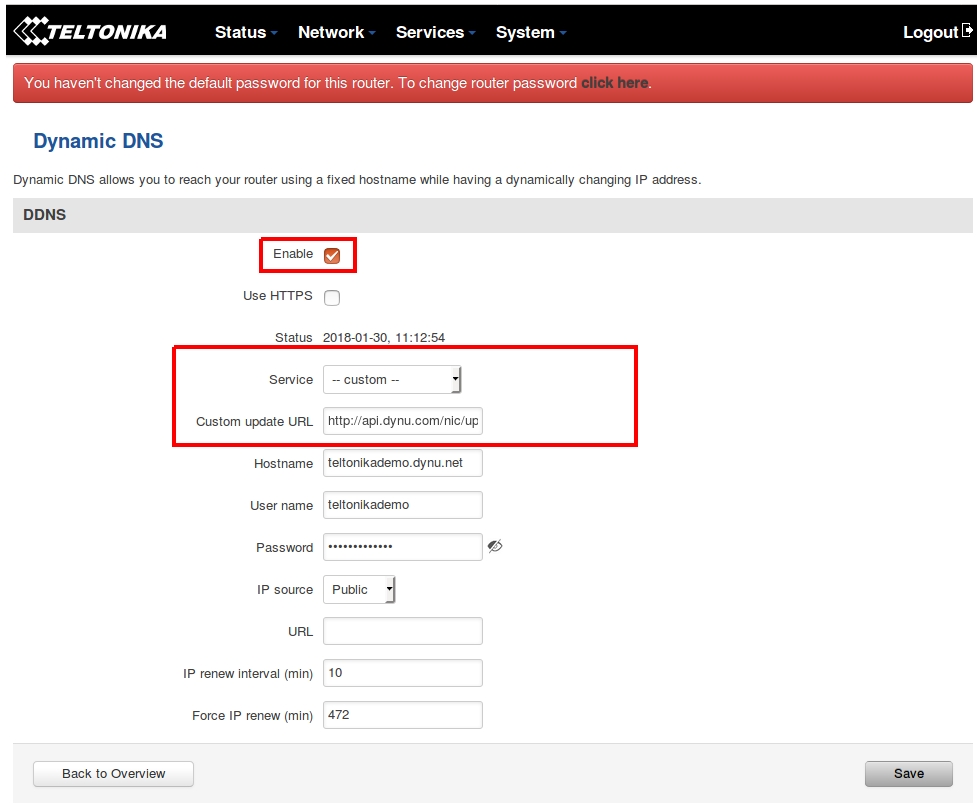
Next, you need to select service provider: Service, however our routers do not have Dynu as default provider, so you have to select custom.
After that it is important to create good "Custom update URL". It should look like this:
http://api.dynu.com/nic/update?hostname=[DOMAIN]&myip=[IP]&username=[USERNAME]&password=[PASSWORD]
DOMAIN -> your register domain eg. teltonikademo.dynu.net
IP -> your IP address eg. 214.154.12.47
USERNAME -> your Dynu account username eg. teltonikademo
PASSWORD -> your Dynu account password. IMPORTANT use hash methods that covers your password for security reasons. You can do that here eg. 28c7e9d80022be6f5c801cc9a7d0e13ee1647579df1f4911c7cfb6f0cca323f3
Complete URL example: http://api.dynu.com/nic/update?hostname=teltonikademo.dynu.net&myip=212.47.100.158&username=teltonikademo&password=28c7e9d80022be6f5c801cc9a7d0e13ee1647579df1f4911c7cfb6f0cca323f3
