IdBlender Secure WiFi Setup - RUT Routers
Introduction
idBlender is a reliable and modern Cloud RADIUS platform that is successfully used to rapidly deliver secure and powerful WiFi access via WPA2-Enterprise with 802.1x authentication out of the box. This makes the platform suitable to create individual WiFi login credentials for everybody who is using an access point(s).
This article contains step-by-step instructions on how use idBlender together with RUT routers.
idBlender setup
First of all you will need to set up an idBlender account. This will give you access to the idBlender dashboard and a RADIUS server for WiFi authentication.
- Go to https://app.idblender.com/register and create an account.
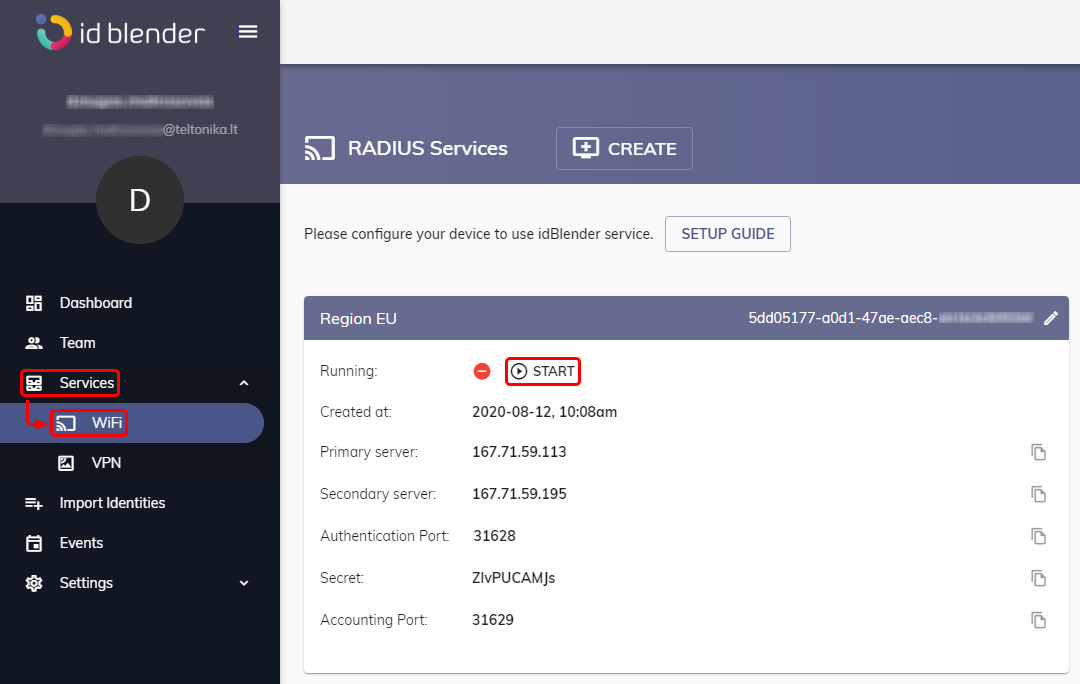
- Open the WiFi section found under the Services tab. Click 'Start' if you wish to start the RADIUS service now or start it later at the end of the configuration.

- This section contains your RADIUS server details required to set up your WiFi Access Point, so you may want to keep it open for the duration of this setup.
Teltonika router setup
Next, you will need to configure your router in accordance with your idBlender settings.
- Login to your router's WebUI. You can do this by entering the router's LAN IP address (192.168.1.1 by default) into the URL field of your web browser.
- Go to the Network → Wireless page.
- Click 'Add' to create a new Wireless Access Point.

- Edit your new Access Point as follows.
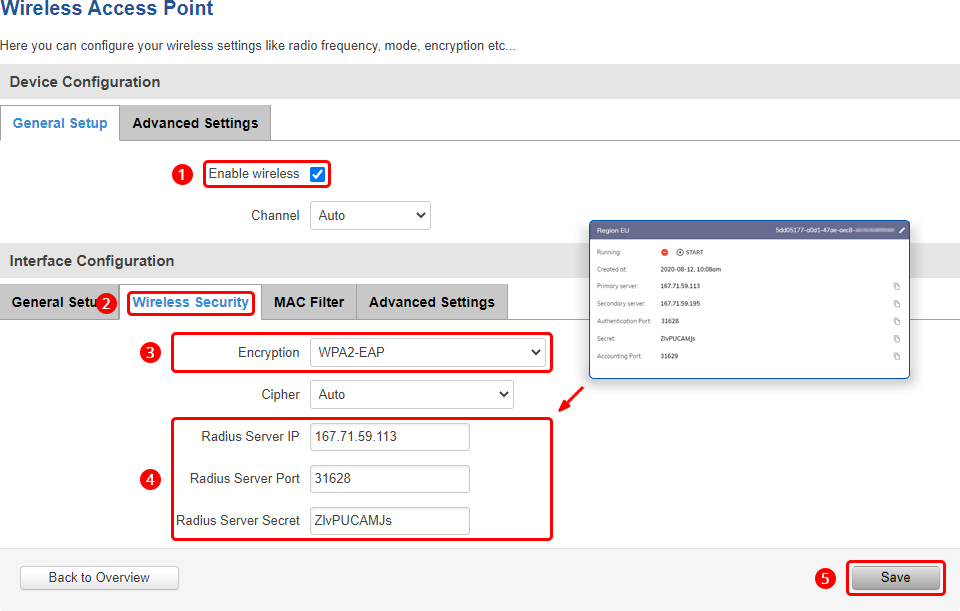
- Under 'Device Configuration' check 'Enable wireless'.
- Open the 'Wireless Security' tabunder 'Interface Configuration'.
- Set Encryption to WPA2-EAP.
- Set Radius Server IP, Port and Secret. Use the information from your idBlender account's WiFi section.
- Save the changes.

Identity setup
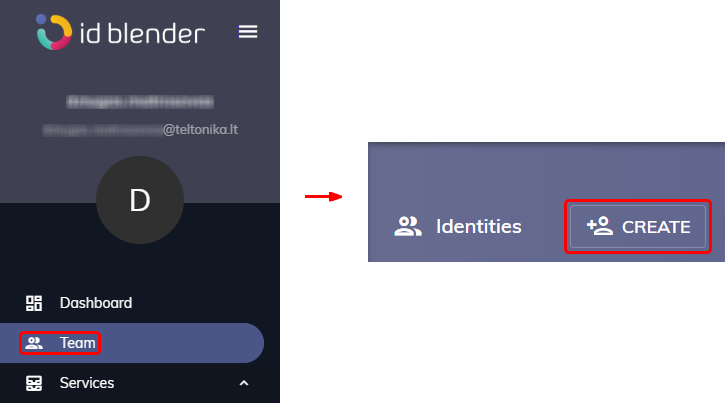
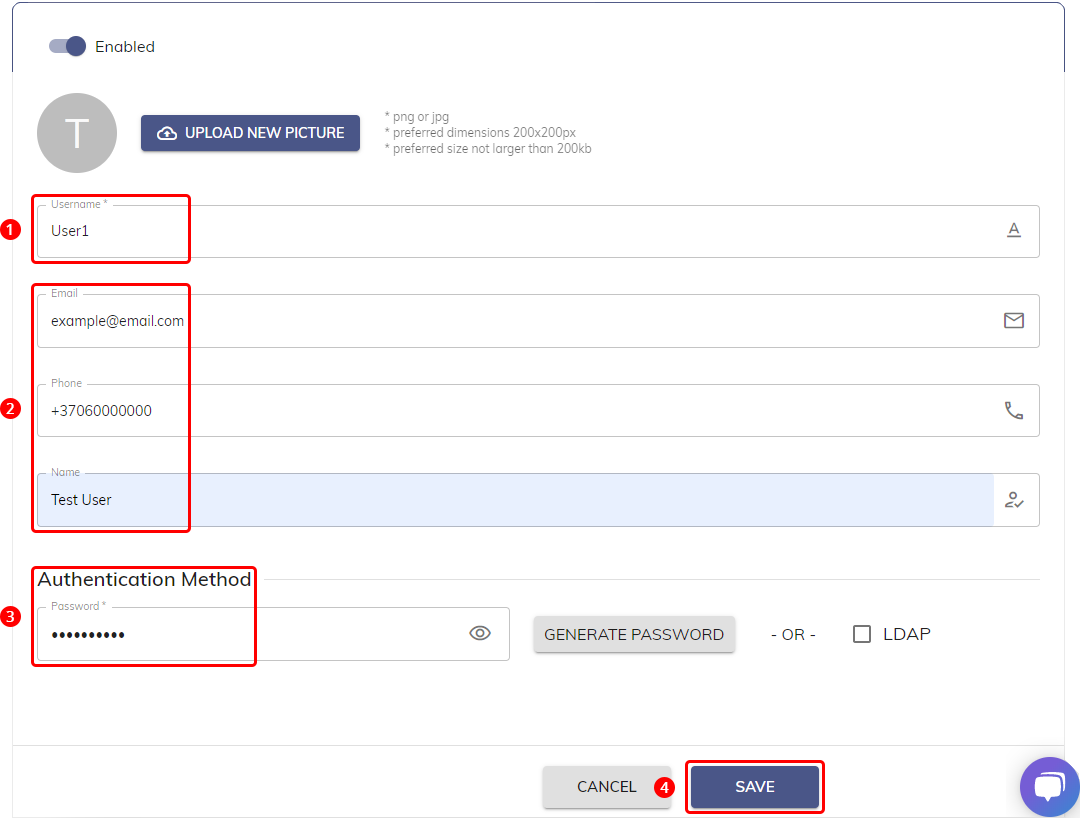
Finally, you will need to create some id Blender identities, i.e., user accounts that will be able to use the WiFi network and authenticate to the idBlender RADIUS server.

