Difference between revisions of "Template:Networking rutos manual firewall"
| (75 intermediate revisions by 4 users not shown) | |||
| Line 1: | Line 1: | ||
| − | {{Template: | + | {{Template: Networking_device_manual_fw_disclosure |
| − | | | + | | series = {{{series}}} |
| − | | series | + | | name = {{{name}}} |
| + | | fw_version ={{Template: Networking_device_manual_latest_fw | ||
| + | | series = {{{series}}} | ||
| + | | name = {{{name}}} | ||
| + | }} | ||
}} | }} | ||
| + | {{#ifeq: {{{series}}} | RUT9 |<br><i><b>Note</b>: <b>[[{{{name}}} Firewall (legacy WebUI)|click here]]</b> for the old style WebUI (FW version {{Template: Networking_device_manual_latest_fw | series = RUT9XX}} and earlier) user manual page.</i>|}} | ||
| + | {{#ifeq: {{{series}}} | RUT2 |<br><i><b>Note</b>: <b>[[{{{name}}} Firewall (legacy WebUI)|click here]]</b> for the old style WebUI (FW version {{Template: Networking_device_manual_latest_fw | series = RUT2XX}} and earlier) user manual page.</i>|}} | ||
==Summary== | ==Summary== | ||
| Line 24: | Line 30: | ||
<th>Value</th> | <th>Value</th> | ||
<th>Description</th> | <th>Description</th> | ||
| − | |||
| − | |||
| − | |||
| − | |||
| − | |||
</tr> | </tr> | ||
<tr> | <tr> | ||
| Line 63: | Line 64: | ||
<li><b>Reject</b> – packet is stopped, deleted and, differently from Drop, a message of rejection is sent to the source from which the packet came.</li> | <li><b>Reject</b> – packet is stopped, deleted and, differently from Drop, a message of rejection is sent to the source from which the packet came.</li> | ||
</ul> | </ul> | ||
| + | |||
| + | {{#ifeq: {{{name}}} | TRB500 | | ===Routing/NAT Offloading=== | ||
| + | ---- | ||
| + | The <b>Routing/NAT Offloading</b> is used to turns software flow offloading on or off. | ||
| + | |||
| + | The device checks whether the flow (sequence of related packets) is of a received a packed is known. Packets of unknown flow are forwarded to the networking stack. Meanwhile, if the flow is known, NAT is applied (if matched) and the packet is forwarded to the correct destination port. This process is called <b>software flow offloading</b>. {{#switch: {{{series}}} | RUTX | RUTM = <b>Hardware flow offloading</b> is used to execute functions of the router using the hardware directly, instead of a process of software functions. | #default =}} | ||
| + | |||
| + | {{#switch: {{{series}}} | ||
| + | | RUTX | RUTM = [[File:Networking_rutos_manual_firewall_general_settings_routing_nat_offloading_rutx_v2.png|border|class=tlt-border]] | ||
| + | | #default =[[File:Networking_rutos_manual_firewall_general_settings_routing_nat_offloading_v2.png|border|class=tlt-border]]}} | ||
| + | <table class="nd-mantable"> | ||
| + | <tr> | ||
| + | <th>Field</th> | ||
| + | <th>Value</th> | ||
| + | <th>Description</th> | ||
| + | </tr> | ||
| + | <tr> | ||
| + | <td>Software flow offloading</td> | ||
| + | <td>off {{!}} on; default: <b>on</b></td> | ||
| + | <td>Turns software flow offloading on or off.</td> | ||
| + | </tr> | ||
| + | {{#switch: {{{series}}} | RUTX | RUTM = | ||
| + | <tr> | ||
| + | <td>Hardware flow offloading</td> | ||
| + | <td>off {{!}} on; default: <b>on</b></td> | ||
| + | <td>Turns hardware flow offloading on or off.</td> | ||
| + | </tr>| #default =}} | ||
| + | </table>}} | ||
===Zones=== | ===Zones=== | ||
| Line 68: | Line 97: | ||
The <b>Zones</b> section is used to manage default traffic forwarding policies between different device zones. The figure below is an example of the Zones section and the table below provides information on the fields contained in that section: | The <b>Zones</b> section is used to manage default traffic forwarding policies between different device zones. The figure below is an example of the Zones section and the table below provides information on the fields contained in that section: | ||
| − | [[File: | + | [[File:Networking_rutos_manual_firewall_general_settings_zones_v2.png|border|class=tlt-border]] |
---- | ---- | ||
| − | You can change a zone's settings from this page by interacting with entries in the zones table. For a more in-depth configuration click the button | + | You can change a zone's settings from this page by interacting with entries in the zones table. For a more in-depth configuration click the edit button [[File:Networking_rutx_trb14x_manual_edit_button_v2.png|20px]] next to a zone: |
| − | [[File: | + | [[File:Networking_rutos_manual_firewall_general_settings_zones_edit_button_v2.png|border|class=tlt-border]] |
====Zones: General Settings==== | ====Zones: General Settings==== | ||
---- | ---- | ||
| − | [[File: | + | [[File:Networking_rutos_manual_firewall_general_settings_zones_general_settings_v2.png|border|class=tlt-border]] |
<table class="nd-mantable"> | <table class="nd-mantable"> | ||
| Line 123: | Line 152: | ||
====Zones: Advanced Settings==== | ====Zones: Advanced Settings==== | ||
---- | ---- | ||
| − | [[File: | + | [[File:Networking_rutos_manual_firewall_general_settings_zones_advanced_settings_v4.png|border|class=tlt-border]] |
<table class="nd-mantable"> | <table class="nd-mantable"> | ||
| Line 172: | Line 201: | ||
The <b>Inter-zone forwarding</b> options control the forwarding policies between the currently edited zone and other zones. | The <b>Inter-zone forwarding</b> options control the forwarding policies between the currently edited zone and other zones. | ||
| − | [[File:Networking_rutos_manual_firewall_general_settings_zones_inter- | + | [[File:Networking_rutos_manual_firewall_general_settings_zones_inter-zone_forwarding_v1.png|border|class=tlt-border]] |
<table class="nd-mantable"> | <table class="nd-mantable"> | ||
| Line 200: | Line 229: | ||
The Port forwards table displays configured port forwarding rules currently configured on the device. | The Port forwards table displays configured port forwarding rules currently configured on the device. | ||
| − | [[File: | + | [[File:Networking_rutos_manual_firewall_port_forwards_port_forwards_v2.png|border|class=tlt-border]] |
===Add New Port Forward=== | ===Add New Port Forward=== | ||
| Line 206: | Line 235: | ||
The <b>Add New Port Forward</b> section is used to quickly add additional port forwarding rules. The figure below is an example of the Add New Port Forward section and the table below provides information on the fields contained in that section: | The <b>Add New Port Forward</b> section is used to quickly add additional port forwarding rules. The figure below is an example of the Add New Port Forward section and the table below provides information on the fields contained in that section: | ||
| − | [[File: | + | [[File:Networking_rutos_manual_firewall_port_forwards_add_new_port_forward_v3.png|border|class=tlt-border]] |
<table class="nd-mantable"> | <table class="nd-mantable"> | ||
| Line 218: | Line 247: | ||
<td>string; default: <b>none</b></td> | <td>string; default: <b>none</b></td> | ||
<td>Name of the rule. This is used for easier management purposes.</td> | <td>Name of the rule. This is used for easier management purposes.</td> | ||
| − | |||
| − | |||
| − | |||
| − | |||
| − | |||
| − | |||
| − | |||
| − | |||
| − | |||
| − | |||
</tr> | </tr> | ||
<tr> | <tr> | ||
<td>External port</td> | <td>External port</td> | ||
| − | <td>integer [0..65535] | range of integers [0..65534] - [1..65535]; default: <b>none</b></td> | + | <td>integer [0..65535] | range of integers [0..65534] - [1..65535] | port inversion [!0..!65535]; default: <b>none</b></td> |
| − | <td>The port number to which hosts will be connecting | + | <td>The port number to which hosts will be connecting.</td> |
| − | |||
| − | |||
| − | |||
| − | |||
| − | |||
</tr> | </tr> | ||
<tr> | <tr> | ||
| Line 246: | Line 260: | ||
<tr> | <tr> | ||
<td>Internal port</td> | <td>Internal port</td> | ||
| − | <td>integer [0..65535] | range of integers [0..65534] - [1..65535]; default: <b>none</b></td> | + | <td>integer [0..65535] | range of integers [0..65534] - [1..65535] | port inversion [!0..!65535]; default: <b>none</b></td> |
<td>The port number to which the incoming connection will be redirected.</td> | <td>The port number to which the incoming connection will be redirected.</td> | ||
</tr> | </tr> | ||
| Line 253: | Line 267: | ||
===Port Forwards Configuration=== | ===Port Forwards Configuration=== | ||
---- | ---- | ||
| − | While the New port forward section provides the possibility to add port forwarding rules fast, it does not contain all possible configuration options to customize a rule. In order to create a more complicated rule, add one using the New port forward section and click the button | + | While the New port forward section provides the possibility to add port forwarding rules fast, it does not contain all possible configuration options to customize a rule. In order to create a more complicated rule, add one using the New port forward section and click the edit button [[File:Networking_rutx_trb14x_manual_edit_button_v2.png|20px]] next to it: |
| − | [[File: | + | [[File:Networking_rutos_manual_firewall_port_forwards_edit_button_v3.png|border|class=tlt-border]] |
| − | You will be redirected to that rule's configuration page: | + | You will be redirected to that rule's configuration general settings page: |
| − | [[File: | + | [[File:Networking_rutos_manual_firewall_port_forwards_configuration_v3.png|border|class=tlt-border]] |
<table class="nd-mantable"> | <table class="nd-mantable"> | ||
| Line 279: | Line 293: | ||
<tr> | <tr> | ||
<td>Protocol</td> | <td>Protocol</td> | ||
| − | <td>TCP | + | <td>TCP | UDP | ICMP | All | +Add new; default: <b>TCP+UDP</b></td> |
<td>Specifies to which protocols the rule should apply.</td> | <td>Specifies to which protocols the rule should apply.</td> | ||
</tr> | </tr> | ||
| Line 286: | Line 300: | ||
<td>firewall zone name; default: <b>wan</b></td> | <td>firewall zone name; default: <b>wan</b></td> | ||
<td>The zone to which the third party will be connecting. (Same thing as "External zone" in the New port forward section.)</td> | <td>The zone to which the third party will be connecting. (Same thing as "External zone" in the New port forward section.)</td> | ||
| + | </tr> | ||
| + | <tr> | ||
| + | <td>External port</td> | ||
| + | <td>integer [0..65535] | range of integers [0..65534] - [1..65535] | port inversion [!0..!65535]; default: <b>none</b></td> | ||
| + | <td>Port number(s) to which hosts will be connecting.<br>The rule will apply only to hosts that connect to the port number(s) specified in this field. Leave empty to make the rule skip external port matching.</td> | ||
| + | </tr> | ||
| + | <tr> | ||
| + | <td>Internal zone</td> | ||
| + | <td>firewall zone name; default: <b>lan</b></td> | ||
| + | <td>The zone to which the incoming connection will be redirected.</td> | ||
| + | </tr> | ||
| + | <tr> | ||
| + | <td>Internal IP address</td> | ||
| + | <td>Device LAN IP; default: <b>Device LAN IP</b></td> | ||
| + | <td>The IP address to which the incoming connection will be redirected.</td> | ||
| + | </tr> | ||
| + | <tr> | ||
| + | <td>Internal port</td> | ||
| + | <td>integer [0..65535] | range of integers [0..65534] - [1..65535] | port inversion [!0..!65535]; default: <b>none</b></td> | ||
| + | <td>The port number to which the incoming connection will be redirected.</td> | ||
| + | </tr> | ||
| + | </table> | ||
| + | |||
| + | Advanced settings: | ||
| + | |||
| + | [[File:Networking rutos manual firewall port forwards configuration advanced_v2.png|border|class=tlt-border]] | ||
| + | |||
| + | <table class="nd-mantable"> | ||
| + | <tr> | ||
| + | <th>Field</th> | ||
| + | <th>Value</th> | ||
| + | <th>Description</th> | ||
</tr> | </tr> | ||
<tr> | <tr> | ||
<td>Source MAC address</td> | <td>Source MAC address</td> | ||
<td>mac; default: <b>none</b></td> | <td>mac; default: <b>none</b></td> | ||
| − | <td>MAC address | + | <td>MAC address of connecting hosts.<br>The rule will apply only to hosts that match MAC addresses specified in this field. Leave empty to make the rule skip MAC address matching.</td> |
</tr> | </tr> | ||
<tr> | <tr> | ||
| Line 299: | Line 345: | ||
<tr> | <tr> | ||
<td>Source port</td> | <td>Source port</td> | ||
| − | <td>integer [0..65535] | range of integers [0..65534] - [1..65535]; default: <b>none</b></td> | + | <td>integer [0..65535] | range of integers [0..65534] - [1..65535] | port inversion [!0..!65535]; default: <b>none</b></td> |
| − | <td>Port number(s) used by the connecting host.<br>The rule will match the source port used by the connecting host with the port number(s) specified in this field. Leave empty to make the rule skip source port matching.<td> | + | <td>Port number(s) used by the connecting host.<br>The rule will match the source port used by the connecting host with the port number(s) specified in this field. Leave empty to make the rule skip source port matching.</td> |
</tr> | </tr> | ||
<tr> | <tr> | ||
| Line 306: | Line 352: | ||
<td>ip | ip/netmask; default: <b>any</b></td> | <td>ip | ip/netmask; default: <b>any</b></td> | ||
<td>IP address or network segment to which hosts will be connecting.<br>The rule will apply only to hosts that connect to IP addresses specified in this field.<br>To specify a subnet instead of one IP, add a forward slash followed by the netmask length after the network indication (for example, <i>10.0.0.0/8</i>).</td> | <td>IP address or network segment to which hosts will be connecting.<br>The rule will apply only to hosts that connect to IP addresses specified in this field.<br>To specify a subnet instead of one IP, add a forward slash followed by the netmask length after the network indication (for example, <i>10.0.0.0/8</i>).</td> | ||
| − | |||
| − | |||
| − | |||
| − | |||
| − | |||
| − | |||
| − | |||
| − | |||
| − | |||
| − | |||
| − | |||
| − | |||
| − | |||
| − | |||
| − | |||
| − | |||
| − | |||
| − | |||
| − | |||
| − | |||
</tr> | </tr> | ||
<tr> | <tr> | ||
| Line 343: | Line 369: | ||
The <b>Traffic rules</b> tab is used to set firewall rules that filter traffic moving through the device. The figure below is an example of the Traffic rules table: | The <b>Traffic rules</b> tab is used to set firewall rules that filter traffic moving through the device. The figure below is an example of the Traffic rules table: | ||
| − | [[File: | + | [[File:Networking_rutos_manual_firewall_traffic_rules_v2.png|border|class=tlt-border]] |
===Traffic Rule Configuration=== | ===Traffic Rule Configuration=== | ||
---- | ---- | ||
| − | In order to begin editing a traffic rule, click the button | + | In order to begin editing a traffic rule, click the edit button [[File:Networking rutx trb14x manual edit button v2.png|20px]] next to it: |
| − | [[File: | + | [[File:Networking_rutos_manual_firewall_traffic_rules_edit_button_v2.png|border|class=tlt-border]] |
You will be redirected to that rule's configuration page: | You will be redirected to that rule's configuration page: | ||
| − | [[File: | + | ====General settings==== |
| − | + | ---- | |
| + | [[File:Networking_rutos_manual_firewall_traffic_rules_configuration_general_settings_v2.png|border|class=tlt-border]] | ||
<table class="nd-mantable"> | <table class="nd-mantable"> | ||
<tr> | <tr> | ||
| Line 372: | Line 399: | ||
</tr> | </tr> | ||
<tr> | <tr> | ||
| − | + | <td>Protocol</td> | |
| − | + | <td>TCP | UDP | All | +Add new |<span style="color:red">ICMP</span>; default: <b>depends on the rule</b></td> | |
| − | + | <td>Specifies to which protocols the rule should apply.</td> | |
</tr> | </tr> | ||
<tr> | <tr> | ||
| − | + | <td><span style="color:red"> Match ICMP type</span></td> | |
| − | <td> | + | <td>Any | ICMP-type | + Add new; default: '''none'''</td> |
| − | <td> | + | <td>Allows matching specific ICMP types.</td> |
</tr> | </tr> | ||
<tr> | <tr> | ||
| Line 387: | Line 414: | ||
</tr> | </tr> | ||
<tr> | <tr> | ||
| − | <td>Source | + | <td>Source IP address</td> |
| − | |||
| − | |||
| − | |||
| − | |||
| − | |||
<td>ip | ip/netmask; default: <b>any</b></td> | <td>ip | ip/netmask; default: <b>any</b></td> | ||
<td>IP address or network segment used by connecting hosts.<br>The rule will apply only to hosts that connect from IP addresses specified in this field.<br>To specify a network segment instead of one IP address, add a forward slash followed by the netmask length after the network indication (for example, <i>10.0.0.0/8</i>).</td> | <td>IP address or network segment used by connecting hosts.<br>The rule will apply only to hosts that connect from IP addresses specified in this field.<br>To specify a network segment instead of one IP address, add a forward slash followed by the netmask length after the network indication (for example, <i>10.0.0.0/8</i>).</td> | ||
| Line 398: | Line 420: | ||
<tr> | <tr> | ||
<td>Source port</td> | <td>Source port</td> | ||
| − | <td>integer [0..65535] | range of integers [0..65534] - [1..65535]; default: <b>none</b></td> | + | <td>integer [0..65535] | range of integers [0..65534] - [1..65535] | port inversion [!0..!65535]; default: <b>none</b></td> |
| − | <td>Port number(s) used by the connecting host.<br>The rule will match the source port used by the connecting host with the port number(s) specified in this field. Leave empty to make the rule skip source port matching.<td> | + | <td>Port number(s) used by the connecting host.<br>The rule will match the source port used by the connecting host with the port number(s) specified in this field. Leave empty to make the rule skip source port matching. Port negation using is also available, for ex. <b>!1</b>.<td> |
</tr> | </tr> | ||
<tr> | <tr> | ||
| Line 413: | Line 435: | ||
<tr> | <tr> | ||
<td>Destination port</td> | <td>Destination port</td> | ||
| − | <td>integer [0..65535] | range of integers [0..65534] - [1..65535]; default: <b>none</b></td> | + | <td>integer [0..65535] | range of integers [0..65534] - [1..65535] | port inversion [!0..!65535]; default: <b>none</b></td> |
| − | <td>Tagert port or range of ports of the incoming connection.</td> | + | <td>Tagert port or range of ports of the incoming connection. Port negation using is also available, for ex. <b>!1</b>.</td> |
</tr> | </tr> | ||
<tr> | <tr> | ||
<td>Action</td> | <td>Action</td> | ||
| − | <td>Drop | Accept | Reject | Don't track; default: <b>Accept</b></td> | + | <td>Drop | Accept | Reject | Don't track | <span style="color:green">DSCP</span> | <span style="color:blue">Mark</span>; default: <b>Accept</b></td> |
<td>Action that is to be taken when a packet matches the conditions of the rule. | <td>Action that is to be taken when a packet matches the conditions of the rule. | ||
<ul> | <ul> | ||
| Line 425: | Line 447: | ||
<li><b>Reject</b> – packet is stopped, deleted and, differently from Drop, an ICMP packet containing a message of rejection is sent to the source from which the dropped packet came.</li> | <li><b>Reject</b> – packet is stopped, deleted and, differently from Drop, an ICMP packet containing a message of rejection is sent to the source from which the dropped packet came.</li> | ||
<li><b>Don't track</b> – packet is no longer tracked as it moves forward.</li> | <li><b>Don't track</b> – packet is no longer tracked as it moves forward.</li> | ||
| + | <li><b>DSCP</b> – packet is marked with specified DiffServ Code Point value.</li> | ||
| + | <li><b>Mark</b> – packet is marked with specified firewall mark..</li> | ||
</ul> | </ul> | ||
</td> | </td> | ||
| + | </tr> | ||
| + | </table> | ||
| + | |||
| + | ====Advanced settings==== | ||
| + | ---- | ||
| + | [[File:Networking_rutos_manual_firewall_traffic_rules_configuration_advanced_settings_v2.png|border|class=tlt-border]] | ||
| + | <table class="nd-mantable"> | ||
| + | <tr> | ||
| + | <td>Restrict to address family</td> | ||
| + | <td>IPv4 and IPv6 | IPv4 only | IPv6 only; default: <b>IPv4 and IPv6</b></td> | ||
| + | <td>IP address family to which the rule will apply to.</td> | ||
| + | </tr> | ||
| + | <tr> | ||
| + | <td>Source MAC address</td> | ||
| + | <td>mac; default: <b>none</b></td> | ||
| + | <td>MAC address(es) of connecting hosts.<br>The rule will apply only to hosts that match MAC addresses specified in this field. Leave empty to make the rule skip MAC address matching.</td> | ||
| + | </tr> | ||
| + | <tr> | ||
| + | <td><span style="color:green">DSCP</span>: Set Target value</td> | ||
| + | <td>Default | DSCP values; default: <b>Default</b></td> | ||
| + | <td>If specified, target traffic against the given firewall DSCP value.</td> | ||
| + | </tr> | ||
| + | <tr> | ||
| + | <td><span style="color:blue">Mark</span>: Set Target value</td> | ||
| + | <td>hex; default: <b>none</b></td> | ||
| + | <td>If specified, target traffic against the given firewall mark, e.g. FF or ff to target mark 255.</td> | ||
| + | </tr> | ||
| + | <tr> | ||
| + | <td>Match</td> | ||
| + | <td><span style="color:green">DSCP</span> | <span style="color:blue">Mark</span>; default: <b>none</b></td> | ||
| + | <td>Match traffic against the given DSCP value or firewall mark</td> | ||
| + | </tr> | ||
| + | <tr> | ||
| + | <td><span style="color:green">DSCP</span>: Set Match value</td> | ||
| + | <td>Default | DSCP values; default: <b>Default</b></td> | ||
| + | <td>Match traffic against the given firewall DSCP value.</td> | ||
| + | </tr> | ||
| + | <tr> | ||
| + | <td><span style="color:blue">Mark</span>: Set Match value</td> | ||
| + | <td>hex; default: <b>none</b></td> | ||
| + | <td>If specified, match traffic against the given firewall mark, e.g. FF or ff to match mark 255.</td> | ||
</tr> | </tr> | ||
<tr> | <tr> | ||
| Line 433: | Line 498: | ||
<td>Adds extra .iptables options to the rule.</td> | <td>Adds extra .iptables options to the rule.</td> | ||
</tr> | </tr> | ||
| + | </table> | ||
| + | |||
| + | ====Time restrictions==== | ||
| + | ---- | ||
| + | [[File:Networking_rutos_manual_firewall_traffic_rules_configuration_time_restrictions_v2.png|border|class=tlt-border]] | ||
| + | <table class="nd-mantable"> | ||
<tr> | <tr> | ||
<td>Week days</td> | <td>Week days</td> | ||
| − | <td>days of the week [ | + | <td>days of the week [Monday..Sunday]; default: <b>none</b></td> |
<td>Specifies on which days of the week the rule is valid.</td> | <td>Specifies on which days of the week the rule is valid.</td> | ||
</tr> | </tr> | ||
| Line 466: | Line 537: | ||
<td>Time in UTC</td> | <td>Time in UTC</td> | ||
<td>off | on; default: <b>no</b></td> | <td>off | on; default: <b>no</b></td> | ||
| − | <td>Specifies whether the device should use UTC time. If this is disabled, the time zone specified in the | + | <td>Specifies whether the device should use UTC time. If this is disabled, the time zone specified in the System → Administration → [[{{{name}}}_Administration#NTP|NTP]] page will be used.</td> |
</tr> | </tr> | ||
</table> | </table> | ||
| Line 472: | Line 543: | ||
===Open Ports on Router=== | ===Open Ports on Router=== | ||
---- | ---- | ||
| − | + | In the <b>Add new instance</b> section, select <b>Open ports on router</b>. This provides a quick way to set simple rules that allow traffic on specified ports of the device. The figure below is an example of the Open ports on device section and the table below provides information on the fields contained in that section: | |
| − | [[File: | + | [[File:Networking_rutos_manual_firewall_traffic_rules_open_ports_on_router_v2.png|border|class=tlt-border]] |
<table class="nd-mantable"> | <table class="nd-mantable"> | ||
| Line 489: | Line 560: | ||
<tr> | <tr> | ||
<td>Protocol</td> | <td>Protocol</td> | ||
| − | <td>TCP | + | <td>TCP | UDP | ICMP | All | +Add new; default: <b>none</b></td> |
<td>Specifies to which protocols the rule should apply.</td> | <td>Specifies to which protocols the rule should apply.</td> | ||
</tr> | </tr> | ||
<tr> | <tr> | ||
<td>External port</td> | <td>External port</td> | ||
| − | <td>integer [0..65535] | range of integers [0..65534] - [1..65535]; default: <b>none</b></td> | + | <td>integer [0..65535] | range of integers [0..65534] - [1..65535] | port inversion [!0..!65535]; default: <b>none</b></td> |
<td>Specifies which port(s) should be opened.</td> | <td>Specifies which port(s) should be opened.</td> | ||
</tr> | </tr> | ||
| Line 501: | Line 572: | ||
===Add New Forward Rule=== | ===Add New Forward Rule=== | ||
---- | ---- | ||
| − | + | In the <b>Add new instance</b> section, select <b>Add new forward rule</b>. This is used to create firewall rules that control traffic on the FORWARD chain. The figure below is an example of the Add New Forward Rule section and the table below provides information on the fields contained in that section: | |
| − | [[File: | + | [[File:Networking_rutos_manual_firewall_traffic_rules_add_new_forward_rule_v2.png|border|class=tlt-border]] |
<table class="nd-mantable"> | <table class="nd-mantable"> | ||
| Line 543: | Line 614: | ||
The Source NAT section displays currently existing SNAT rules. | The Source NAT section displays currently existing SNAT rules. | ||
| − | [[File: | + | [[File:Networking_rutos_manual_firewall_nat_rules_source_nat_v2.png|border|class=tlt-border]] |
===Add New Source NAT=== | ===Add New Source NAT=== | ||
| Line 549: | Line 620: | ||
The <b>Add New Source NAT</b> section is used to create new source NAT rules. | The <b>Add New Source NAT</b> section is used to create new source NAT rules. | ||
| − | [[File: | + | [[File:Networking_rutos_manual_firewall_nat_rules_add_new_source_nat_v2.png|border|class=tlt-border]] |
<table class="nd-mantable"> | <table class="nd-mantable"> | ||
| Line 579: | Line 650: | ||
<tr> | <tr> | ||
<td>To Source Port</td> | <td>To Source Port</td> | ||
| − | <td>integer [0..65335] | do not rewrite; default: <b>none</b></td> | + | <td>integer [0..65335] | port inversion [!0..!65535] | do not rewrite; default: <b>none</b></td> |
<td>Changes the source port in the packet header to the value specified in this field.</td> | <td>Changes the source port in the packet header to the value specified in this field.</td> | ||
</tr> | </tr> | ||
| Line 591: | Line 662: | ||
===Source NAT Configuration=== | ===Source NAT Configuration=== | ||
---- | ---- | ||
| − | In order to begin editing a traffic rule, click the button | + | In order to begin editing a traffic rule, click the edit button [[File:Networking_rutx_trb14x_manual_edit_button_v2.png|20px]] next to it: |
| − | + | [[File:Networking_rutos_manual_firewall_nat_rules_source_nat_edit_button_v2.png|border|class=tlt-border]] | |
| − | |||
| − | |||
| − | |||
You will be redirected to that rule's configuration page: | You will be redirected to that rule's configuration page: | ||
| − | [[File: | + | [[File:Networking rutos manual firewall nat rules configuration mobile general.png|border|class=tlt-border]] |
<table class="nd-mantable"> | <table class="nd-mantable"> | ||
| Line 620: | Line 688: | ||
<tr> | <tr> | ||
<td>Protocol</td> | <td>Protocol</td> | ||
| − | <td> | + | <td>TCP | UDP | ICMP | +Add new; default: <b>All protocols</b></td> |
<td>Specifies to which protocols the rule should apply.</td> | <td>Specifies to which protocols the rule should apply.</td> | ||
</tr> | </tr> | ||
| Line 635: | Line 703: | ||
<tr> | <tr> | ||
<td>Source port</td> | <td>Source port</td> | ||
| − | <td>integer [0..65535] | range of integers [0..65534] - [1..65535]; default: <b>none</b></td> | + | <td>integer [0..65535] | range of integers [0..65534] - [1..65535] | port inversion [!0..!65535]; default: <b>none</b></td> |
| − | <td>Mathes traffic originated from specified port number.<td> | + | <td>Mathes traffic originated from specified port number.</td> |
</tr> | </tr> | ||
<tr> | <tr> | ||
| Line 642: | Line 710: | ||
<td>firewall zone; default: <b>wan</b></td> | <td>firewall zone; default: <b>wan</b></td> | ||
<td>Matches traffic destined for the specified zone.</td> | <td>Matches traffic destined for the specified zone.</td> | ||
| − | </tr> | + | </tr> |
<tr> | <tr> | ||
<td>Destination IP address</td> | <td>Destination IP address</td> | ||
| Line 650: | Line 718: | ||
<tr> | <tr> | ||
<td>Destination port</td> | <td>Destination port</td> | ||
| − | <td>integer [0..65535] | range of integers [0..65534] - [1..65535]; default: <b>none</b></td> | + | <td>integer [0..65535] | range of integers [0..65534] - [1..65535] | port inversion [!0..!65535]; default: <b>none</b></td> |
<td>Matches traffic destined for the specified port number.</td> | <td>Matches traffic destined for the specified port number.</td> | ||
</tr> | </tr> | ||
<tr> | <tr> | ||
| − | + | <td>Rewrite port</td> | |
| − | <td> | + | <td>integer [0..65535] | range of integers [0..65534] - [1..65535] | port inversion [!0..!65535]; default: <b>No rewrite</b></td> |
| − | <td> | + | <td>Rewrite matched traffic to the given source port.</td> |
</tr> | </tr> | ||
| + | </table> | ||
| + | |||
| + | [[File:Networking rutos manual firewall nat rules configuration mobile advanced.png|border|class=tlt-border]] | ||
| + | |||
| + | <table class="nd-mantable"> | ||
<tr> | <tr> | ||
| − | < | + | <th>Field</th> |
| − | + | <th>Value</th> | |
| − | + | <th>Description</th> | |
</tr> | </tr> | ||
<tr> | <tr> | ||
| Line 667: | Line 740: | ||
<td>string; default: <b>none</b></td> | <td>string; default: <b>none</b></td> | ||
<td>Adds extra .iptables options to the rule.</td> | <td>Adds extra .iptables options to the rule.</td> | ||
| + | </tr> | ||
| + | </table> | ||
| + | |||
| + | [[File:Networking rutos manual firewall nat rules configuration mobile time restriction.png|border|class=tlt-border]] | ||
| + | |||
| + | <table class="nd-mantable"> | ||
| + | <tr> | ||
| + | <th>Field</th> | ||
| + | <th>Value</th> | ||
| + | <th>Description</th> | ||
</tr> | </tr> | ||
<tr> | <tr> | ||
<td>Week days</td> | <td>Week days</td> | ||
| − | <td>days of the week [ | + | <td>days of the week [Monday..Sunday]; default: <b>none</b></td> |
<td>Specifies on which days of the week the rule is valid.</td> | <td>Specifies on which days of the week the rule is valid.</td> | ||
</tr> | </tr> | ||
| Line 701: | Line 784: | ||
<td>Time in UTC</td> | <td>Time in UTC</td> | ||
<td>off | on; default: <b>no</b></td> | <td>off | on; default: <b>no</b></td> | ||
| − | <td>Specifies whether the device should use UTC time. If this is disabled, the time zone specified in the | + | <td>Specifies whether the device should use UTC time. If this is disabled, the time zone specified in the System → Administration → [[{{{name}}}_Administration#NTP|NTP]] page will be used.</td> |
</tr> | </tr> | ||
</table> | </table> | ||
| − | |||
| − | |||
| − | |||
| − | |||
| − | |||
| − | |||
| − | |||
| − | |||
| − | |||
| − | |||
| − | |||
| − | |||
| − | |||
| − | |||
==Attack Prevention== | ==Attack Prevention== | ||
| Line 727: | Line 796: | ||
<b>SYN Flood Protection</b> allows you to protect yourself from attacks that exploit part of the normal TCP three-way handshake to consume resources on the targeted server and render it unresponsive. Essentially, with SYN flood DDOS, the offender sends TCP connection requests faster than the targeted machine can process them, causing network over-saturation. | <b>SYN Flood Protection</b> allows you to protect yourself from attacks that exploit part of the normal TCP three-way handshake to consume resources on the targeted server and render it unresponsive. Essentially, with SYN flood DDOS, the offender sends TCP connection requests faster than the targeted machine can process them, causing network over-saturation. | ||
| − | [[File: | + | [[File:Networking_rutos_manual_firewall_attack_prevention_syn_flood_protection_v2.png|border|class=tlt-border]] |
<table class="nd-mantable"> | <table class="nd-mantable"> | ||
| Line 743: | Line 812: | ||
<td>SYN flood rate</td> | <td>SYN flood rate</td> | ||
<td>integer; default: <b>5</b></td> | <td>integer; default: <b>5</b></td> | ||
| − | <td>Set rate limit (packets per second) for SYN packets above which the traffic is considered | + | <td>Set rate limit (packets per second) for SYN packets above which the traffic is considered flooded</td> |
</tr> | </tr> | ||
<tr> | <tr> | ||
<td>SYN flood burst</td> | <td>SYN flood burst</td> | ||
<td>integer; default: <b>10</b></td> | <td>integer; default: <b>10</b></td> | ||
| − | <td>Sets burst limit for SYN packets above which the traffic is considered flooded if it exceeds the allowed | + | <td>Sets burst limit for SYN packets above which the traffic is considered flooded if it exceeds the allowed rate</td> |
</tr> | </tr> | ||
<tr> | <tr> | ||
<td>TCP SYN cookies</td> | <td>TCP SYN cookies</td> | ||
| − | <td>off | on; default: <b> | + | <td>off | on; default: <b>on</b></td> |
| − | <td>Enables the use of SYN cookies (particular choices of initial TCP sequence numbers by TCP servers) | + | <td>Enables the use of SYN cookies (particular choices of initial TCP sequence numbers by TCP servers)</td> |
</tr> | </tr> | ||
</table> | </table> | ||
| Line 761: | Line 830: | ||
Some attackers use <b>ICMP echo request</b> packets directed to IP broadcast addresses from remote locations to generate denial-of-service attacks. You can set up some custom restrictions to help protect your router from ICMP bursts. | Some attackers use <b>ICMP echo request</b> packets directed to IP broadcast addresses from remote locations to generate denial-of-service attacks. You can set up some custom restrictions to help protect your router from ICMP bursts. | ||
| − | [[File: | + | [[File:Networking_rutos_manual_firewall_attack_prevention_remote_icmp_requests_v2.png|border|class=tlt-border]] |
<table class="nd-mantable"> | <table class="nd-mantable"> | ||
| Line 776: | Line 845: | ||
<tr> | <tr> | ||
<td>Enable ICMP limit</td> | <td>Enable ICMP limit</td> | ||
| − | <td>off | on; default: <b> | + | <td>off | <span style="color: #1550bf;">on</span>; default: <b>off</b></td> |
<td>Turns ICMP echo-request limit in selected period on or off.</td> | <td>Turns ICMP echo-request limit in selected period on or off.</td> | ||
</tr> | </tr> | ||
<tr> | <tr> | ||
| − | <td>Limit period</td> | + | <td><span style="color: #1550bf;">Limit period</span></td> |
<td>Second | Minute | Hour | Day; default: <b>Second</b></td> | <td>Second | Minute | Hour | Day; default: <b>Second</b></td> | ||
<td>Period length for matching the conditions of the rule.</td> | <td>Period length for matching the conditions of the rule.</td> | ||
</tr> | </tr> | ||
<tr> | <tr> | ||
| − | <td>Limit</td> | + | <td><span style="color: #1550bf;">Limit</span></td> |
<td>integer; default: <b>5</b></td> | <td>integer; default: <b>5</b></td> | ||
<td>Maximum ICMP echo-request number during the period.</td> | <td>Maximum ICMP echo-request number during the period.</td> | ||
</tr> | </tr> | ||
<tr> | <tr> | ||
| − | <td>Limit burst</td> | + | <td><span style="color: #1550bf;">Limit burst</span></td> |
<td>integer; default: <b>10</b></td> | <td>integer; default: <b>10</b></td> | ||
<td>Indicates the maximum burst before the above limit kicks in.</td> | <td>Indicates the maximum burst before the above limit kicks in.</td> | ||
| Line 800: | Line 869: | ||
This protection prevent <b>SSH attacks</b> by limiting connections in a defined period. | This protection prevent <b>SSH attacks</b> by limiting connections in a defined period. | ||
| − | [[File: | + | [[File:Networking_rutos_manual_firewall_attack_prevention_ssh_attack_prevention_v2.png|border|class=tlt-border]] |
<table class="nd-mantable"> | <table class="nd-mantable"> | ||
| Line 820: | Line 889: | ||
<tr> | <tr> | ||
<td>Limit</td> | <td>Limit</td> | ||
| − | <td>integer; default: <b> | + | <td>integer [1..10000]; default: <b>none</b></td> |
<td>Maximum SSH connections during the set period</td> | <td>Maximum SSH connections during the set period</td> | ||
</tr> | </tr> | ||
<tr> | <tr> | ||
<td>Limit burst</td> | <td>Limit burst</td> | ||
| − | <td>integer; default: <b> | + | <td>integer [1..10000]; default: <b>none</b></td> |
<td>Indicates the maximum burst before the above limit kicks in.</td> | <td>Indicates the maximum burst before the above limit kicks in.</td> | ||
</tr> | </tr> | ||
| Line 834: | Line 903: | ||
An <b>HTTP attack</b> sends a complete, legitimate HTTP header, which includes a 'Content-Length' field to specify the size of the message body to follow. However, the attacker then proceeds to send the actual message body at an extremely slow rate (e.g. 1 byte/100 seconds.) Due to the entire message being correct and complete, the target server will attempt to obey the 'Content-Length' field in the header, and wait for the entire body of the message to be transmitted, hence slowing it down. | An <b>HTTP attack</b> sends a complete, legitimate HTTP header, which includes a 'Content-Length' field to specify the size of the message body to follow. However, the attacker then proceeds to send the actual message body at an extremely slow rate (e.g. 1 byte/100 seconds.) Due to the entire message being correct and complete, the target server will attempt to obey the 'Content-Length' field in the header, and wait for the entire body of the message to be transmitted, hence slowing it down. | ||
| − | [[File: | + | [[File:Networking_rutos_manual_firewall_attack_prevention_http_attack_prevention_v2.png|border|class=tlt-border]] |
<table class="nd-mantable"> | <table class="nd-mantable"> | ||
| Line 854: | Line 923: | ||
<tr> | <tr> | ||
<td>Limit</td> | <td>Limit</td> | ||
| − | <td>integer; default: <b> | + | <td>integer [1..10000]; default: <b>none</b></td> |
| − | <td>Maximum HTTP connections during the set period< | + | <td>Maximum HTTP connections during the set period.</td> |
</tr> | </tr> | ||
<tr> | <tr> | ||
<td>Limit burst</td> | <td>Limit burst</td> | ||
| − | <td>integer; default: <b> | + | <td>integer [1..10000]; default: <b>none</b></td> |
<td>Indicates the maximum burst before the above limit kicks in.</td> | <td>Indicates the maximum burst before the above limit kicks in.</td> | ||
</tr> | </tr> | ||
| Line 870: | Line 939: | ||
In cryptography and computer security, a man-in-the-middle attack (MITM) is an attack where the perpetrator secretly relays and possibly alters the communication between two parties who believe they are directly communicating with each other. One example of man-in-the-middle attacks is active eavesdropping, in which the attacker makes independent connections with the victims and relays messages between them to make them believe they are talking directly to each other over a private connection, when in fact the entire conversation is controlled by the attacker. | In cryptography and computer security, a man-in-the-middle attack (MITM) is an attack where the perpetrator secretly relays and possibly alters the communication between two parties who believe they are directly communicating with each other. One example of man-in-the-middle attacks is active eavesdropping, in which the attacker makes independent connections with the victims and relays messages between them to make them believe they are talking directly to each other over a private connection, when in fact the entire conversation is controlled by the attacker. | ||
| − | [[File: | + | [[File:Networking_rutos_manual_firewall_attack_prevention_https_attack_prevention_v2.png|border|class=tlt-border]] |
<table class="nd-mantable"> | <table class="nd-mantable"> | ||
| Line 890: | Line 959: | ||
<tr> | <tr> | ||
<td>Limit</td> | <td>Limit</td> | ||
| − | <td>integer; default: <b> | + | <td>integer [1..10000]; default: <b>none</b></td> |
<td>Maximum HTTPS connections during the set period.</td> | <td>Maximum HTTPS connections during the set period.</td> | ||
</tr> | </tr> | ||
<tr> | <tr> | ||
<td>Limit burst</td> | <td>Limit burst</td> | ||
| − | <td>integer; default: <b> | + | <td>integer [1..10000]; default: <b>none</b></td> |
<td>Indicates the maximum burst number before the above limit kicks in.</td> | <td>Indicates the maximum burst number before the above limit kicks in.</td> | ||
</tr> | </tr> | ||
| Line 905: | Line 974: | ||
Port scanning is usually done in the initial phase of a penetration test in order to discover all network entry points into the target system. The Port Scan section provides you with the possibility to enable protection against port scanning software. The Defending Type section provides the possibility for the user to enable protections from certain types of online attacks. These include <b>SYN-FIN</b>, <b>SYN-RST</b>, <b>X-Mas</b>, <b>FIN scan</b> and <b>NULLflags</b> attacks. | Port scanning is usually done in the initial phase of a penetration test in order to discover all network entry points into the target system. The Port Scan section provides you with the possibility to enable protection against port scanning software. The Defending Type section provides the possibility for the user to enable protections from certain types of online attacks. These include <b>SYN-FIN</b>, <b>SYN-RST</b>, <b>X-Mas</b>, <b>FIN scan</b> and <b>NULLflags</b> attacks. | ||
| − | [[File: | + | [[File:Networking_rutos_manual_firewall_attack_prevention_port_scan_v2.png|border|class=tlt-border]] |
<table class="nd-mantable"> | <table class="nd-mantable"> | ||
| Line 920: | Line 989: | ||
<tr> | <tr> | ||
<td>Scan count</td> | <td>Scan count</td> | ||
| − | <td>integer [5.. | + | <td>integer [5..10000]; default: <b>none</b></td> |
<td>How many port scans before blocked.</td> | <td>How many port scans before blocked.</td> | ||
</tr> | </tr> | ||
<tr> | <tr> | ||
<td>Interval</td> | <td>Interval</td> | ||
| − | <td>integer [10.. | + | <td>integer [10..4096]; default: <b>none</b></td> |
<td>Time interval in seconds in which port scans are counted.</td> | <td>Time interval in seconds in which port scans are counted.</td> | ||
</tr> | </tr> | ||
| Line 952: | Line 1,021: | ||
<td>off | on; default: <b>off</b></td> | <td>off | on; default: <b>off</b></td> | ||
<td>Turns protection from NULLflags attacks on or off.</td> | <td>Turns protection from NULLflags attacks on or off.</td> | ||
| + | </tr> | ||
| + | </table> | ||
| + | |||
| + | ==Custom Rules== | ||
| + | |||
| + | The <b>Custom rules</b> tab provides you with the possibility to execute <b>iptables</b> commands which are not otherwise covered by the device's firewall framework. The commands are executed after each firewall restart, right after the default rule set has been loaded. | ||
| + | |||
| + | <b>Note: </b> Custom rules are not recommended to be used with <i>hostnames</i>. The rules will not remain active after reboot due to security reasons. | ||
| + | |||
| + | The figure below is an example of the Custom rules tab: | ||
| + | |||
| + | [[File:Networking_rutos_manual_firewall_custom_rules.png|border|class=tlt-border]] | ||
| + | |||
| + | The rules added here are saved in the <b>/etc/firewall.user</b> file. Feel free to edit that file instead for the same effect in case you don't have access to the device's WebUI. | ||
| + | |||
| + | The <b>Save</b> button restarts the firewall service. Thus, adding the custom rules specified in this section to the device's list of firewall rules. | ||
| + | |||
| + | The <b>Reset</b> button resets the custom rules field to its default state. | ||
| + | |||
| + | ==DMZ== | ||
| + | |||
| + | The <b>DMZ</b> is a security concept. It comprises the separation of the LAN-side network into at least two networks: the user LAN and the DMZ. Generally the DMZ is imprisoned: only access to certain ports from the Internet are allowed into the DMZ, while the DMZ is not allowed to establish new connections to the WAN-side or LAN-side networks. That way, if a server inside of the DMZ is hacked the potential damage that can be done remains restricted! The whole point of the DMZ is to cleanly create a unique firewall rule set that dramatically restricts access in to, and out of the, DMZ. | ||
| + | |||
| + | [[File:Networking rutos manual network firewall dmz_v2.png|border|class=tlt-border]] | ||
| + | |||
| + | <table class="nd-mantable"> | ||
| + | <tr> | ||
| + | <th>Field</th> | ||
| + | <th>Value</th> | ||
| + | <th>Description</th> | ||
| + | </tr> | ||
| + | <tr> | ||
| + | <td>Enable</td> | ||
| + | <td>off | on; default: <b>off</b></td> | ||
| + | <td>Enables the DMZ configuration.</td> | ||
| + | </tr> | ||
| + | <tr> | ||
| + | <td>Host IP</td> | ||
| + | <td>ipv4; default: <b>none</b></td> | ||
| + | <td>Specifies the IP address of the DMZ host.</td> | ||
| + | </tr> | ||
| + | <tr> | ||
| + | <td>Protocol</td> | ||
| + | <td>All | <span style="color:blue">TCP</span> | <span style="color:blue">UDP</span> | ICMP; default: <b>None</b></td> | ||
| + | <td>Specifies for which protocols the DMZ will be used.</td> | ||
| + | </tr> | ||
| + | <tr> | ||
| + | <td><span style="color:blue">Ports</span></td> | ||
| + | <td>0..65535 | port range | port negation; default: <b>none</b></td> | ||
| + | <td>Match incoming traffic directed at the given destination port or port range on DMZ host IP.</td> | ||
</tr> | </tr> | ||
</table> | </table> | ||
[[Category:{{{name}}} Network section]] | [[Category:{{{name}}} Network section]] | ||
Latest revision as of 14:41, 5 January 2024
The information in this page is updated in accordance with firmware version .
Summary
{{{name}}} devices use a standard Linux iptables package as its firewall, which uses routing chains and policies to facilitate control over inbound and outbound traffic.
This chapter of the user manual provides an overview of the Firewall page for {{{name}}} devices.
If you're having trouble finding this page or some of the parameters described here on your device's WebUI, you should turn on "Advanced WebUI" mode. You can do that by clicking the "Advanced" button, located at the top of the WebUI.

General Settings
The General Settings section is used to configure the main policies of the device's firewall. The figure below is an example of the General Settings section and the table below provides information on the fields contained in that section:

| Field | Value | Description |
|---|---|---|
| Drop invalid packets | off | on; default: off | If enabled, a "Drop" action will be performed on packets that are determined to be invalid. |
| Automatic helper assignment | off | on; default: on | Automatically assigns conntrack helpers based on traffic protocol and port. If turned off, conntrack helpers can be selected for each zone. |
| Input | Reject | Drop | Accept; default: Reject | Default action* of the INPUT chain if a packet does not match any existing rule on that chain. |
| Output | Reject | Drop | Accept; default: Accept | Default action* of the OUTPUT chain if a packet does not match any existing rule on that chain. |
| Forward | Reject | Drop | Accept; default: Reject | Default action* of the FORWARD chain if a packet does not match any existing rule on that chain. |
* When a packet goes through a firewall chain it is matched against all the rules of that specific chain. If no rule matches said packet, an according Action (Drop, Reject or Accept) is performed:
- Accept – packet gets to continue to the next chain.
- Drop – packet is stopped and deleted.
- Reject – packet is stopped, deleted and, differently from Drop, a message of rejection is sent to the source from which the packet came.
Routing/NAT Offloading
The Routing/NAT Offloading is used to turns software flow offloading on or off.
The device checks whether the flow (sequence of related packets) is of a received a packed is known. Packets of unknown flow are forwarded to the networking stack. Meanwhile, if the flow is known, NAT is applied (if matched) and the packet is forwarded to the correct destination port. This process is called software flow offloading.

| Field | Value | Description |
|---|---|---|
| Software flow offloading | off | on; default: on | Turns software flow offloading on or off. |
Zones
The Zones section is used to manage default traffic forwarding policies between different device zones. The figure below is an example of the Zones section and the table below provides information on the fields contained in that section:

You can change a zone's settings from this page by interacting with entries in the zones table. For a more in-depth configuration click the edit button ![]() next to a zone:
next to a zone:

Zones: General Settings

| Field | Value | Description |
|---|---|---|
| Name | string; default: newzone | A custom name for the zone. Used for easier management purposes. |
| Input | Reject | Drop | Accept; default: Accept | Default policy for traffic entering the zone. |
| Output | Reject | Drop | Accept; default: Accept | Default policy for traffic originating from and leaving the zone. |
| Forward | Reject | Drop | Accept; default: Reject | Default policy for traffic forwarded between the networks belonging to the zone. |
| Masquerading | off | on; default: off | Turns Masquerading off or on. MASQUERADE is an iptables target that can be used instead of the SNAT (source NAT) target when the external IP of the network interface is not known at the moment of writing the rule (when the interface gets the external IP dynamically). |
| MSS clamping | off | on; default: off | Turns MSS clamping off or on. MSS clamping is a workaround used to change the maximum segment size (MSS) of all TCP connections passing through links with an MTU lower than the Ethernet default of 1500. |
| Covered networks | network interface(s); default: none | Network or networks that belong to the zone. |
Zones: Advanced Settings

| Field | Value | Description |
|---|---|---|
| Restrict to address family | IPv4 and IPv6 | IPv4 only | IPv6 only; default: IPv4 and IPv6 | IP address family to which to rule will apply. |
| Restrict Masquerading to given source subnets | network/subnet; default: none | Applies Masquerading only to the specified source network/subnet. |
| Restrict Masquerading to given destinations subnets | network/subnet; default: none | Applies Masquerading only to the specified destination network/subnet. |
| Force connection tracking | off | on; default: off | Always maintains connection state (NEW, ESTABLISHED, RELATED) information. |
| Enable logging on this zone | off | on; default: off | Logs packets that hit this rule. |
| Limit log messages | integer/minute; default: none | Limit how many messages can be logged in the span of 1 minute. For example, to log 50 packets per minute use: 50/minute. |
| Conntrack helpers | Amanda backup and archiving proto (AMANDA) | FTP passive connection tracking (FTP) | RAS proto tracking (RAS) | Q.931 proto tracking (Q.931) | IRC DCC connection tracking (IRC) | NetBIOS name service broadcast tracking (NETBIOS-NS) | PPTP VPN connection tracking (PPTP) | SIP VoIP connection tracking (SIP) | SNMP monitoring connection tracking (SNMP) | TFTP connection tracking (TFTP); default: none | This option appears only when automatic helper assignment option in the firewall's general settings is disabled. Explicitly choses allowed connection tracking helpers for zone traffic. |
Zones: Inter-zone Forwarding
The Inter-zone forwarding options control the forwarding policies between the currently edited zone and other zones.

| Field | Value | Description |
|---|---|---|
| Allow forward to destination zones | zone(s); default: none | Allows forward traffic to specified destination zones. Destination zones cover forwarded traffic originating from this source zone. |
| Allow forward from source zones | zone(s); default: none | Allows forward traffic to specified source zones. Source zones match forwarded traffic originating from other zones that is targeted at this zone. |
Port Forwards
Port forwarding is a way of redirecting an incoming connection to another IP address, port or the combination of both:

The Port forwards table displays configured port forwarding rules currently configured on the device.

Add New Port Forward
The Add New Port Forward section is used to quickly add additional port forwarding rules. The figure below is an example of the Add New Port Forward section and the table below provides information on the fields contained in that section:

| Field | Value | Description |
|---|---|---|
| Name | string; default: none | Name of the rule. This is used for easier management purposes. |
| External port | integer [0..65535] | range of integers [0..65534] - [1..65535] | port inversion [!0..!65535]; default: none | The port number to which hosts will be connecting. |
| Internal IP address | ip; default: none | The IP address to which the incoming connection will be redirected. |
| Internal port | integer [0..65535] | range of integers [0..65534] - [1..65535] | port inversion [!0..!65535]; default: none | The port number to which the incoming connection will be redirected. |
Port Forwards Configuration
While the New port forward section provides the possibility to add port forwarding rules fast, it does not contain all possible configuration options to customize a rule. In order to create a more complicated rule, add one using the New port forward section and click the edit button ![]() next to it:
next to it:

You will be redirected to that rule's configuration general settings page:

| Field | Value | Description |
|---|---|---|
| Enable | off | on ; default: on | Turns the rule on or off |
| Name | string; default: none | Name of the rule. This is used for easier management purposes. |
| Protocol | TCP | UDP | ICMP | All | +Add new; default: TCP+UDP | Specifies to which protocols the rule should apply. |
| Source zone | firewall zone name; default: wan | The zone to which the third party will be connecting. (Same thing as "External zone" in the New port forward section.) |
| External port | integer [0..65535] | range of integers [0..65534] - [1..65535] | port inversion [!0..!65535]; default: none | Port number(s) to which hosts will be connecting. The rule will apply only to hosts that connect to the port number(s) specified in this field. Leave empty to make the rule skip external port matching. |
| Internal zone | firewall zone name; default: lan | The zone to which the incoming connection will be redirected. |
| Internal IP address | Device LAN IP; default: Device LAN IP | The IP address to which the incoming connection will be redirected. |
| Internal port | integer [0..65535] | range of integers [0..65534] - [1..65535] | port inversion [!0..!65535]; default: none | The port number to which the incoming connection will be redirected. |
Advanced settings:

| Field | Value | Description |
|---|---|---|
| Source MAC address | mac; default: none | MAC address of connecting hosts. The rule will apply only to hosts that match MAC addresses specified in this field. Leave empty to make the rule skip MAC address matching. |
| Source IP address | ip | ip/netmask; default: any | IP address or network segment used by connecting hosts. The rule will apply only to hosts that connect from IP addresses specified in this field. To specify a network segment instead of one IP address, add a forward slash followed by the netmask length after the network indication (for example, 10.0.0.0/8). |
| Source port | integer [0..65535] | range of integers [0..65534] - [1..65535] | port inversion [!0..!65535]; default: none | Port number(s) used by the connecting host. The rule will match the source port used by the connecting host with the port number(s) specified in this field. Leave empty to make the rule skip source port matching. |
| External IP address | ip | ip/netmask; default: any | IP address or network segment to which hosts will be connecting. The rule will apply only to hosts that connect to IP addresses specified in this field. To specify a subnet instead of one IP, add a forward slash followed by the netmask length after the network indication (for example, 10.0.0.0/8). |
| Enable NAT loopback | off | on ; default: on | NAT loopback a.k.a. NAT reflection a.k.a. NAT hairpinning is a method of accessing an internal server using a public IP. NAT loopback enables your local network (i.e., behind your NAT device) to connect to a forward-facing IP address of a machine that it also on your local network. |
| Extra arguments | string; default: none | Adds extra iptables options to the rule. |
Traffic Rules
The Traffic rules tab is used to set firewall rules that filter traffic moving through the device. The figure below is an example of the Traffic rules table:

Traffic Rule Configuration
In order to begin editing a traffic rule, click the edit button ![]() next to it:
next to it:

You will be redirected to that rule's configuration page:
General settings

| Field | Value | Description | |
|---|---|---|---|
| Enable | off | on; default on | Turns the rule on or off. | |
| Name | string; default none | Name of the rule. This is used for easier management purposes. | |
| Protocol | TCP | UDP | All | +Add new |ICMP; default: depends on the rule | Specifies to which protocols the rule should apply. | |
| Match ICMP type | Any | ICMP-type | + Add new; default: none | Allows matching specific ICMP types. | |
| Source zone | firewall zone name; default: wan | The zone to which the third party will be connecting. | |
| Source IP address | ip | ip/netmask; default: any | IP address or network segment used by connecting hosts. The rule will apply only to hosts that connect from IP addresses specified in this field. To specify a network segment instead of one IP address, add a forward slash followed by the netmask length after the network indication (for example, 10.0.0.0/8). |
|
| Source port | integer [0..65535] | range of integers [0..65534] - [1..65535] | port inversion [!0..!65535]; default: none | Port number(s) used by the connecting host. The rule will match the source port used by the connecting host with the port number(s) specified in this field. Leave empty to make the rule skip source port matching. Port negation using is also available, for ex. !1. | |
| Destination zone | firewall zone; default: Device (input) | Target zone of the incoming connection. | |
| Destination address | ip | ip/netmask; default: any | Tagert IP address or network segment of the incoming connection. | |
| Destination port | integer [0..65535] | range of integers [0..65534] - [1..65535] | port inversion [!0..!65535]; default: none | Tagert port or range of ports of the incoming connection. Port negation using is also available, for ex. !1. | |
| Action | Drop | Accept | Reject | Don't track | DSCP | Mark; default: Accept | Action that is to be taken when a packet matches the conditions of the rule.
|
Advanced settings

| Restrict to address family | IPv4 and IPv6 | IPv4 only | IPv6 only; default: IPv4 and IPv6 | IP address family to which the rule will apply to. |
| Source MAC address | mac; default: none | MAC address(es) of connecting hosts. The rule will apply only to hosts that match MAC addresses specified in this field. Leave empty to make the rule skip MAC address matching. |
| DSCP: Set Target value | Default | DSCP values; default: Default | If specified, target traffic against the given firewall DSCP value. |
| Mark: Set Target value | hex; default: none | If specified, target traffic against the given firewall mark, e.g. FF or ff to target mark 255. |
| Match | DSCP | Mark; default: none | Match traffic against the given DSCP value or firewall mark |
| DSCP: Set Match value | Default | DSCP values; default: Default | Match traffic against the given firewall DSCP value. |
| Mark: Set Match value | hex; default: none | If specified, match traffic against the given firewall mark, e.g. FF or ff to match mark 255. |
| Extra arguments | string; default: none | Adds extra .iptables options to the rule. |
Time restrictions

| Week days | days of the week [Monday..Sunday]; default: none | Specifies on which days of the week the rule is valid. |
| Month days | days of the month [1..31]; default: none | Specifies on which days of the month the rule is valid. |
| Start Time (hh:mm:ss) | time [0..23:0..59:0..59]; default: none | Indicates the beginning of the time period during which the rule is valid. |
| Stop Time (hh:mm:ss) | time [0..23:0..59:0..59]; default: none | Indicates the end of the time period during which the rule is valid. |
| Start Date (yyyy-mm-dd) | date [0000..9999:1..12:1..31]; default: none | Indicates the first day of the date of the period during which the rule is valid. |
| Stop Date (yyyy-mm-dd) | date [0000..9999:1..12:1..31]; default: none | Indicates the last day of the date of the period during which the rule is valid. |
| Time in UTC | off | on; default: no | Specifies whether the device should use UTC time. If this is disabled, the time zone specified in the System → Administration → [[{{{name}}}_Administration#NTP|NTP]] page will be used. |
Open Ports on Router
In the Add new instance section, select Open ports on router. This provides a quick way to set simple rules that allow traffic on specified ports of the device. The figure below is an example of the Open ports on device section and the table below provides information on the fields contained in that section:

| Field | Value | Description |
|---|---|---|
| Name | string; default: none | The name of the rule. This is used for easier management purposes. The name field is filled automatically when port numbers are specified, unless the name was specified beforehand by the user. |
| Protocol | TCP | UDP | ICMP | All | +Add new; default: none | Specifies to which protocols the rule should apply. |
| External port | integer [0..65535] | range of integers [0..65534] - [1..65535] | port inversion [!0..!65535]; default: none | Specifies which port(s) should be opened. |
Add New Forward Rule
In the Add new instance section, select Add new forward rule. This is used to create firewall rules that control traffic on the FORWARD chain. The figure below is an example of the Add New Forward Rule section and the table below provides information on the fields contained in that section:

| Field | Value | Description |
|---|---|---|
| Name | string; default: none | The name of the rule. This is used for easier management purposes. |
| Source zone | firewall zone; default: wan | The zone from which traffic has originated. |
| Destination zone | firewall zone; default: lan | The zone to which traffic will be forwarded to. |
| Add | - (interactive button) | Creates the rule and redirects you to the rule's configuration page |
NAT Rules
Network address translation (NAT) is method of modifying the source/destination address and/or port information in a packet's IP header.
Source NAT
Source NAT (SNAT) is a form of masquerading used to change a packet's source address and/or port number to a static, user-defined value. SNAT is performed in the POSTROUTING chain, just before a packet leaves the device.
The Source NAT section displays currently existing SNAT rules.

Add New Source NAT
The Add New Source NAT section is used to create new source NAT rules.

| Field | Value | Description |
|---|---|---|
| Name | string; default: none | The name of the rule. Used only for easier management purposes. |
| Source zone | firewall zone; default: lan | Matches traffic originated from the specified zone. |
| Destination Zone | firewall zone; default: wan | Matches traffic destined for the specified zone. |
| To source IP | ip | do not rewrite; default: none | Changes the source IP address in the packet header to the value specified in this field. |
| To Source Port | integer [0..65335] | port inversion [!0..!65535] | do not rewrite; default: none | Changes the source port in the packet header to the value specified in this field. |
| Add | - (interactive button) | Creates the rule in accordance with the given parameter and redirects you to the rule's configuration page. |
Source NAT Configuration
In order to begin editing a traffic rule, click the edit button ![]() next to it:
next to it:


You will be redirected to that rule's configuration page:

| Field | Value | Description |
|---|---|---|
| Enable | off | on; default on | Turns the rule on or off. |
| Name | string; default none | Name of the rule. This is used for easier management purposes. |
| Protocol | TCP | UDP | ICMP | +Add new; default: All protocols | Specifies to which protocols the rule should apply. |
| Source zone | firewall zone; default: lan | Matches traffic originated from the specified zone. |
| Source IP address | ip | ip/netmask; default: Any | Mathes traffic originated from specified IP address or network segment. |
| Source port | integer [0..65535] | range of integers [0..65534] - [1..65535] | port inversion [!0..!65535]; default: none | Mathes traffic originated from specified port number. |
| Destination zone | firewall zone; default: wan | Matches traffic destined for the specified zone. |
| Destination IP address | ip | ip/netmask; default: any | Matches traffic destined for the specified IP address or network segment. |
| Destination port | integer [0..65535] | range of integers [0..65534] - [1..65535] | port inversion [!0..!65535]; default: none | Matches traffic destined for the specified port number. |
| Rewrite port | integer [0..65535] | range of integers [0..65534] - [1..65535] | port inversion [!0..!65535]; default: No rewrite | Rewrite matched traffic to the given source port. |
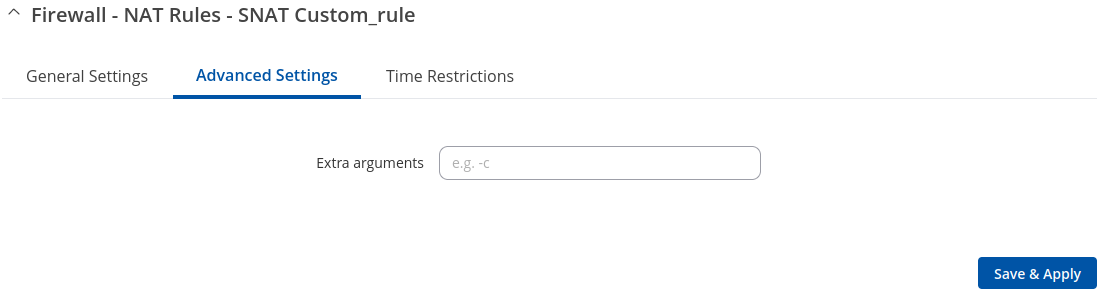

| Field | Value | Description |
|---|---|---|
| Extra arguments | string; default: none | Adds extra .iptables options to the rule. |
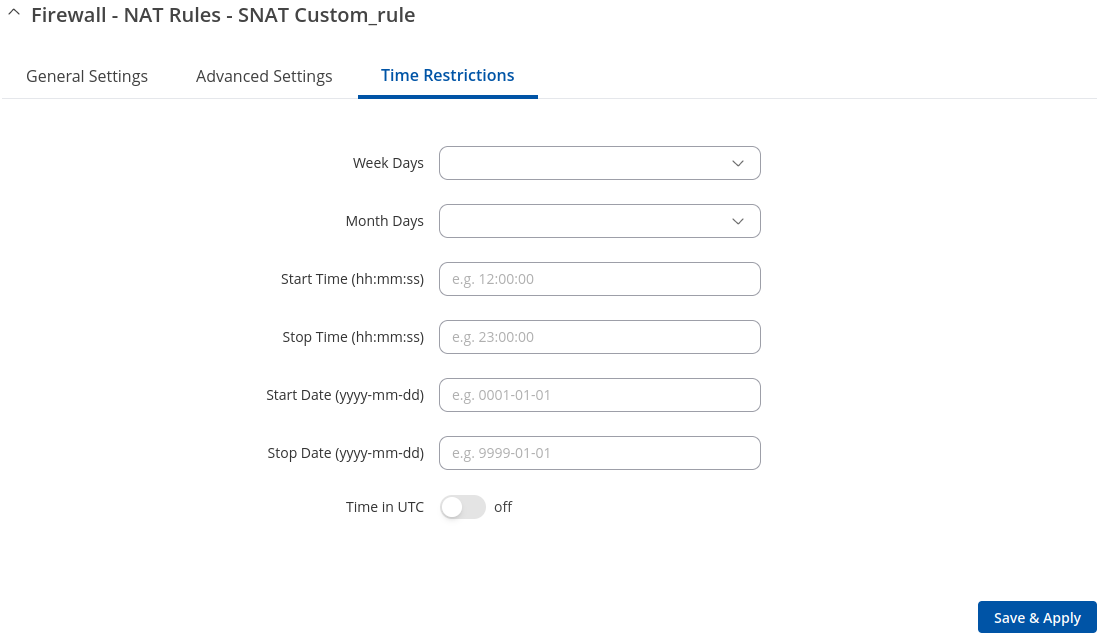

| Field | Value | Description |
|---|---|---|
| Week days | days of the week [Monday..Sunday]; default: none | Specifies on which days of the week the rule is valid. |
| Month days | days of the month [1..31]; default: none | Specifies on which days of the month the rule is valid. |
| Start Time (hh:mm:ss) | time [0..23:0..59:0..59]; default: none | Indicates the beginning of the time period during which the rule is valid. |
| Stop Time (hh:mm:ss) | time [0..23:0..59:0..59]; default: none | Indicates the end of the time period during which the rule is valid. |
| Start Date (yyyy-mm-dd) | date [0000..9999:1..12:1..31]; default: none | Indicates the first day of the date of the period during which the rule is valid. |
| Stop Date (yyyy-mm-dd) | date [0000..9999:1..12:1..31]; default: none | Indicates the last day of the date of the period during which the rule is valid. |
| Time in UTC | off | on; default: no | Specifies whether the device should use UTC time. If this is disabled, the time zone specified in the System → Administration → [[{{{name}}}_Administration#NTP|NTP]] page will be used. |
Attack Prevention
The Attack Prevention menu tab provides the possibility to configure protections against certain types of online attacks.
SYN Flood Protection
SYN Flood Protection allows you to protect yourself from attacks that exploit part of the normal TCP three-way handshake to consume resources on the targeted server and render it unresponsive. Essentially, with SYN flood DDOS, the offender sends TCP connection requests faster than the targeted machine can process them, causing network over-saturation.

| Field | Value | Description |
|---|---|---|
| Enable SYN flood protection | off | on; default: on | Turns the rule on or off. |
| SYN flood rate | integer; default: 5 | Set rate limit (packets per second) for SYN packets above which the traffic is considered flooded |
| SYN flood burst | integer; default: 10 | Sets burst limit for SYN packets above which the traffic is considered flooded if it exceeds the allowed rate |
| TCP SYN cookies | off | on; default: on | Enables the use of SYN cookies (particular choices of initial TCP sequence numbers by TCP servers) |
Remote ICMP Requests
Some attackers use ICMP echo request packets directed to IP broadcast addresses from remote locations to generate denial-of-service attacks. You can set up some custom restrictions to help protect your router from ICMP bursts.

| Field | Value | Description |
|---|---|---|
| Enable ICMP requests | off | on; default: on | Turns the rule on or off. |
| Enable ICMP limit | off | on; default: off | Turns ICMP echo-request limit in selected period on or off. |
| Limit period | Second | Minute | Hour | Day; default: Second | Period length for matching the conditions of the rule. |
| Limit | integer; default: 5 | Maximum ICMP echo-request number during the period. |
| Limit burst | integer; default: 10 | Indicates the maximum burst before the above limit kicks in. |
SSH Attack Prevention
This protection prevent SSH attacks by limiting connections in a defined period.

| Field | Value | Description |
|---|---|---|
| Enable SSH limit | off | on; default: off | Turns the rule on or off. |
| Limit period | Second | Minute | Hour | Day; default: Second | Period length for matching the conditions of the rule. |
| Limit | integer [1..10000]; default: none | Maximum SSH connections during the set period |
| Limit burst | integer [1..10000]; default: none | Indicates the maximum burst before the above limit kicks in. |
HTTP Attack Prevention
An HTTP attack sends a complete, legitimate HTTP header, which includes a 'Content-Length' field to specify the size of the message body to follow. However, the attacker then proceeds to send the actual message body at an extremely slow rate (e.g. 1 byte/100 seconds.) Due to the entire message being correct and complete, the target server will attempt to obey the 'Content-Length' field in the header, and wait for the entire body of the message to be transmitted, hence slowing it down.

| Field | Value | Description |
|---|---|---|
| Enable HTTP limit | off | on; default: off | Turns the rule on or off. |
| Limit period | Second | Minute | Hour | Day; default: Second | Period length for matching the conditions of the rule. |
| Limit | integer [1..10000]; default: none | Maximum HTTP connections during the set period. |
| Limit burst | integer [1..10000]; default: none | Indicates the maximum burst before the above limit kicks in. |
HTTPS Attack Prevention
This section allows you to enable protection against HTTPS attacks, also known as "man-in-the-middle" attacks (MITM).
In cryptography and computer security, a man-in-the-middle attack (MITM) is an attack where the perpetrator secretly relays and possibly alters the communication between two parties who believe they are directly communicating with each other. One example of man-in-the-middle attacks is active eavesdropping, in which the attacker makes independent connections with the victims and relays messages between them to make them believe they are talking directly to each other over a private connection, when in fact the entire conversation is controlled by the attacker.

| Field | Value | Description |
|---|---|---|
| Enable HTTPS limit | off | on; default: off | Turns the rule on or off. |
| Limit period | Second | Minute | Hour | Day; default: Second | Period length for matching the conditions of the rule. |
| Limit | integer [1..10000]; default: none | Maximum HTTPS connections during the set period. |
| Limit burst | integer [1..10000]; default: none | Indicates the maximum burst number before the above limit kicks in. |
Port Scan
Port Scan attacks scan which of the targeted host's ports are open. Network ports are the entry points to a machine that is connected to the Internet. A service that listens on a port is able to receive data from a client application, process it and send a response back. Malicious clients can sometimes exploit vulnerabilities in the server code so they gain access to sensitive data or execute malicious code on the machine remotely. Port scanning is usually done in the initial phase of a penetration test in order to discover all network entry points into the target system. The Port Scan section provides you with the possibility to enable protection against port scanning software. The Defending Type section provides the possibility for the user to enable protections from certain types of online attacks. These include SYN-FIN, SYN-RST, X-Mas, FIN scan and NULLflags attacks.

| Field | Value | Description |
|---|---|---|
| Enable | off | on; default: off | Turns the function on or off. |
| Scan count | integer [5..10000]; default: none | How many port scans before blocked. |
| Interval | integer [10..4096]; default: none | Time interval in seconds in which port scans are counted. |
| SYN-FIN attack | off | on; default: off | Turns protection from SYN-FIN attacks on or off. |
| SYN-RST attack | off | on; default: off | Turns protection from SYN-RST attacks on or off. |
| X-Mas attack | off | on; default: off | Turns protection from X-Mas attacks on or off. |
| FIN scan | off | on; default: off | Turns protection from FIN scan attacks on or off. |
| NULLflags attack | off | on; default: off | Turns protection from NULLflags attacks on or off. |
Custom Rules
The Custom rules tab provides you with the possibility to execute iptables commands which are not otherwise covered by the device's firewall framework. The commands are executed after each firewall restart, right after the default rule set has been loaded.
Note: Custom rules are not recommended to be used with hostnames. The rules will not remain active after reboot due to security reasons.
The figure below is an example of the Custom rules tab:

The rules added here are saved in the /etc/firewall.user file. Feel free to edit that file instead for the same effect in case you don't have access to the device's WebUI.
The Save button restarts the firewall service. Thus, adding the custom rules specified in this section to the device's list of firewall rules.
The Reset button resets the custom rules field to its default state.
DMZ
The DMZ is a security concept. It comprises the separation of the LAN-side network into at least two networks: the user LAN and the DMZ. Generally the DMZ is imprisoned: only access to certain ports from the Internet are allowed into the DMZ, while the DMZ is not allowed to establish new connections to the WAN-side or LAN-side networks. That way, if a server inside of the DMZ is hacked the potential damage that can be done remains restricted! The whole point of the DMZ is to cleanly create a unique firewall rule set that dramatically restricts access in to, and out of the, DMZ.

| Field | Value | Description |
|---|---|---|
| Enable | off | on; default: off | Enables the DMZ configuration. |
| Host IP | ipv4; default: none | Specifies the IP address of the DMZ host. |
| Protocol | All | TCP | UDP | ICMP; default: None | Specifies for which protocols the DMZ will be used. |
| Ports | 0..65535 | port range | port negation; default: none | Match incoming traffic directed at the given destination port or port range on DMZ host IP. |
[[Category:{{{name}}} Network section]]

