Difference between revisions of "How to set up a USB printer (Windows, RUTX11)"
From Teltonika Networks Wiki
(Created page with "{{Template: Networking_rutx_configuration_examples_printer_server <!---------------DEVICE DETAILS---------------> | name = RUTX11 | fw_version = RUTX_R...") |
|||
| Line 6: | Line 6: | ||
| file_printer_server = Networking_rutx_configuration_examples_printer_server_v1.png | | file_printer_server = Networking_rutx_configuration_examples_printer_server_v1.png | ||
<!-------------WINDOWS SCREENSHOTS------------> | <!-------------WINDOWS SCREENSHOTS------------> | ||
| − | | file_windows_1 = | + | | file_windows_1 = Printer_server_setup_figure_1_v2.png |
| file_windows_2 = Printer_server_setup_figure_2_v2.png | | file_windows_2 = Printer_server_setup_figure_2_v2.png | ||
| file_windows_3 = Printer_server_setup_figure_3_v2.png | | file_windows_3 = Printer_server_setup_figure_3_v2.png | ||
| file_windows_4 = Printer_server_setup_figure_4_v2.png | | file_windows_4 = Printer_server_setup_figure_4_v2.png | ||
}} | }} | ||
Latest revision as of 23:55, 19 April 2020
Main Page > RUTX Routers > RUTX11 > RUTX11 Configuration Examples > How to set up a USB printer (Windows, RUTX11)Introduction
This article provides step-by-step instructions on how to set up and utilize a printer connected to the USB port of a RUTX11 router.
The information in this page is updated in accordance with the RUTX_R_00.02.03 firmware version.
Prerequisites
You will need:
- a RUTX router running FW version RUTX_R_00.02.3 or newer (FW downloads);
- a computer running Windows 10 OS;
- a USB A to B printer cable.
Instructions
- Connect the printer to your router's USB port. Connect your computer to the router via Ethernet cable or wirelessly.
- Login to the router's WebUI, go the Services → USB Tools → Printer Server page and configure the printer settings:
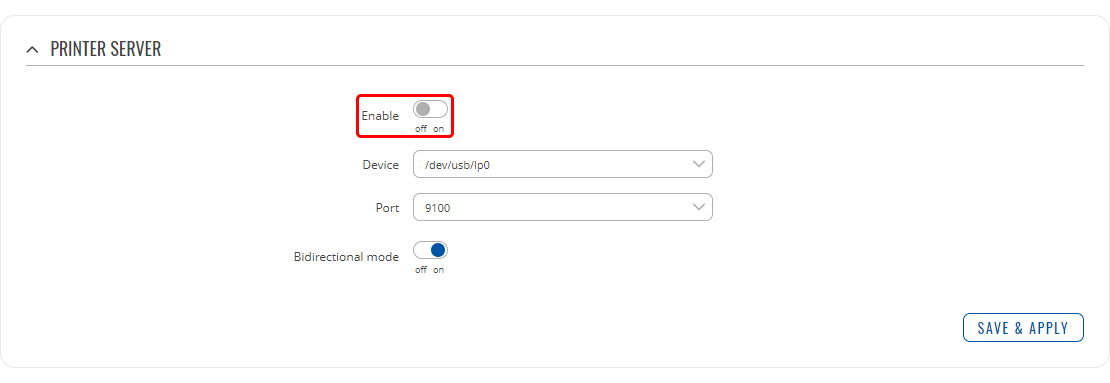
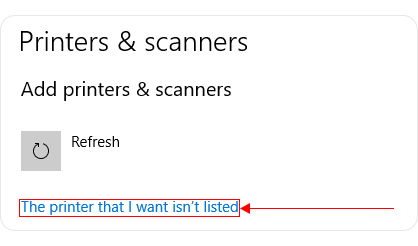
Most importantly - Enable the printer. - Open the Printers & scanners page on your PC. Click the Add a printer or scanner button and wait until the note "The printer that I want isn't listed" appears; click it:
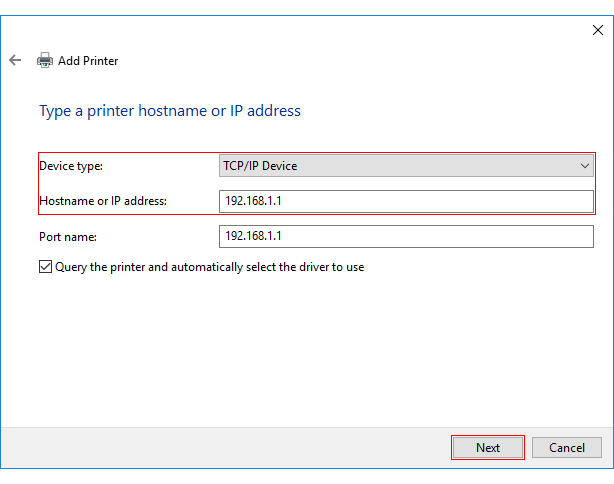
- In the following window choose TCP/IP address option and click Next.
- Select Device type: TCP/IP Device, enter the router's LAN IP address and port name. For example:
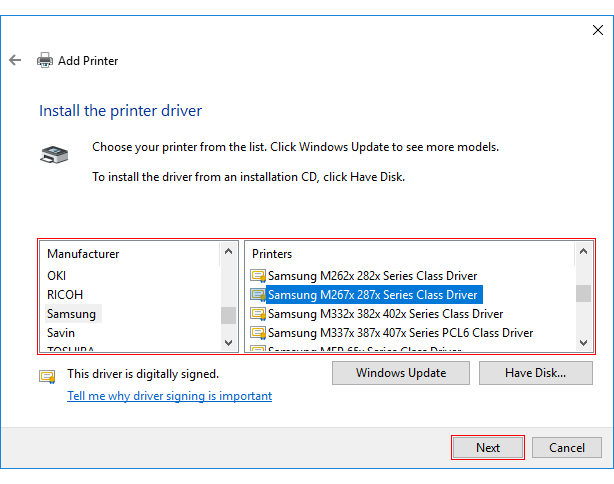
- In the next window, select Device Type: Standard, find and select your printer's manufacturer from the dropdown:
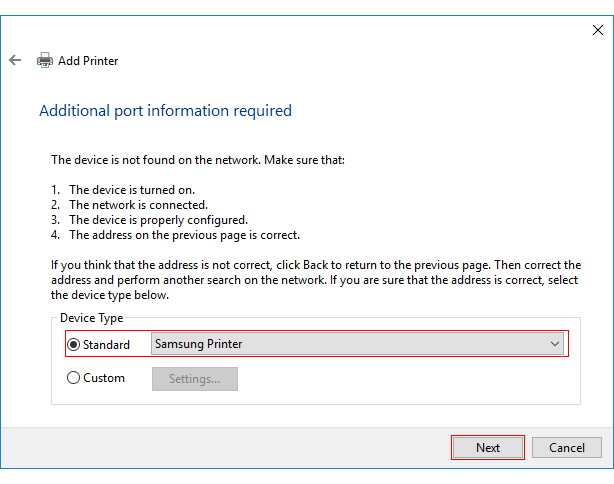
- Select your printer from the list:
- Next, the PC will look printer drivers. If the drivers for your printer have been installed prior, you can choose the option to replace them or use the currently installed drivers.
- In the next two windows you will be asked you to enter a custom name for the printer and set up sharing rights. The very last window will provide the option to print a test page in order to find out if the printer was set up successfully. If you choose it and see a test page coming out of your printer - congratulations, you have just successfully set up your printer!


