Difference between revisions of "LAN Traffic Splitting Using Advanced Static Routing Rules"
| Line 27: | Line 27: | ||
[[File:Interfaces.png|center]] | [[File:Interfaces.png|center]] | ||
| + | |||
| + | ==Configuration== | ||
| + | |||
| + | '''1.''' Go to '''Network –> Interface -> edit MOB2S1A1 -> Advanced settings -> Set IP4table to 10'''. Click save and apply. | ||
| + | |||
| + | [[File:MOB2S1A1 Configuration.png|center]] | ||
| + | |||
| + | '''2.''' Go to '''Network -> Routing -> Advanced Static Routes -> Add new instance of Routing table.''' Table ID can be chosen freely, however, it later on must match in the routing rules configuration. E.G TableID = 10 and set the Name of the Table, E.G Name of Table = Example. | ||
| + | |||
| + | [[File:Routing table creation.png|center]] | ||
| + | |||
| + | '''3.''' '''Click the edit button on next to the created routing table:''' | ||
| + | |||
| + | [[File:Editing created Routing table.png|center]] | ||
| + | |||
| + | '''4.''' '''Configure the Static route in the following manner and click save and apply:''' | ||
| + | |||
| + | * interface: LAN | ||
| + | * Name: Example | ||
| + | * Target: 192.168.1.0 | ||
| + | * IPV4-Netmask: 255.255.255.0 | ||
| + | * Leave everything other blank | ||
| + | * Add the route. | ||
| + | |||
| + | |||
| + | [[File:Adding static IPV4 route.png|center]] | ||
Revision as of 15:00, 11 November 2021
Introduction
This article provides a guide on how to separate mobile data traffic within a LAN by using advanced static routing rules. These configurations are specifically made for RUTX12.
- First you want to make sure that you have ADVANCED mode enabled. This will allow you to choose from a larger variety of settings.
Prerequisites
For this particular configuration you will need:
- A Router with 2xLTE modules (RUTX12 is being used in the example)
- 2 SIM cards
- 2 PCs in the same LAN network
Preparation
- Prepare RUTX12, power up the device, insert two sim cards, check that both are active and working. SIM1, SIM2, PWR and signal strength indicators should light up.
- Access the router through WEBUI, go to Network -> Interfaces, make sure that both MOB1S1A1 and MOB2S1A1 interfaces are running (Status = Running). You should also be able to see their Ip addresses.
- Make sure that you have ADVANCED mode enabled. This will allow you to choose from a larger variety of settings.
Network -> Interfaces should look similar to this:
Configuration
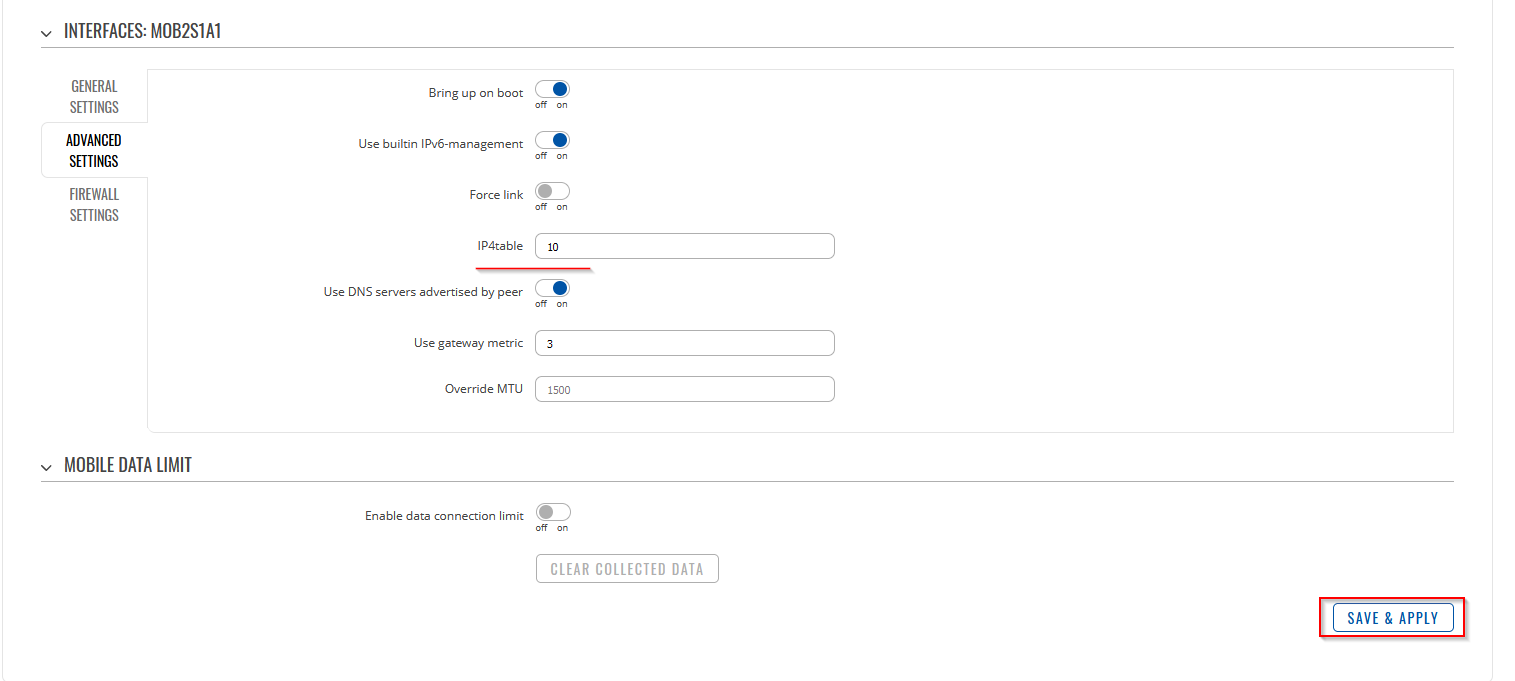
1. Go to Network –> Interface -> edit MOB2S1A1 -> Advanced settings -> Set IP4table to 10. Click save and apply.
2. Go to Network -> Routing -> Advanced Static Routes -> Add new instance of Routing table. Table ID can be chosen freely, however, it later on must match in the routing rules configuration. E.G TableID = 10 and set the Name of the Table, E.G Name of Table = Example.
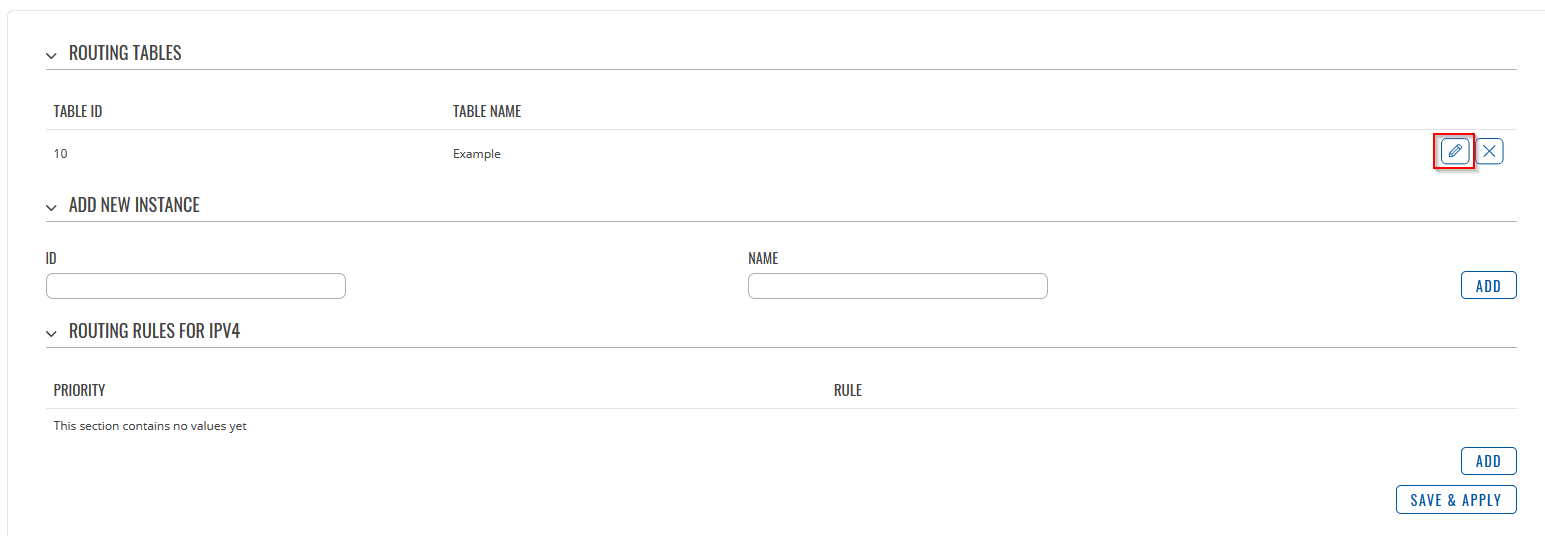
3. Click the edit button on next to the created routing table:
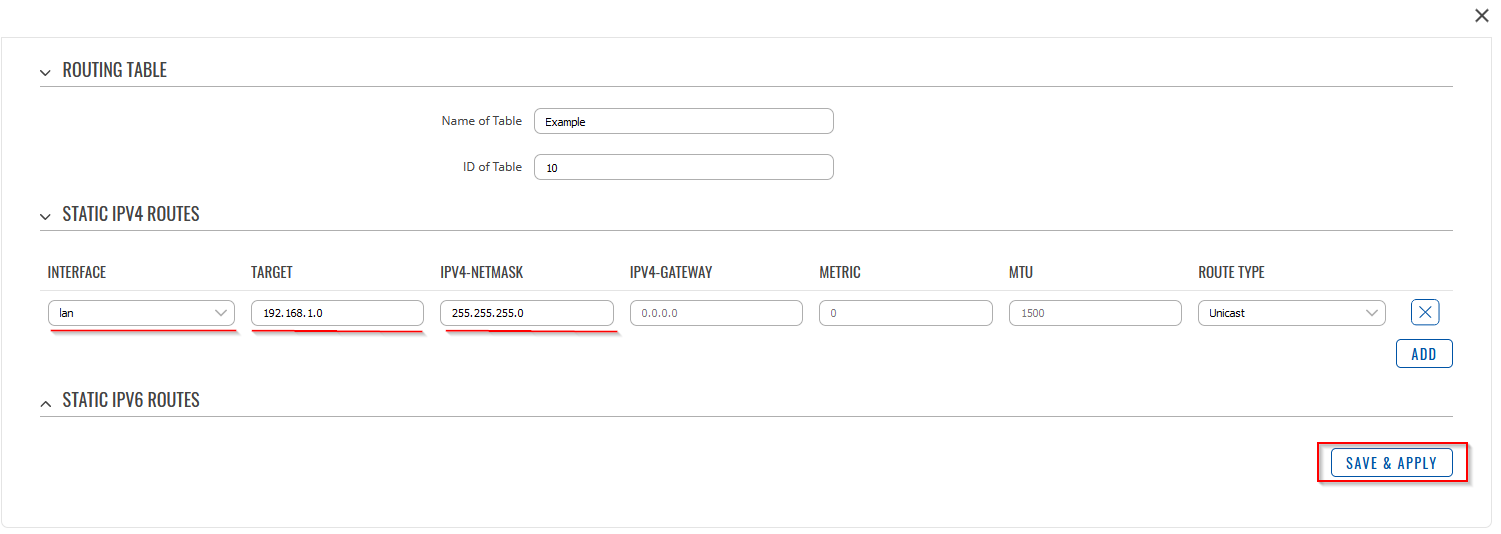
4. Configure the Static route in the following manner and click save and apply:
- interface: LAN
- Name: Example
- Target: 192.168.1.0
- IPV4-Netmask: 255.255.255.0
- Leave everything other blank
- Add the route.


