Difference between revisions of "Template:Rms manual files config files add new config"
From Teltonika Networks Wiki
| Line 1: | Line 1: | ||
| + | |||
| + | [[File:RMS Configuration Add New.gif]] | ||
* To upload a config file, you must first obtain one by downloading it from the router's WebUI or if that router is added to RMS, you can download from there (instructions provided below) | * To upload a config file, you must first obtain one by downloading it from the router's WebUI or if that router is added to RMS, you can download from there (instructions provided below) | ||
Revision as of 16:31, 12 June 2019

- To upload a config file, you must first obtain one by downloading it from the router's WebUI or if that router is added to RMS, you can download from there (instructions provided below)
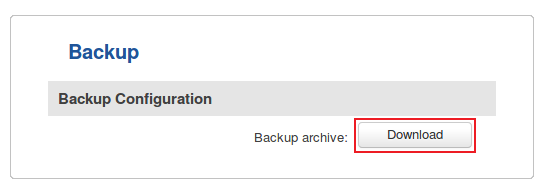
- From router's WebUI: navigate to System → Administration → Backup and download the backup file:
- From RMS: while in the Management tab place a check mark next to the device whose configuration you want to download:

- Scroll your mouse pointer to the Configuration submenu (Management → Configuration) and click "Download":

- Scroll your mouse pointer to the Configuration submenu (Management → Configuration) and click "Download":
- From router's WebUI: navigate to System → Administration → Backup and download the backup file:


- Go to the Files tab, scroll your mouse pointer to the File submenu (Files → Config files → File) and click "Add New":

- Click the "
 Choose a file..." button, select the config file that you wish to add from your computer and click "Upload":

- If the config file was uploaded successfully, you will see a success indication message and the config file will appear in the config table:


