Template:Rms manual management device submenu add device
From Teltonika Networks Wiki
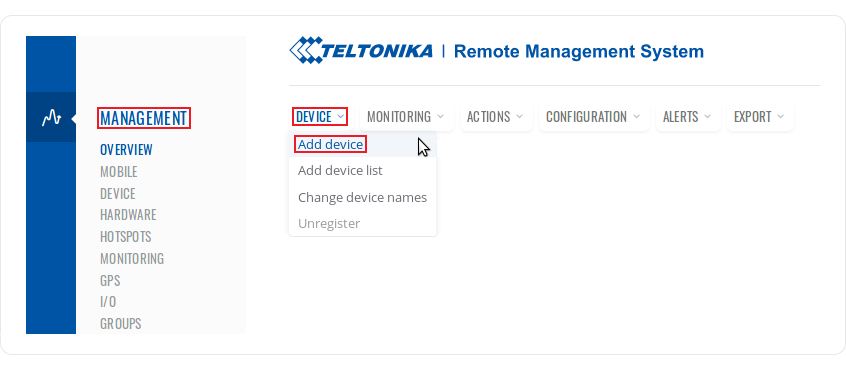
- To add a new device(s) to RMS, hover your mouse pointer over the Device submenu (Management → Device) and click "Add device":
- In the pop-up box select your company, choose the device's type (RUT or TRB), enter the device's serial number*, LAN MAC Address* (IMEI* for TRB) and a custom name. Click the plus (
 ) symbol to add more than one device. Click "Add":
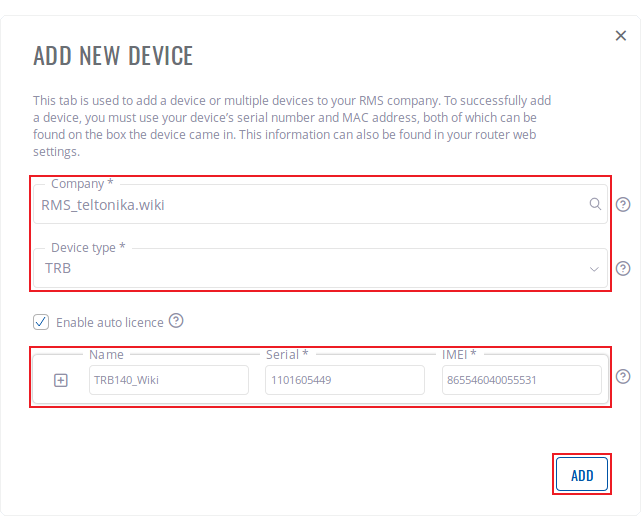
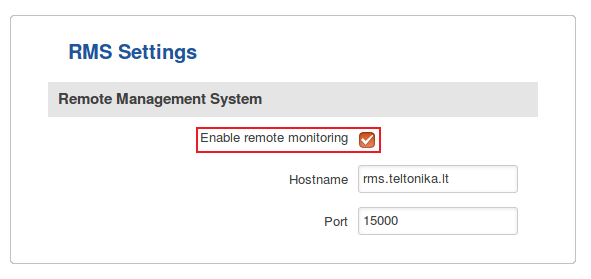
* You can find the serial number, LAN MAC address and IMEI on the device's package or in the WebUI, under System → Administration → RMS) - Don't forget to enable remote monitoring on the device(s) that you are trying to add. To do so, go to the router's WebUI and navigate to System → Administration → RMS and place a check mark next to the "Enable remote monitoring" field (detailed instructions provided here). This can be done either before or after clicking "Add device":
- Wait for about a minute for the system to finish adding the device(s). You will know the process is done when the word "Done" appears under the Status field:
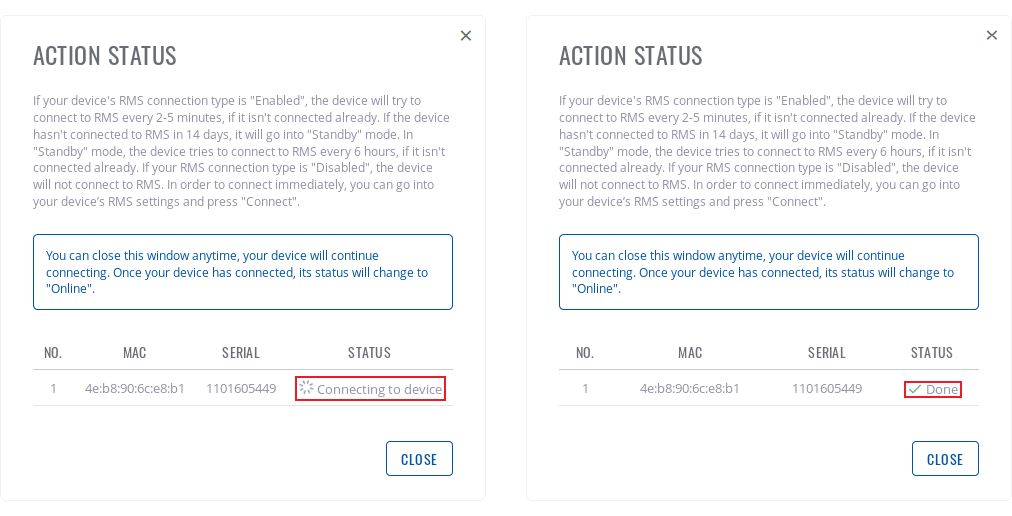
- You can close the "Add device" box earlier if you wish. You should be able to see the newly added device in the device table. When the power button symbol next to it turns green, the system will have finished connecting it to RMS:


