RUT241 esim dziugas
The information in this page is updated in accordance with 00.07.09 firmware version.
Introduction
Traditionally, we use a SIM card, also known as a Subscriber Identity Module card, which is a small, removable card in cellular devices that stores user identity and authentication information for accessing mobile networks. However there is a new feature, where we do not need to physically have a SIM card, we can have a eSIM card, which stands for embedded Subscriber Identity Module, that is an electronic version of a SIM card! eSIM most of the time comes directly embedded into the device's motherboard, which cannot be removed or replaced by the user of the device.
Configuration overview and prerequisites
Before we begin, let's look at the configuration we are attempting to achieve and the prerequisites that make it possible.
Prerequisites:
- One RUT/RUTX series router or TRB gateway with RUTOS firmware and eSIM feature;
- One eSIM which we would be able to use;
- An end device (PC, Laptop) for configuration;
If you're having trouble finding this page or some of the parameters described here on your device's WebUI, you should turn on "Advanced WebUI" mode. You can do that by clicking the "Advanced" button, located at the top of the WebUI.
Device configuration
In this configuration we will enable and activate eSIM card.
Activating eSIM card
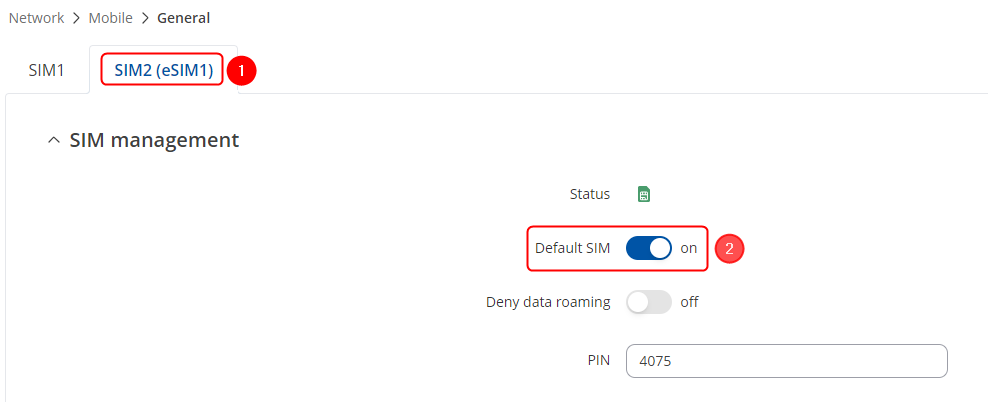
Firstly, we will need to enable the eSIM as a default SIM for the device. Start by logging to the WebUI, navigate to 1. Network → 2. Mobile → 3. General.
Make the following changes:
- Move to - SIM2(eSIM1) section;
- Enable – Default SIM option;
- Click Save & Apply button at the bottom of the page;
Adding eSIM profile
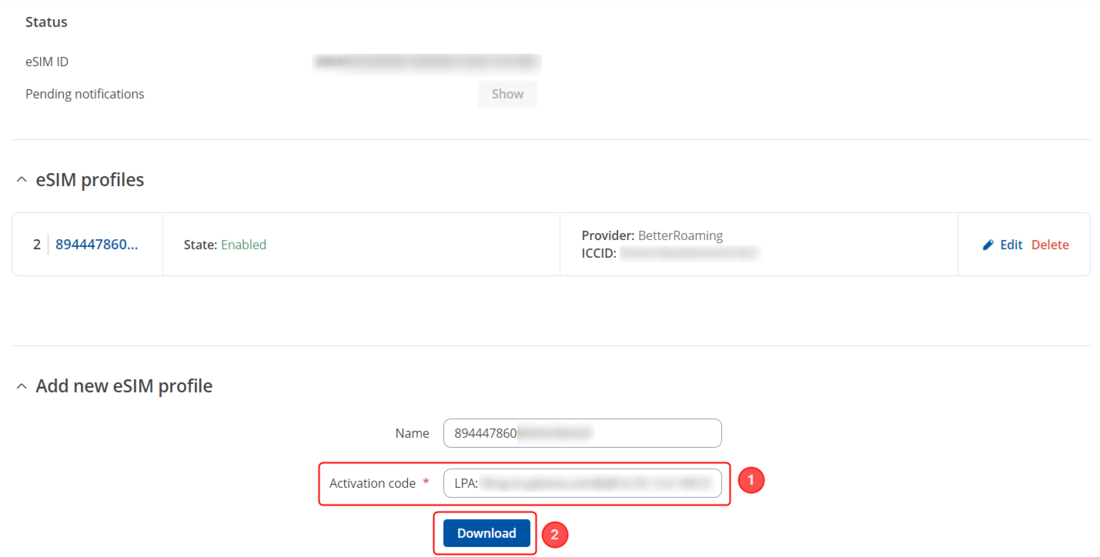
After enabling the eSIM card as a default SIM, we are able to add eSIM profile, which we would want to load. Navigate to 1. Network → 2. Mobile → 3. eSIM profiles.
Make the following changes:
- Activation code – Code provided by the eSIM provider;
- Once provided - click on Download button;
Note: - You will need an internet source to download the eSIM profile.
eSIM profile switch
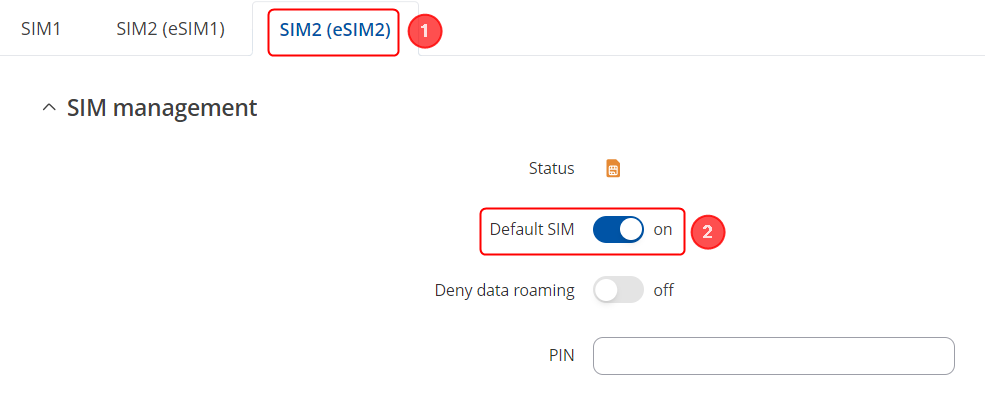
If you have several eSIM profiles, you can switch between them, to use the desired eSIM at the moment. Navigate to 1. Network → 2. Mobile → 3. General.
Make the following changes:
- Move to - SIM2(eSIM2) section or to the one that you would like to switch to;
- Enable – Default SIM option;
- Click Save & Apply button at the bottom of the page;
Changing eSIM profile name
If you would like to change the eSIM profile name, you will need to navigate to 1. Network → 2. Mobile → 3. eSIM profiles → 4. Click ![]() button on the desired profile name.
button on the desired profile name.
Make the following changes:
- Write the desired name for the eSIM in the – Name section;
- Click Save & Apply button to save the changes;
Testing the configuration
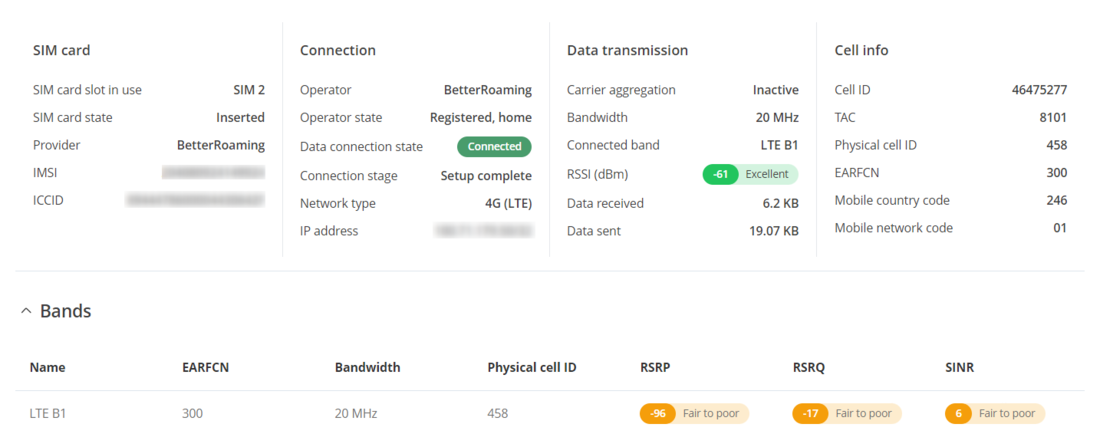
To check if the eSIM profile was downloaded and is working properly on the device, we can check it via WebUI of the device. Navigate to 1. Status → 2. Network → 3. Mobile. There you should see if the eSIM is connected to the operator.


