Noip IPv6 DDNS Configuration: Difference between revisions
No edit summary |
|||
| Line 60: | Line 60: | ||
|<td> | |<td> | ||
<p> #!/bin/sh </p> | <p> #!/bin/sh </p> | ||
<p> | <p> . /lib/functions/network.sh </p> | ||
<p> network_flush_cache </p> | <p> network_flush_cache </p> | ||
<p> network_find_wan6 NET_IF6 </p> | <p> network_find_wan6 NET_IF6 </p> | ||
Revision as of 10:21, 14 December 2023
Summary
This article will guide you through configuring an IPv6 DDNS AAAA record at www.noip.com and activating an IPv6 DDNS service on RUT routers.
Prerequisite
To use the IPv6 DDNS service, you must have a Static or Dynamic IPv6 Global Unicast Address (GUA) configured in your router WAN interface. Otherwise, your router will not be able to update the IPv6 DDNS record. Also, you need to have IPv6 connectivity from your laptop to reach your router IPv6 address hostname. You can click on the following link to get more information about IPv6 Addressing and here to test your ipv6 connectivity from your laptop.
| Prefix | Designation and explanation |
|---|---|
| 2000::/3 | They are globally routable and reachable IPv6 addresses on the Internet. Therefore, in the IPv6 network environment, they are considered the equivalent of public IPv4 addresses. |
Step 1: noip.com Configuration
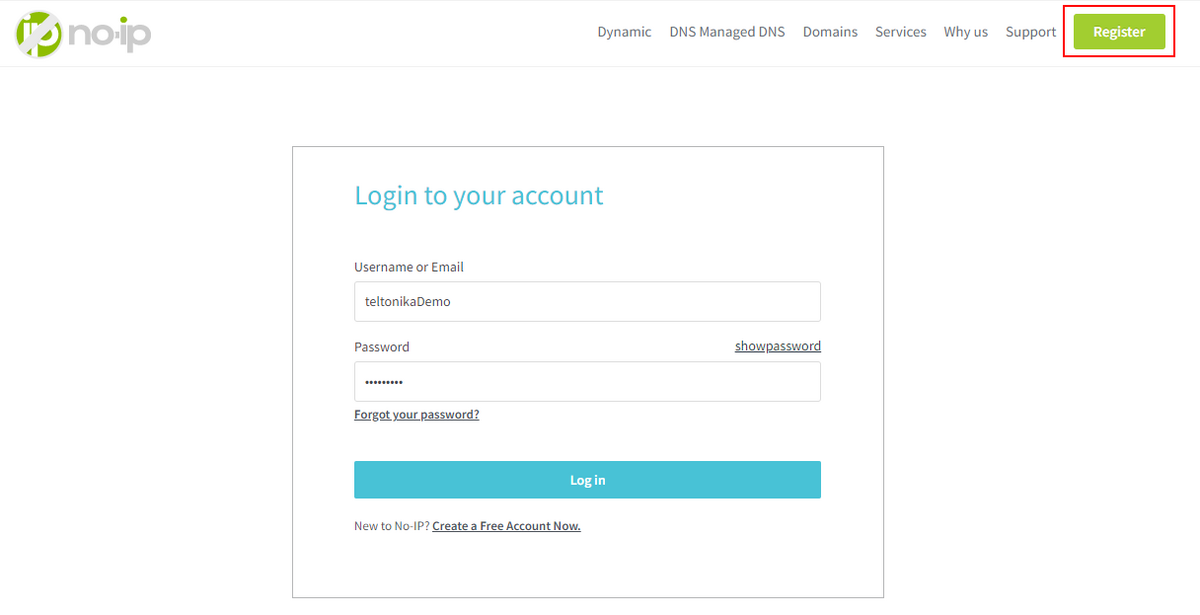
First, access the website by entering www.noip.com/login in your internet web browser's URL bar.
Login Screen
Sign in to the noip.com platform by using your credentials. If you don't have a registered account, you need to create one. You can do that by clicking on the Register button.
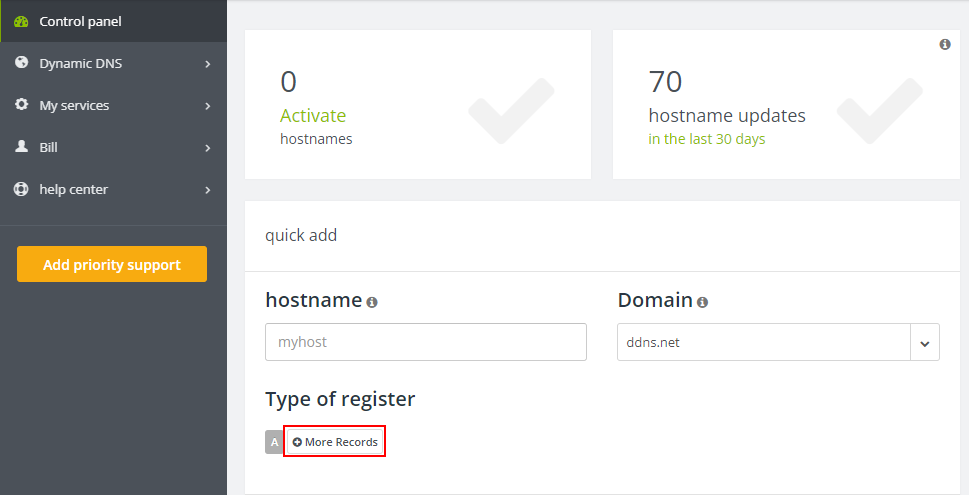
Create a Hostname
After successfully logging into your account, in the control panel dashboard go to the "quick add" section and select More Records
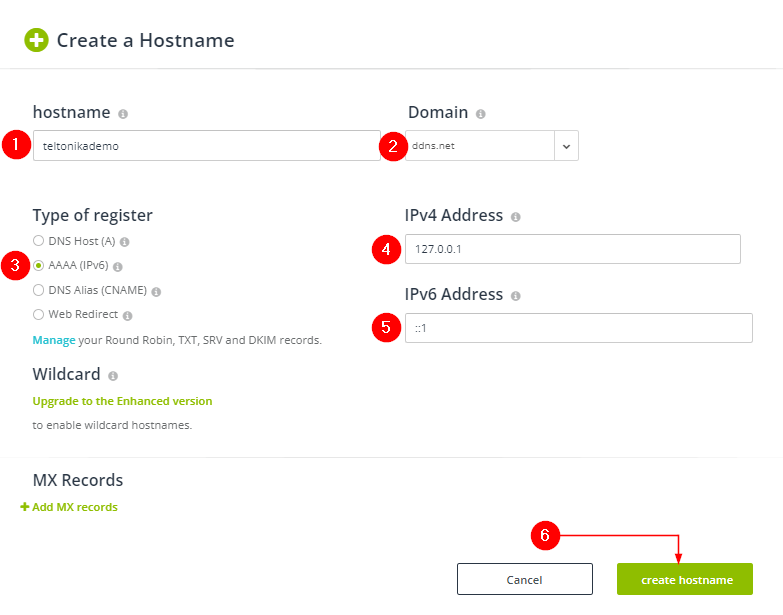
A new window will prompt on your web browser; fill out the information according to your hostname and domain of preference, select AAAA as type of register, introduce the loopback address for each Internet protocol accordingly, and finally click on create hostname.
Hostname Verification
Check the record you just have created shows an Active button below the hostname. Don't worry about the warning signal displayed in the Last Update field; it's just to inform is not detecting any dynamic updates yet.

Note: For further verifications, check the DNS records of your given domain name by introducing at your laptop command prompt or shell terminal the nslookup command as shown below:
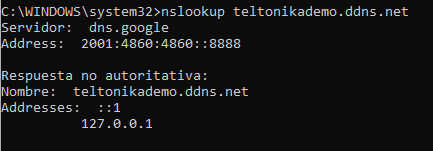
Step 2: Router configuration
CLI Configuration
You will need to configure a script to get your current WAN IPv6 address and send it to noip.com servers. To accomplish this task, login into your router Command-line interface, create a directory to store your scripts, and add the following script to your router configuration:
Script: getwanip.sh|
#!/bin/sh . /lib/functions/network.sh network_flush_cache network_find_wan6 NET_IF6 network_get_ipaddr6 NET_ADDR6 "${NET_IF6}" echo "${NET_ADDR6}" |
Suggested PATH: /root/scripts/getwanip.sh
Give execution privileges to the script by executing at the Command-line interface: chmod +x /root/scripts/getwanip.sh
WebUI Configuration
Now open your RUT homepage and download the DDNS package if it hasn't been installed yet. Next, open the DDNS configuration panel by clicking Services → Dynamic DNS
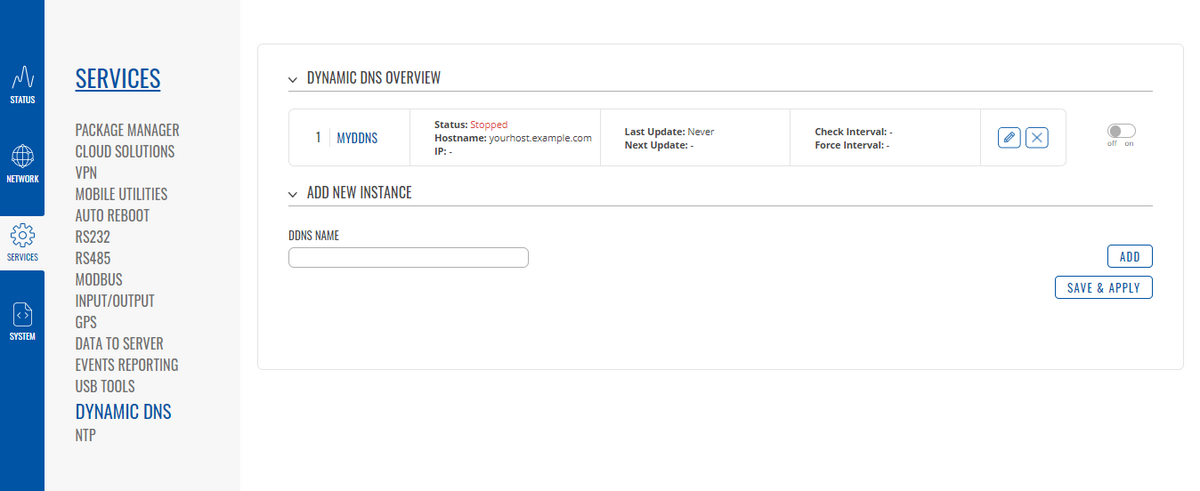
DDNS Configuration Name
Edit the instance named MYDDNS by selecting the pencil icon or create a new DDNS instance by typing in a new DDNS NAME and clicking on the ADD button. For the simplicity purposes of this guide, we are going to edit the current instance named MYDDNS.
Configuration Settings
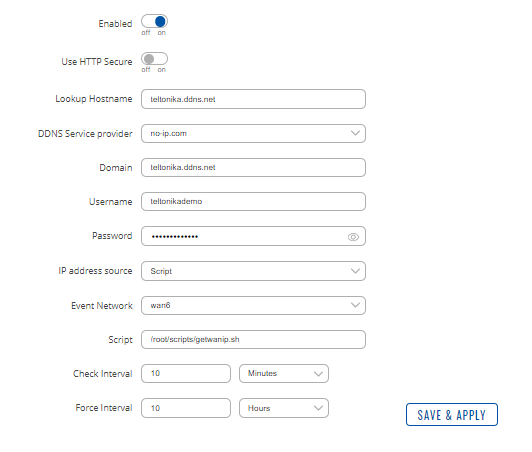
A new window will prompt on your WebUI; fill out the fields according to the information below:
- Switch the Enable toggle to the on position.
- Switch the Use HTTP Secure toggle to the on position. (Optional).
- At Lookup Hostname and Domain introduce the noip.com Hostname previously created. (All of them must match).
- Choose no-ip.com as DDNS Service Provider.
- Type in the credentials used to create your noip.com account.
- Select Script as the Ip address Source.
- At Event Network, select the interface where the ipv6 address is enabled.
- Introduce your Script PATH.
- Choose the update interval of your preference, and click on SAVE & APPLY to save and load your configuration.
Step 3: Try Your DDNS Service
Status
Wait up to 5 minutes from the time you saved the changes. In the Status column, you can see when the last time it sent an update. After updating, it should display the 127.0.0.1 loopback IPv4 address.

By doing a DNS lookup, check if the ipv6 address of your hostname record was updated.

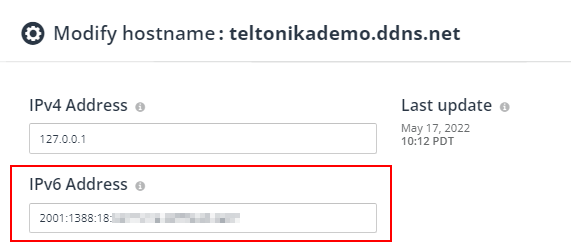
Also, you can check your no-ip.com hostname's current ipv6 address by clicking on the cogwheel that appears at the right of your hostname record.

A new window will prompt on your web browser; it will display the updated IPv6 address.
Connect To Your Host
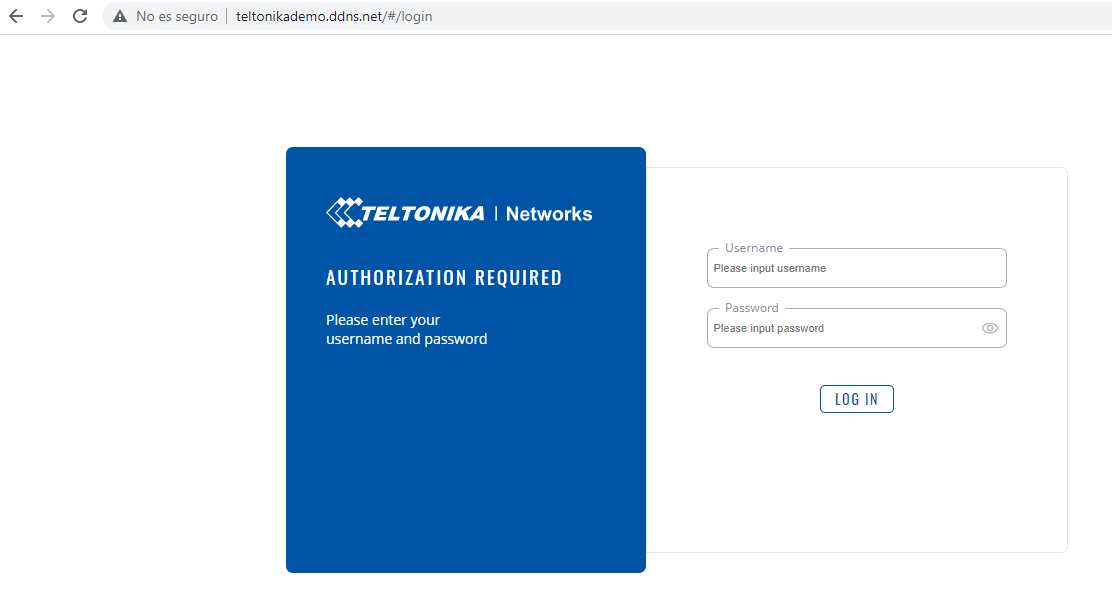
Recall you need to have IPv6 connectivity on your laptop to reach your router login page. You can test your IPv6 connectivity by clicking here. Also, verify your router allows Remote HTTP(S) Access connections.
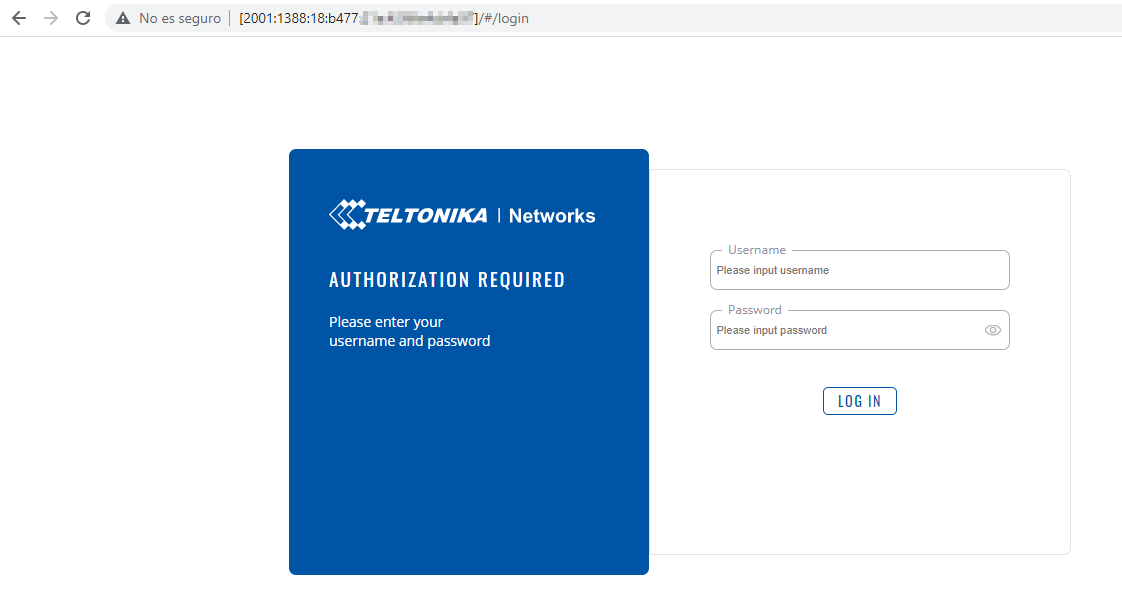
Try to access the host by entering your hostname in your internet browser's URL bar. You should get an output like the image below:
Note: If you have a VPN service enabled on your laptop, you may not reach your router WebUI by just typing the domain name on your web browser; instead, you should enter the full ipv6 address between brackets e.g.: https://[2001:AAAA:BBBB:CCCC::0001].
Logs Verification
After following the steps above, the DDNS service should be up and running. However, for debugging purposes, you can verify the DDNS generated logs by executing in the Command-Line interface the command: cat /tmp/logs/ddns/{yourddnsinstance.log} .This command will show you the current ddns configuration and the messages between noip.com servers and your router every time it sends its updates. In the picture below, you will find a log message response from the noip.com server at the moment of successfully updating the new IPv6 address:

See Also
- Dynamic DNS - general information on the DDNS service.
- DDNS Configuration Examples - additional examples for different DDNS providers.
