Template:Rms manual management configuration new alert: Difference between revisions
Appearance
No edit summary |
No edit summary |
||
| (17 intermediate revisions by 3 users not shown) | |||
| Line 1: | Line 1: | ||
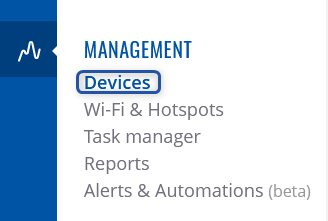
The '''Create | The '''Create alert''' is used to set up alerts for the specified device in the RMS. To create alert(s) go to Left sidebar panel (<b>Management → Devices</b>) and click on <b>Devices</b> submenu. | ||
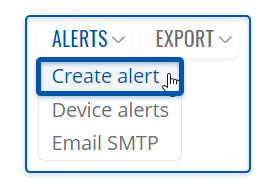
Move your mouse pointer to the Top control '''Alerts''' menu and select '''Create alerts''' ( | Move your mouse pointer to the Top control '''Alerts''' menu and select '''Create alerts''' (Alerts → Create alert). | ||
[[File:RMS-device-menu-left-sidebar-panel.jpg]] [[File:RMS-top-menu-alerts-create-alert.png]] | [[File:RMS-device-menu-left-sidebar-panel.jpg]] [[File:RMS-top-menu-alerts-create-alert.png]] | ||
The '''Create alert''' function is used to set up a new custom alert event for a specified device. | |||
<br> | <br> | ||
===Instructions=== | |||
---- | |||
# Select the device for which you want to create alert(s). | |||
# | |||
# Move your mouse pointer to the top control '''Alerts''' menu and select '''Create alert'''. | # Move your mouse pointer to the top control '''Alerts''' menu and select '''Create alert'''. | ||
# A pop window | # A pop-up window with alert event, event subtype and other information for selected device will appear. | ||
# Fill out | # Fill out and select the appropriate fields in the window and click the '''Save''' button. | ||
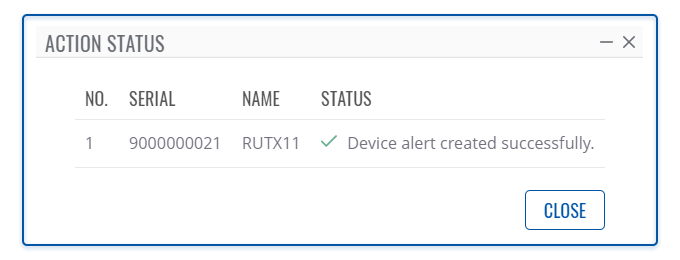
#A new pop-up showing alert status for that device will appear. If successful you will get '''<span style="color:#6CAF8F">✔</span> Device alert created successfully''' in the '''Status''' column. | |||
# A pop | |||
[[File:Rms manual top device alert created v1.png]] | |||
Latest revision as of 14:06, 5 February 2021
The Create alert is used to set up alerts for the specified device in the RMS. To create alert(s) go to Left sidebar panel (Management → Devices) and click on Devices submenu.
Move your mouse pointer to the Top control Alerts menu and select Create alerts (Alerts → Create alert).
The Create alert function is used to set up a new custom alert event for a specified device.
Instructions
- Select the device for which you want to create alert(s).
- Move your mouse pointer to the top control Alerts menu and select Create alert.
- A pop-up window with alert event, event subtype and other information for selected device will appear.
- Fill out and select the appropriate fields in the window and click the Save button.
- A new pop-up showing alert status for that device will appear. If successful you will get ✔ Device alert created successfully in the Status column.


