Purple.ai Hotspot Configuration: Difference between revisions
(Created page with "==Summary== This chapter is a guide on configuring purple.ai provider hotspot instance on RUT routers. == Step1: purple.ai configuration == ===Registration=== First, regi...") |
PauliusRug (talk | contribs) No edit summary |
||
| (11 intermediate revisions by 3 users not shown) | |||
| Line 11: | Line 11: | ||
If you already have registered account skip to Login section | If you already have registered account skip to Login section | ||
[[File:1purpleai .jpg]] | [[File:1purpleai .jpg|1150px]] | ||
Fill in the registration form and click '''NEXT'''. In next window fill the required fields too and if all information is correct click '''LET’S GET STARTED'''. | Fill in the registration form and click '''NEXT'''. In next window fill the required fields too and if all information is correct click '''LET’S GET STARTED'''. | ||
[[File:2registration.jpg]] | [[File:2registration.jpg|1150px]] | ||
=== Portal Configuration === | === Portal Configuration === | ||
| Line 21: | Line 21: | ||
Link your social media accounts and move to step2. | Link your social media accounts and move to step2. | ||
[[File:3portal1.jpg]] | [[File:3portal1.jpg|1150px]] | ||
Select with which social media accounts guests will connect to hotspot and move to step3. | Select with which social media accounts guests will connect to hotspot and move to step3. | ||
[[File:4portal2.jpg]] | [[File:4portal2.jpg|1150px]] | ||
Add your hardware. | Add your hardware. | ||
| Line 33: | Line 33: | ||
Fill '''Router Mac Address''', you can find it on router sticker by the WLAN MAC or connect to router and run command IFCONFIG mac address will be by the wlan. | Fill '''Router Mac Address''', you can find it on router sticker by the WLAN MAC or connect to router and run command IFCONFIG mac address will be by the wlan. | ||
[[File:5portal3.jpg]] | [[File:5portal3.jpg|1150px]] | ||
[[File:MacAddr.jpg]] | [[File:MacAddr.jpg|1150px]] | ||
Now registration process is finished, login credentials will be send to your email. | Now registration process is finished, login credentials will be send to your email. | ||
| Line 43: | Line 43: | ||
Now that you have registered account, to manage your portal, login with your credentials into purpleportal.net/login system. To check if everything was configured properly during registration, go to Management → Locations → Venues and Groups and click pencil like button '''EDIT'''. | Now that you have registered account, to manage your portal, login with your credentials into purpleportal.net/login system. To check if everything was configured properly during registration, go to Management → Locations → Venues and Groups and click pencil like button '''EDIT'''. | ||
[[File:6managementloc.jpg]] | [[File:6managementloc.jpg|1150px]] | ||
There you can add new or change your hardware and access methods for guests. | There you can add new or change your hardware and access methods for guests. | ||
[[File:7hardware.jpg]] | [[File:7hardware.jpg|1150px]] | ||
==Step2: Router configuration== | ==Step2: Router configuration== | ||
| Line 58: | Line 58: | ||
Open the hotspot configuration panel by clicking '''Services → Hotspot''' | Open the hotspot configuration panel by clicking '''Services → Hotspot''' | ||
[[File:ServicesHotspot.jpg]] | [[File:ServicesHotspot.jpg|1150px]] | ||
Click '''Edit'''. | Click '''Edit'''. | ||
[[File:Edit1.jpg]] | [[File:Edit1.jpg|1150px]] | ||
Check '''enable''' | Check '''enable''' | ||
| Line 78: | Line 78: | ||
Type in '''Landing page address''': https://purpleportal.net/access/ | Type in '''Landing page address''': https://purpleportal.net/access/ | ||
[[File:8hotspot config.jpg]] | [[File:8hotspot config.jpg|1150px]] | ||
Under '''Walled Garden''' | Under '''Walled Garden''' | ||
| Line 98: | Line 98: | ||
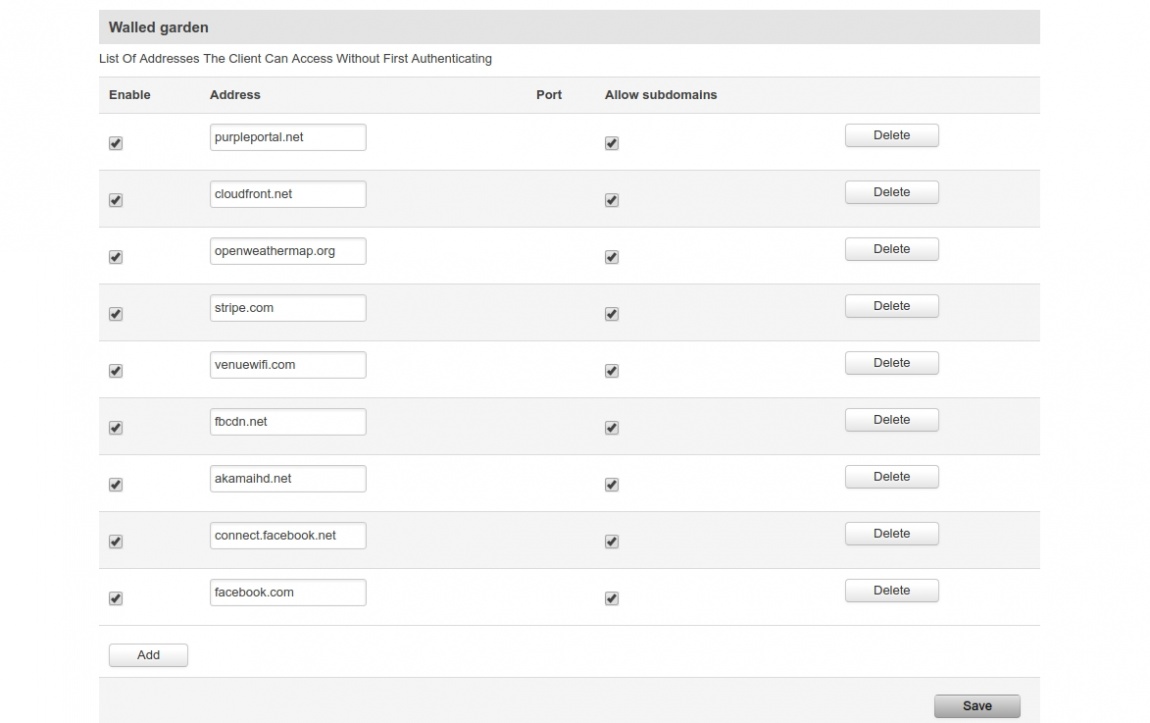
If you added social media access methods, then you need to add additional domains. Walled garden with facebook as social media access method should look like this. | If you added social media access methods, then you need to add additional domains. Walled garden with facebook as social media access method should look like this. | ||
[[File:9walledgarden.jpg]] | [[File:9walledgarden.jpg|1150px]] | ||
Click '''Save''' | Click '''Save''' | ||
| Line 126: | Line 126: | ||
https://purpleportal.net/hardware/firmware/download/130/userguide | https://purpleportal.net/hardware/firmware/download/130/userguide | ||
[[Category:Third party services]] | |||
Latest revision as of 14:14, 2 August 2023
Main Page > General Information > Configuration Examples > Third party services > Purple.ai Hotspot ConfigurationSummary
This chapter is a guide on configuring purple.ai provider hotspot instance on RUT routers.
Step1: purple.ai configuration
Registration
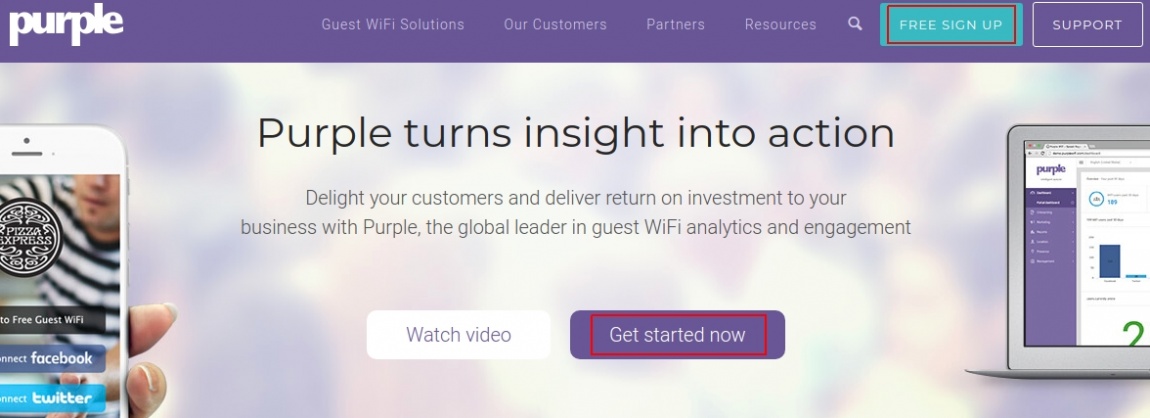
First, register at purple.ai by clicking on GET STARTED NOW or FREE SIGN UP
If you already have registered account skip to Login section
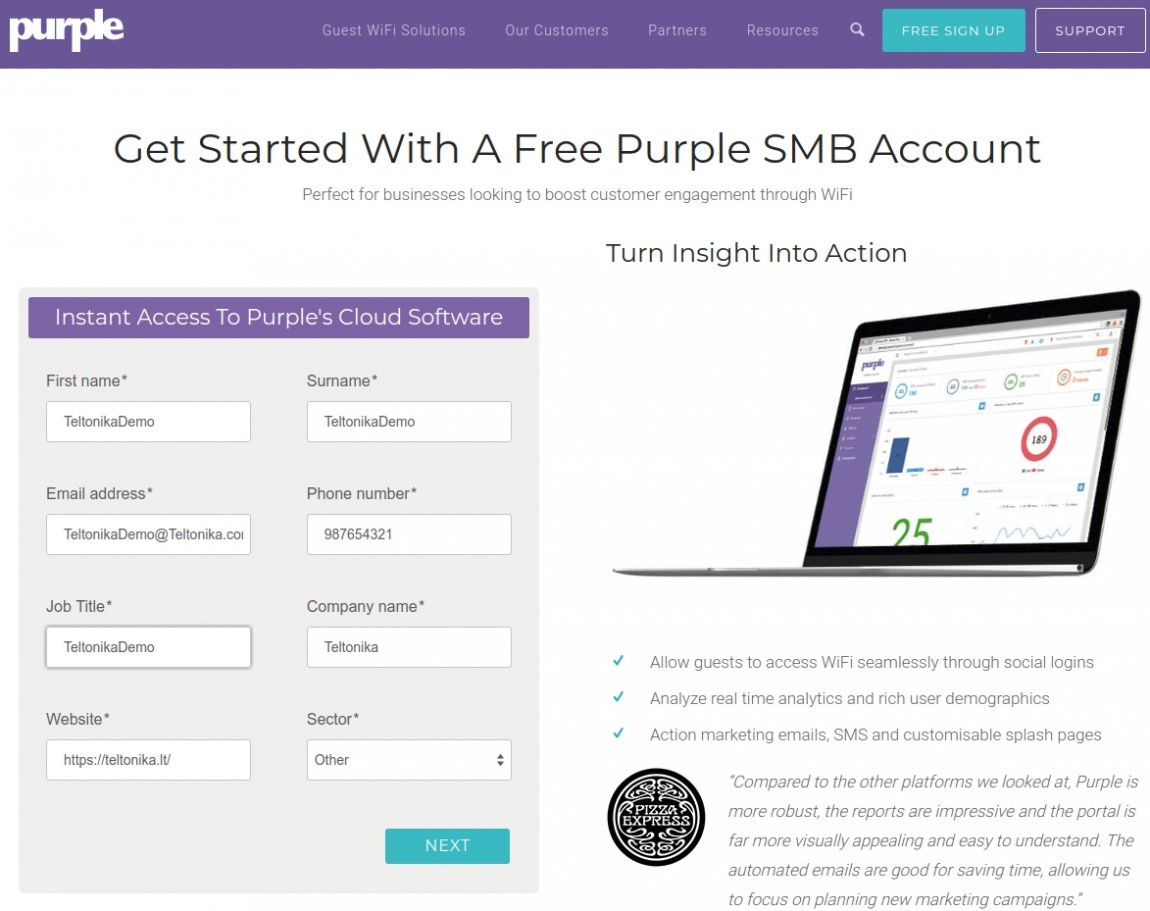
Fill in the registration form and click NEXT. In next window fill the required fields too and if all information is correct click LET’S GET STARTED.
Portal Configuration
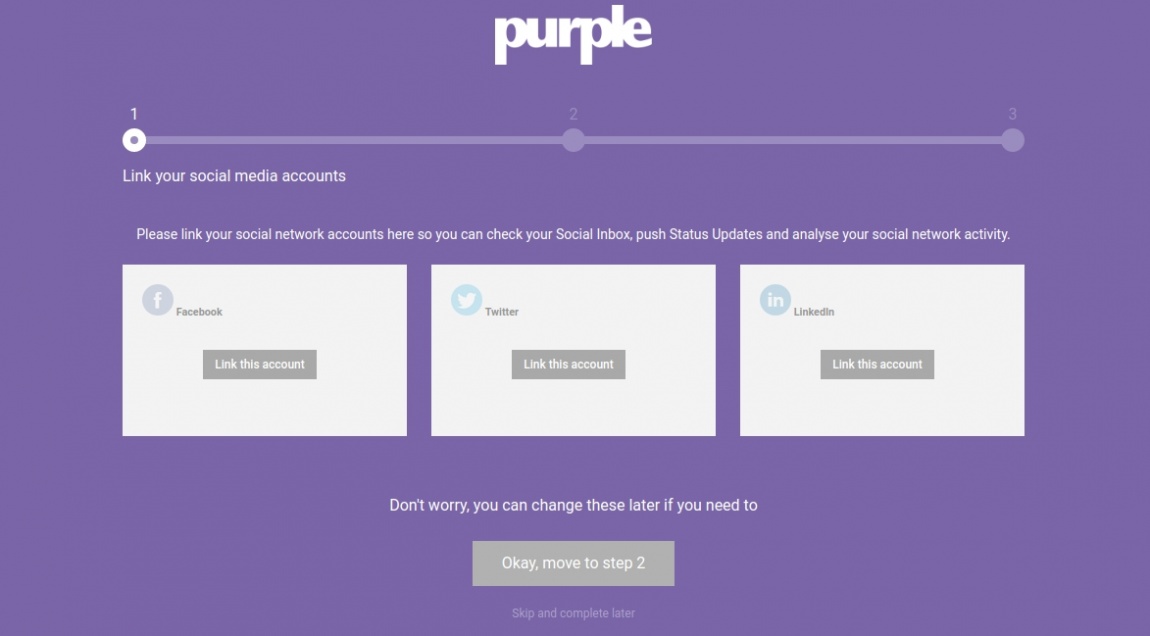
Link your social media accounts and move to step2.
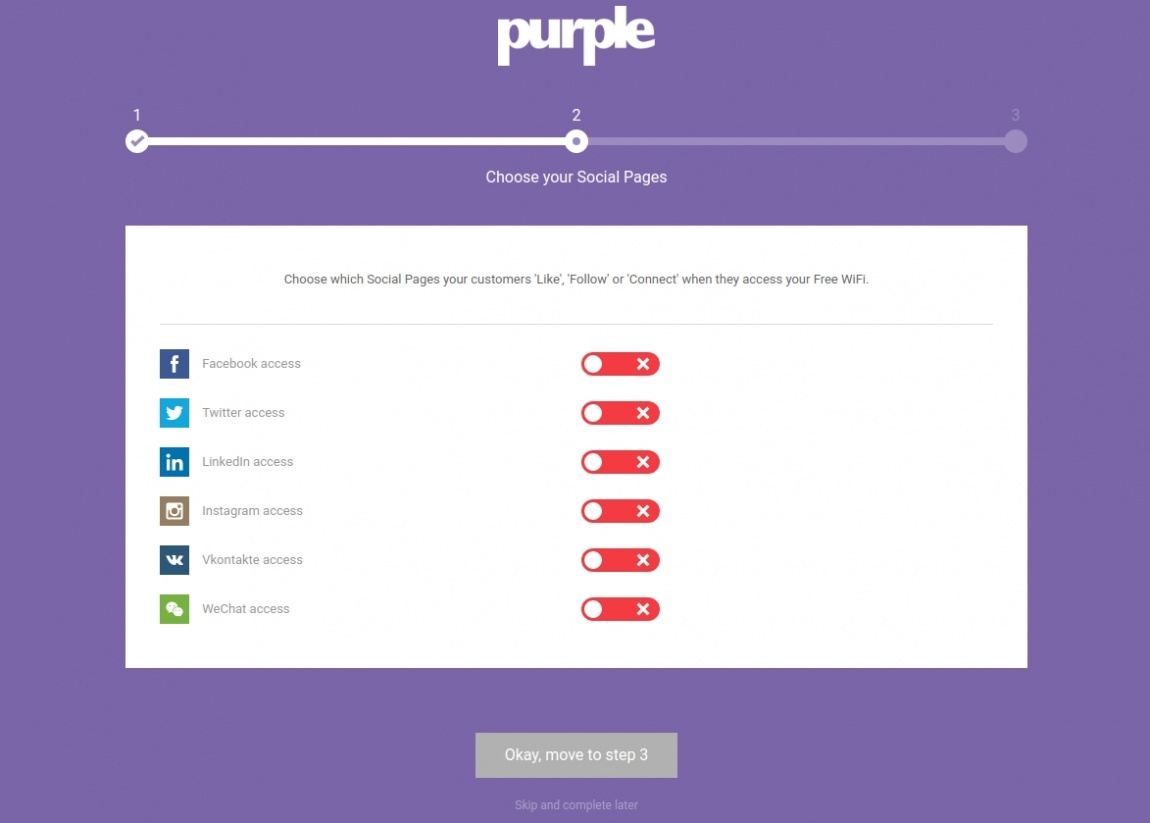
Select with which social media accounts guests will connect to hotspot and move to step3.
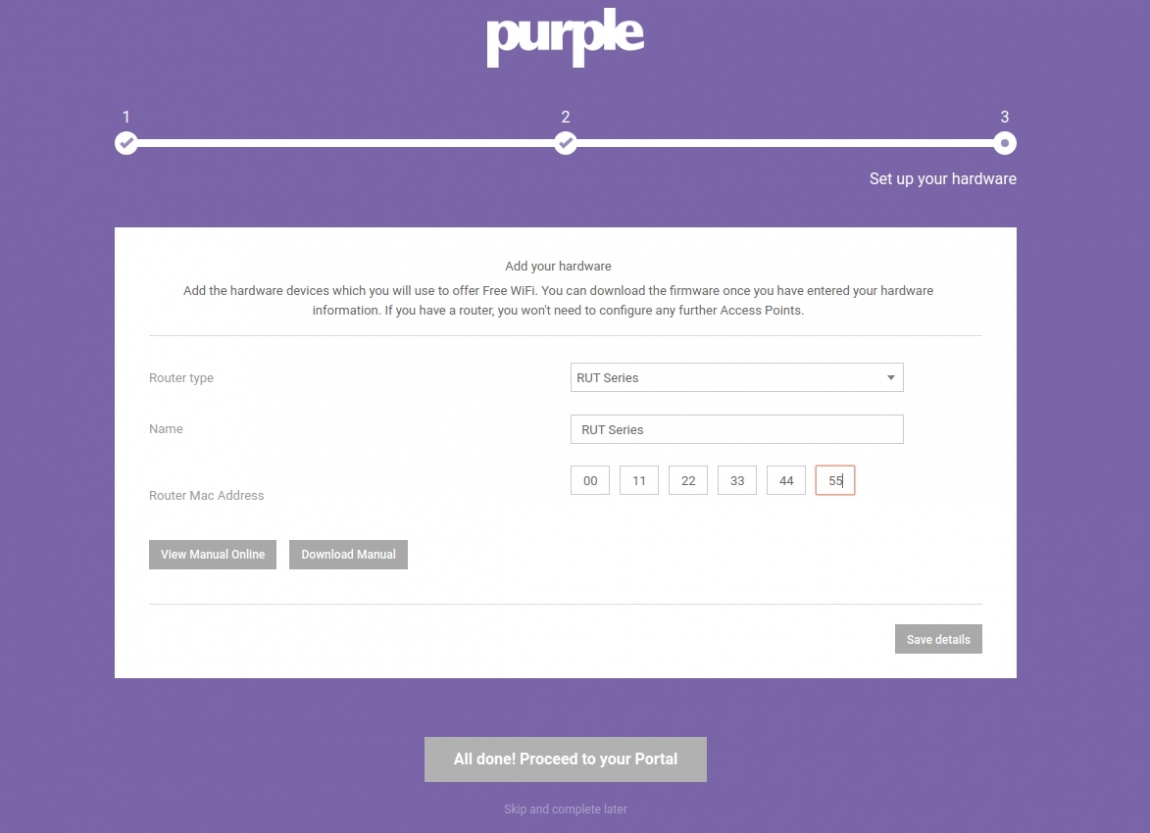
Add your hardware.
In router type select RUT SERIES.
Fill Router Mac Address, you can find it on router sticker by the WLAN MAC or connect to router and run command IFCONFIG mac address will be by the wlan.
Now registration process is finished, login credentials will be send to your email.
Login
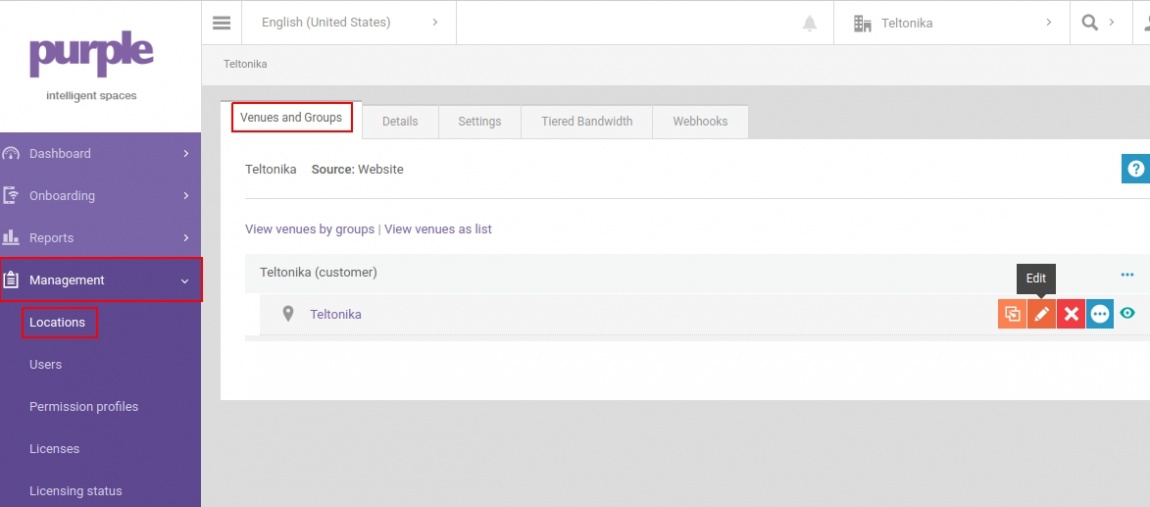
Now that you have registered account, to manage your portal, login with your credentials into purpleportal.net/login system. To check if everything was configured properly during registration, go to Management → Locations → Venues and Groups and click pencil like button EDIT.
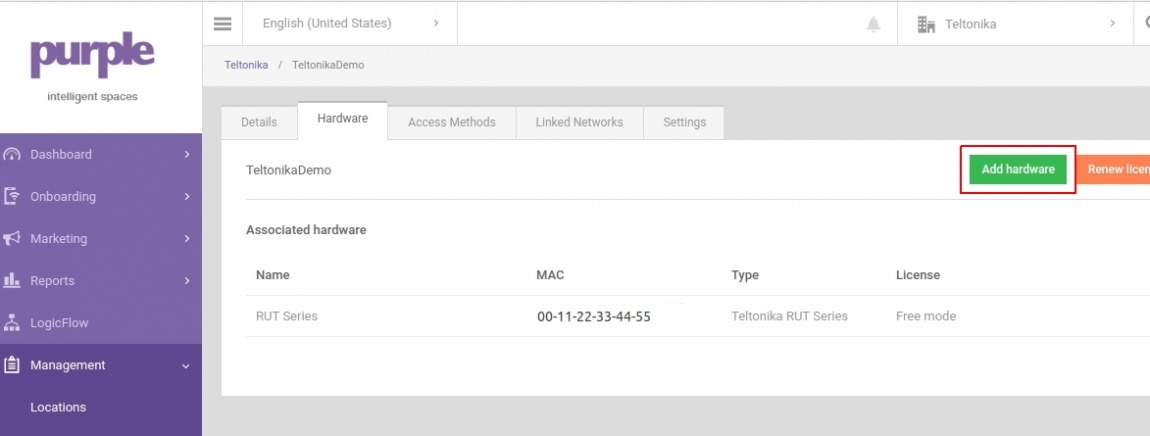
There you can add new or change your hardware and access methods for guests.
Step2: Router configuration
Login
Now we need to open our RUT homepage. You can access the website by entering 192.168.1.1 in your internet browser's URL bar.
Set up hotspot
Open the hotspot configuration panel by clicking Services → Hotspot
Click Edit.
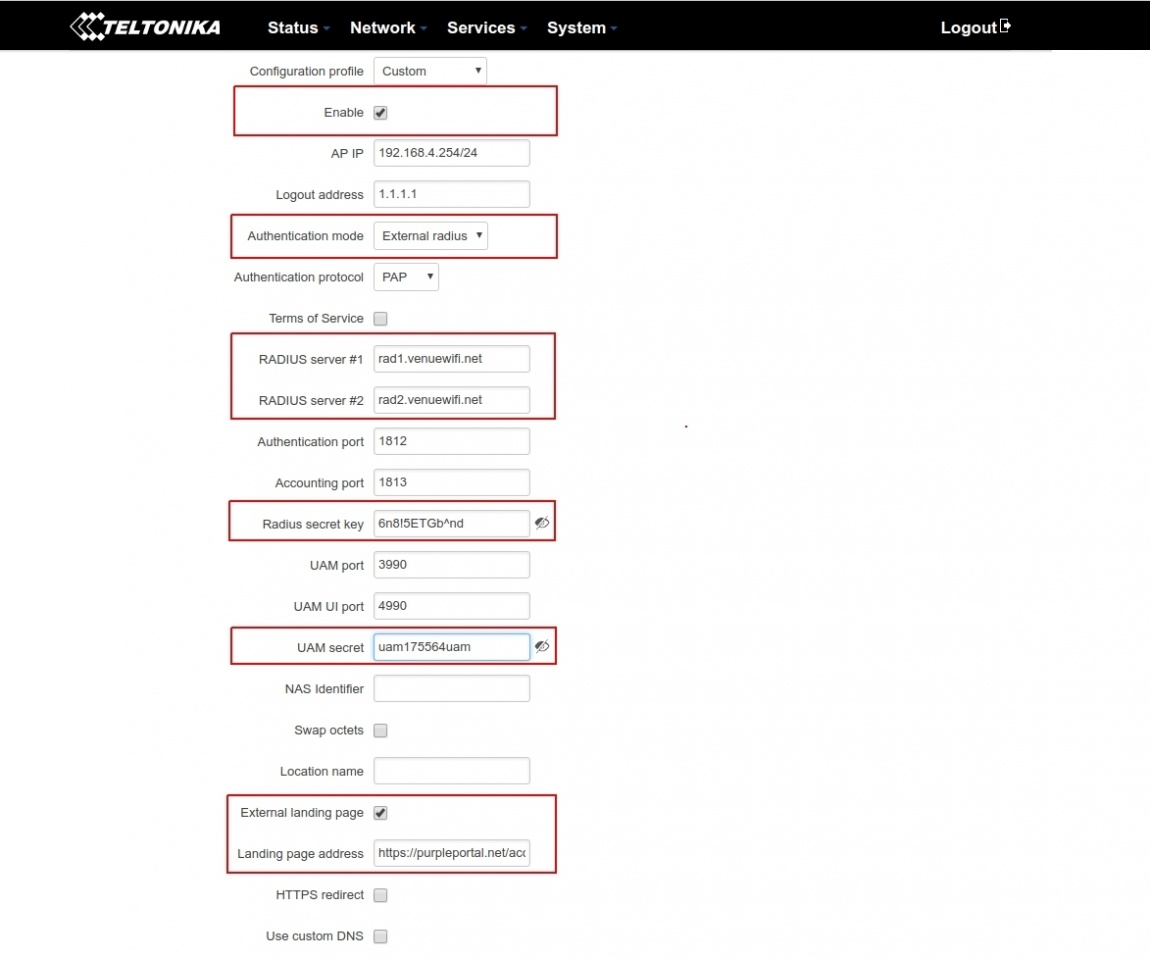
Check enable
Select External radius from Authentication mode dropbox
Type configuration details: RADIUS Server
Radius secret key: 6n8!5ETGb^nd
UAM secret: uam175564uam
Check External landing page
Type in Landing page address: https://purpleportal.net/access/
Under Walled Garden
Click Add and configure with:
purpleportal.net
venuewifi.com
cloudfront.net
openweathermap.org
stripe.com
If you added social media access methods, then you need to add additional domains. Walled garden with facebook as social media access method should look like this.
Click Save
How to configure other social media access methods and additional information check userguide:
https://purpleportal.net/hardware/firmware/download/130/userguide
Test your hotspot
Try connecting to your router using computer or mobile phone.
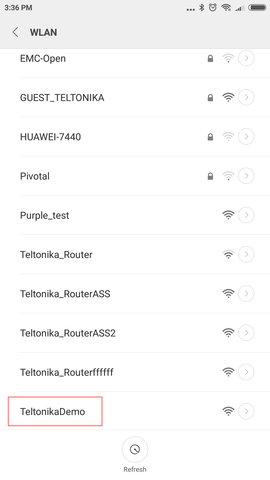
Select your configured wifi network.
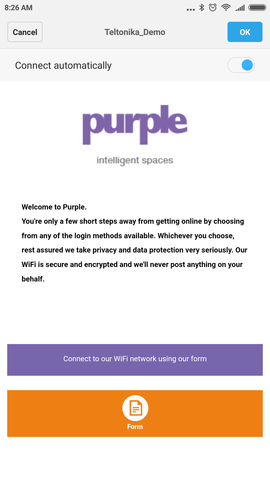
Connect to network by filling purple.ai form or if configured with social media account
External links
https://purpleportal.net/hardware/firmware/download/130/userguide

