AnyViz: Difference between revisions
(Created page with "right|160px The '''AnyViz''' is now compatible with Teltonika TRB gateways. ==Description== AnyViz is a modern cloud service for the automation indust...") |
No edit summary |
||
| Line 78: | Line 78: | ||
https://www.youtube.com/channel/UCszDP0QuX_ZJxOMty1SrR9w | https://www.youtube.com/channel/UCszDP0QuX_ZJxOMty1SrR9w | ||
[[Category:IoT platforms]] | |||
Revision as of 09:39, 26 February 2020
Main Page > IoT Platforms > IoT > AnyViz
The AnyViz is now compatible with Teltonika TRB gateways.
Description
AnyViz is a modern cloud service for the automation industry. With the AnyViz Cloud Adapter you are able to connect your facilities, plants or machines to the AnyViz Cloud. Completely without complicated engineering tools you can immediately start with the online configuration of your Cloud HMI.
Creating an account
First of all, you need to have an AnyViz account. After registration, you can test AnyViz with the range of the evaluation package.
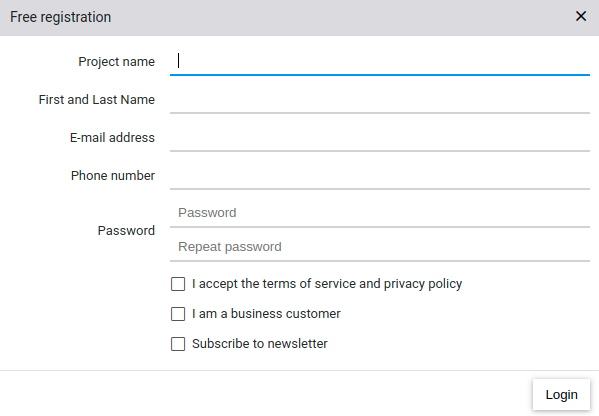
The registration form can be found at: https://portal.anyviz.de/?register=true.
Below you can see registration form:
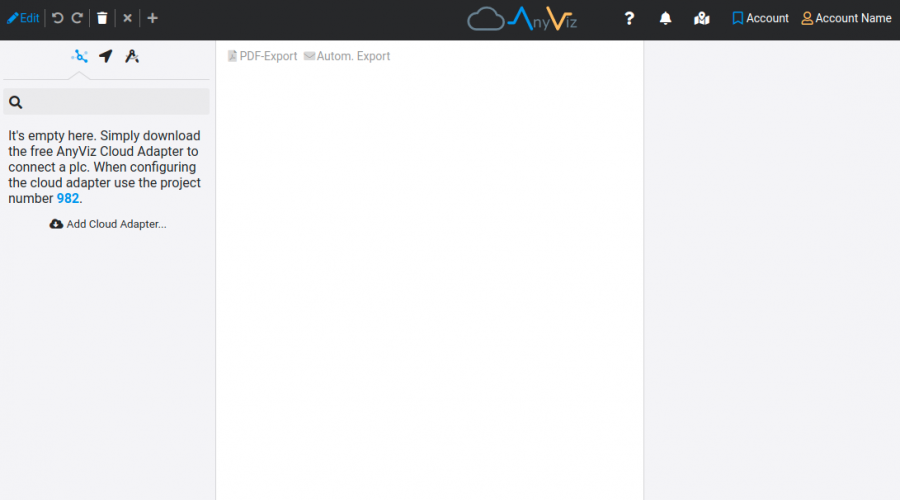
After successful registration and email confirmation, a project with a unique project ID is created automatically. The id is displayed after login on the left side of the portal. In this example, the ID is 982.
Installing AnyViz cloud adapter
AnyViz IoT platform is not included in the standard software package, so in order to use the feature we recommend installing AnyViz with the simple installation script. The script is executed via a single command and can be executed via SSH as well as via the device web interface.
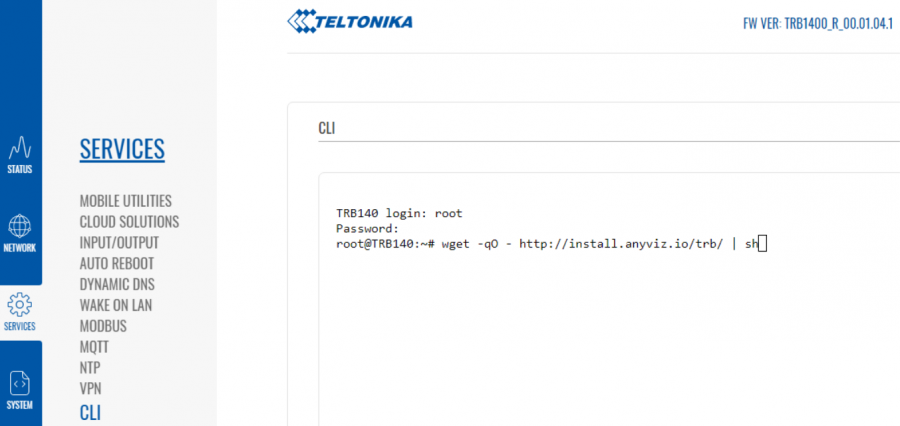
1. Use Web browser to go to address http://192.168.2.1
2. Navigate to SERVICES → CLI
3. Type in “root” to login
4. Type in the same password as used for web interface
5. Type in the following command to start installation:
wget -qO - http://install.anyviz.io/trb/ | sh
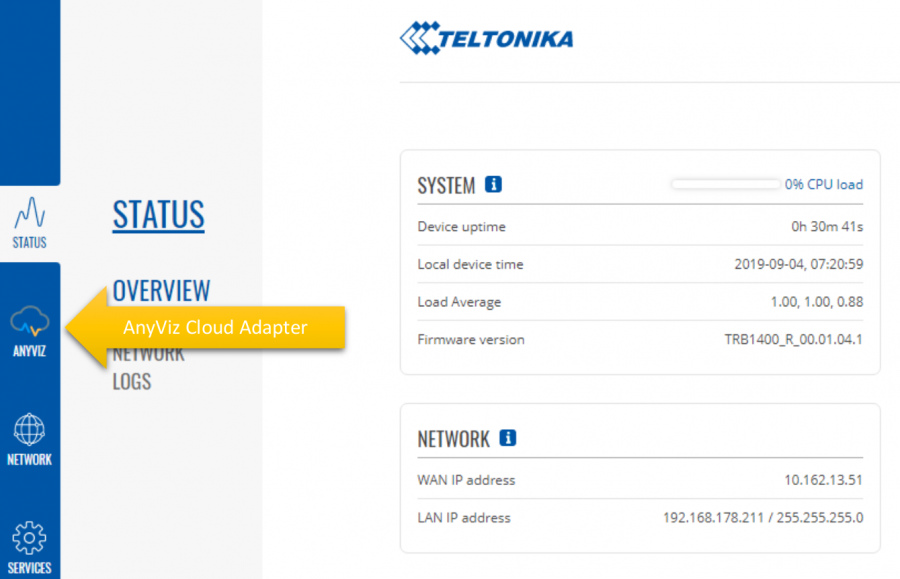
After a refresh of the web interface, a new element in the navigation named ANYVIZ occurs. Click on the AnyViz icon and start configuring your AnyViz Cloud Adapter.
Registering device
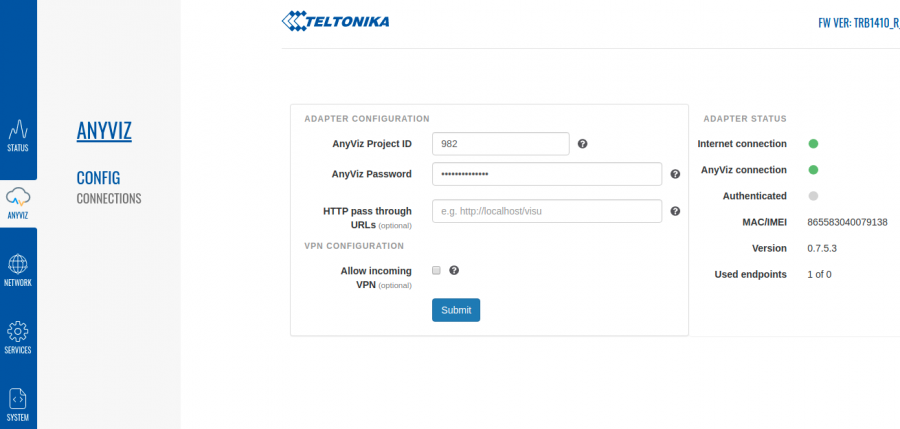
After AnyViz cloud adapter installation, in order to register device go to ANYVIZ → CONFIG and enter your project ID, define a secure password and click submit.
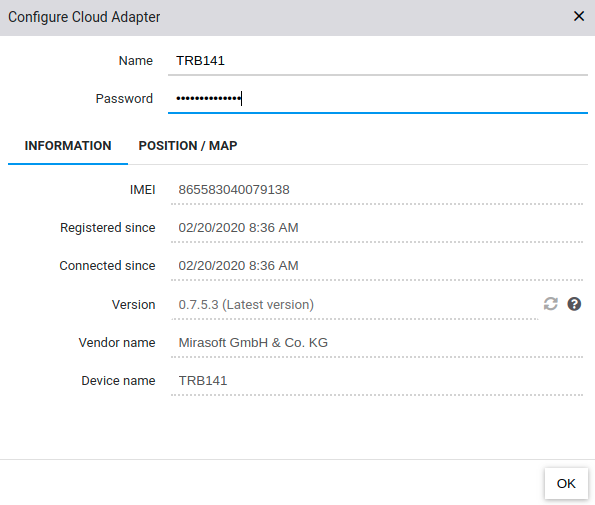
The cloud adapter should now appear in the AnyViz portal. In the configuration dialog of the Cloud Adapter the password from the last step must be confirmed.
Browse and process data
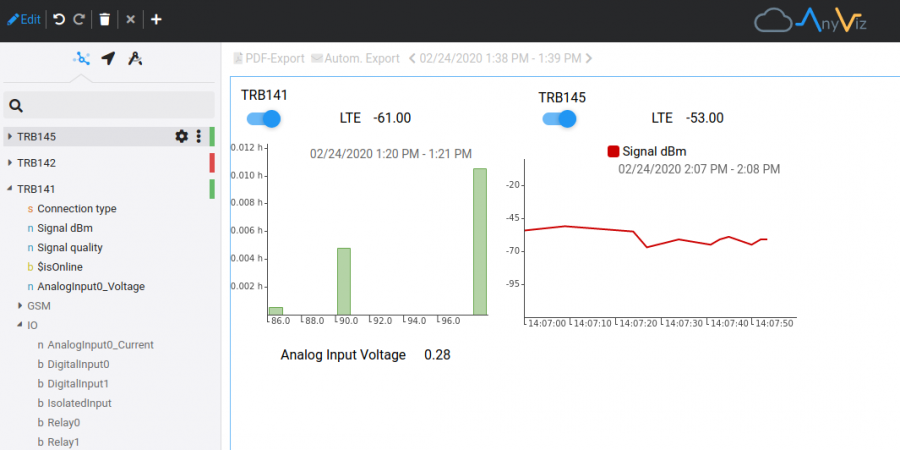
After successful confirmation the cloud adapter appears connected and all data can be comfortably browsed. All tags can be recorded, visualized or otherwise processed. For visualization, the data point is conveniently dragged and dropped into the view, where a selection with different visualization elements appears.
Supported devices
At the moment AnyViz cloud services are compatible with TRB140, TRB141, TRB142 and TRB145 gateways.
Readable parameters for TRB140, TRB141, TRB142, TRB145: Device status (online/offline), Operator, Connection type, Signal Quality, Signal dBm.
Readable parameters for TRB141: Analog Input voltage, Digital Input0, Digital Input1, Isolated Input, Relay.
External Links
https://www.anyviz.io/connectivity/
https://www.anyviz.io/features/

