1NCE Configuration: Difference between revisions
Appearance
No edit summary |
No edit summary |
||
| Line 1: | Line 1: | ||
<b>1NCE</b> is the global Tier-1 IoT Carrier specialized in providing managed connectivity services for low bandwidth IoT applications | <b>1NCE</b> is the global Tier-1 IoT Carrier specialized in providing managed connectivity services for low bandwidth IoT applications. | ||
==Introduction== | ==Introduction== | ||
| Line 10: | Line 10: | ||
<li>Go to https://portal.1nce.com/portal/customer/login and log in.</li> | <li>Go to https://portal.1nce.com/portal/customer/login and log in.</li> | ||
<li>Open the 'Configuration' tab and click the on 'OpenVPN Configuration' button.<br>[[File:1NCE_OpenVPN_Configuration_1.png|border|class=tlt-border]]</li> | <li>Open the 'Configuration' tab and click the on 'OpenVPN Configuration' button.<br>[[File:1NCE_OpenVPN_Configuration_1.png|border|class=tlt-border]]</li> | ||
<li>Select 'Linux/macOS' operating systems.<br>[[File:1NCE_OpenVPN_Configuration_2.png|border|class=tlt-border]]</li> | |||
<li>Download 'client.conf' and 'credentials.txt' files.<br>[[File:1NCE_OpenVPN_Configuration_3.png|border|class=tlt-border]]</li> | |||
</ul> | </ul> | ||
Revision as of 16:16, 10 February 2022
Main Page > General Information > Configuration Examples > VPN > 1NCE Configuration1NCE is the global Tier-1 IoT Carrier specialized in providing managed connectivity services for low bandwidth IoT applications.
Introduction
This article contains step-by-step instructions on how to set up Teltonika-Networks devices as 1NCE OpenVPN clients.
Downlowding configuration files
- Go to https://portal.1nce.com/portal/customer/login and log in.
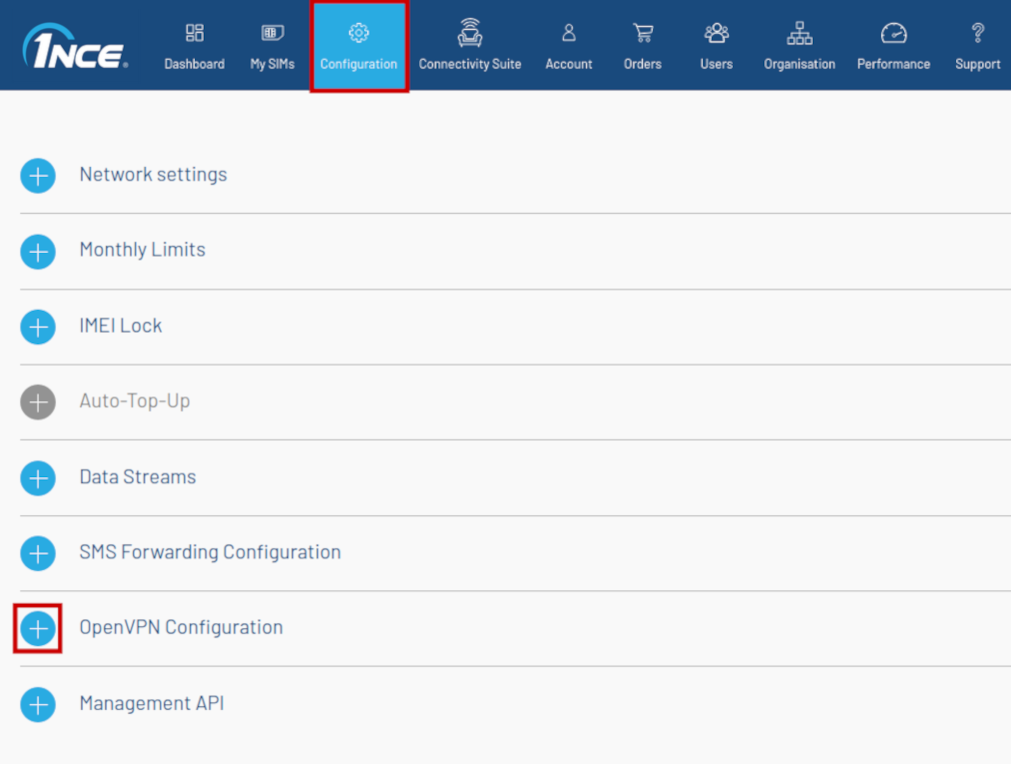
- Open the 'Configuration' tab and click the on 'OpenVPN Configuration' button.

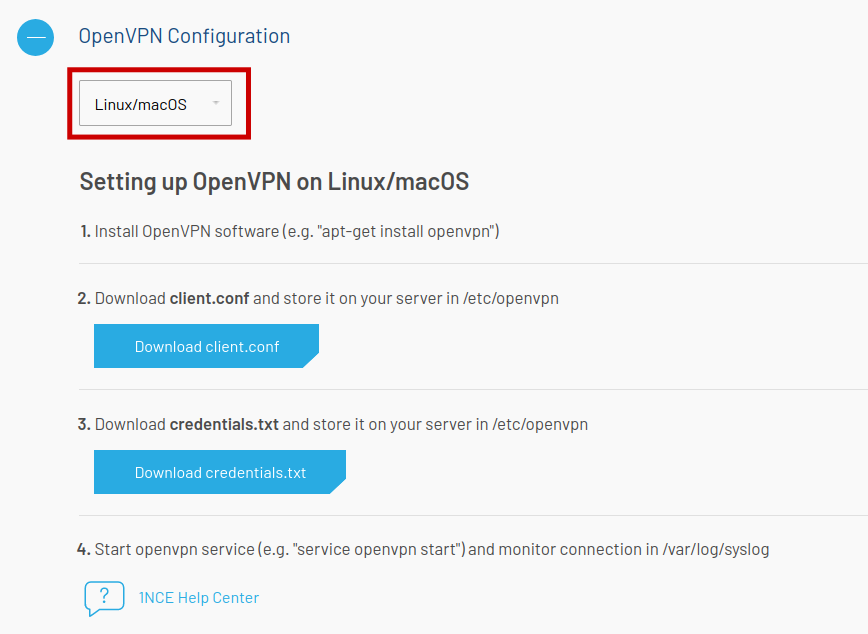
- Select 'Linux/macOS' operating systems.

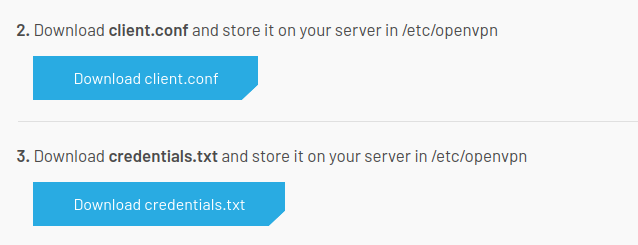
- Download 'client.conf' and 'credentials.txt' files.

