RMS Actions menu: Difference between revisions
No edit summary |
|||
| Line 47: | Line 47: | ||
==Upload backup== | ==Upload backup== | ||
[[File:Rmsdevices14.png|border|class=tlt-border|1100x700px]] | |||
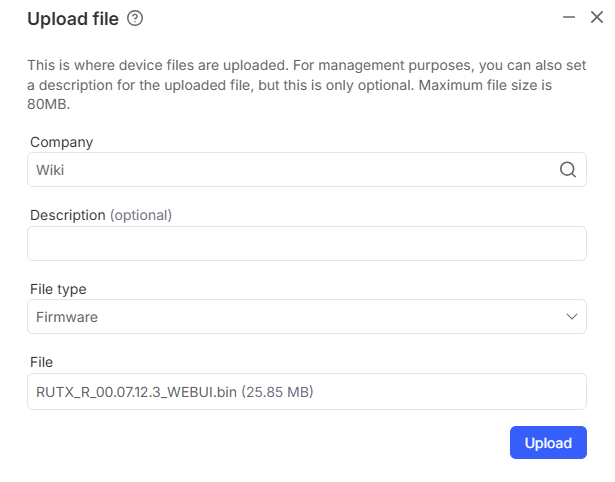
Using this menu option, you can upload backups to the selected devices either from the RMS '''file list''' or by uploading a new backup to RMS via the '''upload file''' option. | |||
Additionally, backup files can be uploaded to RMS via the [https://wiki.teltonika-networks.com/view/RMS_Files#Uploading_files|RMS Files page]. | |||
==Cancel pending updates== | ==Cancel pending updates== | ||
Revision as of 12:37, 2 December 2022
Main Page > IoT Platforms > RMS > RMS Manual > RMS Management > RMS Devices > RMS Actions menuSummary
The Actions top control menu is located in the Devices section. It can be used to update firmware, manage delayed tasks, update device information, set up remote access to devices connected to your router's LAN, manage password and reboot devices registered on your RMS profile. This section of the RMS user manual provides an overview of the functions of the Actions submenu.
Update firmware
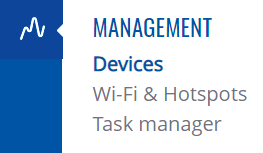
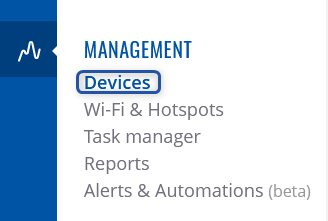
To Update firmware firmware for device(s) selected from your device table go to the RMS web page, Left sidebar panel, (Management → Devices) and select desired devices.
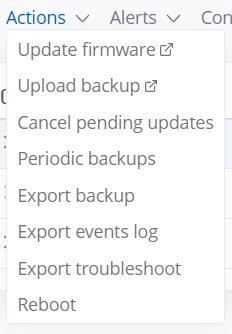
Move your mouse pointer to the Top control Actions menu and select Update firmware (Actions → Update firmware).
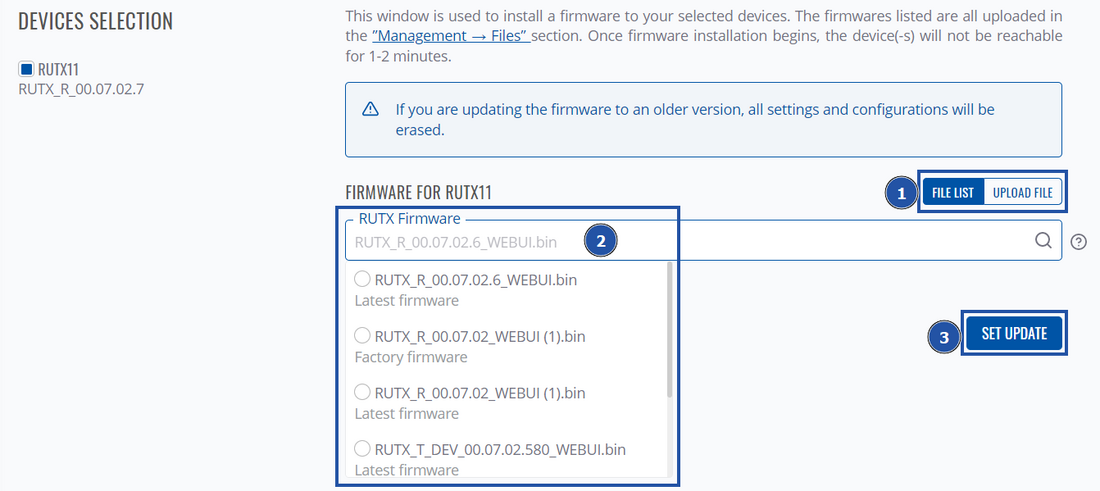
You'll be redirected to this window:
- Choose whether update from the file list or upload new firmware.
- If you chose from File List, here you'll get to choose file, alternatively, if you chose to upload, you'll get an upload button instead.
- Set Update
- Additionally, you also have the option to keep settings when updating.
Step by step instructions
Read step by step instructions to learn how to update firmware for your device(s).
- Select the device(s) that you wish to update
- Move your mouse pointer to the Actions menu and click "Update firmware".
- After a pop-up window will appear. Select the Latest or Factory firmware from the top of the list. You also can select the firmware you have previously uploaded.
- Click the Set update button, you will get a pop-up window showing the firmware upload progress.
- After the firmware upload has complete in the Status column you will you will get a message: ✔ Successfully updated firmware.
- You can safely close the pop-up window by clicking Close button.
Important!
- Allow some time for your device(s) to update. They won't be reachable for up to 1-2 minute(s).
- When the ⬤ red circle (Offline) will change to ⬤ green circle (Online) the device(s) have been updated and now are fully operational.
Your device(s) will be unreachable for a few minutes and will thus be shown as "Offline". The power button symbols located next to each device in the device table indicate the monitoring status of these devices. When it turns green, the firmware updates will have finished and the device(s) will be seen as "Online" in RMS.
Upload firmware
Firmware files can be uploaded to RMS via the Files page. You can download firmware for different devices from here.
Alternatively, you can upload the firmware using the Update Firmware option.

Upload backup
 Using this menu option, you can upload backups to the selected devices either from the RMS file list or by uploading a new backup to RMS via the upload file option.
Additionally, backup files can be uploaded to RMS via the Files page.
Cancel pending updates
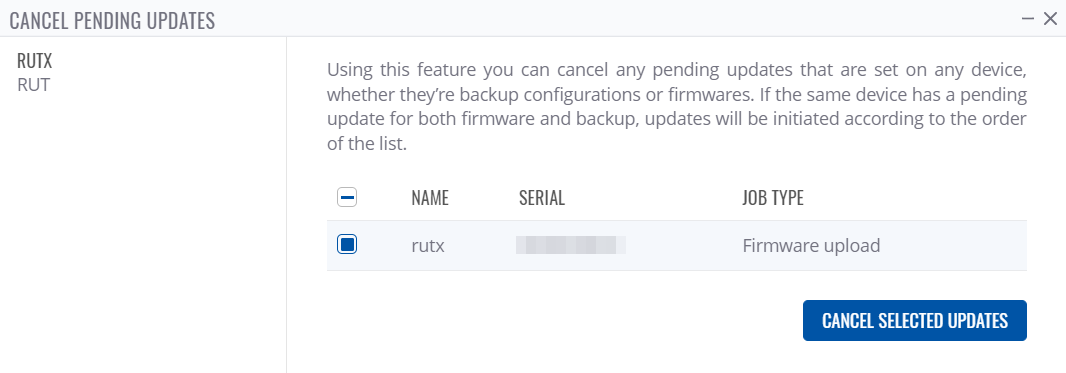
The Cancel pending updates allows you to cancel any pending firmware or configuration updates for offline devices. Cancel updates provides an option to manage all the pending jobs. To access it go to the RMS web page, Left sidebar panel, (Management → Devices) and click on Devices submenu.
Move your mouse pointer to the Top control Actions menu and select Cancel pending updates (Actions → Cancel pending updates).
Step by step instructions
Read step by step instructions to learn how to cancel pending updates.
- Move your mouse pointer to the Actions menu and click "Cancel pending updates".
- After a pop-up window will appear. Select the the actions you want to cancel.
- Click the Cancel selected updates button.
- You can safely close the pop-up window.
At the top of your screen, you will get a notification:
Update device information
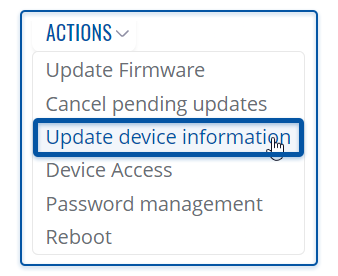
To Update device information allows to update information for selected device(s) from your device table. Go to the RMS web page, Left sidebar panel, (Management → Devices) and click on Devices submenu.
Move your mouse pointer to the top control Actions menu and select Update device information (Actions → Update device information).
RMS regularly update device information by itself. But if you want you can force RMS update the device information. This can be accomplished in two ways:
Multiple devices
- Select the device(s).
- Move your mouse pointer to the Actions menu and click "Update device information".
- A pop-up window will appear. If update is successful in the Status column you will you will get a message: ✔ Device information updated successfully.
Single device
- Click the double rotating arrow icon in the Actions column
Access
This function provides you with the possibility to set up remote HTTP(S) access to devices that are connected to a device's LAN, provided that the device in question has been registered to RMS.
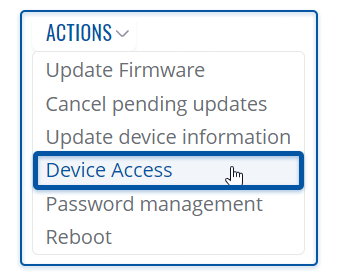
To configure device access go to the RMS web page, Left sidebar panel, (Management → Devices) and click on Devices submenu.
Move your mouse pointer to the Top control Actions menu and select Device Access (Actions → Device Access).
Configure device access
- Make sure that the device for which you would like to set up remote access is physically connected to the router's LAN or WAN (depends on your configuration).
- Locate and select that device in the device table.
- Move your mouse pointer to the Actions menu and click Device Access.
- New pop-up window will open, click the plus sign
 to create a new row.
 - Fill out the new row will appropriate data (look for example in the table below). When ready, click "Save".
- Enter a custom name for the device (for easier management purposes), the device's destination IP address, and the device's destination port.
The next Actions status pop-up will display the status of your request. If update is successful in the Status column you will you will get a message: ✔ LAN device(s) created successfully.
| Field | Value | Description |
|---|---|---|
| Name | For example: RUT955 | A custom name for the LAN device. |
| Destination IP | For example: 192.168.1.2 | The device’s LAN IP address. |
| Destination Port | Default: 80 | The destination device's WebUI HTTP port. |
Connect to device
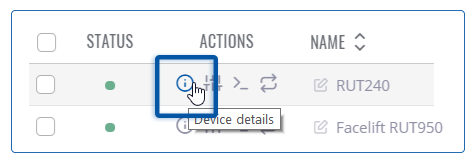
- You can then find remote access links in the Device details page. You can find this page by clicking the "Device Information" icon located under the Actions column in the Device table, next to the relevant device.
- You will be redirected to the device's Device details page. By default, the Device access widget will be at the bottom of that page. Locate the custom name for the device you created in previous steps.
- A Device Web UI link pop-up window will open. Click the Generate button.
- A new link will appear in the window. Click the link to connect to the device.
- For this example, I used another Teltonika Networks device that was connected to the RMS device's LAN. Therefore, when I click the link, I am redirected to WebUI login page.
Remove from device access list
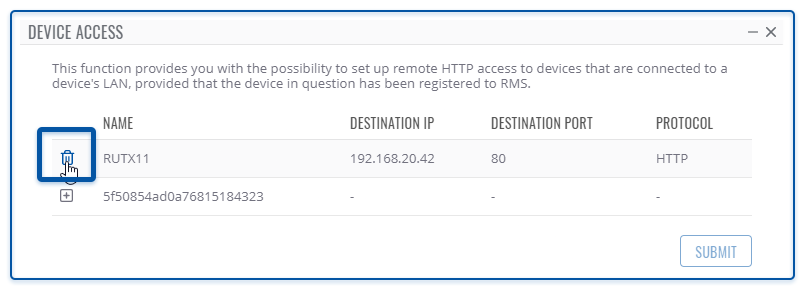
- You can later delete device access entries by once again selecting the device and clicking "Access" from the Actions menu.
- When the new pop-window opens click the Remove access listing icon next to the entry that you would like to delete.
At the top of your screen, you will get a notification in green text: Device access deleted.
Password management
Password management feature is used to generate random or set user preferred passwords for selected devices. Or using Set Password the CSV feature, the password(s) will be set from data in the file. This functionality allows changing the password(s) on demand by the policies set according to various requirements.
Generate new password(s)
Selected devices will have their passwords changed to random ones of a given length. Can then be download all generated passwords in one convenient CSV file where all devices and their new passwords are listed.
Important!
- The generated passwords CSV file can only be downloaded ONCE, after which it will be removed and no longer stored from the server.
To generate password(s) for your selected device(s) go to the RMS web page, Left sidebar panel, (Management → Devices) and click on Devices submenu.
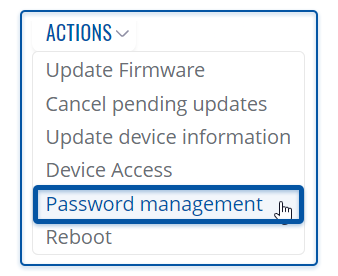
Move your mouse pointer to the Top control Actions menu and select Password management (Actions → Password management).
The Generate password function provides you an option to generate new password(s) for your selected device(s).
Step by step instructions
- Locate and select device(s) in the device table.
- Move your mouse pointer to the "Actions" menu and click Password management.
- New pop-up window will open, click on Generate password.
- Choose the length of the password and/or check the checkmark to include special symbols (optional).
- Click the button Generate.
In the new pop-up window you will get a message: ✔ Device password was changed successfully. Click Close button.
Download generated CSV password file
- Follow the steps above to open Password management window.
- Click on Generated Passwords to open the download window.
- Click on
 Download password list icon to download the CSV file.
Below is an image of the generated CSV file.
Set new password
For selected devices the password will be set by user using the Set password function.
Important!
- Password must be atleast 8 characters long, must include one uppercase letter and one digit.
Instructions:
- Locate and select device(s) in the device table.
- Move your mouse pointer to the "Actions" menu and click Password management.
- New pop-up window will open, click on Set Password.
- Enter the desired password(s) for your devices.
- Click on the button Set password.
In the new pop-up window you will get a message: ✔ Device password was changed successfully. Click Close button.
Set new password(s) from CSV file
This function is designed for large size password change operations. To successfully change the password(s) for all the devices, you must prepare a CSV file. You can download an example from here.
Important!
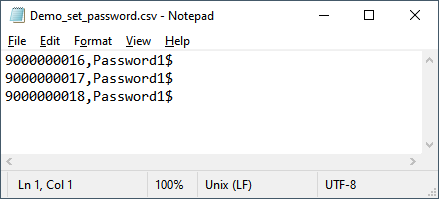
- The first column in the CSV file must contain the device serial number.
- The second column must contain the desired password.
- Password must be at least 8 characters long, must include one uppercase letter and one digit.
Here is an example with serial numbers and passwords:
Instructions:
- Prepare a CSV file according to the requirements above.
- Move your mouse pointer to the "Actions" menu and click Password management.
- New pop-up window will open, click on Set Password from CSV.
- Select file you have prepared.
- Click on the button Set password.
In the new pop-up window you will get a message for each device in the list: ✔ Device password was changed successfully. Click Close button.
Export Backup
Export backup
The Backup is used to download configuration files for your selected device(s). Backup files can be uploaded only to identical devices with identical firmware. Once a backup file is uploaded to a router, that router will have an identical configuration as the router from which the backup file originated (was downloaded from).
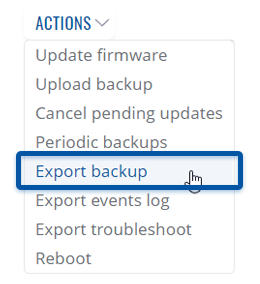
To download backup for your devices go to the RMS web page, Left sidebar panel, (Management → Devices), click on ![]() and expand actions submenu, there you will find Export Backup.
and expand actions submenu, there you will find Export Backup.
The Export Backup function provides you with the possibility to download configuration files from devices registered on your RMS profile.
Instructions
- Select the device(s) whose configuration file(s) you would like to download.
- You can select multiple devices.
- Open actions menu

- Expand actions submenu and click on Export backup.
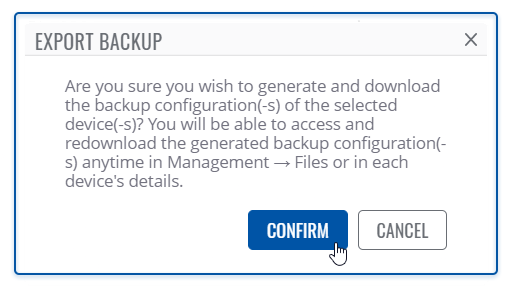
- Click the Confirm button.
- You will get a pop-up box that displays your selected device(s). In the Status column, click the link to download configuration files.
Useful
- You can easily download backup files by clicking the file link.
- You will be able to access and redownload the generated backup configuration(-s) anytime in Management → Files or in each device's details.
Export Event logs
Export events log
The Events Logs is used to download the event logs for your selected device(s). The Events Log windows display records of such events like logins, reboots, resets, connections, configuration changes, and more.
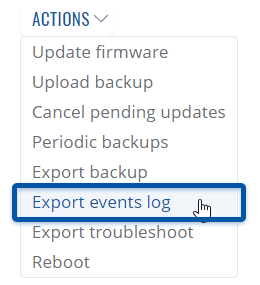
To download event logs for your devices go to the RMS web page, Left sidebar panel, (Management → Devices), click on ![]() and expand actions submenu, there you will find Export events log.
and expand actions submenu, there you will find Export events log.
The Export event logs function is used to download the event log files from the selected device(s).
Instructions
- Select a device(s) whose events log file(s) you would like to download.
- Open actions menu

- Expand actions submenu and click on Export events log.
- You will get a confirmation pop-up window.
- Click the Confirm button.
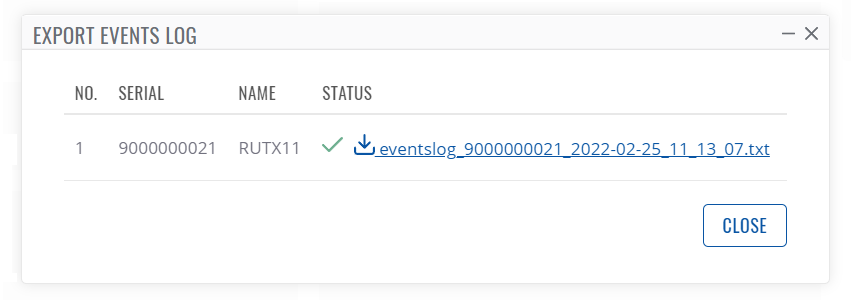
- In the Status column click the link to download event log files.
Useful
- You can easily download event logs by clicking the file link.
- You will be able to access and redownload the generated event logs(-s) anytime in Management → Files or in each device's details.
Export Troubleshoot
Export troubleshoot
The Troubleshoot is used to download troubleshoot file for your selected device(s). Troubleshoot file - downloadable archive, that contains full router configuration and all System log files.
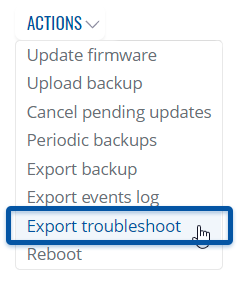
To download troubleshoot file for your devices go to the RMS web page, Left sidebar panel, click on ![]() and expand actions submenu, there you will find Export troubleshoot.
and expand actions submenu, there you will find Export troubleshoot.
The Export Troubleshoot function is used to download the troubleshoot file from the selected device(s).
Step by step Instructions
- Select device(s) for which troubleshoot file(s) you would like to download.
- Open actions menu

- Expand actions submenu and click on Export troubleshoot.
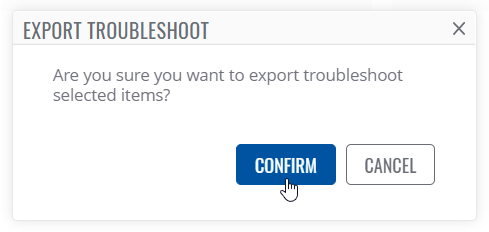
- You will get a confirmation pop-up window.
- Click the Confirm button.
- In the Status column click the link to download troubleshoot files.
Useful
- You can easily download troubleshoot by clicking the file link.
- You will be able to access and redownload the troubleshot(-s) anytime in Management → Files or in each device's details.
Reboot
To Reboot device(s) selected from your device table go to the RMS web page, Left sidebar panel, (Management → Devices), click on ![]() and then Actions submenu, there you will find Reboot.
and then Actions submenu, there you will find Reboot.
The Reboot function is used to reboot devices selected from your device table.

Instructions
- Select the device(s) that you wish to reboot.
- Open actions menu

- Expand actions submenu and click on Reboot.
- You will get a pop-up asking whether you really want to reboot the selected device(s). If you're ready to proceed, click Yes.
- The next pop-up box will display the status of each device.
If the reboot is successful in the Status column you will you will get a message:✔ Successfully Rebooted device.
Important!
- Your device(s) will be unreachable for a few minutes and shown as (Offline) in RMS.
- When the ⬤ red circle (Offline) will change to ⬤ green circle (Online) the device(s) have been rebooted and now are fully operational.

