802.11r WiFi roaming configuration example
Introduction
This article provides a basic configuration example of 802.11r WiFi roaming.
Firmwware
The information in this page is updated in accordance with 00.07.09 firmware version. .
Prerequisites
- Main gateway with WAN access (Any RUTOS router. RUTX50 is used in this example)
- Access Points (Any WiFi-capable RUTOS device. RUTX11 (Router 1) and RUTX11 (Router 2) are used in this example)
Before you start configuring the router turn on "Advanced WebUI" mode. You can do that by clicking the "Basic" button under "Mode", which is located at the top-right corner of the WebUI.
Configuration
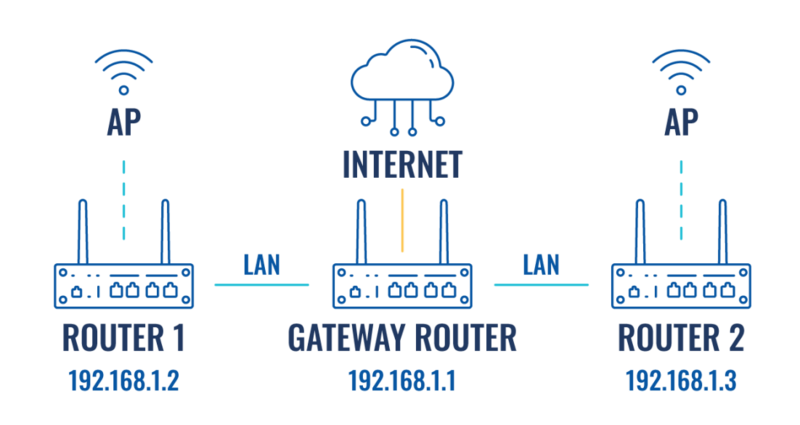
Gateway router
Login to the router's WebUI, navigate to the Network → Interfaces → Edit LAN page. Enter main gateway's IP address and save. We will leave it default (192.168.1.1) for this example. Enter IP address on the same subnet as main gateway. We will use 192.168.1.2 for Router 1 and 192.168.1.3 for Router 2 in this example.
- Connect your AP/WiFi router to the gateway router using LAN to LAN connection.
- Login to the router's WebUI, navigate to the Network → Interfaces → Edit LAN page. Configure as follows:
- Enter IPv4 address. We will use our gateway router's IP - 192.168.1.1.

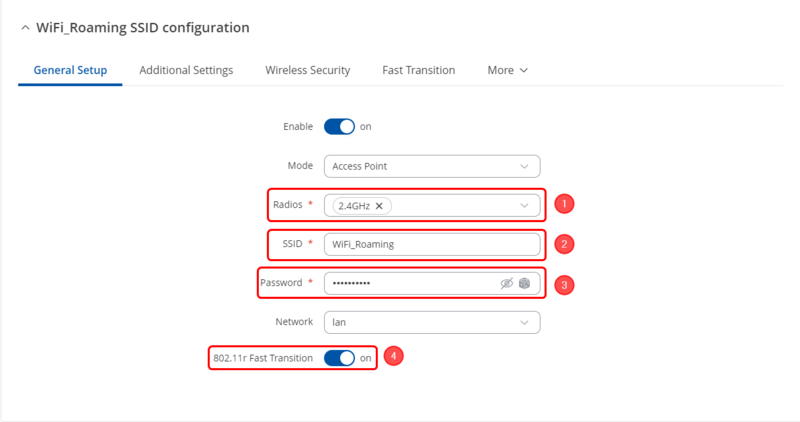
Navigate to the Network → Wireless → SSIDs page. Configures as follows:
- Select radios to 2.4Ghz
- Enter SSID: WiFi_Roaming
- Enter Password
- Enable 802.11r Fast Transition
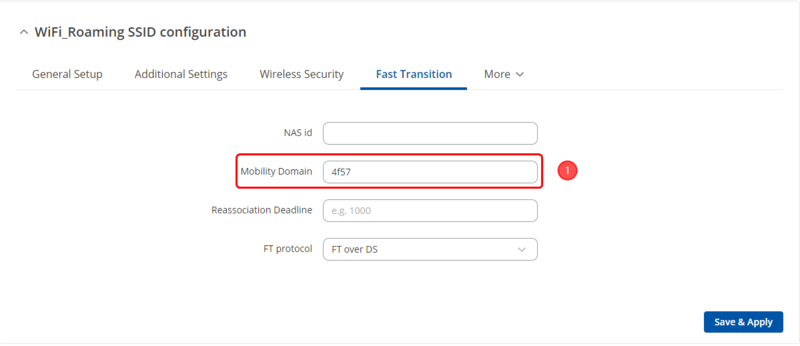
Navigate to the Fast Transition section
- Enter NASID: 1 (Nas ID of each device must be unique)
- Enter Mobile Domain: 4f57 ()
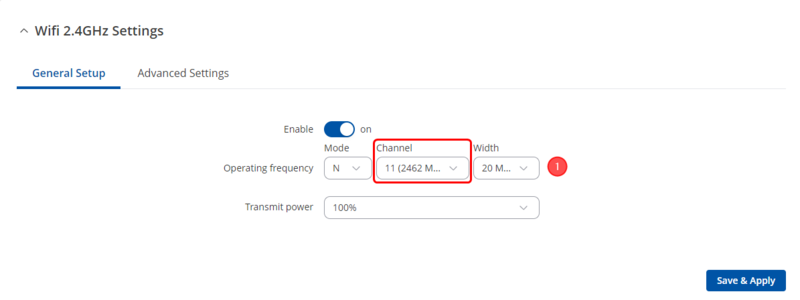
To reduce the posbility of interference between 2 AP/WiFi Router, Highly recommend that set radio channel manually. Navigate to the Network → Wireless → Radio → Edit 2.4GHz. Configures as follows:
- Select Channel: 11
AP/WiFi Router
Navigate to the Network → Interfaces → Edit LAN, Configures as follows:
- Enter IPv4 address: 192.168.1.2 (On router 3, enter 192.168.1.3)
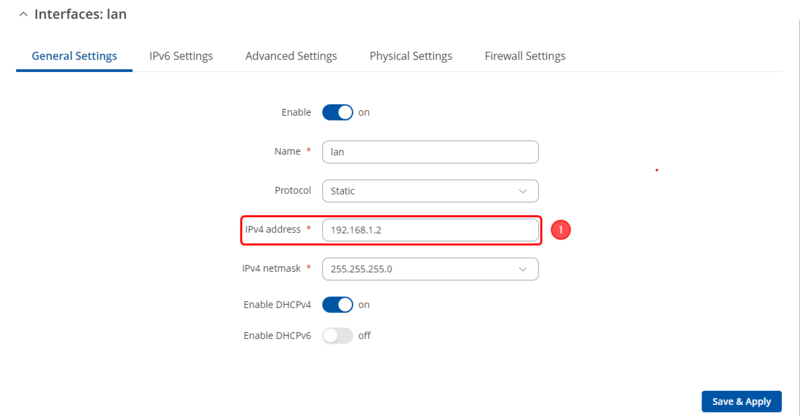
Navigate to the Network → DHCP → Sever Setting, configures as follows:
- Select DHCPv4 Mode to Relay
- Enter DHCP Server 192.168.1.1 (Gateway router is also the DHCP server for all internal devices)
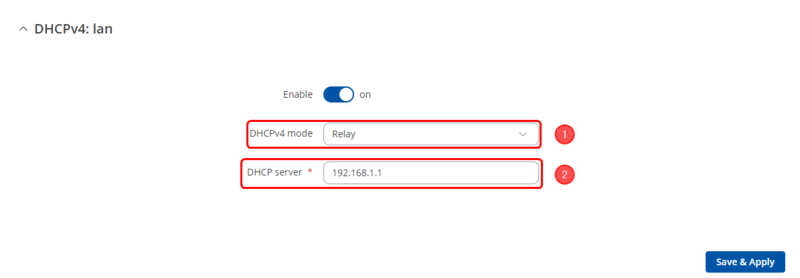
Navigate to the Network → Routing → Static routes, add one default routing to gateway routing. Configures as follows:
- Add 0.0.0.0/0 static route to gateway IP 192.168.1.1 with matrix 1, select Route Type to unicast
Navigate to the Network → Wireless → SSIDs, configures as follows:
- Select radios to 2.4Ghz
- Enter SSID: WiFi_Roaming (Same as gateway's SSID)
- Enter Password (Same as gateway's SSID password)
- Enable 802.11r Fast Transition
- Enter NASID: 2 (On router 3, enter 3)
- Enter Mobile Domain: 4f57 (Keep same as gateway router's setting)
- Stand close to Router 2 or Router 3.
- Connect to SSID WiFi_Roaming
- Check if the connected devices are showed on wireless clients page. (Staus → Wireless → Interfaces)
- Reboot the router 2 or router 3 (Simulate the devices is offline)
- Check the gateway router's CLI, the log will show fast transit completed, do not start 4-way handshake.
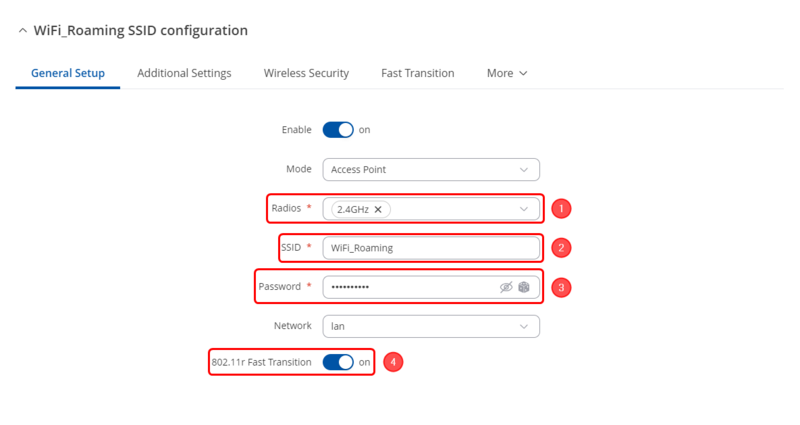
Navigate to the Fast Transition section
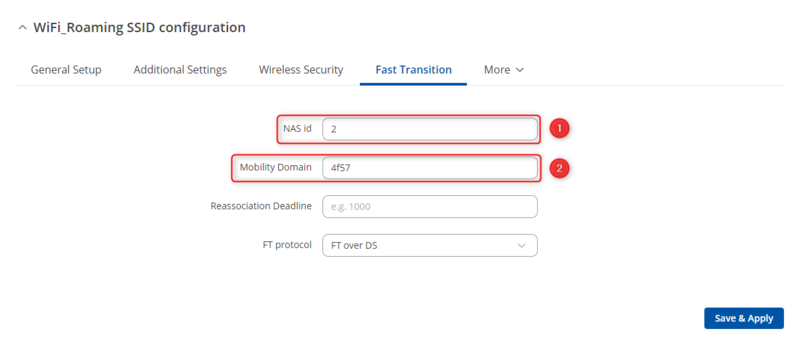
Result
The single AP should now be visible on your WiFi devices (an iOS phone is used in this example).
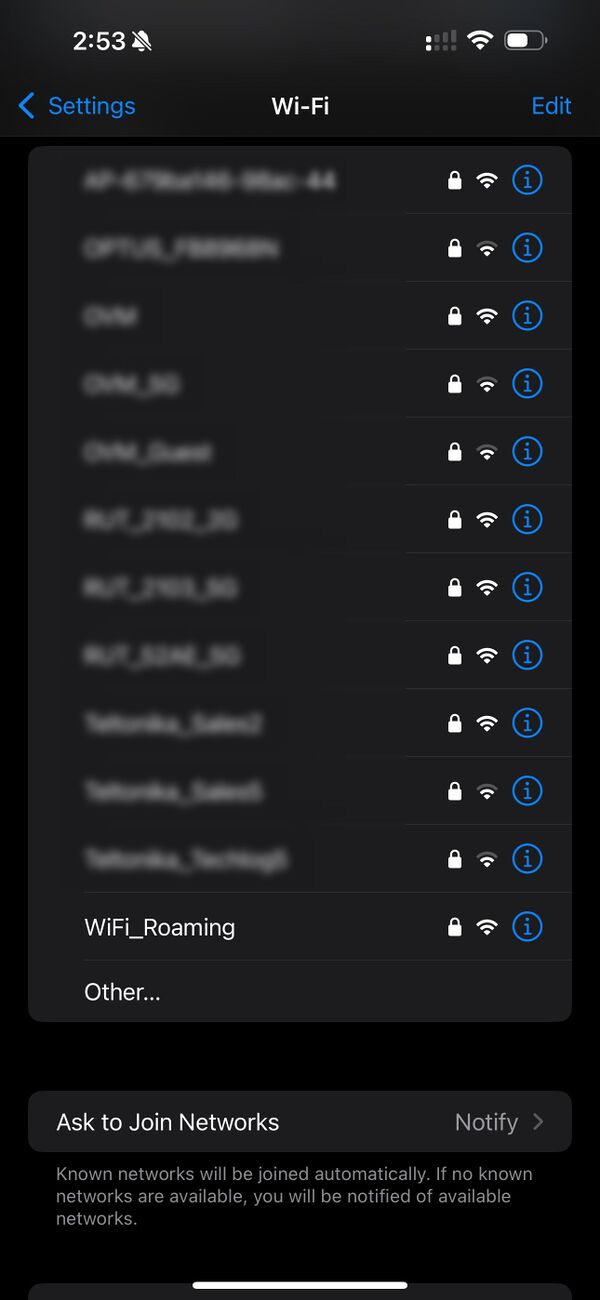
Use copper connect to gateway router, login webUI navigate to System → Maintenance → CLI. Open CLI then login by username root and login password. Do the following steps to check the result.

