Multi-APN
The information in this page is updated in accordance with 00.07.08 firmware version.
Introduction
This article contains instructions on how to utilize the device's Multi-APN feature in order to establish connections to multiple mobile networks using a single SIM card. This feature may also be referred to as "Multiple PDN".
Configuration prerequisites
Prerequisites:
- Latest firmware with Multi-APN support (R_00.07.00 and newer)
- SIM card with multiple APNs
Configuring router
If you're having trouble finding this page or some of the parameters described here on your device's WebUI, you should turn on "Advanced WebUI" mode. You can do that by clicking the "Advanced" button, located at the top of the WebUI.
In the example below, we will be using wap (dynamic) and bangapro (static) as our different APNs. Replace these values in accordance with your SIM card provider.
Note: As of firmware version R_00.07.08, 8 different APNs are supported at once. Multi-APN feature is not supported on the following devices:
- TRB1 series
- TRB5 series
- RUT200
- RUT901
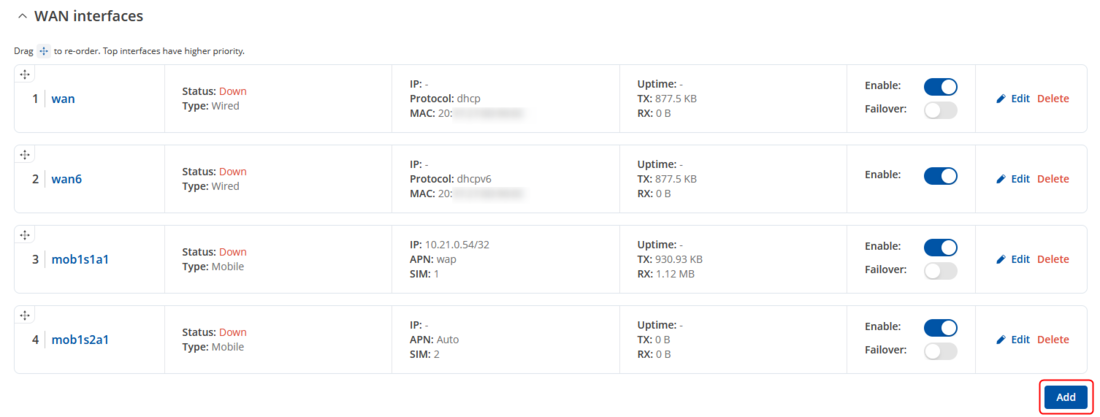
STEP 1: Create a new mobile interface: Connect to router's WebUI, navigate to Network → WAN. Find the Add button below and click the Add button.
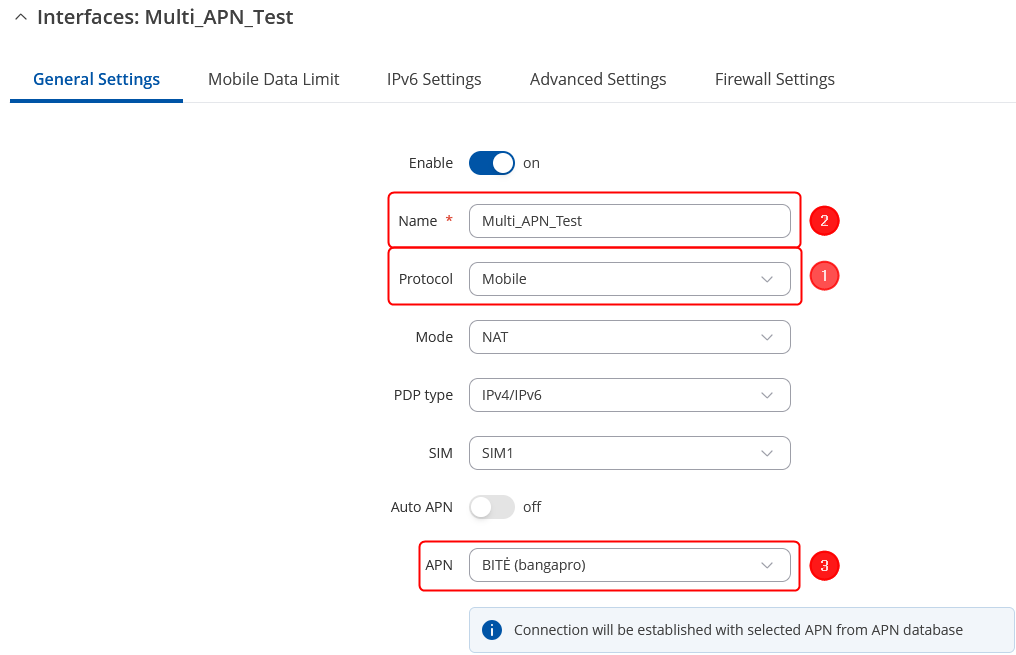
STEP 2: Configure the new interface.
An interface configuration window should appear after adding a new interface.
Then configure the interface in this order:
- Select Mobile in the protocol list.
- Choose the name for your new interface.
- Choose an APN from the list, or select + Add new to define a custom APN.
- Press Save & Apply below once done.
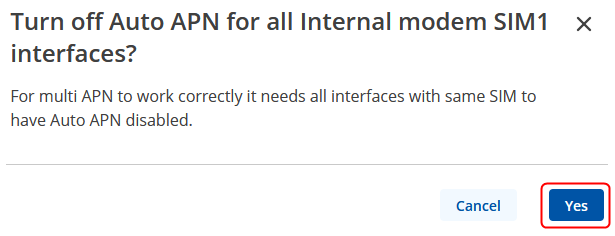
If your first interface has auto APN, once you will click "Save & Apply", you will be prompted to a new window, where you will have to accept to turn off the Auto APN on the sim card interfaces. Choose Yes.
The new interface should appear in the list and start connecting to mobile data.
Once connected, you will see an IP assigned according to the APN.
If your new interface is unable to connect, make sure you have not set an identical APN on the default mobile interface for that SIM card.
STEP 3: Configure the default interface.
Interface configuration window should appear after pressing EDIT. Follow the same steps in STEP 2 with a different APN if needed.
The default interface should soon connect to data with an IP assigned according to the APN.
Results
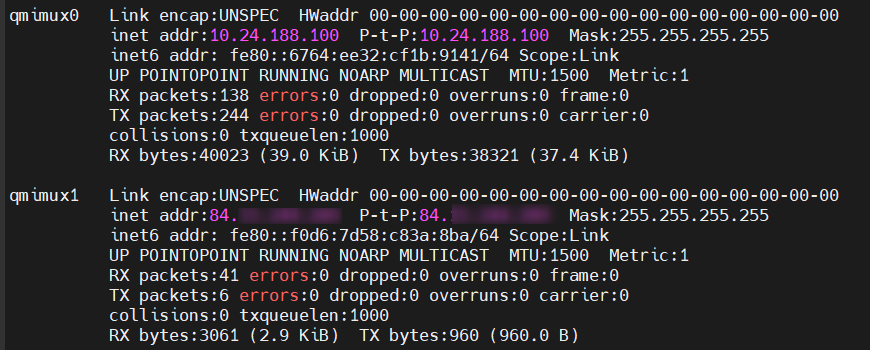
You should see the two different mobile interfaces connected to data with different IPs assigned:
Testing configuration
You may also check if the configuration was successful by pinging an address reachable from the internet via CLI or SSH: To check which interfaces are created for mobile, you can use this command:
ifconfig
To ping from the default interface, use command:
ping -I qmimux0 8.8.8.8
To ping from the created interface, use command:
ping -I qmimux1 8.8.8.8


